Table of Contents
Advertisement
Advertisement
Table of Contents

Subscribe to Our Youtube Channel
Related Manuals for Vanderbilt CFMW3025


Summary of Contents for Vanderbilt CFMW3025
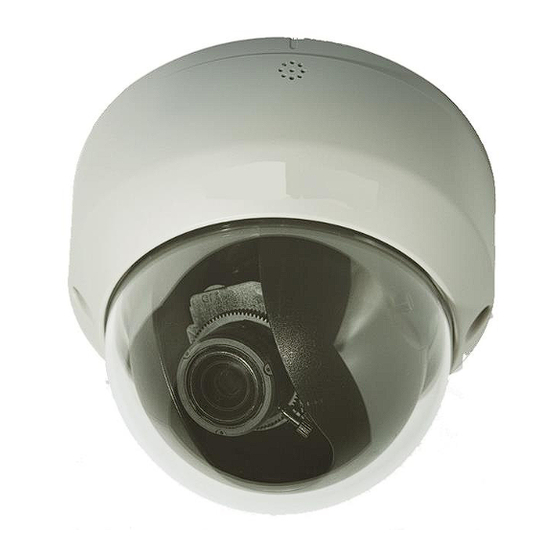
- Page 1 CFMW3025 3 Megapixel IP Indoor Dome Camera Configuration © Vanderbilt 2016...
-
Page 2: Table Of Contents
IEEE802.1X ..................... 30 9.2.7 SNMP ...................... 31 9.2.8 3GPP ....................... 31 Image parameter ..................32 9.3.1 Basic camera settings ................32 9.3.2 Camera mask zone settings..............35 9.3.3 Camera cropping settings ............... 37 9.3.4 Camera OSD settings ................37 © Vanderbilt 2016... - Page 3 9.12 Notice ...................... 66 Utility program application ..............67 10.1 NAS player setup ..................67 10.2 Audio recording setup ................67 10.3 Firmware update setup ................67 Maintenance ..................69 Disposal ....................70 Keyword index ....................... 71 © Vanderbilt 2016...
-
Page 4: Copyright
Liefermöglichkeiten und technische Änderungen vorbehalten. Data and design subject to change without notice. / Supply subject to availability. © 2017 Copyright by Vanderbilt Wir behalten uns alle Rechte an diesem Dokument und an dem in ihm dargestellten Gegenstand vor. Der Empfänger erkennt diese Rechte an und wird dieses Dokument nicht ohne unsere vorgängige schriftliche Ermächtigung ganz oder teilweise Dritten zugänglich machen oder... -
Page 5: About This Document
Searches for and corrects malfunctions. Operating personnel Performs the procedures No particular qualification required. for proper operation of the Has received instruction from the opera- product. tional startup personnel. © Vanderbilt 2016... -
Page 6: Safety
Limited Power Source requirements to EN 60950-1. Maintenance Do not attempt to service or modify this device yourself. Refer this work to qualified service personnel. Do not use liquid cleaners or sprays that contain alcohol, spirit or am- monia. © Vanderbilt 2016... -
Page 7: Sensor Characteristics
This is a fixed pattern, which may appear over the entire monitor screen when the camera is operated at a high temperature or in a low luminance environment. Jagged picture: When viewing stripes, straight lines, or similar patterns, the image on the screen may appear jagged. © Vanderbilt 2016... -
Page 8: Eu-Directives
Clonshaugh Business and Technology Park Clonshaugh Dublin Ireland www.vanderbiltindustries.com European Directive 2004/108/EC „Electromagnetic Compatibility” Compliance with the European Directive 2004/108/EC has been proven by testing according to the following standards: Emitted interference: EN 55022 Interference resistance: EN 55024 © Vanderbilt 2016... -
Page 9: Technical Data
Web Browsing Requirements Google chrome, Power In: terminal block/RJ45 Connectors Network: RJ-45 connector Audio in/out: Spring Terminal Alarm in/out: Spring Terminal DC12V(600 mA) Power Requirement AC24V[450mA(PF=0.5)] PoE IEEE 802.3af ; Class 0 -10°C ~ 50°C Operating Temperature © Vanderbilt 2016... -
Page 10: Details For Ordering
Further products and accessories can be found in the internet: https://is.spiap.com/products/video.html Package contents IP dome camera Video cable 2 anchors 2 screws Template 4 GB SD card (in box) Installation instruction Utilities CD (including software and documentation) © Vanderbilt 2016... -
Page 11: Camera Part And Connector Definition
Camera housing SD card Dome cover Default button Connector pin definition 7.2.1 Digital I/O terminal Au.IN Audio in Au.IN Au.OUT Audio out Au.OU T AI.IN3 AI.IN3 Alarm in AI.IN2 AI.IN1 AI.IN2 AI.IN1 AI.OU T AI.COM Alarm out AI.OUT © Vanderbilt 2016... -
Page 12: Power Terminal
Video Signal Output Composite video output 7.2.4 Default/Reset buttons DEFAULT Return to factory default by pressing button (after 5 Sec) RESET System restart 7.2.5 SD card SD CARD To record images when alarm events happen. SD CARD © Vanderbilt 2016... -
Page 13: Installing The Camera
Buzzing noises may come from inside. This does not indicate malfunc- tion. Using the power adapter near a radio, TV, or cell phone may cause in- terference. Use the adapter at sufficient distances from these devices. © Vanderbilt 2016... -
Page 14: Concept Of The Network Camera
Entering an IP address manually (factory default) Obtaining an IP address automatically from the DHCP server Entering the IP address manually. Your camera is set to this mode at the factory with IP address 192.168.0.10, so © Vanderbilt 2016... - Page 15 Testing the camera connection using ping. Start a command prompt. Type "ping 192.168.0.10" and press "Enter". If the "Reply from..." message appears, the connection is correctly es- tablished. Search for the camera using the "Webcam IP Manager" and view a camera © Vanderbilt 2016...
-
Page 16: Using The Camera Search Application "Webcam Ip Manager
Do not install "Webcam IP Manager" with other operat- ing systems. Using "Webcam IP Manager" to search for a camera Set the personal computer to "Administrator authorization" when using "Webcam IP Manager". Select "Start" > "Programs" > "Webcam IP-Finder". © Vanderbilt 2016... - Page 17 SSDP multicast messages sent by the Web-Cam IP Manager on to the network segment where the device is located. Start the Web-Cam IP Manager by loading IP Manager.exe. This appli- cation is found on the CD included with delivery. The Web-Cam IP Manager program window will open: © Vanderbilt 2016...
-
Page 18: Login Dialog
ID and password to ensure camera security. Keep the new administrator login ID and password handy for future use. Information on how to change the administrator login ID and password can be found in Section "Access protection. © Vanderbilt 2016... -
Page 19: Viewing And Listening
Enter the IP addresses of the network cameras in the fields marked "Do not use the proxy server with addresses started with the following". Click "OK." When Windows XP SP2 is used: Click "Install" for "Active-X control." © Vanderbilt 2016... - Page 20 Image streams 1, 2 & 3: Triple streams 1, 2 & 3 are available for selec- tion. H.264 & JPEG only support 2 streams when the resolution sets at QXGA and 1080P. E-zoom: PTZ control, preset settings and more. © Vanderbilt 2016...
- Page 21 Zoom in/out: Users can click zoom in /out the lens in order to obtain a close-up or a wide view. Focus far/near: User can manually click Focus Near/Focus Far to adjust the fo- cus for optimal picture clearness. One push focus: Click “One push focus” to have the lens focus automatically once. © Vanderbilt 2016...
- Page 22 Installing the camera © Vanderbilt 2016...
- Page 23 ActiveX: Please use IE 8.0, IE 9.0 and IE 10.0 browser to view image. JavaApplet: Please use Firefox browser to view image. VLC: Before view the image, please install VLC player in PC. QuickTime: Before view the image, please install VLC player in PC. Still Image: Shows an image. © Vanderbilt 2016...
-
Page 24: Resolution
Stream 2 480P H.264 JPEG Stream 3 480P H.264 JPEG (It can switch to cropping size) Stream 1 H.264 QVGA/CIF JPEG Stream 2 H.264 QVGA/CIF JPEG Stream 3 H.264 QVGA/CIF (It can switch to cropping JPEG size) © Vanderbilt 2016... -
Page 25: Configuration
Set the quality of the delivered images. The size of the image files (JPEG files) depends on the compression ratio. Low compression: This setting produces the highest image quality. The – file size increases. Mid compression: Standard setting. – © Vanderbilt 2016... -
Page 26: Network Settings
Ask your Network Administrator for information on the default gateway. Primary DNS: (same as above) Secondary DNS: (same as above) Ipv6 address configuration Ipv6: Select "ON" to use the new internet protocol or "OFF" to disable it. © Vanderbilt 2016... - Page 27 When "ON" is selected, the camera can be detected automatically by the Inter- net Explorer browser. It is not necessary to have the Web cam IP manager in- stalled. AUDIO output Use When "ON" is selected, a voice message indicating camera’s IP address can be delivered to a headphone. © Vanderbilt 2016...
-
Page 28: Ddns Settings
Select the number of maximum connections from the "Max Simultane- ous Connections" list box. Click "Save" to save your settings. This function is used to download directories/files to or to delete them from the SD memory card. © Vanderbilt 2016... -
Page 29: Rtsp
HTTPS Here you can upload the *. pem file of certificate or *.pem file of private key. Click "Browse". A window will pop up. Select the file you want to upload. Click upload to upload the file. © Vanderbilt 2016... -
Page 30: Ieee802.1X
EAPOL version: Select 1 or 2. EAP identity: Enter the EAP identity. Private key password: Enter your private key password. Enable IEEE 802.1X: Select "ON" to enable it or "OFF" to disable it. © Vanderbilt 2016... -
Page 31: Snmp
Select "ON" to enable SNMP V1, SNMP V2C and SNMP V3, respectively, or select "OFF" to disable them. 9.2.8 3GPP 3GPP is the third generation technical standard which refers to GSM core net- work as the basis and UTRA as the wireless interface. © Vanderbilt 2016... -
Page 32: Image Parameter
– Select "Basic" in the sub menu. The "Camera - Basic Settings" dialog will appear. – Configure the individual settings. Click "Save" to save your settings. – The settings will not be applied unless "Save" is clicked. © Vanderbilt 2016... - Page 33 Set the desired shutter speed between 1/25 and 1/8912s. The shutter speed can be set to 1/25, 1/50, 1/100, 1/120, 1/1024, 1/2048, 1/4096, or 1/8192s. The network camera will adjust the aperture to the ambient light level. (ALC) © Vanderbilt 2016...
- Page 34 Outdoor: default for 6500K condition. R Gain, G Gain, B Gain : Adjust manual gain value of R Gain, G Gain, and B Gain between 0 and 255. This function is available for manual lenses only. © Vanderbilt 2016...
-
Page 35: Camera Mask Zone Settings
Select "ON" to activate or "OFF" to deactivate the flip function. Picture Mirror: The selected image will be side-inverted. Select "ON" to activate or "OFF" to deactivate the mirror function. 9.3.2 Camera mask zone settings © Vanderbilt 2016... - Page 36 Select "ON", then click "Set Mask Zone" to start mask setting. Drag a mask rectangle on the screen. Click "OK" to complete the selec- tion. Click "Save" to enable the mask setting. Up to 4 masks can be set on the screen. © Vanderbilt 2016...
-
Page 37: Camera Cropping Settings
9.3.4 Camera OSD settings This function can upload a new OSD image, displays logo image as Vanderbilt- logo, and setups the text position and color of camera name, alarm text or DATE/TIME on the screen. Of course, the corresponding ENABLE flag for each item shall be "ON"... - Page 38 Configuration © Vanderbilt 2016...
-
Page 39: Alarm
Normally Open (NO): open if nothing occurs but closed in case of an alarm. Normally Closed (NC): closed if nothing occurs but open in case of an alarm. Text Enable When "ON" is selected, an alarm message will be displayed on the screen. © Vanderbilt 2016... - Page 40 Choose different levels of 1~100 for object size. Set the percentage area size for a recognizable object. "100%": Very large objects trigger motion. "30%": Small objects trigger motion. Text Enable When "ON" is selected, an alarm message will be displayed on the screen. © Vanderbilt 2016...
- Page 41 When turned on and triggered, the alarm message will be recorded to SD card. Sensitivity Select the desired sensitivity. High: Even small changes are detected. Mid: Intermediate between High and Low. © Vanderbilt 2016...
- Page 42 Configuration Low: Only large changes are detected. © Vanderbilt 2016...
-
Page 43: Audio Event Upload
SD card or a PC. Up to 10 audio events can be selected. Alarm input 1 and motion setting will show different effects depending on which audio event you selected. NOTICE The audio event only accepts *.wav file and the audio time have to be in 5 secs. © Vanderbilt 2016... -
Page 44: Alarm Server
SD card not ready. Once upload files successfully, you can open the alarm settings page and se- lect different audio voice as alarm messages in event drop-down menu. 9.4.3 Alarm server Configure the alarm server as follows: © Vanderbilt 2016... - Page 45 When an alarm event occurs, the alarm server will receive this message text. Motion Alarm Message: Enter a message text. This text must not be longer than 64 characters. When a motion event occurs, the alarm server will receive this message text. © Vanderbilt 2016...
-
Page 46: Record
1, 2, 5, 10, 30,60,90,120s can be selected. Not required with H.264 format. Recording Time When H.264 is selected, the recording time can be set to 2, 5, or 10s. NOTICE When selected H.264 source, the schedule recording of FTP will be disabled. © Vanderbilt 2016... -
Page 47: Ftp Recording Basic
Scheduled Recording Select the recording condition in the recording schedule table for all days from Monday to Sunday: Stop, All Day, Schedule 1 or Schedule 2. © Vanderbilt 2016... - Page 48 You can make a SD card backup even in case of an FTP failure. The network camera automatically stores images on the SD card if they cannot be stored on the server due to a network failure, or other error condition. The © Vanderbilt 2016...
-
Page 49: Sd Recording
ON: Data stored on the SD card will be overwritten when the capacity of the SD card has been reached, starting with the oldest file. OFF: Recording will be stopped if the capacity of the SD memory card is reached during recording. Click "Save". © Vanderbilt 2016... -
Page 50: Email Recording
When the overwrite mode is set to "ON", files will be deleted starting with the oldest files. If important data needs to be saved, set the overwrite mode to "OFF". 9.5.4 Email recording You can receive images if you have set up your email account. © Vanderbilt 2016... - Page 51 Attach Image - When "ON" is selected, you can attach image files to your email. Recording Schedule - Select the days to be included in the recording schedule. Recording Cycle - Set a time interval for scheduled recording: 30, 60, © Vanderbilt 2016...
- Page 52 Configuration 120, 240, 600, 1200, 1800 or 3600 s. © Vanderbilt 2016...
- Page 53 Click "Save & Test Email" to save and test your email settings. Mail to address list You can send emails to multiple users according to schedule, or when an alarm is triggered or motion, acoustic, and tampers is detected. © Vanderbilt 2016...
-
Page 54: Nas Recording
Server, User ID, Password and Path text fields, respectively. Click "Save" to complete the NAS setup procedure. Make sure all NAS devices are available in network before activating this func- tion. © Vanderbilt 2016... -
Page 55: Audio
Audio Output: Select "ON" for delivering audio to a headphone or an active speaker connected to the camera. Audio Output Level: High - Increases the audio output level. – Mid - Adjusts the audio output level to a medium level. – Low - Reduces the audio output level. – © Vanderbilt 2016... -
Page 56: Date / Time
Enter a host name for the NTP server, select a time adjustment period, and click "Save & Test" to start testing the NTP function. Synchronization from PC: – The system date/time can be synchronized via the PC settings. © Vanderbilt 2016... -
Page 57: Access Protection
You can create your own Admin ID and password in these fields Language: English. You can select from 5 languages. Logoff Time Set the period of time during the user leaving the camera configuration in- terface for camera to logoff. © Vanderbilt 2016... -
Page 58: User List
IP address field(s). Up to 10 addresses can be set. Enable the IP address (es) in the list which are to pass the firewall filter by selecting "ON". Select either "Allowed" or "Denied" or "OFF". Allowed: The listed IP addresses will pass the firewall. © Vanderbilt 2016... - Page 59 Configuration Denied: The listed IP addresses will be rejected by the firewall. © Vanderbilt 2016...
-
Page 60: Forbidden Ports
Configuration 9.9.2 Forbidden ports All the listed ports that enabled (set to "ON") will be rejected by the firewall. 9.9.3 Forbidden protocols ICMP or UDP protocols can be rejected by the firewall if assigned. © Vanderbilt 2016... -
Page 61: System
*.bmp file and the file size have to be below 10K (10x1024). CGI-Lock is a system security setting. - ON: User should pass authorization to activate CGI-command action. - OFF: User can freely use any CGI-commands without any authorization. © Vanderbilt 2016... -
Page 62: 9.10.2 Update
15 minutes. After you finish a software update, please reboot your computer at first. Do not disconnect power during a SW update. Otherwise, it causes SW update failure and you have to send back your camera to Vanderbilt maintenance. © Vanderbilt 2016... -
Page 63: 9.10.3 Configuration
Network Camera Reboot - When you click on "Reboot" the following message will pop up: "This will reboot the camera. Are you sure?” Click "OK" to reboot the network camera. © Vanderbilt 2016... -
Page 64: 9.10.4 Back Focus
When the temperature of the camera is too high, for example above 70°C,a warning message will pop up. 9.10.6 Calibration Click Calibration button for calibration DC IRIS testing. A window pops up and camera begins calibrating automatically. After calibration finished, click Close to exit calibration DC IRIS testing page. © Vanderbilt 2016... -
Page 65: 9.10.7 Self-Testing
Configuration 9.10.7 Self-Testing The status of the system can be displayed here. © Vanderbilt 2016... -
Page 66: Log
Event log Select the menu sequence Settings > Log. By clicking the buttons "Display All Logs", "Display System Logs", "Display User Logs", "Delete logs" the corre- sponding logs will be displayed and can be processed. 9.12 Notice © Vanderbilt 2016... -
Page 67: Utility Program Application
Firmware update setup This application is found on the DVD that is included in the delivery. You can update multiple network cameras simultaneously. To update firmware, proceed in the following manner: Prerequisite: The firmware update software has been installed. © Vanderbilt 2016... - Page 68 Select the network camera you want to update. The upgrade tool sup- ports the simultaneous firmware update of up to 100 network cameras. Click on "Browse…" and select the software version for the network camera. Click on "Upload" to start the firmware update. Current FW version: X.0.1.33 © Vanderbilt 2016...
-
Page 69: Maintenance
Do not touch the lens area. If the surface is touched accidently use a soft cloth moistened with al- cohol to clean it. Defective modules should be sent to the nearest Vanderbilt office to be forwarded to the service centre. © Vanderbilt 2016... -
Page 70: Disposal
It is a precondition for reuse and recycling of used electrical and electronic equip- ment. For more detailed information about disposal of your old appliance, please contact your city office, waste disposal service or the shop where you purchased the product. © Vanderbilt 2016... -
Page 71: Keyword Index
Frame rate, 26 Temperature, 59 FTP Recording, 45 Transfer type, 30 FTP server, 29, 46 Unit home page, 22 GOP, 26 UPnP Use, 28 H264, 26 User, 55 Image mode, 26 Webcam IP Manager, 18 Import, 59 © Vanderbilt 2016... - Page 72 Issued by Vanderbilt © Vanderbilt 2016 Clonshaugh Business and Technology Park Data and design subject to change without notice Clonshaugh Supply subject to availability Dublin 17 Document no.: C-300883 Ireland Document version: 2.0 www.vanderbiltindustries.com Edition: 17/2/2016...
Need help?
Do you have a question about the CFMW3025 and is the answer not in the manual?
Questions and answers