Advertisement
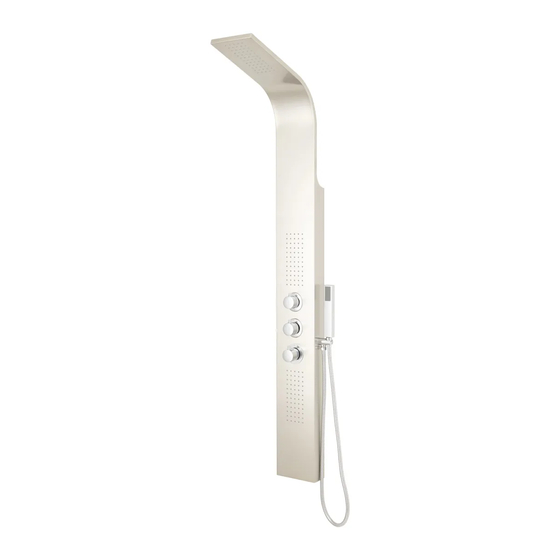
ANDROMEDA THERMOSTATIC SHOWER PANEL
BEFORE YOU BEGIN
We recommend consulting a professional if you are
unfamiliar with installing plumbing fixtures. Signature
Hardware accepts no liability for any damage to the
plumbing, floor, walls, tub, or for personal injury during
Observe all local plumbing and building codes.
Unpack and inspect the item for shipping damage. If any
damage is found, contact our Customer Relations team
at 1-866-855-2284.
GETTING STARTED
Ensure that you have gathered all the required
materials that are needed for the installation.
Before you begin, the main water supply to your home
should be shut off.
TOOLS AND MATERIALS:
Plumbers
Tape
Adjustable
Wrench
Andromeda Thermostatic Shower Panel Installation Instructions
SKU(s): 296157
Tape Measure
Level
Pencil or
Drill
Marker
1
Advertisement
Table of Contents

Related Manuals for Signature Hardware Andromeda 296157


Summary of Contents for Signature Hardware Andromeda 296157
- Page 1 SKU(s): 296157 ANDROMEDA THERMOSTATIC SHOWER PANEL TOOLS AND MATERIALS: BEFORE YOU BEGIN We recommend consulting a professional if you are unfamiliar with installing plumbing fixtures. Signature Hardware accepts no liability for any damage to the plumbing, floor, walls, tub, or for personal injury during Plumbers Tape Measure Level...
- Page 2 ANDROMEDA THERMOSTATIC SHOWER PANEL Installation 1. Before installation, complete the in-wall plumbing. 3. Once properly positioned, mark the locations of the The hot and cold water lines should be prepared 5” upper and lower mounting brackets on the wall. Make a on-center.
- Page 3 ANDROMEDA THERMOSTATIC SHOWER PANEL 5. Drill pilot holes into the wall at the marked mount- 7. Attach the hand shower cradle to the shower ing hole locations. Insert one of the provided anchors panel. Remove the lock nut and rubber gasket from into each of the four holes.
- Page 4 ANDROMEDA THERMOSTATIC SHOWER PANEL 9. Connect the shower panel’s water lines to their 11. Attach the hand shower to the shower panel installed male fittings on the wall. Ensure that you are using the provided metal hose, as shown. Hand connecting the hot and cold lines appropriately.
Need help?
Do you have a question about the Andromeda 296157 and is the answer not in the manual?
Questions and answers