Table of Contents
Advertisement
Available languages
Available languages
Quick Links
Bedienungsanleitung in Deutsch
Bedienungsanleitung in Deutsch
User Guide in English
User Guide in English
Guide de l'utilisateur en Français
Guide de l'utilisateur en Français
eGimbal G4 Plus
3-Achsen Universal-
Hand-Gimbal für alle
Actioncams mit einer
Höhe von 33 – 51 mm
und LCD BacPac*
3 axes universal gimbal
for all actioncams with
a height of 33 up to
51 mm and with LCD
BacPac*
Nacelle auto-stabilisée
à 3 axes pour toutes les
caméras d'action d'une
hauteur de 33 – 51 mm
et avec LCD BacPac*
Advertisement
Table of Contents

Related Manuals for Rollei eGimbal G4 Plus


Summary of Contents for Rollei eGimbal G4 Plus
- Page 1 G4 Plus 3-Achsen Universal- Hand-Gimbal für alle Actioncams mit einer Höhe von 33 – 51 mm und LCD BacPac* 3 axes universal gimbal for all actioncams with a height of 33 up to 51 mm and with LCD BacPac* Nacelle auto-stabilisée...
-
Page 2: Table Of Contents
Instructions d‘initialisation de la nacelle Rollei G4 Plus . . . . . . . . . . . . . . . . -
Page 3: Anleitung - Erste Schritte
Anleitung – Erste Schritte Bitte aktualisieren Sie die Firmware und verwenden Sie V1 .11 oder eine aktuellere Version . ACHTUNG! Bitte montieren Sie die geeignete Kamera, bevor Sie den Gimbal einschalten. Batterien einsetzen Entfernen Sie den Deckel des Einschaltknopfes . Legen Sie zwei 18350-Batterien in den Griff . -
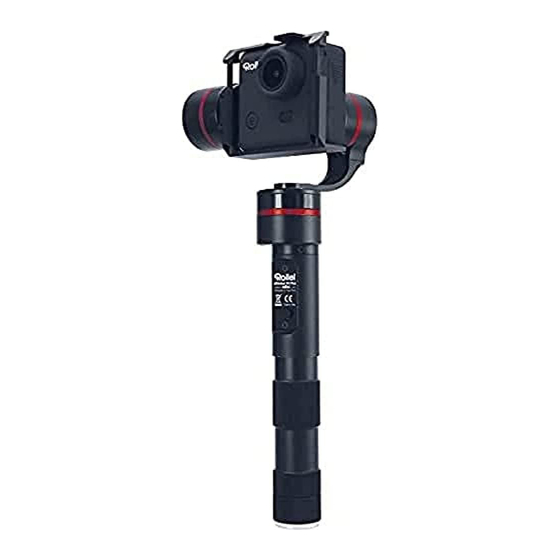
Page 4: Produktansicht
Produktansicht Nickachse Richtungsachse Funktions- schnittstelle Längsachse Funktionstaste Einschaltknopf Anzeige Erläuterung der Anzeige LED-Status Erläuterung Blaues Licht leuchtet dreimal auf Akku vollständig geladen Blaues Licht leuchtet zweimal auf Ausreichende Akkuleistung Blaues Licht leuchtet einmal auf Geringe Akkuleistung Blaues Licht leuchtet kontinuierlich auf Vollständig entladener Akku Wenn die Anzeige bei Betrieb rot leuchtet, deutet das auf einen Fehler des Gimbals hin . -
Page 5: Anleitung Zum Arbeitsmodus
Spezieller Arbeitsmodus (Umkehrmodus): Drücken Sie die Funktionstaste dreimal hintereinander, während sich der Gimbal in einem beliebigen Arbeitsmodus befindet . Der Umkehrmodus wird aktiviert und der Rollei eGimbal G4 schaltet sich automatisch in den Richtungs-Folge-Modus . Aktivieren Sie den Umkehrmodus des Gimbals um aufregende Szenen festzuhalten, indem Sie zwischen den Arbeitsmo- di hin- und herschalten . -
Page 6: Zubehör
Anleitung zu den Aufnahmen Selfie: Drehen Sie den Gimbal um 180°, damit die Funktionsschnittstelle zu Ihnen zeigt . Stellen Sie dann den gewünschten Höhenwinkel ein, indem Sie den „Rich- tungs- und Höhen-Folge-Modus“ aktivieren (wie oben beschrieben) . Schalten Sie dann zurück zum „Richtungs-Folge-Modus“ . Nun können Sie sich ohne Probleme selbst filmen . -
Page 7: Anleitung Zur Funktionsschnittstelle
Anleitung zur Aktualisierung der Firmware Laden Sie die neueste Firmware von der offiziellen Webseite von Rollei (www .rollei .com) herunterladen . Entpacken Sie die RAR Datei . Entfernen Sie die Akkus und verbinden Sie den Gimbal mit Ihrem Computer so wie oben dargestellt . -
Page 8: Den Rollei Egimbal G4 Plus Initialisieren
2 . Gimbal auf einer flachen Fläche positionieren und nicht bewegen . 3 . Gimbal einschalten . 4 . Der Gimbal ist aktiviert und wird automatisch initialisiert . Sie können den Rollei eGimbal G4 Plus nun nehmen und normal damit arbeiten . -
Page 9: Haftungsausschluss
Achtung Haftungsausschluss Der tragbare Rollei eGimbal G4 Plus ist ein ausgezeichneter Stabilisator für die Kamera mit geringem Gewicht . Ein unrechtmäßiger Gebrauch ist untersagt . Anwender werden für Handlungen in Verbindung mit dem Kauf und dem Gebrauch der Produkte verantwortlich gemacht . -
Page 10: Getting Started Guide
Power On Please make sure that the camera is installed correctly . Then press the power button to turn on the Rollei eGimbal G4 Plus . Mode Switching When the Gimbal is working you can press the function button to switch between 3 working modes and a special working condition . -
Page 11: Product Appearance
Product Appearance Pitch Axis Heading Axis Function Interface Roll Axis Function Button Power Switch Indicator Indicator Explanation LED Status Explanation Blue light flashes three times Full Power Blue light flashes twice Enough Power Blue light flashes once Low Power Blue light keeps flashing No Power If the indicator light flashes red, the Gimbal will not work correctly due to an error . -
Page 12: Working Mode Instructions
Working Mode Instructions Function Button Use the function button to switch between the different working modes . The chosen mode can be identified by the status of the indicator light . Working Mode Instructions 1 . Heading Follow Mode: Camera Pitch and Roll Angles remain constant, heading follows the handheld position . -
Page 13: Accessories
Accessories mini USB USB Cable Charger Rechargeable Extension Type: 16340/18350 Battery Knurled Screw Input: DC 5V Min 800 mA Type: 18350 Output: DC 4 .2V USB Connector Correct Method For Using USB Data Cable Please refer to the method of proper usage mentioned below. Otherwise the device itself or other equipment can be damaged. -
Page 14: Function Interface Instructions
Firmware Upgrade Instruction Please visit the official website of Rollei (www .rollei .com) to download the USB driver, firmware upgrade software and the latest firmware . Then unzip the RAR file and remove the batteries . Connect the Gimbal with the computer as shown above . -
Page 15: Initialize The Rollei Egimbal G4 Plus
4 . The Gimbal is activated and it will be initialized automatically . Afterwards pick up the Gimbal and start working with it . Rollei eGimbal G4 Plus needs to be initialized whenever the following situations appear after power on 1 . -
Page 16: Disclaimer
The Rollei GmbH & Co . KG and our associates are not responsible for any damages or liabilities caused by the use of this product . Rollei will not offer any service if the Gimbal is uses improperly . Rollei reserves the right to amend this manual and the terms and conditions of use of the Gimbal at any time . -
Page 17: Manuel De Démarrage
Manuel de démarrage Veuillez mettre à niveau le progiciel vers la version 1 .11 ou une version ultérieure . Attention! Veuillez installer la caméra appropriée avant d’allumer la nacelle. Insérer les piles Retirez le capuchon du bouton de commutation, insérez deux piles 18350 dans la poignée . -
Page 18: Instructions Relatives À L'agencement Du Produit
Instructions relatives à l’agencement du produit Axe de tangage Axe de roulis Fonction Interface Axe de roulis Button de fonction Interrupteur Indicateur Explications des indicateurs État LED Explications Témoin bleu clignotte 3 fois Pleine puzissance Témoin bleu clignotte 2 fois Puissance suffisante Témoin bleu clignotte 1 fois Puissance faible... -
Page 19: Mode D'emploi
Mode d‘emploi Bouton de fonction Identifier le mode de fonctionnement en parcourant les différents états du témoin lumineux . Utiliser pour changer les modes de travail . Mode d‘emploi 1 . Mode de suivi du pan: le tilt et le roll de la caméra sont stabilisés, le pan suit la position du nez . -
Page 20: Accessoires
Accessoires mini USB Câble USB Chargeur Pile Extension vis molletée type: 16340/18350 rechargeable Entrée: DC 5V Min 800 type: 18350 mA Sortie : DC 4 2V Connecteur USB Correct Method For Using USB Data Cable Veuillez-vous référer à la méthode suivante pour un usage approprié. Dans le cas contraire, votre appareil et d’autres équipements pourraient subir des dommages. -
Page 21: Instructions De Fonction D'interface
à l’aide du connecteur USB . Instructions de mise à niveau du progiciel Visitez sur le site internet official de Rollei (www .rollei .com) pour télécharger la dernière version du progiciel . Décompressez le fichier RAR et retirez les piles . -
Page 22: Instructions D'initialisation De La Nacelle Rollei G4 Plus
4 . La nacelle est activée et s’initialise automatiquement . Soulevez la nacelle afin qu’elle se mette en marche . Rollei eGimbal G4 Plus doit être initialisé chaque fois que les situa- tions décrites ci-après se produisent 1 . Après la mise en marche, l’angle de tilt n’est pas au même niveau que la ligne d’horizon . -
Page 23: Attention
. The Rollei GmbH & Co . KG et nos associés ne sont pas responsables des défauts ou dégats causés par l’utilisation de ce produit . Pour toute source ou usage non conforme, nous ne pourrons vous être d’aucune utilité... - Page 24 (rollei.photo.en) www.youtube.com/ rolleibullet www.twitter.com/ RolleiGermany www.pinterest.com/ rollei1920/ http://instagram.com/ rollei1920 Service: Rollei Service Germany Denisstraße 28a D-67663 Kaiserslautern Hotline +49 (0)6 31/3 42 84 49 Distribution: Rollei GmbH & Co. KG Tarpen 40/Gebäude 7b D-22419 Hamburg www.rollei.com...
Need help?
Do you have a question about the eGimbal G4 Plus and is the answer not in the manual?
Questions and answers