Advertisement
Available languages
Available languages
Quick Links
NL
Gebruiksaanwijzing
Bedienungsanleitung
DE
EN
Operating instuctions
FR
Instruction de service
Instruktionsbok
SV
CS
Návod k obsluze
Návod na použitie
SK
Broşură cu instrucţiuni
RO
Heat-Duct-Pro 3 – 9 – 15 kW
Art.nr. 33.246.9 (HDP 3) – 33.248.3 (HDP 9) – 33.249.0 (HDP 15)
This product is only suitable for well insulated spaces of occasional use.
Elektrische werkplaatskachel met thermostaat
NL
Elektrischer Werkstattofen mit Thermostat
DE
Electrical workspace heater with thermostat
EN
Poele d'atelier electrique avec thermostat
FR
Elektrisk byggfläkt med thermostat
SV
Elektrické dílenské topení s termostatem
CS
Elektrický dielenký ohrievač s termostatom
SK
Radiator electric pentru spaţii de lucre cu termostat
RO
Advertisement

Related Manuals for EUROM Heat-Duct-Pro 3


Summary of Contents for EUROM Heat-Duct-Pro 3
- Page 1 Návod k obsluze Návod na použitie Broşură cu instrucţiuni Heat-Duct-Pro 3 – 9 – 15 kW Art.nr. 33.246.9 (HDP 3) – 33.248.3 (HDP 9) – 33.249.0 (HDP 15) This product is only suitable for well insulated spaces of occasional use.
- Page 2 Dit symbool op uw apparaat betekent: niet afdekken! This symbol on your device means: do not cover! Dieses Symbol auf Ihrem Gerät bedeutet: Nicht abdecken! Ce symbole sur votre appareil signifie : ne pas couvrir ! Dette symbol betyder: Må ikke tildækkes! Den här symbolen betyder: får ej övertäckas! Dette symbolet på...
- Page 3 Nederlands Technische gegevens Type Heat-Duct-Pro 3 Heat-Duct-Pro 9 Heat-Duct-Pro 15 Aansluitspanning V / Hz 220-240 / 50 400 - 3~ / 50 400-3~ / 50 Max. vermogen 3000 9000 15000 0 – 4500 - 9000 Instelmogelijkheden W 0 - 3000...
- Page 4 6. Rol de elektrokabel volledig af voor u de stekker in het stopcontact steekt, en zorg ervoor dat hij nergens met de kachel in contact komt of anderszins heet kan worden. Leid de kabel niet onder tapijt door, bedek hem niet met matten, lopertjes o.i.d.
- Page 5 op zachte oppervlakken als een bed of hoogpolig tapijt, waardoor openingen afgesloten kunnen raken. 14. De lucht rond een kachel moet vrij kunnen circuleren. Plaats hem dus niet te dicht op muren of grote voorwerpen en niet onder een plank, kast o.i.d. 15.
- Page 6 Zij doen de garantie vervallen en leverancier, importeur en/of fabrikant aanvaarden geen aansprakelijkheid voor de gevolgen! Beschrijving De EUROM Heat-Duct-Pro-kachels zijn echte ruimteverwarmers, met een krachtige ventilator die veel lucht verplaatst. Aan de achterkant wordt de (koude) lucht aangezogen, verwarmd en als opgewarmde lucht weer uitgeblazen.
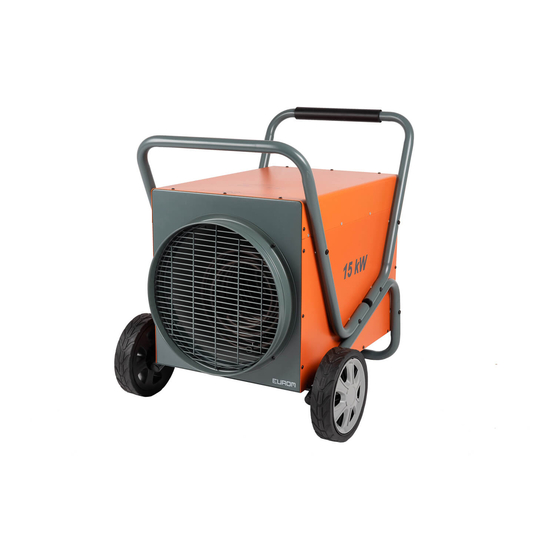
- Page 7 HEAT-DUCT-PRO 3 en 9 1. Omkasting 2. Luchtuitlaat 3. Verwarmingsspira 4. Voet 5. Handgreep 6. Thermostaatknop 7. Bedieningsknop 8. Motor 9. Luchtinlaat HEAT-DUCT-PRO 15 Omkasting Handvat Luchtuitlaat Bediendingsknop Verwarmingspiraal Motor Wielen Luchtinlaat Trolly voorzijde Trolly onderzijde Thermostaatknop...
- Page 8 Bedieningspaneel HEAT-DUCT-PRO 3: bedieningspaneel HEAT-DUCT- omvat twee knoppen: Links traploos instel-bare thermostaatknop Rechts de bedienings- knop met 3 standen: = uit = alleen ventileren X ■ = ventileren en verwarmen (3000W) Bedieningspaneel HEAT-DUCT-PRO 9 en 15: Het bedieningspaneel van...
- Page 9 Montage trolly HDP 15 Monteer de trolley volgens onderstaande illustratie en omschrijving: 2x frame 12x schroef M6x45 2x wieltjes 2x plastic afdekplaatje 4x ring 2x moer Monteer de trolley volgens onderstaande illustratie en omschrijving: - Monteer eerst het onderste frame, zie afbeelding 1 - Monteer nu de wielen, zie afbeelding 3 Monteer nu het bovenste frame, zie afbeelding 5 ...
- Page 10 Ook voor de slang geldt: zorg ervoor dat hij niet te dicht bij brandbare materialen komt! Heat-Duct-Pro 3: 5m. x 26 cm., Art.nr. 33.241.4 Heat-Duct-Pro 9: 5m. x 29 cm., Art.nr. 33.242.1...
- Page 11 Controleer voor gebruik of de slang met de klem goed om de uitlaat bevestigd zit en zorg ervoor dat de slang nooit een bocht, kleiner dan 90°, maakt! Beveiligingen De oververhittingbeveiliging schakelt de kachel uit wanneer hij inwendig te heet wordt.
- Page 12 Deutsch Technische Daten Heat-Duct-Pro 3 Heat-Duct-Pro 9 Heat-Duct-Pro 15 Anschlussspannung V / Hz 220-240 / 50 400 - 3~ / 50 400 - 3~ / 50 Maximale Leistung 3000 9000 15000 Einstellungsmöglichkeiten W 0-3000 0-4500-9000 0-7500-15000 Luftverdrängung m³/h 1227 1609...
- Page 13 Anschlussspannung und Frequenz, genannt auf dem Gerät, müssen benutzten Steckdose entsprechen. elektrische Installation muss einem Leitungsschutzschalter (max. 30 mAmp.) gesichert sein. Rollen Sie die Anschlussleitung komplett ab, bevor Sie den Stecker in die Steckdose stecken und sorgen Sie dafür, dass es nirgendwo mit dem Gerät in Kontakt kommt oder auf andere Weise...
- Page 14 Platzieren Sie den Ofen nicht in der Nähe, unter oder auf eine Steckdose gerichtet und nicht in der Nähe eines offenen Feuers oder einer Wärmequelle. Benutzen Sie den Ofen nicht in der Nähe von oder gerichtet auf Möbel, Tieren, Gardinen, Papier, Kleidung, Bettwäsche oder sonstiger brennbarer...
- Page 15 Sorgen Sie für gute Aufsicht, falls der Heizlüfter in der Nähe von Kindern oder Behinderten betrieben wird. Dieses Gerät ist nicht geeignet, um durch Kinder oder Personen mit körperlichen, sensorischen oder geistigen Behinderungen oder durch Personen ohne Wissen oder Erfahrung mit diesem Gerät bedient zu werden.
- Page 16 (max. 5 m), um die ausgeblasene warme Luft zu einem anderen Ort zu führen. Darum haben die Öfen einen besonders starken Lüfter mit hoher Luftverdrängung. Der Oft hat einen Thermostat und einen Überhitzungsschutz. HEAT-DUCT-PRO 3 und 9 1. Gehäuse 2. Luftaustritt 3. Heizspirale 4.
- Page 17 Bedienungseinheit HEAT-DUCT-PRO 3: Bedienungseinheit des HEAT-DUCT-PRO 3 besteht zwei Knöpfen: Links der stufenlos verstellbare Thermostatknopf Rechts der Bedienungsknopf mit 3 Stellungen: = aus = nur lüften X ■ = lüften und heizen (3000 W) Bedienungseinheit HEAT-DUCT-PRO 9 und 15:...
- Page 18 Sorgen Sie dafür, dass der Ofen ausgeschaltet ist (Schalter auf O) und stecken Sie dann den Stecker in eine passende und ordnungsgemäß funktionierende, geerdete 230V-50Hz (Heat-Duct-Pro 3) / 400V-50Hz, 5-Polig (Heat-Duct-Pro 9 + 15) Steckdose. Inbetriebnahme und Funktion Wenn der Ofen zum ersten Mal in Betrieb genommen wird (oder wenn Sie die gewünschte...
- Page 19 Hitzebeständigkeit auf und wird mit einer geeigneten Klemme geliefert. Auch für den chlauch gilt: Sorgen Sie dafür, dass er nicht in die Nähe brennbarer Materialien kommt! Heat-Duct-Pro 3: 5 m x 26 cm, Art.-Nr. 33.241.4 Heat-Duct-Pro 9: 5 m x 29 cm, Art.-Nr. 33.242.1 Heat-Duct-Pro 15: Auf Anfrage...
- Page 20 Kontrollieren Sie vor der Nutzung, ob der Schlauch mit der Klemme ordentlich am Auslass befestigt ist, und achten Sie darauf, dass der Schlauch keine Biegung von weniger als 90° aufweist! Sicherungen Die Überhitzungssicherung schaltet den Heizlüfter aus, wenn es inwendig zu heiß wird.
- Page 21 English Technical data Type Heat-Duct-Pro Heat-Duct-Pro Heat-Duct-Pro Supply voltage V / Hz 220-240 / 50 400 - 3~ / 50 400 - 3~ / 50 Maximum capacity 3000 9000 15000 Settings 0-3000 0-4500-9000 0-7500-15000 Air flow m³/h 1227 1609 Protection class IP24 IP24 IP24...
- Page 22 The electrical installation needs to be protected by a residual current device (max. 30 mAmp). 6. Fully extend the cord before plugging in the heater. Make sure it does not come into contact with any part of the heater and prevent it from heating up any other way. Do not run the cord underneath carpeting;...
- Page 23 inflammable objects. Keep them at least 1 metre away from the heater! 13. Never cover a heater! The heater’s air inlets and outlets should never be obstructed in any way, so as to prevent the possibility of fire. Never use the heater to dry clothes and do not place anything on top of the heater.
- Page 24 Description EUROM Heat-Duct-Pro heaters are ‘real space’ heaters, with a powerful fan which disseminates a great deal of air. Cold air is sucked in at the back, heated, and then blown out as hot air. Because a relatively large quantity of air is sucked in and blown out, the air expelled by the heater does not feel particularly hot.
- Page 25 9. Motor 4. Wheels 10. Air inlet 5. Trolley front side 11. Trolley rear side 6. Thermostat knob Control panel for HEAT-DUCT-PRO 3: The control panel for the HEAT-DUCT-PRO 3 has two buttons: On the left the freely adjustable...
- Page 26 Control panel for HEAT-DUCT-PRO 9: The control panel for the HEAT-DUCT-PRO 9 has two buttons: Left freely adjustable thermostat knob On right control knob with four settings Location and Connection Remove all packaging material and keep out of reach of children. After removing packaging, check the appliance for damage or other signs that could indicate a fault/defect/malfunction.
- Page 27 Make sure the heater is switched off (switch to O position), then plug into a correctly functioning, properly grounded 230V-50Hz (Heat-Duct-Pro 3) / 400V- 50Hz, 5-Pole (Heat-Duct-Pro 9 + 15) socket. Set-up and Operation If the heater is being used for the first time (or if you want to reset the desired temperature), turn the thermostat dial to the maximum position (clockwise as far as it goes).
- Page 28 Before use, check that the hose and clamp are fitted properly around the vent and make sure that the hose never makes a bender smaller than 90°. Safety features In case of internal overheating, the overheating safeguard will switch the heater off. This may occur if the heater cannot give off enough heat or if it cannot draw in enough fresh air.
- Page 29 Français Données techniques Type Heat-Duct-Pro Heat-Duct-Pro Heat-Duct-Pro Tension V / Hz 220-240 / 50 400 - 3~ / 50 400 - 3~ / 50 Puissance max. W 3000 9000 15000 Possibilités de 0-3000 0-4500-9000 0-7500-15000 réglage Flux d’air m³/h 1227 1609 Classe de IP24...
- Page 30 N’utilisez plus un poêle si ses composants internes sont humides, mais portez-le en réparation. Ne plongez jamais le poêle, le cordon ou la fiche dans l’eau ou dans un autre liquide et ne touchez jamais le poêle avec des mains mouillées.
- Page 31 11. Ne placez pas le poêle à proximité, en dessous ou dans la direction d’une prise de courant, ni à proximité d’un feu ouvert ou de sources de chaleur. 12. N’utilisez pas le poêle à proximité ou dans la direction de meubles, d’animaux, de rideaux, de papier, de vêtements, de literie ou d’autres objets inflammables.
- Page 32 ou d’animaux domestiques. Cet appareil ne convient pas pour être commandé par des enfants ou des personnes avec des handicaps physiques, sensoriels ou mentaux ou par des personnes sans connaissance ou expérience avec cet appareil. Cet appareil peut être utilisé par des enfants de 8 ans et plus et par des personnes dont les capacités physiques, sensorielles ou mentales sont réduites ou qui manquent d'expérience et de connaissance à...
- Page 33 Description Les poêles Eurom Heat-Duct-Pro sont de véritables chauffages d’ambiance équipés d’un puissant ventilateur capable de brasser beaucoup d’air. L’air (froid) est aspiré à l’arrière, chauffé, puis soufflé en tant qu’air chaud. Comme il y a relativement beaucoup d’air qui est aspiré et soufflé, la chaleur de l’air soufflé ne paraît pas si spectaculaire.
- Page 34 Panneau de commande HEAT-DUCT-PRO 3 : panneau commande HEAT- DUCT-PRO 3 comprend deux boutons : A gauche le bouton thermostat réglable en continu A droite le sélecteur à 3 positions : = arrêt = uniquement ventiler X ■...
- Page 35 Assurez-vous que le poêle soit éteint (interrupteur sur OFF), puis insérez la fiche dans une prise de courant, 230V-50Hz (Heat-Duct-Pro 3) / 400V-50Hz, 5- broches (Heat-Duct-Pro 9+15) en bon état de fonctionnement (prise de terre). Mise en service et fonctionnement A la première mise en service du poêle (ou lorsque vous souhaitez à...
- Page 36 à la chaleur et est fourni avec une attache adaptée. Pour le flexible également, veillez à ce qu’il ne soit pas trop près de matériaux inflammables ! Heat-Duct-Pro 3 : 5 m x 26 cm, n° art. 33.241.4 Heat-Duct-Pro 9 : 5 m x 29 cm. n° art. 33.242.1 Heat-Duct-Pro 15: sur demande Avant toute utilisation, contrôlez si le flexible est bien fixé...
- Page 37 refroidi, il reprendra en principe son activité, mais si vous n’éliminez pas la cause, la mise hors service va probablement se reproduire. La surchauffe régulière peut provoquer des dégâts irréparables. Lorsque la protection anti-surchauffe éteint le poêle, vous devez mettre l’interrupteur sur ‘OFF’...
- Page 38 Svenska Tekniska data Heat-Duct-Pro 3 Heat-Duct-Pro 9 Heat-Duct-Pro 15 Spänning V / Hz 220-240 / 50 400 - 3~ / 50 400 - 3~ / 50 Max. effekt 3000 9000 15000 Inställningsalternativ W 0-3000 0-4500-9000 0-7500-15000 Luftlöde m³/h 1227 1609...
- Page 39 installationen skall skyddas av en restströmsanordning (max. 30 mA). 6. Drag ut sladden helt innan elementet ansluts till elnätet. Se till att den inte kommer i kontakt med någon del av elementet och förhindra att den värms upp på något annat sätt.
- Page 40 mjuka underlag eller på mattor med lång lugg eftersom de kan blockera öppningar. 14. Se till att luften kan cirkulera fritt runt byggfläkten. Placera inte byggfläkten för nära väggar eller stora föremål och placera det inte under hyllor, skåp och liknande. 15.
- Page 41 Beskrivning EUROM Heat-Duct-Pro byggfläktar värmer verkligen upp utrymmen med en kraftfull fläkt som ger mycket luft. (Kall) luft sugs in på baksidan, värms och blåses ut som varm luft. Eftersom en relativt stor mängd luft sugs in och blåses ut känns den utblåsta luften inte speciellt...
- Page 42 3. Uppvärmningscylinder 9. Motor 4. Hjul 10. Luftintag 5. Vagn framsida 11. Vagn undersida 6. Termostatknapp Kontrollpanel för HEAT-DUCT-PRO 3: Kontrollpanelen för HEAT-DUCT- PRO 3 har två knappar: Till vänster sitter den fritt justerbara termostatknappen Till höger sitter kontrollknapp med tre lägen...
- Page 43 Kontrollpanel för HEAT-DUCT-PRO 9+15: Kontrollpanelen för HEAT-DUCT-PRO 9 har två knappar: Till vänster den fritt justerbara termostatknappen Till höger sitter en kontrollknapp fyra lägen Placering och anslutning Tag bort allt förpackningsmaterial och förvara det utom räckhåll för barn. När förpackningsmaterialet är borttaget, kontrollera om byggfläkten är skadad eller har andra tecken på...
- Page 44 är försedd med en matchande klämma. Även vad gäller slangen: se till att den inte kommer i närheten av lättantändliga material! Heat-Duct-Pro 3: 5 m. x 26 cm., Art.nr. 33.241.4 Heat-Duct-Pro 9: 5 m. x 29 cm., Art.nr. 33.242.1...
- Page 45 Före användning ska du kontrollera att slangen och klämman sitter korrekt kring ventilen och se till att slangen aldrig böjs med mer än 90°. Säkerhetsåtgärder Vid intern överhettning stänger överhettningsskyddet av värmefläkten.. Detta kan hända när den inte kan avge tillräckligt med värme eller inte överhettningsskyddet av kan ta in tillräckligt med frisk luft.
-
Page 46: Všeobecné Bezpečnostní Pokyny
Česky Technické údaje Heat-Duct-Pro 3 Heat-Duct-Pro 9 Heat-Duct-Pro 15 Napájecí napětí V / Hz 220-240 / 50 400 - 3~ / 50 400 - 3~ / 50 Dosažitelný 3000 9000 15000 výkon Volby nastavení W 0-3000 0-4500-9000 0-7500-15000 Vzduchový m³/h... - Page 47 zásuvce. Elektrická instalace musí být chráněna proudovým jističem (max. 30 mA). 6. Před připojením topení šňůru úplně natáhněte. Zajistěte, aby se nedotýkala žádné částí topení a zabraňte jejímu ohřevu jakýmkoli jiným způsobem. Nedávejte kabel pod koberec, nepřekrývejte jej rohožemi, kobercovými lištami a podobně, a zajistěte aby neprocházel žádným průchodem.
- Page 48 13. Topení nikdy nezakrývejte! Z důvodu požární bezpečnosti nesmí nic bránit vstupu ani výstupu vzduchu z topení. Nikdy nepoužívejte přístroj k sušení oblečení a nepokládejte nic na horní stranu přístroje. Nestavte přístroj na měkké povrchy, jako jsou postele, nebo tlusté koberce, aby nedošlo k zablokování...
- Page 49 Na výstupním otvoru ohřívače Heat-Duct-Pro lze připojit hadici (max. 5 m.) za účelem vést foukaný horký vzduch na jiné místo. Proto má ohřívač i silný ventilátor a silný vzduchový proud. Ohřívač je opatřen termostatem a ochranou proti přehřátí. HEAT-DUCT-PRO 3+9 1. Kryt 2. Vývod vzduchu 3. Ohřevná spirála 4.
- Page 50 3. Ohřevná spirála 9. Motor Kolečka 10. Přívod vzduchu Vozík – přední strana 11.Vozík – zadní strana 6. Spínač termostatu Obslužný panel ohřívače HEAT-DUCT-PRO 3: Obslužný panel ohřívače HEAT-DUCT-PRO 3 má dva spínače: Vlevo plynule nastavitelný spínač termostatu Vpravo obslužný...
- Page 51 Obslužný panel HEAT-DUCT-PRO 9+15: Obslužný panel ohřívače HEAT-DUCT-PRO 9+15 má dva spínače: Vlevo plynule nastavitelný spínač termostatu Vpravo obslužný spínač se 4 pozicemi: Umístění a připojení Odstraňte veškerý obalový materiál a odstraňte jej z dosahu dětí. Po odstranění ...
- Page 52 Ujistěte se, že je přístroj vypnutý (nastaven na pozici 0), potom jej zapojte do správně fungující zásuvky 230 V - 50 Hz. (Heat-Duct-Pro 3) / 400V-50Hz, 5-pol (Heat-Duct-Pro 9+15) (uzemněné elektrické zásuvky). Nastavení a provoz Pokud přístroj používáte poprvé...
-
Page 53: Bezpečnostní Prvky
Před použitím prověřte, zda je hadice svorkou k vývodu dobře upevněna a zabezpečte, aby se nepřehnula do oblouku menšího než 90°! Bezpečnostní prvky V případě, že dojde k vnitřnímu přehřátí, funkce ochrany proti přehřátí přístroj automaticky vypne. Taková situace může nastat, když topení nemůže poskytnout dostatek tepla, nebo nemá... -
Page 54: Všeobecné Bezpečnostné Predpisy
Slovensky Technické údaje Heat-Duct-Pro 3 Heat-Duct-Pro 9 Heat-Duct-Pro 15 Napájanie V / Hz 220-240 / 50 400 - 3~ / 50 400 - 3~ / 50 Max. vermogen W 3000 9000 15000 0 – 4500 - 9000 Nastavenia 0 - 3000 0-7500-15000 Vzduchový... - Page 55 používanú zásuvku. Elektrická inštalácia musí byť chránená zariadením na zvyškový prúd (max. 30 mA). 6. Pred pripojením ohrievača kábel úplne roztiahnite. Uistite sa, že nie je v kontakte so žiadnou časťou ohrievača a zabezpečte ho pred ohriatím iným spôsobom. Kábel neveďte popod kobercom, neprikrývajte ho rohožami, behúňmi a pod.
- Page 56 horľavých predmetov. Uchovávajte minimálne 1 meter od ohrievača! 13. Ohrievač nikdy neprikrývajte! Prívody a vývody vzduchu ohrievača by nikdy nemali byť žiadnym spôsobom zablokované, pretože v opačnom prípade hrozí nebezpečenstvo požiaru. Ohrievač nikdy nepoužívajte na sušenie odevov a na hornú stranu ohrievača nič...
- Page 57 Popis Ohrievače EUROM HEAT-DUCT-PRO sú skutočné radiátory s výkonným ventilátorom, ktorým prechádza veľké množstvo vzduchu. Studený vzduch je nasávaný zozadu, ohreje sa a potom je vyfukovaný ako horúci vzduch. Vzhľadom na to, že sa nasáva relatívne veľké množstvo vzduchu a vyfukuje sa von, nie je vyfukovaný...
- Page 58 3. Ohrevná špirála 9. Motor Kolesá 10. Prívod vzduchu 5. Vozík predná strana 11.Vozík spodná strana 6. Spínač termostatu Obslužný panel ohrievača HEAT-DUCT-PRO 3: Obslužný panel ohrievača HEAT-DUCT-PRO 3 má dva spínače: Vľavo plynulo nastaviteľný spínač termostatu Vpravo obslužný spínač...
- Page 59 Obslužný panel ohrievača HEAT-DUCT-PRO 9+15: Obslužný panel ohrievača HEAT-DUCT- PRO 9 má dva spínače: Vľavo plynulo nastaviteľný spínač termostatu Vpravo obslužný spínač pozíciami: Umiestnenie a pripojenie Odstráňte všetok obalový materiál a udržujte mimo dosahu detí. Po odstránení balenia skontrolujte zariadenie na poškodenie a ostatné...
- Page 60 Uistite sa, že je prístroj vypnutý (nastavený v polohe O), potom ho pripojte k správne fungujúcej 230 V – 50 Hz (Heat-Duct-Pro 3) / 400V-50Hz, 5-pólová (Heat-Duct-Pro 9+15) zásuvky ( uzemnenej elektrickej zásuvky). Nastavenie a prevádzka Pri prvom použití...
-
Page 61: Bezpečnostné Prvky
Pred použitím preverte, či je hadica svorkou dobre upevnená k vývodu, a zabezpečte, aby sa neprehla do oblúka menšieho ako 90 °! Bezpečnostné prvky V prípade interného prehriatia vypne ohrievač ochranu proti prehriatiu. Môže sa tak stať, ak nedokáže ohrievač vydávať viac tepla alebo dostatok čerstvého vzduchu. Tak, ako je uvedené... -
Page 62: Instrucţiuni Generale De Siguranţă
Română Date tehnice Heat-Duct-Pro 3 Heat-Duct-Pro 9 Heat-Duct-Pro 15 Tensiune de 220-240 / 50 400 - 3~ / 50 400 - 3~ / 50 alimentare Capacitate 3000 9000 15000 maximă Configurarea 0-3000 0–4500-9000 0-7500-15000 opţiunilor Debit de aer m³/h 1227 1609 Clasa de protecţie... - Page 63 5. Tensiunea alimentare şi frecvenţa utilizare menţionate pe aparat trebuie să corespundă cu a prizei la care urmează a fi conectat. Instalaţia electrică trebuie protejată printr-un dispozitiv de curent rezidual (max. 30 mA). 6. Înainte de a cupla radiatorul, întindeţi complet cablul de alimentare.
- Page 64 12. Nu folosiţi radiatorul în apropierea sau direct pe mobilă, în apropiere de animale, perdele, haine, hârtie, aşternut sau alte obiecte inflamabile. Ţineţi-l la o distanţă de cel puţin 1 metru de radiator! 13. Nu acoperiţi niciodată radiatorul! Prizele de aer şi de evacuare ale radiatorului nu vor fi niciodată...
- Page 65 şi/sau producătorul nu îşi asumă răspunderea pentru nicio consecinţă! Descriere Radiatoarele EUROM HEAT-DUCT-PRO sunt cu adevărat radiatoare pentru spaţii largi, cu un ventilator puternic care pune în mişcare o cantitate mare de aer. Aerul (rece) este aspirat în partea din spate, încălzit şi suflat în exterior ca aer fierbinte.
- Page 66 Încălzitorul este echipat cu termostat şi protecţie împotriva supraîncălzirii. HEAT-DUCT-PRO 3+9 1. Carcasă 2. Orificiu ieşire aerului 3. Bobină de încălzire 4. Picior 5. Mâner 6. Buton pentru termostat 7. Buton de comandă 8. Motor 9. Orificiu de admisie a...
- Page 67 Panoul de comandă pentru HEAT-DUCT-PRO 3: Panoul comandă pentru HEAT-DUCT-PRO 3 are două butoane: În partea stângă, butonul pentru reglarea termostatului În partea dreaptă, butonul de comandă cu trei setări = oprit = numai ventilaţie X ■ = ventilaţie şi încălzire (3000W) Panoul de comandă...
- Page 68 şi orizontală din materialignifug. Asiguraţi-vă că radiatorul este decuplat (întrerupător în poziţia O), apoi cuplaţi-l la o priză care funcţionează la parametrii 230 V-50 Hz. (Heat-Duct-Pro 3) / 400V- 50Hz, 5-pol, (Heat-Duct-Pro 9+15) (împământare priză). Configurare şi exploatare Când radiator este puns în funcţiune pentru prima dată (sau doriţi să reconfiguraţi temperatura dorită), rotiţi discul termostatului spre poziţia maximaă...
- Page 69 şi este echipat cu o clemă corespunzătoare. De asemenea, referitor la furtun: asiguraţi-vă că nu este prea aproape de materiale inflamabile! Heat-Duct-Pro 3: 5 m. x 26 cm., Nr. art. 33.241.4 Heat-Duct-Pro 9: 5 m. x 29 cm., Nr. art. 33.242.1 Heat-Duct-Pro 15: La cerere Înainte de utilizare, verificaţi fixarea corespunzătoare a furtunului şi a clemei pe...
- Page 70 supraîncălzirii înainte de a pune din nou în funcţiune aeroterma. În cazul în care nu puteţi găsi cauza supraîncălzirii, nu mai folosiţi aeroterma ci predaţi-o în vederea unei verificări/reparaţii. Curăţare şi întreţinere Menţineţi aparatul în perfectă stare de curăţenie. Depunerile de praf şi de murdărie din interiorul aparatului sunt cauza frecventă...
- Page 71 Déclaration CE Par la présente, Eurom - Genemuiden-NL, déclare que les poêles d’atelier EUROM, type HEAT-DUCT-PRO 3, 9 & 15 répondent à la directive LVD 2014/35/EU et à la directive EMC 2014/30/EU et sont conformes aux normes ci-dessous : CE-deklaration Eurom, Genemuiden-NL intygar härmed att EUROM byggfläktar, typ HEAT-DUCT-PRO 3,...
- Page 72 Other control options (multiple selections possible) room temperature control, with presence detection room temperature control, with open window detection with distance control option with adaptive start control with working time limitation with black bulb sensor EUROM-KOKOSSTRAAT 20-8281JC-GENEMUIDEN- Contact details NETHERLANDS...
- Page 73 Other control options (multiple selections possible) room temperature control, with presence detection room temperature control, with open window detection with distance control option with adaptive start control with working time limitation with black bulb sensor EUROM-KOKOSSTRAAT 20-8281JC-GENEMUIDEN- Contact details NETHERLANDS...
- Page 74 Other control options (multiple selections possible) room temperature control, with presence detection room temperature control, with open window detection with distance control option with adaptive start control with working time limitation with black bulb sensor EUROM-KOKOSSTRAAT 20-8281JC-GENEMUIDEN- Contact details NETHERLANDS...
- Page 76 EUROM, Kokosstraat 20, 8281 JC Genemuiden e-mail: info@eurom.nl www.eurom.nl...
Need help?
Do you have a question about the Heat-Duct-Pro 3 and is the answer not in the manual?
Questions and answers