Advertisement
Advertisement
Table of Contents

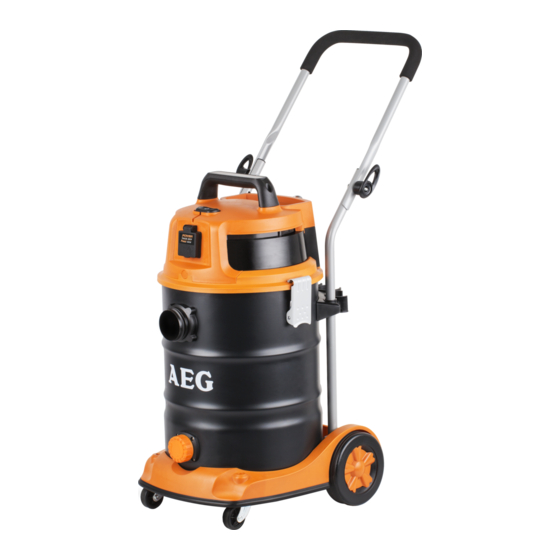
Summary of Contents for AEG AVC-1530-G
- Page 1 WET/DRY VACUUM CLEANER AVC-1530-G Instructions for use...
- Page 2 3.5m THANK YOU FOR BUYING AN AEG WORKSHOP VACUUM Your new workshop vacuum has been engineered and manufactured to AEG’s high standard for dependability, ease of operation and operator safety. Properly cared for, it will give you years of rugged, trouble free performance.
- Page 3 FEATURES 1. Hose set 13. Rear wheel (x2) 25. Hose hook / Power cable hook 2. Power tool adaptor 14. Hub cap (x2) 26. Handle 3. Crevice tool 15. ‘R’ lock pin (x2) 27. ON / OFF switch 4. Floor tool 16.
-
Page 4: Rules For Safe Operation
RULES FOR SAFE OPERATION The purpose of safety rules is to attract your attention to 9. Always wear safety glasses. Everyday eyeglasses have possible dangers. The safety symbols and the explanations only impact resistant lenses, they are not safety glasses. with them, require your careful attention and understanding. - Page 5 GENERAL SAFETY PRECAUTIONS FOR USING WORKSHOP VACUUM 1. This appliance is designed solely for use in the private 21. Children, disabled persons, and the aged are often not sector and for the designated purpose. The appliance is aware of the dangers that can result from handling electric not suitable for commercial use.
- Page 6 IMPORTANT! Cleaning filters and replacing them regularly maintains vacuum performance. AEG recommends that your filters should be checked, cleaned and replaced periodically. DAMAGE TO THE VACUUM CLEANER CAUSED AS A DIRECT RESULT OF NOT ADHERING TO THE GENERAL SAFETY INFORMATION AND THE INSTRUCTIONS IN THIS USER GUIDE INVALIDATES THE WARRANTY.
- Page 7 GENERAL ASSEMBLY INSTRUCTIONS CAUTION! Use only manufacturer’s approved vacuum filters and filters bags. Before attempting to use or before cleaning with this vacuum, be sure that you fully understand the instructions for setting up or cleaning/changing filters. UNPACKING YOUR WET/DRY VACUUM & GENERAL ASSEMBLY 1.
-
Page 8: Dry-Vacuum Operation
6. Insert the locking end of the hose into the vacuum port and lock in place. Push the required attachment onto the free end of the hose or extension. (Fig. 20) 7. Plug in the power cord into the mains power source. 8. -
Page 9: Wet Vacuum Operation
CONNECT THE MAINS PLUG. OPERATING INSTRUCTIONS – WET VACUUMING 1. Fit the desired nozzle to the vacuum hose. (Fig. 24) 1. Switching on the vacuum cleaner: Press 2. Verify that the switch is in the ‘O’ OFF position before 2. Connecting electrical appliances: Press plugging the power cord into the mains power source. -
Page 10: Maintenance
Removing HEPA Filter And Pre-filter MAINTENANCE 1. Remove pre-filter from the tank. 2. Unlock and remove the filter cap by tuning cap counter clockwise. WARNING! ALWAYS DISCONNECT THE PLUG 3. Carefully hold and pull the HEPA filter up for removal. FROM THE MAINS POWER SOURCE BEFORE (Fig. -
Page 11: Installing & Cleaning Foam Sleeve Filter
INSTALLING & CLEANING FOAM SLEEVE FILTER Installing Foam Sleeve Filter 1. Verify that the power cord is disconnected from the mains power source. 2. Remove power head and place in upside down position. Fig. 38 Fig. 39 3. Carefully slide foam sleeve filter down over the filter cage making sure the hole is covered. -
Page 12: Troubleshooting
Change the pre-filter The pre-filter should be replaced with every fifth change of collection bag and whenever there is damage or a visible collection of debris on the outside of the filter. Change the HEPA filter Replace the HEPA filter when loss of vacuum continues to occur after you have checked for any obstructions in the hose or wand. - Page 13 NOTES...
- Page 14 NOTES...
- Page 15 NOTES...
- Page 16 Techtronic Industries GmbH Techtronic Industries (Australia) Pty. Ltd. Techtronic Industries N.Z. Limited Max-Eyth-Straße 10 31 Gilby Road, 2 Landing Drive, Mangere, 71364 Winnenden Mount Waverley VIC 3149, Auckland, New Zealand 2022 Germany Australia...


Need help?
Do you have a question about the AVC-1530-G and is the answer not in the manual?
Questions and answers