Table of Contents
Advertisement
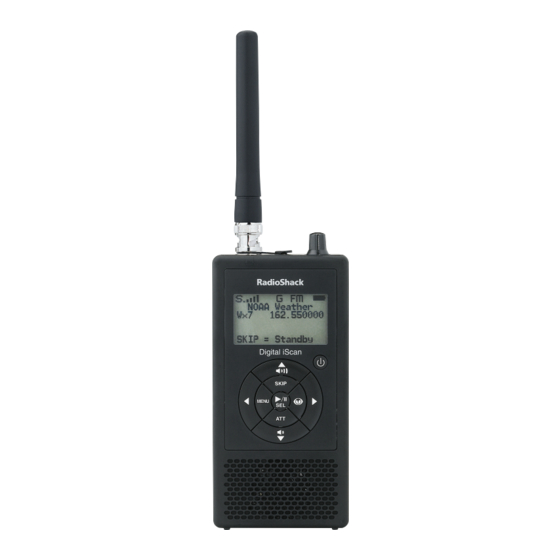
Thank you for purchasing your iScan Trunking Scanner from RadioShack. Please read this user's
guide before installing, setting up, and using your new scanner.
2000018.UG.031011.indd 1
iSCAN Trunking Scanner
Features
• Simple keypad and display
• USA RadioReference database
• Detects and masks encrypted voice audio
• Decodes RadioID/TalkgroupID data
• Upgradeable CPU Firmware, DSP
Firmware and Library
• USB Interface
• PC Software to customize your PRO-18
settings.
• Signal Strength Meter
• 101 Playlists
• Weather Radio Functions
• Multi–system Trunking
• Signal Stalker II
• Alarms and flash patterns
• Headphone/speaker jack
Package Contents
• iSCAN
• Antenna
• USB Cable
• microSD Card
2000018 / PRO-18
User's Guide
• Belt Clip
• User's Guide
• Quick Start
• CD-ROM
3/10/2011 11:06:43 AM
Advertisement
Table of Contents

Subscribe to Our Youtube Channel
Related Manuals for Radio Shack iSCAN PRO-18


Summary of Contents for Radio Shack iSCAN PRO-18
- Page 1 2000018 / PRO-18 User’s Guide iSCAN Trunking Scanner Features • Simple keypad and display • USA RadioReference database • Detects and masks encrypted voice audio • Decodes RadioID/TalkgroupID data • Upgradeable CPU Firmware, DSP Firmware and Library • USB Interface •...
-
Page 2: Table Of Contents
Contents Controls ................4 Display Icons ................ 4 Setup ................... 5 Attaching the Antenna ................5 Connecting Headphones or an External Speaker .........5 Using AC or DC Power ................6 Installing Batteries ..................6 Attaching the Belt Clip ................7 Turn on iSCAN and Set Squelch..............7 iSCAN Library ..............8 Installing the iSCAN PC Application ............9 Updating the Firmware ................10 Library Data .....................11 Updating the Library (PC) ..............12 Updating the Library (iSCAN) ..............12 Importing Frequencies and Talkgroups (PC) ........13 Importing Frequencies and Talkgroups (iSCAN) .........14 iSCAN Library Notes ................14 Searching ................ - Page 3 Attenuation and Trunking (PC) ..............28 Attenuation and Trunking (iSCAN) ............28 Playlist Controls (PC) ................29 Playlist Controls (iSCAN) ................29 Editing Frequencies or Talkgroups (PC) ..........30 Editing Frequencies or Talkgroups (iSCAN) .........31 Additional Information ............38 Frequency Coverage ................38 Specifications ..................39 Glossary ....................40 MicroSD Card error messages...............41 Birdie Frequencies ..................43 Care ......................44 Service and Repair ..................44 Scanning Legally ..................44 FCC Notice .....................45 Library Copyright Notice ...............45 Limited Warranty ..................46 2000018.UG.031011.indd 3 3/10/2011 11:06:44 AM...
-
Page 4: Controls
Controls Scroll up • Volume up • Scroll down • Volume down • Left/Right • Resume scanning • Change scan direction during search • Press to play or pause / II • In menus: select, enable, or disable options • SKIP Toggles iSCAN’s skip function MENU Access the Main Menu, or submenus for the active function While scanning, press to toggle iSCAN’s attenuator function. Access NOAA weather radio broadcasts • Access SAME weather alert receiver mode • Select the SKYWARN playlist for monitoring • Display Icons Squelch circuit is open Signal strength Trunking control channel data Attenuator is set for Global Mode Attenuator is active... -
Page 5: Setup
Setup Attaching the Antenna Align the antenna with the antenna posts. Then slide and turn the antenna in place. If this scanner is your only means for receiving weather alerts, make sure you can receive a clear signal when using the flex antenna, or switch to an external antenna. For an external antenna, follow the antenna’s installation instructions. You also may need a BNC adapter (available at RadioShack). • For lengths between 50 and 100 feet, use 50-ohm RG-8X low-loss dielectric coaxial cable. • For lengths of more than 100 feet, use 50-ohm RG8. Warning: Use extreme caution when installing or removing an outdoor antenna. If the antenna starts to fall, let it go! If the antenna touches a power line, touching the antenna, mast, cable, or guy wires can cause electrocution and death. -
Page 6: Using Ac Or Dc Power
Using AC or DC Power To prevent corruption of microSD card data, always turn off iSCAN before connecting or disconnecting power sources. Use the supplied USB cable to connect the iSCAN to a USB power source, such as your computer, or an AC or DC USB power adapter (not included, available at RadioShack or RadioShack.com). Notes: • Using an incompatible USB cable may damage your scanner. • Some USB power adapters can interfere with iSCAN’s reception. • If you connect iScan to a vehicle power source and the vehicle’s engine is running, you might hear electrical noise from the engine while scanning. -
Page 7: Attaching The Belt Clip
3. Connect iSCAN to your computer or an AC or DC USB power adapter using the supplied USB cable. The battery icon indicates the batteries are being charged. When replaces , the batteries are fully charged. High-capacity batteries may take up to 16 hours to charge. You cannot use the iSCAN while charging. Battery Notes: • Use only fresh batteries of the required size and type. Do not mix old and new batteries, different battery types (alkaline or rechargeable), or rechargeable batteries of different capacities. •... -
Page 8: Iscan Library
iSCAN Library Your iSCAN comes installed with a formatted 2GB microSD card that contains the entire USA RadioReference database. RadioReference.com is the world’s largest radio communications data provider, featuring a complete frequency database, trunked radio system information, and FCC license data. You can update, microSD card configure, and import this library directly Push to remove to your iSCAN or with the iScan PC application. To manage the microSD card contents, you must remove it from iSCAN and insert it into a microSD card reader connected to your computer. 1. Turn off iSCAN, unplug external power, and remove the batteries. 2. Press and release the microSD card. To reinsert the microSD card, press it in until it clicks in place. microSD Card Contents The microSD card comes formatted for the standard FAT file system with a cluster size of 32k. You can purchase additional cards to store different configurations or backups for your iSCAN data. The CDAT folder contains your iSCAN programming. You can copy the CDAT folder to your computer as a backup. Warning: Modifying these directories or their contents is not recommended and may cause iSCAN to malfunction. -
Page 9: Installing The Iscan Pc Application
Installing the iSCAN PC Application iSCAN includes an easy-to-use PC Application that you can use to: • Update the Library to the most current version • Format and maintain the microSD card • Make changes to iSCAN’s programming and configuration • Update iSCAN’s firmware for enhancements and bug fixes To install, insert the CD into your computer’s CD-ROM drive; the iSCAN Application’s installer starts automatically. To install, click the “Install Software” button and follow the on-screen instructions. Note: If the installation does not start automatically, navigate to your CD-ROM drive and run the iSCANCD.exe program. 2000018.UG.031011.indd 9 3/10/2011 11:06:56 AM... -
Page 10: Updating The Firmware
Updating the Firmware Firmware updates are available to correct known issues or to add new functionality to your scanner. Be sure to update the iScan firmware regularly. CPU Firmware Updates 1. Turn off the iScan and disconnect the USB cable from the scanner. Keep the USB cable connected to your computer. 2. While pressing the Menu key, connect the USB cable to the iScan. You should see a display of the current boot and CPU versions followed by the CPU SW Upgrade prompt. 3. Select Check for CPU Firmware Updates in the update menu. 4. Click Check for Updates on the update screen. This process will check the Internet for the most current CPU firmware version and compare it to the version on your iScan. Information about the need to update your scanner will appear just below the version information. 5. If there are available updates, click Update My Scanner. 6. When you have finished the update, click Done. DSP Firmware Updates 1. Turn off the iScan. -
Page 11: Library Data
Library Data Library Updates Your iSCAN comes with the most current library data available from RadioReference.com. However, you can use the PC application to check for updates to the library data. To check for library updates: 1. Select Check for Library Update in the update menu. 2. If there are available updates, click Update My Library. 3. When you have finished the update, click Done. Library Structure States – Each state contains three data types: Agencies – Statewide agencies such as highway patrol, emergency mgmt., state parks, etc. (Conventional frequencies) Counties/Cities – Local county or independent city Agencies – Non-government businesses, airports, attractions, etc. (Conventional frequencies) Categories – Local government and public safety. (Conventional frequencies) Systems –... -
Page 12: Updating The Library (Pc)
Updating the Library (PC) To update the library to the most recent version: 1. On the Library Import Tab, click the Update Channels button. A second Import screen appears. 2. Click the Update Channels button. The library will be updated to the latest version. Note: The procedure to update the RadioReference library requires an internet connection. Updating the Library (iSCAN) To update the library on the iSCAN to the most recent version: In the Main Menu, select Update from Lib and... -
Page 13: Importing Frequencies And Talkgroups (Pc)
Importing Frequencies and Talkgroups (PC) After you have the most current library, you can import frequencies or talkgroups from the library into iSCAN’s playlists. Importing many items can slow scanning significantly. We recommend importing fewer items, and increase the number as you become more familiar with your iScan. 1. Select a state from the Select a State list. The available data types appear. 2. Select a data type from the Data Type list. 3. Click Next. Additional screens appear based on the library structure described “Updating the Firmware” on page 1012. 4. Make selections. 5. Click Back to make additional selections. 6. After you make your final channel selections, click the Import Selected Channels button. The Import Selected Channels screen appears. 7. Select the playlist(s) where the channels will be imported. 8. Click Import Channels. 9. Select Scanner/SD Card >... -
Page 14: Importing Frequencies And Talkgroups (Iscan)
Importing Frequencies and Talkgroups (iSCAN) 1. From the main menu, select Browse Library , then press . The Select State menu appears. Playlists Alaska 2. Press or to scroll to a state. Press to select a Search Arizona state. Browse Library Arkansas Additional screens may Update from Lib California appear based on the library structure described in “Updating the Firmware” on page 10. 3. Make additional selections. Press after each set of selections. 4. When a list of channels with check boxes appears, press or to scroll through the list and press to select each option. A checkmark ( ) indicates a selected item. 5. To import selected items, press MENU. The Import Selected Library menu appears. -
Page 15: Searching
Searching You can locate active frequencies quickly and easily using one of iScan’s three convenient frequency search modes: • Signal Stalker II sweeps rapidly through frequency ranges in 1 MHz blocks. • Service Search searches through frequencies used by the following radio services: Public Safety, Aircraft, Railroad, Amateur, CB, Marine, and FRS/ GMRS/MURS. This is a good way to find activity on local frequencies. • Limit Search searches within a range of frequencies that you define. Signal Stalker II To search for active frequencies using Signal Stalker II: 1. In the main menu, select Play Main Menu Search , and press to Browse Objects Signal Stalker enter the search menu. -
Page 16: Service Search
Service Search To search for active frequencies using Service Search: 1. In the main menu, select Play Main Menu Search , and press to enter Browse Objects Signal Stalker to the search menu. Playlists Service Search 2. Select Service Search and press . Search Limit Search Browse Library Lockouts 3. Scroll down to see all Main Menu Main Menu available services. Select a... -
Page 17: Limit Search
Limit Search To search for active frequencies within a limited range: Play Main Menu 1. In the main menu, select Browse Objects Signal Stalker Limit Search , and press Playlists Service Search . The search begins immediately. Search Limit Search 2. To change the search range: Browse Library Lockouts a. Press MENU. b. Scroll to and press . -
Page 18: Search Settings
Search Settings To change search settings, press MENU while searching. Limits iSCAN’s effective range, which may help reduce Attenuator interference from strong local transmitters. Helps iSCAN tune to exact frequencies when searching. Zeromatic How long iSCAN waits after a transmission before resuming. Delay Special Mode Signal Stalker II skips any 1 MHz block where you have skipped five or more frequencies. Special Mode is useful when you are close to many high power transmitters that are close together in frequency. Sets the lowest frequency for the search range. Sets the upper frequency for the search range. Disabling some frequency ranges speeds up the search. Frequency Ranges Rx Mode Set the RX modulation mode to automatic, or forces AM mode or FM mode. RX Mode functions in Aircraft and or Amateur bands, Press to change. Saving Found CTCSS or DCS Codes When importing objects from the Library, CTCSS and DCS code information from the RadioReference database is automatically imported with the conventional channel information. In cases where the squelch code (CTCSS or DCS subaudible) for a conventional radio channel is not included in the RadioReference database, your iSCAN can quickly identify the code, if one is present. - Page 19 To save the found code with the channel: 1. When a CTCSS or DCS code is found by the search feature, press MENU. Store sq code appears. 2. Press SEL. After the code is stored, the scanner will only stop on transmissions that have a matching CTCSS or DCS squelch code present. Note: The Settings menu (Main Menu > Settings) “Simple Display” menu item must be unchecked in order to display and store found CTCSS and DCS codes.
-
Page 20: Scanning And Monitoring
Scanning and Monitoring After you have found active frequencies in your area and saved them to playlists, you can scan multiple channels or monitor a single channel. Scanning To scan your active playlists, select Play from the main menu and press or /II/SEL. To pause the scan, press /II/SEL when iSCAN stops on a transmission. To resume scanning, press /II/SEL again. Monitoring a Frequency or Talkgroup Monitoring is when you set iSCAN to remain on a single frequency and wait for a transmission. To monitor a frequency or talkgroup: From the main menu, select , then press . Browse Objects Press /II/SEL to monitor the displayed frequency. Play Press or to change playlists. The current playlist Browse Objects Press or to browse through and frequency Playlists frequencies within the current appear. Search playlist. Browse Library 20 20 2000018.UG.031011.indd 20 3/10/2011 11:06:59 AM... -
Page 21: Weather Monitoring
Weather Monitoring To monitor NOAA weather broadcasts in your area, press . iSCAN immediately scans NOAA channel for your area. Press or to continue the scan. To receive severe weather broadcasts while scanning other channels, set your local NOAA channel as the Weather Priority channel. For information about setting the Weather Priority, see “Weather Priority Mode (PC)” on page 36. Note: Weather Priority is not available while you search for frequencies. SAME Standby Mode A weather alert tone includes a digitally-encoded SAME (Specific Area Message Encoding) signal, which includes a FIPS (Federal Information Processing Standard) code and an event code. Before you can use SAME Standby Mode, you must program at least one FIPS code (located at: www.NWS.NOAA.gov/NWR/indexnw.htm). To activate SAME Standby Mode: 1. Press , and then press or to select a NOAA channel. 2. Press SKIP to enter Standby Mode. The speaker silences and appears at the bottom of the screen. SKIP Normal 3. To return to Normal Weather Mode, press SKIP again. -
Page 22: Configuration
Configuration Before you make your configuration changes, consider whether you have any data in your iSCAN that you want to save. For example, you may have searched for and saved frequencies using your scanner. If so, you must copy that data to your PC configuration before you begin. Note: Leave your iSCAN off while copying configurations. To copy scanner data to your PC, select Scanner/SD Card > Copy Configuration From Scanner Memory/SD Card from the menu bar. This will copy your scanner data to your PC configuration. After you make your configuration changes, select Scanner/SD Card > Copy Configuration To Scanner Memory/ SD Card from the menu bar. Configuration Settings (PC) When you launch the iSCAN software, the General Settings Tab appears. You can use this tab to configure basic iSCAN settings. 2000018.UG.031011.indd 22 3/10/2011 11:06:59 AM... - Page 23 • Welcome Text – The message that appears when you first turn on iSCAN. To edit, click on a line and type in text. • Volume Settings – Controls both speaker and headphone volumes. • Backlight Settings – Set how the backlight functions when using batteries or external power. • Display Settings – Customizes the iSCAN display. For more information, see “Display Settings (PC)” on page 26. • Sound Settings – This section lets you customize the iSCAN sound settings, including key tones and volume. For more information, see “Sound and Backlight (PC)” on page 27. • Alert Settings – Customizes audio and visual alert settings. • Priority Settings – Activates and customizes priority settings. • Attenuation Settings – Attenuation limits the range of radio signals to reduce interference. For more information, see “Attenuation and Trunking (PC)” on page 28. • Trunking Options – Configures how iSCAN responds to transmissions on trunking systems. For more information, see “Attenuation and Trunking (PC)” on page 28. Note: You can also access these settings directly through iSCAN. See “Configuration Settings (iSCAN)”...
-
Page 24: Configuration Settings (Iscan)
Configuration Settings (iSCAN) To access configuration settings using iSCAN, select Settings from the main menu and press . Restores all settings to their factory default values. Default Vals Disable this option to display more information. Simple Display Defines the default playlist. Default PL Enables /disables priority mode. Priority Mode Controls how frequently priority objects are checked. Priority Time Enables the Global Attenuator. G Atten Mode Applies global attenuation, ignores individual settings. G Atten On When checked, applies Digital AGC to digital transmis- Search Dg AGC sions received while searching. Uses G AGC On instead of per-object settings. G AGC Mode Activates AGC for all transmissions. - Page 25 Voice channel and control channel displays. Simple Show VC/CC Display must be unchecked. Show Radio ID will over- ride if a Radio ID is available. Controls talkgroup ID display. Simple Display must be Show TGID unchecked. Controls trunking site name display only if two or more Show Site Name trunking system sites are programmed. Simple Display must be unchecked. Displays the talkgroup ID for P25 conventional talk- CONV TGID group calls. Simple Display must be unchecked. Displays the radio ID for P25 conventional calls. Simple CONV Radio ID Display must be unchecked. Streams ASCII Control Channel Dump data over the PC/IF CCDump USB interface for trunking control channels. Stores ASCII Control Channel Dump data to the to file microSD card for trunking control channels. Interval (seconds) between low-battery alert sounds. Low Batt Time Sets the charge time for the built-in radio charger.
-
Page 26: Display Settings (Pc)
Display Settings (PC) The Display Settings let you quickly and easily configure your iSCAN’s display. To change the display setting, select an option from the Display Mode drop-down list. Simple displays only channel names; Advanced displays channel and frequency information. Use the Blink Time to set how long each item is displayed. Use the Contrast bar to set the screens contrast. Display Settings (iSCAN) To set the display settings, select Settings from the main menu, and then press . Browse Library Default Vals Select Simple Display and press or to switch the display Update from Lib Simple Display mode. Simple displays only Restore Skipped Default PL channel numbers; Advanced displays channel and frequency. -
Page 27: Sound And Backlight (Pc)
Sound and Backlight (PC) The Volume Settings and Sound Settings sections control the iSCAN sound settings. The Backlight Settings section controls the backlight behavior when the iSCAN is powered by either batteries or external power. Note: Before you make your configuration changes, consider whether the data in your iSCAN matches your PC configuration. For information about synchronizing your iSCAN and PC, refer to “Configuration” on page 22. Sound and Backlight (iSCAN) To set the backlight settings, select Settings... -
Page 28: Attenuation And Trunking (Pc)
Attenuation and Trunking (PC) To set the attenuation mode, select an option from the Attenuation Mode drop- down list: • Global – Applies attenuation to all channels. • Normal – Applies attentuation based on individual channel settings. Use the Global Attenuation On/Off drop- down list to turn on global attenuation. To set the display for trunking systems, select an option from the Attenuation Mode drop-down list. Use the Use Radio ID Alarm drop-down list to display the Radio ID when available. Attenuation and Trunking (iSCAN) To configure the attenuation settings, select Settings from the main menu, and then press . Press or to change each Browse Library G Atten On setting. -
Page 29: Playlist Controls (Pc)
Playlist Controls (PC) The Playlist Controls let you quickly and easily manage your playlists. To rename a playlist, select the playlist name in the Alpha Tag column and type the new name. To enable or disable a playlist, click the checkbox in the Enabled column. An empty checkbox indicates a disabled playlist. To set a default playlist, click in the Default column. You can select only one default playlist. Note: Before you make your configuration changes, consider whether the data in your iSCAN matches your PC configuration. For information about synchronizing your iSCAN and PC, refer to “Configuration” on page 22. Playlist Controls (iSCAN) To enable playlists for scanning, select Playlist... -
Page 30: Editing Frequencies Or Talkgroups (Pc)
Editing Frequencies or Talkgroups (PC) You can customize settings for individual frequencies and talkgroups to control how iSCAN handles transmissions on a case-by-case basis. Note: Before you make your configuration changes, consider whether the data in your iSCAN matches your PC configuration. For information about synchronizing your iSCAN and PC, refer to “Configuration” on page 22. The Playlist Tab let you configure channels in your playlists. • Alpha Tag – The object’s name. -
Page 31: Editing Frequencies Or Talkgroups (Iscan)
Editing Frequencies or Talkgroups (iSCAN) From the main menu, select Browse Objects and , browse to an object press Menu. The object name. Press or to move the cursor to Alpha Tag another character. Press or to change the value. Changes the objects’ playlists. Set Playlists Locked Out Locked objects (indicated by an L ) are not scanned. Skipped frequencies and talkgroups are not scanned. Skipped iScan frequently checks priority channels for activity. Priority Priority status is indicated by an upper case P . The scanner waits for a reply for two seconds after a Delay transmission ends before resuming a scan. Applies attenuation to the channel. Attenuate Reduces interference from strong local transmitters. (Only available for conventional frequencies.) An alarm sounds when activity is found for a frequency Alarm or talkgroup. Press or to select an alarm sound. Press or to select the desired light options: Light Leave – use default backlight settings •... - Page 32 Locking Out Frequencies (PC) When you identify frequencies that you do not wish to scan, you can lock out that frequency. To lock out a frequency, locate the channel on the Playlist tab and click the L/O check box. Locking Out Frequencies (iSCAN) When you identify frequencies that you do not wish to scan, you can lock out that frequency. To lock out unwanted transmissions, browse to an Alpha Tag object and press Menu. Set Playlists Select Locked Out and press . A checkmark ( ) Locked Out indicates an active playlist. A square ( ) indicates Skipped a disabled playlist. An uppercase L in the display indicates a locked out frequency. Skipping Frequencies (PC) To skip a frequency during a scan, locate the channel on the Playlist tab and click the Skip check box. Skipping Frequencies (iSCAN) To skip unwanted transmissions while scanning, wait for iSCAN to stop on the transmission and press SKIP. An uppercase S in the display indicates the object will be skipped during future scans.
- Page 33 Setting Priority Channels (PC) Priority causes the scanner to check for activity more frequently. Note: Before you make your configuration changes, consider whether the data in your iSCAN matches your PC configuration. For information about synchronizing your iSCAN and PC, refer to “Configuration” on page 22. To set a Priority channel: 1. Set the Priority Mode to On.
- Page 34 Flash Patterns The Flash Pattern is a backlight flash sequence that you can customize to identify active frequencies at a glance. The flash pattern consists of 32 steps divided into 8 four-step blocks. Each four-step block represent a letter or number: =ON, =OFF (No flashes) (Steady Flashes) ...
- Page 35 Setting Flash Patterns (PC) Your iSCAN software lets you quickly and easily customize a flash pattern for a channel. To set a flash pattern: 1. Click on the Bklt column for the channel. The Backlight Settings dialog box appears. 2. From the Backlight Mode drop- down list, select Flash. The remaining fields become active. 3. Select the checkboxes in a custom pattern for the channel. The Sample field displays an example of the pattern, and the Pattern Value appears automatically. Setting Flash Patterns (iSCAN) To set a flash pattern: 1. Browse to an object and press Menu. 2. Select Light and press repeatedly until Flash Light...
- Page 36 Weather Priority Mode (PC) When you launch the iSCAN software, the General Settings tab appears. You can use this tab to configure basic iSCAN settings. To receive severe weather broadcasts while scanning other channels, set your local NOAA channel as the Weather Priority channel. 1. Click on the Weather tab in the configuration program and click the Pri column for one of the frequencies in the Weather Channels list. 2. (Optional) To apply attenuation to the frequency, click in the Att column. Weather Priority Mode (iSCAN) To receive severe weather broadcasts while scanning other channels, set your local NOAA channel as the Weather Priority channel. 1. Press . iSCAN begins to scan weather frequencies. When iSCAN stops on the strongest NOAA channel, press MENU. 2. Select and press or to select the channel. Priority 3. Scroll to Save Changes and press /II/SEL or to save. Programming FIPS Codes (PC) Before you can use SAME Standby Mode, you must program at least one FIPS code (Available at: www.NWS.NOAA.gov/NWR/indexnw.htm).
- Page 37 Programming FIPS Codes (iSCAN) 1. Look up the FIPS code(s) for your area. 2. Press to activate Weather Mode, then press MENU. 3. Scroll to SAME 1 Tag and press to name the channel. Press or to change the character. Press or to move the cursor to another character. 4. Scroll down to SAME 1 FIPS and press to enter a FIPS code. Press or to change the character. Press or to move the cursor to another character. 5. Scroll down to SAME 1 Enable and press SEL or . 6. To program other areas, repeat steps 3-5. You can program up to ten FIPS code locations. 7. When finished, select Save Changes and press SEL or . Importing Skywarn Frequencies (PC) 1. Browse for Skywarn frequencies in the iSCAN Library and import them to the Skywarn playlist. (TIP: Browse in agencies...
-
Page 38: Additional Information
Additional Information Frequency Coverage Frequency Range Step Mode (Default) 25.0000 − 26.9600 MHz 10 kHz 26.9650 − 27.4050 MHz 10 kHz 27.4100 − 29.5050 MHz 5 kHz 29.5100 − 29.7000 MHz 5 kHz 29.7100 − 49.8300 MHz 10 kHz 49.8350 − 54.0000 MHz 5 kHz 108.000 − 136.9916 MHz 8.33 kHz 137.000 − 137.995 MHz 5 kHz 138.000 − 143.9875 MHz 12.5 kHz 144.000 − 147.9950 MHz 5 kHz 148.000 − 150.7875 MHz 12.5 kHz 150.800 − 150.8450 MHz 5 kHz 150.8525 − 154.4975 MHz 7.5 kHz 154.5150 − 154.6400 MHz 5 kHz 154.6500 − 156.2550 MHz 7.5 kHz 156.2750 − 157.4500 MHz 25 kHz 157.4700 − 161.5725 MHz 7.5 kHz... -
Page 39: Specifications
Specifications Receiving modes ..............AM, FM, FM-MOT (Motorola), LTR (EF Johnson), CTCSS, DCS, EDACS wide/narrow (GE/Ericsson/HARRIS), P25NAC Receiving system ..........Triple conversion PLL super heterodyne WX frequencies ............162.400, 162.425, 162.450, 162.475, 162.500, 162.525, 162.550 MHz Display ..............Full dot matrix bitmap LCD (96x48 dots) Sensitivity (fm 12 dB SINAD quieting unless otherwise noted) VHF Low ......................... 0.2 μV VHF Aircraft (20 dBq AM) ..................0.4 μV VHF High 137-174 MHz ..................0.3 μV VHF High 216-300 MHz ..................0.4 μV UHF Low 300 - 406MHz ..................0.8 μV UHF/UHF-T 406 - 512 MHz ................... 0.4 μV UHF High 764 - 960 MHz ..................0.5 μV 1240 - 1300 MHz ....................0.5 μV Squelch sensitivity (band center) Threshold ....................AM/FM 0.5 μV Tight . -
Page 40: Glossary
Glossary Attenuator Reduces interference due to intermodulation. Channel (object) A frequency or talkgroup and its associated information. CTCSS/DCS Continuous Tone-Coded Squelch System/Digital Coded Squelch System, a squelch control system which reduces interference when using the same frequency. FIPS Federal Information Processing Standard. A code used to identify geographic locations for SAME weather alerts. Intermodulation Occurs when two or more strong signals mix, generating a false frequency and distorted sound. Monitor Rather than scanning frequencies, to monitor is to keep the scanner tuned to a single frequency, waiting for a transmission. Playlist A customized set of channels that can be managed as a group. Priority Identifies a particular frequency whose transmissions should not be missed while scanning other frequencies. SAME Specific Area Message Encoding system. NOAA broadcasts alerts corresponding to specified areas. Scan Search to find an active frequency through channels. Scanner Wide band radio receiver that can receive Aircraft, CB, Fire, FRS, HAM, Military, Public Safety, Railroad, Weather broadcast, etc. Search Search an active frequency though frequency bands. Signal Stalker ll Powerful tool for rapidly finding a nearby signal. Site A set of control frequencies for a trunked system’s service area. -
Page 41: Microsd Card Error Messages
Weather Alert Special alert signal broadcast by NOAA to alert receivers to severe weather conditions. An abbreviation for weather. Zeromatic Helps iSCAN tune to exact frequencies when searching. Zeromatic does not have any effect in channel-based searches such as CB, Marine and FRS/GMRS/MURS bands. MicroSD Card error messages The iSCAN’s MicroSD Card must be formatted correctly for proper operation. If you experience an error message while using your iSCAN in the field, check that the MicroSD card is fully inserted in the slot. If this does not correct the problem, refer to the following table: Code Meaning Corrective Action General heap error Contact RadioShack Support and provide 01-00 error code information Unable to allocate Contact RadioShack Support and provide 01-01 from heap error code information Unknown object Use PC Application to delete any 02-00 type in data corrupted objects or create a new configuration Unknown TSYS type Use PC Application to delete any 02-01 in data corrupted TSYS objects or create a new configuration No MicroSD Card... - Page 42 Code Meaning Corrective Action MicroSD Card is full Reduce size of configuration, remove 03-05 unnecessary files or switch to a MicroSD card with more capacity. MicroSD Card is Reinsert the MicroSD card to ensure it is 03-06 write protected fully inserted. If necessary, reformat the MicroSD card using the PC Application “Prepare SD Card for use” option. Replace the MicroSD card if the problem persists. Mass storage mode Mass storage device mode should be 03-07 is active disabled when iSCAN is connected to a computer and scanning. Disconnect iSCAN from the computer, wait a few seconds, then reconnect. Unknown MicroSD Reinsert the MicroSD card to ensure it 03-08 card read/write error is fully inserted in locked in the MicroSD slot. If necessary, reformat the MicroSD card using the PC Application “Prepare SD Card for use” option. Replace the MicroSD card if the problem persists. Initialization error Contact RadioShack Support and provide 04-00 error code information Initialization error 04-01 Firmware load error 04-02...
-
Page 43: Birdie Frequencies
Troubleshooting Problem Possible Cause Solution Scanner does No power. Check batteries. not turn on Check power connections. Poor or no Weak signal. Check antenna connection. reception Reposition the scanner. Turn SQUELCH counter-clockwise. Check performance with and without attenuator activated. Low batteries; all data Recharge or replace the Scanning functions (including batteries. not available scanning) are disabled to message prevent data corruption. microSD The microSD card may Check the microSD card. card not Use the iSCAN PC Applica- recognized •... -
Page 44: Care
Care Your scanner is not waterproof. Do not expose it to rain, moisture, or extremely high humidity. If the scanner gets wet, wipe it dry immediately. Use and store the scanner only in normal temperature environments. Handle the scanner carefully; do not drop it. Keep the scanner away from dust and dirt, and wipe it with a damp cloth occasionally to keep it looking new. Service and Repair If your scanner is not performing as it should, take it to your local RadioShack store for assistance. To locate your nearest RadioShack, use the store locator feature on RadioShack’s website (www.radioshack.com), or call 1-800-The Shack (800-843-7422) and follow the menu options. Modifying or tampering with the scanner’s internal components can cause a malfunction and might invalidate its warranty and void your FCC authorization to operate it. Scanning Legally Your scanner covers frequencies used by many different groups, including police, fire and ambulance services, government and military agencies, and amateur radio services. It is legal to listen to almost every transmission your scanner can receive. However, there are some transmissions you should never intentionally listen to: • Telephone conversations (cellular, cordless, or other private means of telephone signal transmission) • Pager transmissions • Any scrambled or encrypted transmissions According to the Electronic Communications Privacy Act (ECPA), as amended, you are subject to fines and possible imprisonment for intentionally listening to, using, or divulging the contents of such a transmission unless you have the consent of a party to the communication (unless such activity is otherwise illegal). iScan is designed to prevent reception of illegal transmissions, in compliance with laws that require that scanners be manufactured in such a way as to not be easily modifiable to pick up those transmissions. Do not open your scanner’s case to make any modifications that could allow it to pick up transmissions that are not legal to listen to. Doing so could subject you to legal penalties. In some areas, mobile use of this scanner is unlawful or requires a permit. Check the laws in your area. We encourage responsible, legal scanner use. 2000018.UG.031011.indd 44 3/10/2011 11:07:03 AM... -
Page 45: Fcc Notice
FCC Notice This equipment has been tested and found to comply with the limits for a scanning receiver, pursuant to Part 15 of the FCC Rules. These limits are designed to provide reasonable protection against harmful interference in a residential installation. This equipment generates, uses and can radiate radio frequency energy and, if not installed and used in accordance with the instructions, may cause harmful interference to radio communications. However, there is no guarantee that interference will not occur in a particular installation. If this equipment does cause harmful interference to radio or television reception, which can be determined by turning the equipment off and on, the user is encouraged to try to correct the interference by one or more of the following measures: • Reorient or relocate the receiving antenna. • Increase the separation between the equipment and receiver. • Connect the equipment into an outlet on a circuit different from that to which the receiver is connected. This device complies with part 15 of the FCC Rules. Operation is subject to the following two conditions: (1) This device may not cause harmful interference, and (2) this device must accept any interference received, including interference that may cause undesired operation. Library Copyright Notice The data contained in iSCAN’s library is provided by special arrangement with RadioReference and is Copyright ©2011 RadioReference.com, LLC who retains sole ownership of the database. We ask that you respect this copyright by adhering to the following guidelines: The library data is intended for your personal use only in conjunction with programming and using your iSCAN. As such, RadioReference.com LLC grants the customer a non-exclusive single license to only be used with the iSCAN radio and its associated PC software. The library shall not be copied or transferred to any third party in any electronic or physical form or posted on any website. To decompile the RadioReference database or convert it for use with another scanning receiver is expressly prohibited. The RadioReference database is developed and maintained by unpaid volunteers who are dedicated scanning hobbyists. The Library data is subject to errors in the user-submitted data reported to RadioReference, and also to the system configuration changes that a radio system operator may make from time to time. Field-testing the library data for accuracy is not feasible. -
Page 46: Limited Warranty
Limited Warranty RadioShack warrants this product against defects in materials and workmanship under normal use by the original purchaser for one (1) year after the date of purchase from a RadioShack-owned store or an authorized RadioShack franchisee or dealer. RADIOSHACK MAKES NO OTHER EXPRESS WARRANTIES. This warranty does not cover: (a) damage or failure caused by or attributable to abuse, misuse, failure to follow instructions, improper installation or maintenance, alteration, accident, Acts of God (such as floods or lightning), or excess voltage or current; (b) improper or incorrectly performed repairs by persons who are not a RadioShack Authorized Service Facility; (c) consumables such as fuses or batteries; (d) ordinary wear and tear or cosmetic damage; (e) transportation, shipping or insurance costs; (f) costs of product removal, installation, set-up service, adjustment or reinstallation; and (g) claims by persons other than the original purchaser. Should a problem occur that is covered by this warranty, take the product and the RadioShack sales receipt as proof of purchase date to any RadioShack store in the U.S. RadioShack will, at its option, unless otherwise provided by law: (a) repair the product without charge for parts and labor; (b) replace the product with the same or a comparable product; or (c) refund the purchase price. All replaced parts and products, and products on which a refund is made, become the property of RadioShack. New or reconditioned parts and products may be used in the performance of warranty service. Repaired or replaced parts and products are warranted for the remainder of the original warranty period. You will be charged for repair or replacement of the product made after the expiration of the warranty period. RADIOSHACK EXPRESSLY DISCLAIMS ALL WARRANTIES AND CONDITIONS NOT STATED IN THIS LIMITED WARRANTY. ANY IMPLIED WARRANTIES THAT MAY BE IMPOSED BY LAW, INCLUDING THE IMPLIED WARRANTY OF MERCHANTABILITY AND, IF APPLICABLE, THE IMPLIED WARRANTY OF FITNESS FOR A PARTICULAR PURPOSE, SHALL EXPIRE ON THE EXPIRATION OF THE STATED WARRANTY PERIOD. EXCEPT AS DESCRIBED ABOVE, RADIOSHACK SHALL HAVE NO LIABILITY OR RESPONSIBILITY TO THE PURCHASER OF THE PRODUCT OR ANY OTHER PERSON OR ENTITY WITH RESPECT TO ANY LIABILITY, LOSS OR DAMAGE CAUSED DIRECTLY OR INDIRECTLY BY USE OR PERFORMANCE OF THE PRODUCT OR ARISING OUT OF ANY BREACH OF THIS WARRANTY, INCLUDING, BUT NOT LIMITED TO, ANY DAMAGES RESULTING FROM INCONVENIENCE AND ANY LOSS OF TIME, DATA, PROPERTY, REVENUE, OR PROFIT AND ANY INDIRECT, SPECIAL, INCIDENTAL, OR CONSEQUENTIAL DAMAGES, EVEN IF RADIOSHACK HAS BEEN ADVISED OF THE POSSIBILITY OF SUCH DAMAGES. - Page 47 RadioReference.com Your Complete Reference Source www.radioreference.com RADIOREFERENCE.COM IS THE WORLD’S LARGEST RADIO COMMUNICATIONS WEBSITE, WITH A COMPLETE FREQUENCY AND TRUNKED RADIO SYSTEM DATABASE. COME SEE WHAT FREE SERVICES WE HAVE TO OFFER TO THE COMMUNITY: The RadioReference Database Includes a complete frequency database, trunked radio system information, FCC license assignments, 10 Code lists, agency maps, les, downloads, and detailed information for most public safety, military, and local government communications systems.
- Page 48 Protect the environment by recycling your used electronics. Go to E-CyclingCentral.com to find an electronic recycling center near you. Motorola, Smartnet, Smartzone, Omnilink, and Privacy Plus are registered trademarks of Motorola Inc. EDACS is a registered trademark of Harris Inc. LTR is a registered trademark of E.F. Johnson, Inc. ©2011. RadioShack Corporation. All rights reserved. Printed 02A11 RadioShack and RadioShack.com are trademarks used by in China 2000018 RadioShack Corporation. GR-10D-3620 2000018.UG.031011.indd 48 3/10/2011 11:07:05 AM...
Need help?
Do you have a question about the iSCAN PRO-18 and is the answer not in the manual?
Questions and answers