Makita DLM382 Instruction Manual
Cordless
Hide thumbs
Also See for DLM382:
- Instruction manual (117 pages) ,
- Instruction manual (117 pages) ,
- Instruction manual (82 pages)
Table of Contents
Advertisement
Advertisement
Table of Contents

Related Manuals for Makita DLM382


Summary of Contents for Makita DLM382
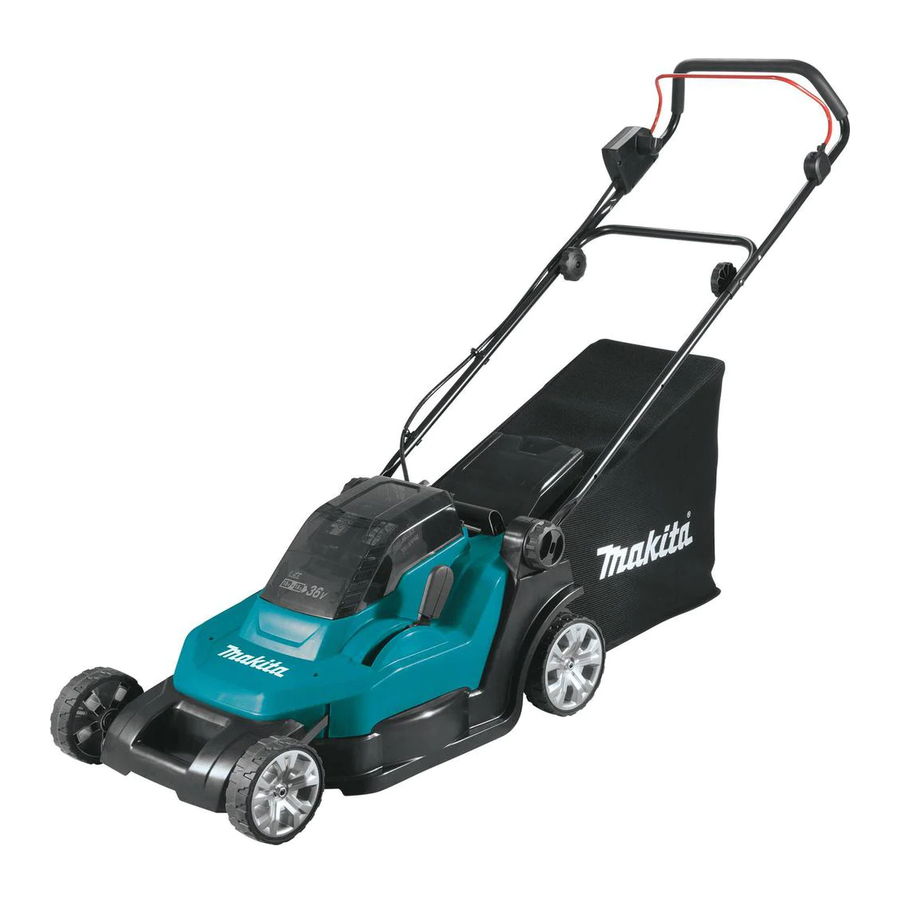
- Page 1 INSTRUCTION MANUAL Cordless Lawn Mower DLM382 DLM432 Read before use.
-
Page 2: Specifications
SPECIFICATIONS Model: DLM382 DLM432 Mowing width (blade diameter) 380 mm 430 mm No load speed 3,700 min 3,600 min Part number of replacement mower blade 191D41-2 191D43-8 Dimensions during operation L: 1,380 mm to 1,410 mm L: 1,435 mm to 1,490 mm... - Page 3 Preparation - before checking, cleaning or working on the mower, While operating the mower, always wear sub- - after striking a foreign object. Inspect the stantial footwear and long trousers. Do not mower for damage and make repairs before operate the mower when barefoot or wearing restarting and operating the mower, open sandals.
- Page 4 When servicing the blades be aware that, even 23. Release switch lever and wait for blade rota- tion to stop before crossing driveways, walks, though the power source is switched off, the roads, and any gravel-covered areas. Also blades can still be moved. remove the lock key if you leave the mower, 12.
-
Page 5: Installing The Battery Cover
CAUTION: DO NOT let comfort or familiarity Only use genuine Makita batteries. with product (gained from repeated use) replace strict Use of non-genuine Makita batteries, or batteries that adherence to safety rules for the subject product. have been altered, may result in the battery bursting causing fires, personal injury and damage. It will MISUSE or failure to follow the safety rules stated in this also void the Makita warranty for the Makita tool and instruction manual may cause serious personal injury. -
Page 6: Installing The Handle
Place your hands in the middle of the battery Align the screw holes of upper handle and lower cover and push it. handle. Secure them with the clamping screws and nuts. Before the first operation, check that the pivot ► 1 . Clamping nut 2. Clamping screw point of the battery cover is attached properly. If the battery cover is installed correctly, it will not open until NOTE: Hold the upper handle firmly so that it does the battery cover locking lever is pulled. not drop off your hand. Attach the holders to the handle. Position the power supply cord as shown in the figure. -
Page 7: Installing The Grass Basket
Hold the mulching plug by the handle, and then Attaching the mulching plug pull it out from the mower body as shown in the figure. Optional accessory Open the rear cover, and then remove the grass basket. ► 1 . Mulching plug 2. Handle Installing the grass basket ► 1 . Rear cover 2. Grass basket Open the rear cover. Hold the mulching plug by the handle, and then attach it to the mower body as shown in the figure. -
Page 8: Functional Description
Insert the lock key in the place shown in the figure FUNCTIONAL as far as it will go. DESCRIPTION Installing or removing battery cartridge CAUTION: Always switch off the machine before installing or removing of the battery cartridge. CAUTION: Make sure that you lock the battery cover before use. Otherwise, mud, dirt, or water may cause damage to the product or the battery cartridge. - Page 9 This mower is equipped with the interlock switch and han- the machine stops and the battery indicator lights up about dle switch. If you notice anything unusual with either of 10 seconds. In this situation, charge the battery cartridge. these switches, stop operation immediately and have them Indicating the remaining battery capacity checked by your nearest Makita Authorized Service Center. Install the battery cartridges. Insert the lock key into the interlock switch and then close the battery cover. Only for battery cartridges with the indicator ► 1 . Battery cartridge 2. Lock key ► 1 . Indicator lamps 2. Check button Press the check button on the battery cartridge to indicate the remain- Press the switch button and hold it.
-
Page 10: Adjusting The Mowing Height
Adjusting the mowing height NOTE: This indicator is a rough guide. Depending on the conditions of inside of the basket, this indicator may not work properly. WARNING: Never put your hand or leg under the mower body when adjusting the mowing Using mulching plug height. -
Page 11: Emptying The Grass Basket
Change the mowing direction each time to prevent the grass grain pattern from forming in just one direction. Firmly hold the handle with both hands when mowing. The mowing speed guideline is approximately 1 meter per 4 seconds. Periodically check the grass basket for mowed grass. Empty the grass before it becomes full. Before every periodical check, be sure to stop the mower then remove the lock key and the battery cartridge. NOTICE: Using the mower with the grass basket full prevents smooth blade rotation and places an extra load on the motor, which may cause breakdown. -
Page 12: Maintenance
Discoloration, deformation or cracks may result. ► 1 . Clamping screw 2. Lower handle To maintain product SAFETY and RELIABILITY, repairs, any other maintenance or adjustment should Loosen the clamping nuts and pivot the upper be performed by Makita Authorized or Factory Service handle back while expanding the both sides. Centers, always using Makita replacement parts. Maintenance Remove the lock key. Store it in a safe place out of the reach of children. - Page 13 WARNING: Always wear gloves when han- dling the blade. Removing the mower blade For DLM382 Put the mower on its side so that the mowing height adjusting lever comes to the upper side. ► 1 . Mower blade 2. Screwdriver 3. Wrench To lock the blade rotation, insert a screwdriver or a similar tool into a hole on the mower body.
-
Page 14: Troubleshooting
Replace the blade. unevenly worn. stop the mower immediately! OPTIONAL ACCESSORIES CAUTION: These accessories or attachments are recommended for use with your Makita tool specified in this manual. The use of any other accessories or attachments might present a risk of injury to persons. Only use accessory or attachment for its stated purpose. If you need any assistance for more details regard- ing these accessories, ask your local Makita Service Center. - Page 16 Makita Corporation 3-11-8, Sumiyoshi-cho, Anjo, Aichi 446-8502 Japan 885748-926 www.makita.com 20190902...
Need help?
Do you have a question about the DLM382 and is the answer not in the manual?
Questions and answers