
Related Manuals for Vivitek DS262


Summary of Contents for Vivitek DS262
- Page 1 DS262/DX263/DW265 DH268/DX281-ST/DW282-ST Projector Service Manual Version: A Date: 2017/07/06...
- Page 2 Update History Date of issue Published by Version Desc. 2017/07/06 liyang New version released.
- Page 3 ■ Safety Instructions SAFETY PRECAUTIONS WARNING: The chassis of this projector is isolated (COLD) from AC line by using the converter transformer. Primary side of the converter and lamp power supply unit circuit is connected to the AC line and it is hot, which hot circuit is identified with the line ( ) in the schematic diagram.
-
Page 4: Table Of Contents
CONTENTS CHAPTER1 INTRODUCTION ............................4 1.1 T ................................4 ECHNICAL PECIFICATION 1.2 C ................................6 OMPATIBILITY ODES 1.3 P .................................. 9 RODUCT VERVIEW 1.4 S ................................14 YSTEM LOCK IAGRAM 1.5 C ................................ 16 ONNECTOR NFORMATION CHAPTER 2 MACHINE DISASSEMBLY ..........................19 2.1 T .................................... - Page 5 APPENDIX C ................................. 63 RS232 C ..................................63 ODE TABLE APPENDIX D ................................. 67 ................................67 EILING OUNT RAWING...
-
Page 6: Chapter1 Introduction
Chapter1 Introduction 1.1 Technical Specification... - Page 7 Attention for handing ♦ Do not touch the lamp until it has cooled completely, because the lamp is very hot during operation and immediately after turned off. ♦ The lamp has to be fixed firmly to the base or socket. ♦...
-
Page 8: Compatibility Modes
1.2 Compatibility Modes 1. VGA Analog Supported timing for PC input The timings showing above may not be supported due to EDID file and VGA graphic card limitations. It is possible that some timings cannot be chosen. - Page 9 Supported timing for Component-YPbPr input 2. HDMI Digital Supported timing for PC input...
- Page 10 The timings showing above may not be supported due to EDID file and VGA graphic card limitations. It is possible that some timings cannot be chosen. Supported timing for video input 3. Video/S-Video Supported timing for Video input...
-
Page 11: Product Overview
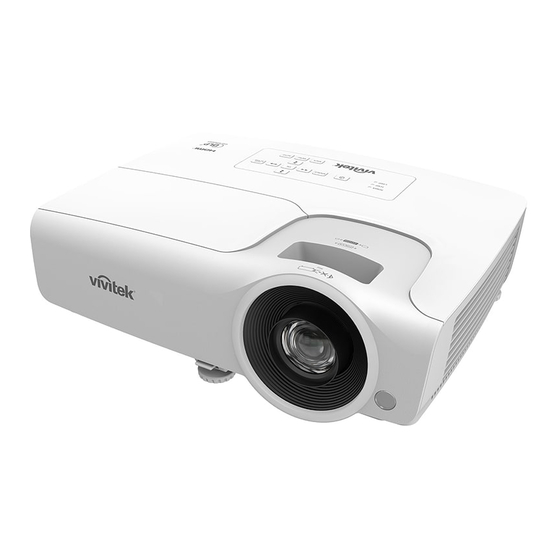
1.3 Product Overview Front/Top side DS262/DX263/DW265/DH268 DX281-ST/DW282-ST... - Page 12 Description Description Quick-release lever Rear adjuster foot Front adjuster foot Zoom ring Projection lens Focus ring Front IR remote control sensor Control panel Ventilation holes Lamp cover Rear side Description Description AC power socket Connection ports Kensington anti-theft lock slot...
- Page 13 Bottom side Ceiling mount screws: M4 x 8 (Max. L = 8 mm) Unit: mm Description Ceiling mount holes Note: 1. This projector can be used with a ceiling mount for support. The ceiling mount is not included in the package. 2.
- Page 14 Control Panel Function Description POWER Turns the projector on or off SOURCE Displays the source selection bar Volume Adjusts volume Keystone Corrects image-trapezoid (wider top/bottom) effect Navigates and changes settings in the OSD 4-WAY KEY Makes the screen blank ECO BLANK Auto adjustment phase, h.size, position AUTO Opens the OSD...
- Page 15 Connection Ports Function Description USB MINI-B This connector is for firmware update. When operating the projector via a computer, connect this to the RS-232 controlling computer's RS-232C port. PC 1/PC 2 Connect image input signal (analog RGB or component) to this jack. S-VIDEO Connect S-Video output from video equipment to this jack.
-
Page 16: System Block Diagram
1.4 System Block Diagram For DS262/DX263/DW265/DX281-ST/DW282-ST... - Page 17 For DH268...
-
Page 18: Connector Information
1.5 Connector Information This section provides each connector location on boards and function of each board. They will be useful for your detecting the defective boards. A. Main Board No 03 No 05 No 02 No 07 No 04 No 06 No 01 Connector Description... - Page 19 B. The back side of Main Board No 01 No 02 No 03 Connector Description No 1 Connect to SPEAKER No 2 Connect to AIO POWER BOARD No 3 Connect to DMD BOARD...
- Page 20 C. AIO Power Board No 2 No 1 No 4 No 3 Connector Description No 1 AC power socket No 2 Connected to Main board No 3 Connected to Main Board...
-
Page 21: Chapter 2 Machine Disassembly
Chapter 2 Machine Disassembly 2.1 Tools Item Photo Long Nose Nipper Hex Sleeves 5mm Screw Bit(+):107 Screw Bit(+):101 Screw Bit(+):102 Anti-static wrist strap Anti-static wrist gloves... -
Page 22: Disassembly Process
2.2 Disassembly Process Warning ♦ Put on the Static Electricity Ring when starting for repair. ♦ Repair Environment suggest in Clean-room class 10000. Do not remove Optical Engine or DMD panel outside the clean room. Please return the optical engine to supplier if your repair condition can not meet the requirement. - Page 23 Step Figure Description Press the power button to shut down the projector and disconnect the power cord. If the lamp is hot, please do not start any procedure until the projector lamp cools down. Rotate the zoom ring from left to right,make the lens back down 1.
- Page 24 Step Figure Description Loosen the screw on SCREW: J1635-B587-00 Lamp cover as shown. Remove the lamp cover 1、Disconnect lamp cable 2、Loosen the screws on lamp,then pull out the lamp 3、Remove the screw on top cover as shown. SCREW SCREW:J1635-3670-01 SCREW:J1635-3670-01...
- Page 25 Step Figure Description Lift up the Top cover tardily Unscrew all screws as shown SCREW: J1635-B854-00 SCREW:J1635-3670-01 SCREW:P0P35-2500-00 1. Remove all screws on the Main Board 2. Disconnect all wires gently.(Don’t ignore the connector of back) 3. Remove the two fan SCREW:P2535-7300-00 modules and the Main Board.
- Page 26 Step Figure Description 1. Unscrew three screws on the optical engine. 2. Take out the Optical Engine module gently. SCREW:J1635-3670-01 1. Unscrew all screws on the AIO POWER BOARD. 2. Remove it. SCREW:J1635-3622-0A...
- Page 27 Step Figure Description 1. Loosen the screws on DMD Board. 2. Remove the heat sink and DMD Board. SCREW:J1635-D564-00 DMD BOARD Heat sink Move the screw to the other side,then pick up the DMD gently. ot20 Loosen the two screws, then remove the color wheel.
- Page 28 Step Figure Description 1. Loosen the four SCREW screws on the projector lens. 2. Remove the projector lens. DS262/DX263/DW265/DH268:J1635-D566-00 DX281-ST/DW282-ST:J1635-D578-00...
-
Page 29: Chapter 3 Troubleshooting
Chapter 3 Troubleshooting This chapter provides technicians with electronic background how to maintain the product. Moreover, you can get the appropriate operation to solve some complicated problems of component repairing and professional problems. 3.1 LED Lighting Message Warning Do not directly look into the lens to avoid eyesight damages. ... -
Page 30: Main Procedure
(3) Confirm cable connection well. Note: Swapping modules that may be defective with others known to be good is generally an ideal way to find the module responsible for the problem. A failure symptom is rarely caused by more than one module, so you will not usually need to replace more than one to correct a particular failure. - Page 31 Fail to light up Refer to LED Check LED indicator and follow indicative indication actions Replace Check Lamp Module Lamp Replace Check Main board Main board Replace AIO Check Power board 380V output Power board Check CW Replace Rotation while Color Wheel power on Note:how to test 380V output:...
- Page 32 Video Signal Troubleshooting Computer Video No Signal No Signal Turn on Turn on Check Check Source Source Source Source Replace Replace Check Check Cable Cable Cable Cable Replace Replace Main Check Check monitor Main board Main board board out signal...
- Page 33 Image abnormal Color abnormal Adjust Power on again Check input cable Input signal and reset OSD and signal setting Adjust Adjust Color Check input cable Check Color Input signal Wheel Index and signal setting Wheel Index Replace Replace Main Check Check Main board board...
-
Page 34: Chapter 4 Function Test & Alignment Procedure
Chapter 4 Function Test & Alignment Procedure After repairing projector (Disassembly and assembly projector), Repair center should verify the quality of repaired unit. 4.1 Signal test (Each I/O can function normally) Connect all connector to the jacks one after the other to check whether each channel can project normally COMPUTER (VGA)... - Page 35 1. Mechanical motion (Up & Down) should be free from getting stuck when pressing the button. MENU 2. Press MODE/ENTER button can activate the selected On-Screen Display (OSD) menu item. 1. Mechanical motion (Up & Down) should be free from getting stuck when pressing the button.
-
Page 36: Image Quality Inspection
4.3 Image Quality Inspection Projected image size: 60 inches (diagonal length) Zoom ring: Adjust zoom ring to wide (Maximum projection size) I/O port COMPUTER Test Equipment Standard Pattern Generator (Ex. Quantum data) SVGA: 800 x 600 Signal format XGA: 1024 x 768 WXGA:1280*800 1080P:1920*1080 60”... - Page 37 RGB Ramps • Use to confirm correct color wheel index delay setting and DMD data line integrity. • Verify proper white, red, green, and blue chromaticity. • Verify transition from dark to light in each ramp is smooth and consistent. •...
- Page 38 GRAY 10 • Use for light blemish inspection including bright (stuck ON) pixels. • Confirm there are no more than four visible blemishes brighter than Gray10. • No blemish greater than one inch or 2.54cm in length/diameter is allowed. • Confirm there are no stuck ON (bright) pixels brighter than Gray10. •...
- Page 39 32 Gray Level Checking Item: Color Gradation •32 level of gray level color should be distinguishable and no defection. FOCUS • Use to evaluate focus sharpness and uniformity. • Focus on the center icon. Then adjust focus to achieve best overall focus. •...
-
Page 40: Resolution
4.4 Resolution I/O port Test Equipment Test Method 1. Rotate Zoom ring to wide mode (Maximum projected image) 2. Fix projector to set diagonal length of projected image to 60”. 3. Adjust focus ring to make resolution of 4 corners and center are balanced. -
Page 41: How To Enter Factory Mode
4.7 How to enter factory mode 【Warning】 Please don’t set any sub-menu of factory menu that doesn’t refer to in this Service Manual. It may cause damage to the projector. (1) Press “Menu” button to open the Main menu. (2) Move the highlight bar to “SYSTEM SETUP: Advanced” item. DOWN (3) Press the into the selected sub-Menu. -
Page 42: Color Wheel Index Adjust
4.8 Color Wheel Index Adjust Step 1: Test Image: 256 level RGB. Step 2: Enter the Engineering Mode. Step 3: 1. Move the highlight bar to the CW index delay. 2. Press the button (Right or Left) with Remote control to adjust the value of Index 3. -
Page 43: Adc Calibration Procedure
4.9 ADC Calibration Procedure Step 1: Resolution: SVGA 800*600 1024*768 WXGA 1280*800 1080P 1920*1080 Test Image: Step2: Enter the Factory Mode. Step 3: 1. Move the highlight bar to the ADC Calibration. 2. Press the Enter button to execute ADC Calibration. The image will flash, and then come back to search signal screen. -
Page 44: How To Reset Lamp Hours
4.10 How to reset lamp hours (1) ,Press “MEUN”,Move to “SYSTEM SETUP:Advanced” (2) Move the highlight bar to “Lamp Setting”, Press Enter into the selected sub-Menu. (3) Move down the highlight bar to “Reset lamp timer” item and press Enter.. (4) A warning message displays asking if you want to reset the lamp timer. -
Page 45: Chapter 5 Firmware Upgrade
Chapter 5 Firmware Upgrade This provides the information regarding relevant equipments and upgrading procedure for firmware upgrade. Purpose: Flash Loader vX.X.exe flash loader is for upgrading image file to projector and is be designed to execute on Windows 2000/Windows XP/Windows Vista/Win 7. Note: Please check the firmware version before any firmware upgrade procedures. - Page 46 Verify you have opened the DPL Composer , then click Next > Once you have read the License Agreement and agree, select the I Agree radio button , then click Next >.
- Page 47 In the box of Readme Information, after read click Next> Select which features you would like to install, and then click Next>...
- Page 48 Click Next> to begin installation You’ll see a progress bar as the DLP Composer is installed...
- Page 49 Once the installation is complete, select Finish. The DLP Composer Icon will appear on desktop of WindowsTM after successful installation. 2) Upgrade the firmware on the projector...
- Page 50 To update firmware, you need a USB type A to USB type B cable (available at any electronics store). Don’t connect the cable until these instructions tell you to do so. IMPORTANT! While the firmware is being downloaded to the projector, do not shut down the computer or projector or disconnect the USB cable.
- Page 51 On Windows XP 4.In Windows XP, select install and then click next...
- Page 52 Select Finish DLP Device Driver installation,then click 完成 7. double-click the DLP Composer(TM) Lite 11.0.2...
- Page 53 8.Choice Edit > Preference, Choice Communications then set Projector Interface > USB, make sure USB Device Identification Vendor is 0x451 and Product code is 0x2000 8. Open the DLP Composer(TM) Lite 11.0.2, execute 8-1~8-7 8-1 Choice Flash Loader 8-2 Flash Image File choice D:\XXX.img...
- Page 54 8-3 Select Complete Image Download, Click “Skip Boot Loader Area” select 128KB 8-4 Connect PC USB port to projector USB port 8-5 Press “POWER” button constantly then plug the Power Cord after around 5 seconds, the power LED will become light and TEMP/LAMP LED red/flash light,...
-
Page 55: I Exploded Overview
Appendix A I Exploded Overview... -
Page 56: Fru (Field Replaceable Unit) List
VTPD-W61BM FOXCONN DX281 DW282 PARTNAME Photo DS262 DX263 DW265 DH268 PART NO. Projector ˙ ˙ ˙ ˙ ˙ ˙ J8947-0395-00 Remote Controller MAIN BOARD ˙ PKM84-7101 FOR DS262 MAIN BOARD ˙ PKN84-7101 FOR DX263 MAIN BOARD ˙ PKP84-7101 FOR DW265... - Page 57 PKQ84-7101 FOR DH268 MAIN BOARD ˙ PKR84-7101 FOR DX281-ST MAIN BOARD ˙ PKS84-7101 DW282-ST AIO POWER ˙ PKM84-9000 BOARD FOR DS262 AIO POWER ˙ PKN84-9000 BOARD FOR DX263 AIO POWER ˙ PKP84-9000 BOARD FOR DW265 AIO POWER ˙ PKQ84-9000 BOARD...
- Page 58 IR BOARD ˙ PKQ84-7500 FOR 1080P CW SENSOR ˙ ˙ ˙ ˙ ˙ ˙ PKM84-7800 BOARD POWER CORD ˙ ˙ ˙ ˙ ˙ ˙ J2552-0115-02 FOR CN POWER CORD ˙ ˙ ˙ ˙ ˙ ˙ J2552-0066-02 FOR EU/ROW POWER CORD ˙...
- Page 59 ˙ ˙ ˙ ˙ PKM84-4500 TOP COVER ˙ ˙ PKR84-4500 TOP COVER ˙ ˙ ˙ ˙ ˙ ˙ PKM84-4540 LAMP COVER BOTTOM ˙ ˙ ˙ ˙ ˙ ˙ PKM84-4510 COVER ZOOM RING ˙ ˙ ˙ PHA34-4660-00 FOR SVGA XGA WXGA ZOOM RING ˙...
- Page 60 OPTICAL ˙ PKQ84-2200 ENGINE BODY OPTICAL ˙ PKR84-2200 ENGINE BODY OPTICAL ˙ PKS84-2200 ENGINE BODY DMD CHIP ˙ PFD84-2700 FOR SVGA DMD CHIP ˙ ˙ PHS84-2700 FOR XGA DMD CHIP ˙ ˙ PHT84-2700 FOR WXGA DMD CHIP ˙ PHU84-2700 FOR 1080P LENS ˙...
- Page 61 ˙ ˙ ˙ ˙ ˙ ˙ PKM84-2300 LEFT FAN ˙ ˙ ˙ ˙ ˙ ˙ PKM84-2301 RIGHT FAN ˙ ˙ ˙ ˙ ˙ ˙ PKM84-2302 TURBO FAN ˙ ˙ ˙ ˙ ˙ ˙ PKM84-0080 SPEAKER FRONT FOOT ˙ ˙ ˙ ˙ ˙ ˙...
- Page 62 ˙ ˙ ˙ ˙ ˙ ˙ PKM39-4000-00 OUTER ˙ ˙ ˙ ˙ ˙ ˙ PKM39-6000-00 CARTON...
-
Page 63: I Serial Number System Definition
④ : 35 = Date Code (week, EX: the thirty-five week of the year = 35) ⑤ : 0001 = Serial Numbers EX: FKM2305350001 This label represents the serial number for DS262. It is produced at FOXCONN on 0001 thirty-five week of 2015. Its serial code is... -
Page 64: Pcba Code Definition
⑤ : 00001 = Serial Numbers ⑥ :A0=PCBA Version Code EX: PKMAFAL00001A0 This label represents the serial number for DS262 PCBA. It is produced on 10/21.2015. Its F/W Version is A. Its serial code is 00001.The PCBA Version is A... - Page 65 Appendix C RS232 Code table 1. Connection: Below shows the illustration of connection between PC and Projector. <CAUTION> Make sure that your computer and projector are turned off before connection. Power on the computer first, and then plug the power cord of the projector. (It may cause Com port incorrect function, if you do not follow this instruction) ...
- Page 69 Appendix D Ceiling Mount Drawing Ceiling mount screws: M4 x 8 (Max. L = 8mm) Unit: mm...
Need help?
Do you have a question about the DS262 and is the answer not in the manual?
Questions and answers