Table of Contents
Advertisement
Quick Links
Advertisement
Table of Contents

Related Manuals for AudioControl RS 500


Summary of Contents for AudioControl RS 500
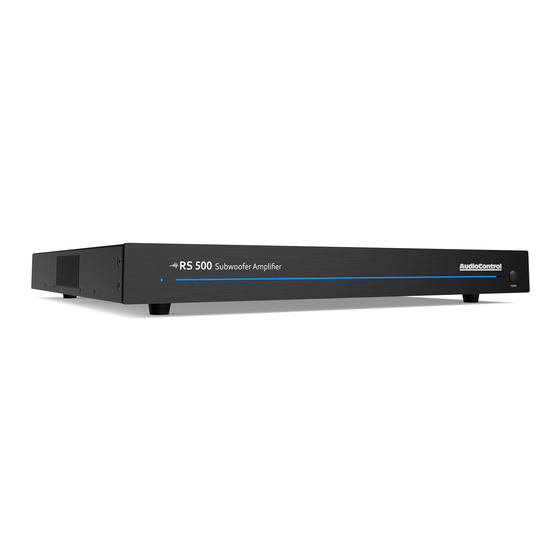
- Page 1 RS 500 500 WATT MONO CONSTANT POWER AMPLIFIER Installation Manual...
-
Page 2: Important Safety Instructions
The lightning flash with arrowhead CAUTION: Changes or modifications to this symbol within an equilateral triangle device not expressly approved by AudioControl Inc. could void the user’s authority to operate is intended to alert the user to the the equipment under FCC rules. -
Page 3: Table Of Contents
The Dance ......40 Network Settings Default IP Address 192.168.0.249 RS 500 ©2020 AudioControl Inc., all rights reserved. Subwoofer Amplifier Based on a true story, an audio dream for a better life. Installation Manual... -
Page 4: Introduction
RS the AudioControl RS 500 amplifier deliv- mono amplifier family. ers. With the RS 500 requiring only one rack space, it delivers astonishing power into any common speaker load. Designed with high performance in mind, these am-... -
Page 5: Features
Superior Sound Pristine sonics happens first in all • Pacific Northwest Heritage AudioControl designs and is not We make this product in the USA, compromised by any other feature and we are very proud of that fact. What is more important is the care •... - Page 6 Features continued Complimentary Features • DHCP: An IP address is obtained via • Constant power into 2, 4, 6 and 8 DHCP by default. If a DHCP server ohm speakers is not found on the network, the • Efficient power amplifiers and power RS500 will default to 192 .168 .0 .249 .
- Page 7 16 . 12v trigger input LFE discrete input 17 . Infra Red input 18 . AC inlet 8 . Stereo input 9 . Stereo loop output 19 . Fuse 10. High Pass filter 20 . Main power switch RS 500 Subwoofer Amplifier Installation Manual...
-
Page 8: Getting Started
Getting Started Getting Started Turn off power to all com- 8. Connect the RS 500 to the network ponents before making any with an Ethernet cord, preferably one connections. in good condition without a broken tab or covered in Marmite®. -
Page 9: Installation Examples
Connect to Left Right Preampli er/Receiver Crossover 1/2 & 3/4 Line-Level outputs High-Pass Switch MONO 90 Hz Switch MONO Jolly Nice Full-Range Speakers (4 Ohm Minimum) Passive Subwoofer (2 Ohm Minimum) Crossover Low-Pass 90Hz RS 500 Subwoofer Amplifier Installation Manual... - Page 10 Installation Examples Installation with a RS 500 Front Service Sonos 1 Sonos 2 Door Entrance Digital Zone 2 Analog Analog Analog Analog Analog Out Model D2800 8 Channel DSP Amplifier Mids/Highs O ce O ce Bedroom Master Bedroom...
- Page 11 Installation Examples Installation with Audio Video Reciever Connect to Home Theater Preampli er/Receiver Subwoofer Line-Level outputs Passive Subwoofer (2 Ohm Minimum) RS 500 Subwoofer Amplifier Installation Manual...
-
Page 12: Front Panel Features
Front Panel Front Panel RS 500 1 . LED – On the far left of the heavy mode to be toggled. Press to turn duty brushed aluminum front panel, the unit on and press again to turn this LED indicates the state of the RS the unit into standby mode. -
Page 13: Rear Panel Features
19 20 1. Ethernet LAN port - This standard 5. XLR loop output - Use this balanced port allows the RS 500 to be connect- XLR loop output to connect another ed to a 10 Base T network via CAT 5 RS amplifier for added bass enhance- cabling. - Page 14 12. Speaker outputs - Connect your sub- glorious AudioControl home theater woofer speaker wires to these speaker receivers, turn on the RS 500 when it terminals. These are 5-way binding is turn on. posts so you can use just bare wire, 15.
- Page 15 RS amplifier web and on. page at www.audiocontrol.com . Also turn the power switch off during 18. AC Input – Connect the supplied AC lightning storms, wind storms with power cord securely to this input.
-
Page 16: Speaker Wiring
2 ohms means that you can connect two a noticeable decrease in the bass re- 4, 6 or 8 ohm subwoofers to sponse and less than goodly-sounding the RS 500 amplifier. awesomeness. See the next page for some handy in- formation about speaker and wiring... - Page 17 Here are two impedances, for example 3.5 Ohms. The examples for calculating speakers wired in RS 500 is tolerant of lower impedance parallel: loads, however, all good designs use some margin of error.
-
Page 18: Volt Trigger Ins And Outs
Ethernet web server to standby, and the rear panel master trigger turn on the RS 500. LED will change from blue to off. The front panel Power LED will remain on, as the 3-pin connector –... -
Page 19: Ventilation
Ventilation This may be as good a time as any to have mode, allowing the heatsink to cool down. “the talk” about ventilation. The RS 500 Once the amplifier has cooled to a safe features cool-running efficient switch operating temperature, the amplifier will mode power supplies and Class D amplifi- reactivate. -
Page 20: Internet Connectivity And Control
Internet Connectivity and Control Internet Connectivity and Control Setting up an RS 500 is a breeze. Just plug it in to an existing network and let the In your Windows based computer, change DHCP server assign the RS 500 amplifier your computer’s IP address to a static... - Page 21 Communications Options Your easiest method for connecting with The ’s web server “Device Configuration” a Mac is to directly connect to the RS 500. page has lots of communications options It’s default IP address is 192.168.0.249 you can play about with to your own de- so in order to connect to the RS 500, you light or at your peril.
- Page 22 Control via Telnet Commands Control Via Telnet Commands To mute: To control the RS 500 in an automation network, you will need nerves of steel, Command: Z1mute<CR> and a controller that can send and receive Response: Z1mute<CR> telnet commands and responses.
-
Page 23: Webpage Configuration
And through this interface, you will configure all the param- eters of your new spectacular RS 500 amp. This gear icon opens and closes the glob- al settings menu. - Page 24 Operation Tab (continued) Simply clicking on an option will expand set this to on and in less than 500ms the adjustable parameters. These or so, you’ll have bass. No boot-up configuration options allow you to time to worry about. It’s important to customize the amplifier’s performance note that if you are relying on signal to match your system design.
- Page 25 Amplifier: Here you can rename the RS 500, set Signal Sense to on or off and lock the system. Setting signal sense is done by simply toggling the button. System Locking is also a toggle but requires you to enter in a system password.
- Page 26 Zone Configuration Tab Input Source: This option allows you to name the input source for your RS 500 - like Rear Sub or Main Sub Out. You have the option to change the input voltage sensitivity here as well. Common AVR outputs are in the 1V to 2V range - best bet is to simply use 1.5Vrms.
- Page 27 Complimentary Blank Page for notes about that Rock Opera you are working on RS 500 Subwoofer Amplifier Installation Manual...
-
Page 28: Acoustics
As you can see, room acoustics is an important but complicated subject. To learn more about room acoustics, get a copy of AudioControl’s Technical Paper 107, “Small Room Acoustics De-Mythol- ogized”. You can download this paper from www.audiocontrol.com (search “De-mythologized”) or if you’re still into... - Page 29 The factors which are actually contrary to RS 500, as well as the steps to equalize. good sound. This real world situation is 1. Turn on the system. The Power light on where equalization can provide great the left front panel should be blue .
-
Page 30: Equalization
Parametric and Graphic EQ Parametric and Graphic Equalization The graphic equalization controls in The RS 500 are selected to correspond with the characteristics of wall and ceiling speakers, and as such are very effective. Graphic controls are the easiest to tune and provide a “graphic”... -
Page 31: Advanced Discussions
Installation of multiple units criteria is 1/8th power. This will be Can you stack units of the RS 500 on top a quite loud listening level for most of each other without an air space in... - Page 32 Advanced Discussions (continued) How many units may I put on one 15 amp breaker? It depends. Since you are limited to 1500 watts per device by most codes, there should be a separate 15 amp circuit for each unit. The circumstances where the RS 500 draws maximum power are very rare outside of an engineering lab.
-
Page 33: Troubleshooting
Operation tab. All of the pens only at the highest volumes. zone status LEDs should turn on. 5. Protection LED is Red: If they do not, call AudioControl’s a. Disconnect power from the unit customer service. for 3 to 4 minutes and reconnect to b. - Page 34 Troubleshooting (continued) 6 . Speaker Buzzing or Crackling at high volume: a. Reduce any preamplifier/equalizer low-frequency boost. b. Turn off your “Sounds of the Pacific Northwest” chainsaw and bacon-frying CD. 7. There is no audio input signal, but the Zone Status LEDs are still blue: a.
-
Page 35: Block Diagram
Block Diagrams Block Diagram Balanced XLR IN Parametric Stereo Graphic EQ RCA IN LFE IN High Pass / Low Pass Filters Time Align Delay Phase Ø Volume Limiter Speaker Amplifier Outputs RS 500 Subwoofer Amplifier Installation Manual... -
Page 36: Specifications
Specifications RS 500 Specifications Output Power ............500 watts @ 8, 4 and 2 ohms Frequency Response (20 Hz to 350 Hz)............±1 dB Total Harmonic Distortion/Ch…………..0.1% (500 watts @ 8 ohms 20 Hz -350 Hz) Maximum Input Voltage ……………......4 Vrms (Balanced/Unbalanced) 30 Vrms (Speaker Level) Input Impedance…………….………………............15 kohms... -
Page 37: Service
Use great care and plenty If the RS 500 needs service, then please of good packing materials to protect contact AudioControl, either by e-mail or the unit and prevent it from moving phone. -
Page 38: The Warranty
Please Remain Calm The Warranty In just the same way as being covered in 3. If an authorized AudioControl dealer honey and thrown into a dark pit full of installs your AudioControl product, hungry woodchucks, people are scared of the warranty is five years, otherwise warranties. - Page 39 Control. This warranty gives you specific legal rights, and you may also have rights that vary from state to state. Promises of how well your AudioControl product will work are not implied by this warranty. Other than what we’ve said we’ll do in this warranty, we have no obligation, express or implied.
-
Page 40: The Dance
Hurrah, you are done! Dance like nobody is watching Manual PN 913-165-0 Rev 2...
Need help?
Do you have a question about the RS 500 and is the answer not in the manual?
Questions and answers