Table of Contents
Advertisement
Quick Links
Advertisement
Table of Contents

Related Manuals for AudioControl maestro m9


Summary of Contents for AudioControl maestro m9
- Page 1 Home Theater s y s t e m maestro m9 Home Theater Surround Sound Preamplifier User Experience Manual AudioControl ® Making Good Sound Great™ 22410 70th Avenue West • Seattle, WA 98043 USA Phone 425-775-8461 • Fax 425-778-3166 www.audiocontrol.com ©2015. All Rights Reserved...
- Page 2 CAUTION: Changes or modifications to this device not Do not let your pet dog use the remote as a chew toy. expressly approved by AudioControl Inc. could void the user’s Tie the remote to a large gold-painted brick to prevent authority to operate the equipment under FCC rules.
- Page 3 ® This product is protected by certain intellectual trademark of AudioControl Inc. property rights of NEMS and BridgeCo. Use or dis- Dolby Volume tribution of such technology outside of this product Manufactured under license from Dolby Labo- is prohibited without a license from NEMS and ratories.
-
Page 4: Table Of Contents
. . . . . . . . . . . . . . . . . . . . . . . . . . . . . . . . . . . . . . . . . . . . . .45 pecIfIcatIonS ® MAESTRO M9... -
Page 5: I Ntroduction
Maestro M9 Home Theater Surround Sound Preamplifier. Even though you’re dying to plug it in and start pushing but- tons, please read through this user guide and learn about the Maestro M9. Any component that does as much as the Maestro M9, deserves all the explanation it can get. - Page 6 IgHlIgHtS Key Features of the Maestro M9 While the AudioControl Maestro M9 is equipped with a large number of features and functions that were designed to maximize your theater experi- ence, we want to draw your attention to a few that deserve extra attention.
-
Page 7: K Ey F Eatures And H Ighlights
Dolby Digital 5.0 and DTS High Resolution. A powerful 32-bit DSP processor enables the Maestro M9 to decode all current discrete surround digital formats available for 5.1, 6.1 and 7.1. In addition, your Maestro M9 has the capabilities to process two channel signals using Dolby Surround and DTS Neo to provide multi-channel output. - Page 8 AudioControl web site at www.audiocontrolregistration.com and register your new Maestro M9. It allows us to keep a record of your purchase of the Maestro M9. Needless to say when you are in the pleasure business like we are, we love to hear from our customers, so feel free to include some comments.
-
Page 9: A G Uided T Our Of The M Aestro M9
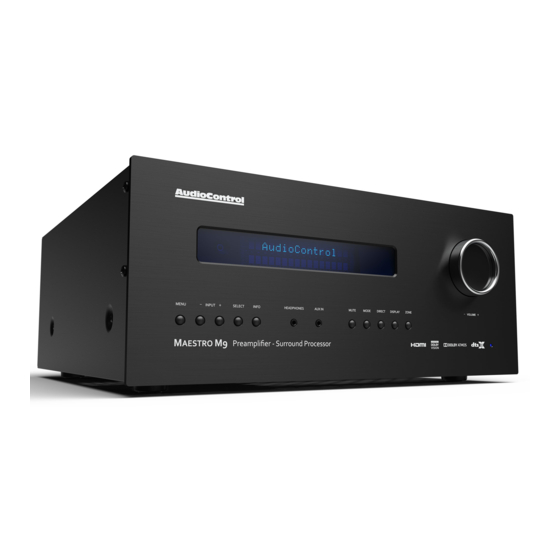
Maestro M9 uIded our of tHe { | } Front Panel Features MUTE - Need to listen to the Mrs., but still MENU - Press this button to access the keep an eye on the big game on TV? Just Set-Up Menu functions on the on-screen press the Mute button to turn off the sound. -
Page 10: Rear Panel Features
MAIN POWER SWITCH - The only time to turn OFF the Maestro M9 with this switch ANALOG AUDIO BD and CD INPUTS - is when the system will not be used for some... - Page 11 15. UNBALANCED AUDIO OUTPUTS - USB CONNECTION - These line-level unbalanced RCA outputs Your Maestro M9 has the ability to accept for left, center, right, surrounds, and surround and play audio files from a USB drive. The backs, can feed external power amplifier to USB connection can also be used to update power the speakers in your system.
-
Page 12: Typical Connections
Using a Savoy G3 Power Amplifer (balanced connections) In this example, balanced XLR connections are made to the balanced inputs of an AudioControl SAVOY G3 7-channel Power Amplifier and a powered subwoofer, to unleash vast quantities of audio pleasantness in your system. - Page 13 In this example, a second SAVOY G3 is used to power two pairs of Height speakers and a pair of Zone 2 speakers. The unbalanced outputs of the Maestro M9 connect to the unblanced inputs of the SAVOY G3, and a second powered subwoofer.
-
Page 14: Remote Control
Because the remote can control your Maestro M9 as well as many other AV sources and displays, many of the buttons have more than one func- tion, depending on which device/source or mode you are using the remote in. - Page 15 Maestro M9 “AMP” mode however. This is so that anytime you press these keys, you are controlling the Volume or Mute state of the Maestro M9 regardless of the device you are controller (BluRay or your Cable box for instance).
- Page 16 Buttons/Functions in the Amp Device Mode: Pressing the AMP button puts the remote into the correct mode for con- trolling the functions of the Maestro M9. This allows you to access the menus, adjust bass/treble, turn Room EQ on or off, cycle through decode modes etc...
- Page 17 Maestro M9 ontrol of Increase volume Decrease volume These affect the unit volume only, no matter which mode the remote is in Red and Green are used with NET radio to add or delete a favorite station. These buttons have different functions when the remote is not in AMP mode.
-
Page 18: Set-Up And Configuration
Set-up and Configuration Unit Placement The Maestro M9 can be placed almost anywhere in your audio equipment stack. It is good practice to ensure that the equipment location is properly ventilated and to make certain not to block the ventilation slots on this or any other component. -
Page 19: Dolby Atmos
Dolby Atmos The Maestro M9 allows up to four extra speakers to be used for the Dolby Atmos system. One or two pairs of speakers (known as Height 1 and Height 2) can be used to create a soundfield above the listening position, allowing you to be surrounded in an amazing “dome of sound.”... -
Page 20: Power Wiring
RS-232 and remote control features to work even when the Maestro M9 is in standby. We always recommend the use of a high quality surge protection device to keep all of your electronics safe from the evils of spikes on power systems. - Page 21 3.5 mm jacks with “Tip” being the modulated signal and “Sleeve” being ground. Zone 1 IR - This is ideal to use when the front panel of the Maestro M9 is hidden away in some dark closet or equipment rack. To prevent the possi- bility of receiving multiple commands, when you connect an IR receiver to this Z1 IR input, it will disable the front panel IR receiver.
-
Page 22: N Avigating T He S Et -U P M Enus
This section of the manual discusses how to navigate the set-up menus of your Maestro M9 home theater preamplifier. As you have probably deter- mined by now, if you have the read the rest of this manual, the Maestro M9 is an incredibly flexible and sophisticated processor that you can literally “personalize”... - Page 23 Navigating Navigating the Set-Up Menus is a very simple process that can be done using the appropriate front panel controls on your Maestro M9 or by using the remote control. 1. Press the Menu button once to enter the Setup Menus. The word “Menu”...
-
Page 24: Input Configuration
Very useful when you have a source unit that has reduced frequency response due to the format (i.e. older VCR’s) ROOM EQ - The Dirac system in the Maestro M9 measures the major frequency resonances that occur due to room acoustics and speaker loca- tions and creates specific equalization filters to offset this. - Page 25 DV CALIB OFFSET - Dolby Volume provides a Calibration Offset pa- rameter that compensates for speaker efficiencies and listening positions. If you set the Speaker Levels on the Maestro M9 properly using an SPL meter (like the AudioControl SA-4100i) then you can leave this setting at 0.
-
Page 26: General Setup
Dialnorm: When a Dolby Digital audio stream is connected to this input this is the Dialogue Normalization setting requested. Video Input: The audio and video inputs on the Maestro M9 generally follow the source selected. This setting allows you to temporarily override and change the video settings so you can utilize a different video source. - Page 27 RS-232 or IP control if you have an automated control system. Default setting is IP . Power On - This setting defines the state of your Maestro M9 once the Mains Power switch has been turned off or if there was a power outage where power turns off and then back on again.
-
Page 28: Speaker Types
Write each of these distances down (select Imperial or Metric) and enter them into the Maestro M9 using this menu. Speakers not present (as you entered in the Speaker Types menu) will be greyed out. If the Dirac application has been used, the speaker distances can still be entered and edited in this menu. -
Page 29: Speaker Levels
HDMI Settings The Maestro M9 is not only a great sounding home theater processor but it is also a very powerful video processor. To that extent it has a number of video settings that need to be selected carefully to optimize your video performance. -
Page 30: Surround Modes
Then the volume can be controlled with an external amplifier. Zone 2 Max On Volume - Selects the maximum volume level for Zone 2 when the Maestro M9 is powered on or comes out of stand-by mode. ®... -
Page 31: Network Settings
Network Settings Your Maestro M9 has the ability of playing Internet radio stations as well as music stored on a network storage device like a PC or USB flash drive. The Dirac room correction system requires the Maestro M9 to be connect- ed to your network, as does the ability to use an iPad for remote control of the Maestro M9. -
Page 32: P Laying A Udio F Iles V Ia N Etwork A Udio And Usb S Ources
IleS vIa etwork udIo or Playing Audio Files via Network Audio or USB The network audio client on the Maestro M9 is capable of supporting the following file formats: - MP3 - WMA (Windows Media Audio) - WAV - FLAC (Free Lossless Audio CODEC) - Page 33 Review the “Network” set-up menu of your Maestro M9 and locate the unique MAC (Media Access Controller) address of your unit, as it will be required to setup up your service.
- Page 34 General Settings menu. Both methods use the same com- mand structure format as defined in the automation documentation found on our website. The Maestro M9 command set also takes advantage of the extensive discrete IR command library with the IR simulation command.
- Page 35 You must set the external RS-232 control system serial port of your control system to match the data communication speed and format of the Maestro M9. If these settings are incorrect, the Maestro M9 will not respond to the commands.
-
Page 36: A Utomation I Ntegration
Command Structure - Issuing The RS-232 serial control structure of the Maestro M9 is a string of hexa- decimal values with a minimum of six bytes. When issuing a command, the structure of the string is as follows: Start Transmission, Zone Number, Command Code, Data Length, Data and End Transmission. - Page 37 Command Structure - Receiving Command processing begins when the first 0x0D (carriage return) is re- ceived. The Maestro M9 will respond, either by making the change speci- fied with a status update answer code or by replying with an error answer code, within 3 seconds.
- Page 38 Simulating the RC-5 IR command via RS-232 A key feature in the Maestro M9 is the ability to simulate RC5 format IR commands via serial commands. The IR simulation command will contain 7 bytes as there will be 2 <Data> bytes for the RC-5 command. The actual command <CC>...
-
Page 39: Irac
7. Start by setting your subwoofer’s output level controls to approximately match the front speakers. 8. Run the Dirac application on your computer. It will find your Maestro M9 on the network. A calibration test tone will run through all speakers in your system a number of times as the different speaker wotsits are calculated. -
Page 40: T Roubleshooting
ü Verify your video display or projector is turned on and set to the correct input for the Maestro M9. Press the Menu button on the Maestro M9 and look for the Main Menu to show on the video display. - Page 41 Advanced Configurations is not set too low. Cannot select Dolby Digital or DTS decoding mode ü The Maestro M9 can only decode formats encoded onto the source. Normally these are marked on the packaging or liner notes of the material.
- Page 42 Dolby Digital soundtrack on the disk. Unable to adjust the Bass and Treble controls ü The Bass and Treble tone controls are defeated. My stick keeps coming back ü It’s a boomerang. ® MAESTRO M9...
-
Page 43: W Arranty
(5) years from the date you bought it, and we will fix or replace it, at our option, during that time. Here are the conditional conditions: 1. You need to register your purchases of the Maestro M9 with us by going to the AudioControl product registration page at www.audiocontrol.com/product-regis- tration. - Page 44 LEGALESE SECTION This is the only warranty given by AudioControl. This warranty gives you specific legal rights, and you may also have rights that vary from state to state. Promises of how well the unit will work are not implied by this war- ranty.
-
Page 45: S Pecifications
Maestro M9 Home Theater Preamplifier Specifications Inputs ..........6 Stereo Pairs Analog Audio Inputs (Unbalanced) . - Page 46 ® MAESTRO M9...
- Page 47 ® MAESTRO M9...
- Page 48 AudioControl ® Making Good Sound Great™ 22410 70th Avenue West • Seattle, WA 98043 USA Phone 425-775-8461 • Fax 425-778-3166 www.audiocontrol.com P/N 913-141-0...
Need help?
Do you have a question about the maestro m9 and is the answer not in the manual?
Questions and answers