
Related Manuals for JMQ A6X


Summary of Contents for JMQ A6X
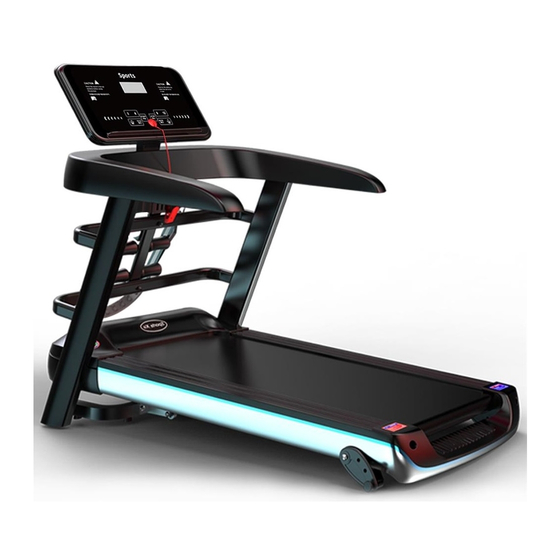
- Page 1 A6X Treadmill Instruction Manual Please read this manual carefully before using the product and keep it.
- Page 2 1. Catalogue Number Content Catalog Safety instructions Package specifications Assembly specifications Electric control instructions Maintenance instructions Failures and trouble shooting Warranty terms Exercise guidelines Warm exercise Thanks for choosing this home electric treadmill, our products will improve your health, the more familiar you are with your treadmill, You will find it easy to use, so please read carefully this user manual,...
- Page 3 product quality. Refer to this manual will guide you assemble , use and maintain thistreadmill. Thank you for using! 2. SAFE USE INSTRUCTIONS We considered many safety problems when design and manufacture this treadmill, to ensure your safety, please read all contents of this manual carefully before use.We do not bear the consequences of any abnormal operation.
- Page 4 dropped off immediately to stop the machine 3.a. Please refer to your health care doctor’s opinion before exercising. b. Please wear comfortable sportswear when exercising, don’t wear shoes with soft sole,or shoe shavings will be involved into motor and control system, and cause operating malfunction. c.
- Page 5 9.This machine is suitable for indoor use, please do not use outdoors or in the gym. 10. Place the treadmill on clean and smooth floor, keep it in good ventilation condition, ensure the unit ventilated. Make sure there are no sharp objects nearby. Do not use it near water or fire sources. 11.
- Page 6 ■ ■ Frame ■ ■ Manual ■ ■ Screen ■ ■ Screwpack Fourth page icon ■ Connecting ■ Massage bracket ■ Massage machine ■ High elastic foam Single function screw pack...
- Page 7 Multi function screw pack 4. Installa tion...
- Page 8 process Step 1:Lift the frame ou of the carton and open the cable tie of the strapping frame. Step 2:Expand the frame: When expand, please pull out the pull pin on the column of N, and hold the frame on the ground with the other hand, and lock it with the knob marked by D#M8*45 to prevent waggle.
- Page 9 of the electronic meter stand: first fold the electronic meter stand in the direction of the arrow, and then fix the electronic meter stand on the column with F#M8*15 screws (2 pieces) and G#M8 pads (2 pieces). Step 4:a. Electronic meter screen assembly: first connect the signal lines of the electronic meter, and then put the panel on the electronic meter as indicated by the direction of the arrow, and then fix it with E#M5*40 screws (2 pieces).
- Page 10 Step 5:Product folding:When you need to carry or use this product for long time,fold it as shown below:Hold the back end of the running platform and slowly raise the running platform in the direction of the arrow until the running platform is substantially parallel with the column.Use another hand to pull the knob outward to ensure that the knob iron shaft is inserted into the side of the running platform inside the hole.
- Page 11 1. The 5# massage bracket is fixed on the column with F# screw M8*15 and G# flat pad M8, and then fixed with D# massage stand with G# screw M8*45, I# flat pad M8 and H# anti-loose nut M8 On the 6# massage stand.
- Page 12 Boot start: Normal start after 3 seconds countdown. The number of programs : P1~P12 automatic programs. Safety lock function Unplug the safety lock and immediately display the “SAFE” treadmill to stop quickly. When the safety lock is placed, the electronic watch will display for 2 seconds and the data will be cleared.
- Page 13 Program key "PROGAM" is the program key. In the standby state, press this button to cycle through the manual mode to the automatic program P1 – P12; the manual mode is the system default operation mode, the manual mode default speed is 1.0, and the maximum running speed is 12.8.
- Page 14 b. Time display: Shows the running time in manual mode or the running time countdown in mode and program. c. Distance display: Displays the distance total in manual and program mode or the inverse of the mode running distance. d. Calorie display: Shows the calorie accumulation during exercise in manual and program mode or the calorie count in mode run.
- Page 15 Program speed form Time slot Set time / 10 = run time of each time slot Program SPEED SPEED SPEED SPEED SPEED SPEED SPEED SPEED SPEED SPEED SPEED SPEED...
- Page 16 Parameter setting in 3 modes a. The countdown time setting is initially 30:00 minutes, the setting range is 5:00---90:00 minutes, and the step is 1:00. b. The calorie setting of the calorie count is: 100 kcal, the setting range is 20---990 kcal, step 10. c.
- Page 17 Bluetooth device to click and connect. After the connection is successful, the music on the mobile phone can be transmitted to the power amplifier device on the treadmill through Bluetooth, and operated on the computer. Lower tone, volume addition and subtraction, etc.
- Page 18 the body is folded before moving. 5. Always check and lock all parts of the treadmill; parts of the damaged ring must be replaced immediately. 6. In order to better maintain and extend the life of the treadmill, it is recommended that you rest the treadmill for 10 minutes after 30 minutes of continuous use.
- Page 19 clockwise. 1/4 laps, note that the left and right must be adjusted synchronously, so that the running belt can be tightened and the running belt will not deviate from the center point. If the running belt is too tight, the left and right synchronization will be adjusted counterclockwise.
- Page 20 clockwise; ● If it is biased to the right, use a hex wrench to turn the right screw 1/4 turn clockwise; ● If the running belt is still not in the middle, repeat the above action until it is adjusted to the middle. After adjusting the running belt to the middle, adjust the speed to the sixth gear, and observe the deviation of the running belt and the smooth running condition.
- Page 21 feeling of dryness, please follow the instructions below to refuel. (Please use non-oil-based lubricants) How to add lubricant, please operate as shown below, open the fueling decorative cover on the left front side of the side strip, cut the oil bottle with scissors or utility knife as shown below, then press the bottom icon to refuel, please pay attention when refueling.
- Page 22 Abnormal The lower control stops and enters the fault communicatio state. Can not run up. The electronic watch n: The displays the fault code and the buzzer sounds Communicati 3 times. Possible cause: The communication between between the the electronic control and the electronic watch lower is blocked.
- Page 23 3.1 Check if the motor terminal is firmly connected to the control. 3.2 Stop into the fault state, the electronic No speed watch buzzer sounds 9 times, and the fault sensor signal: code is displayed at the same time, and the The voltage rest of the area does not display the content.
- Page 24 When the machine enters the fault state, the electronic watch buzzer sounds 9 times, and the fault code is displayed at the same time. The rest of the area does not display the content. After the fault condition is maintained Overcurrent for about 10 seconds, it enters the standby protection: In...
- Page 25 Explosion-pro of protection: The drive Possible cause: motor circuit Check if the power supply voltage is is damaged lower than 50% of the normal voltage. Please due to retest with the correct voltage specification; abnormal 5.2 check the controller for odor, replace the power supply controller;...
- Page 26 whether the buttons are working; 1.2 Check or replace the electronic board; 1.3 Check the button can be worked after the power is turned back on . 2. The electronic watch has no display Troubleshooting methods: 2.1 Check if the input voltage is within the allowable range:AC 200-240V;...
- Page 27 b. Treadmill slips Adjust the running belt tightly by referring to the instructions. c. Running belt deviation Refer to the instructions to adjust the running belt to center. d . Running abnormal sound Check if the machine screws are loose and the running belt needs to be lubricated .
- Page 28 the driving belt; c. Damage caused by improper maintenance; d. Other violations and resulting damage. 4, spare parts and services Please contact the dealer or us. The company is not responsible for the extended services arranged by the merchants themselves. 5, the warranty commitment is only valid for private use of the family, not for professional training in the gym.
- Page 29 ● You can add some aerobic exercise to your exercise plan, such as walking, jogging, swimming, dancing or cycling. Always check the pulse. If you do not have an electronic heartbeat monitor, ask your doctor how to measure the pulse by hand or neck. In addition, you must set the target heart rate based on age and physical well-being.
- Page 30 soreness. We recommend the following warm-up and soothing exercises. 1. Stretch down: The knees are slightly curved, the body slowly bends forward, let the back and shoulders relax, and the hands touch the toes as much as possible. Hold for 10-15 seconds and then relax.
- Page 31 4. Quadriceps stretching: Grasp the balance with your left hand or the table, then extend your right hand backwards and grab the right heel and slowly pull it toward your hips until you feel the muscles in front of your thighs. Hold for 10-15 seconds and then relax.
Need help?
Do you have a question about the A6X and is the answer not in the manual?
Questions and answers