Table of Contents
Advertisement
Quick Links
Advertisement
Table of Contents

Related Manuals for Sunjoy Threshold L-PG080PST-F6


Summary of Contents for Sunjoy Threshold L-PG080PST-F6
- Page 1 Threshold style # L-PG080PST-F6 dpci# 009-05-0372 >> assembly instructions...
-
Page 2: Before You Begin
Congratulations on your latest Target purchase Now what? Don’t start sweating over this box of parts. This will be easy. We did the hard work for you. All you need to do is follow our simple instructions and you’ll be on your way transforming your space in no time. Good luck-though we’re confident you won’t need it. -
Page 3: Tools Needed
Tools needed... - Page 4 Table of contents Introduction Hardware Parts list Assembly Questions? Please call 855-MYTGTHOME (855-698-4846) for parts and service. For faster service, have the style number and DPCI number ready when calling.
-
Page 5: Hardware Pack
Hardware Pack (AA) x 72 (BB) x 108 (CC) x 12 (DD) x 24 (W) x 1 M6 x 15 Bolt M6 Washer M6 x 45 Bolt M6x15 Nut M6 Wrench (EE) x 64 (FF) x 16 M6 spring washer Stake Φ8x180... - Page 6 ITEM DESCRIPTION QUANTITY PIC. Top Bar Fixed Beam Support Beam Corner Connector 1 Post 1 Post 2 Stake Base Base Protestor Arch Support Frame 1 Arch Support Frame 2 Clasp(pre-assembled on Post) Small Connector Beam Guideway Bar Canopy...
- Page 7 Step1: Fig.1: Connect Fixed Beam (B) and Support Bar (B1) with Corner Connector (C) by Bolt (A A ),Spring Washer (EE) and Washer (BB) Note: Make sure the side with Arch Support Frame assembly holes on Support Beam (B1) inwards. Fig.2: Fix Top Bar (A) to Support Bar (B1) by Bolt (CC) and Washer (BB).
- Page 8 Step2: Fig.3: Attach Base Protector (H) to Post 1&2 (E&F), fix Post Base (G) to Post (E&F) by using Bolt (DD) and Washer (BB). Fig.4: Put Small Connector (L) onto Guideway Bar (N) through the bottom of Guideway Bar (N). Fig.5: Insert Guideway Bar (N) into Small Connector (L) that is on the top of Post 1&2(E&F), then fix them by Bolt (AA) and Washer (BB).
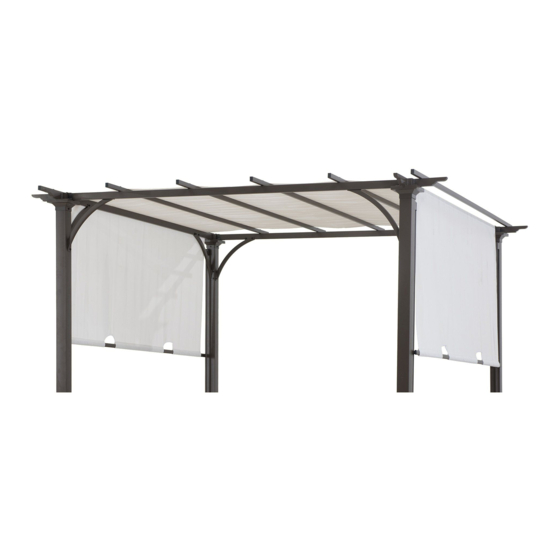
- Page 9 Step2: Fig.8: Fix the top of Arch Support Frame 1&2 (I&J) to Fixed Beam (B) and Suppport Bar (B1) by Bolt (AA), Spring Washer (EE) and Washer (BB). Fig.9: Fix the bottom of Arch Support Frame 1&2 (I&J) to Post (E&F) by Bolt (AA), Spring Washer (EE) and Washer (BB). Fig.10: Put Canopy (O) on the top of the pergola, then insert the assembled beam (M) to the hemline of the canopy.
-
Page 10: Care And Maintenance
Care & Maintenance Our iron / steel components for garden accessories and furniture are treated with rust inhibiting paint that protect it from rusting. However, due to the nature of iron / steel, surface oxidation (rusting) will occur once these protective coatings are scratched. This is a natural process and is not a defect! To minimize this condition, we recommend care to be taken when assembling &...
Need help?
Do you have a question about the Threshold L-PG080PST-F6 and is the answer not in the manual?
Questions and answers