Advertisement
Available languages
Available languages
Product Assemblies
SP-BSC10-1-35-P
Place sliding base assembly on cabinet floor,
1
in desired position. Position front mounting
strap against the back edge of the cabinet
face frame. (If installing in a frameless
cabinet, measure 1/2" to 3/4" back from
front of cabinet opening, and align sliding
base assembly parallel to cabinet opening.)
Close door to make sure the assembly will
not hold cabinet door open. Also, check to
see if unit will clear the door opening when
fully extended. Once position is determined,
fasten in place using four mounting screws
provided and a Phillips head screwdriver.
Optional Step: Mark placement of
mounting holes with a pencil, remove
sliding base assembly and drill pilot holes
for fastening screws. Place sliding base
assembly back into position and fasten
with the provided screws.
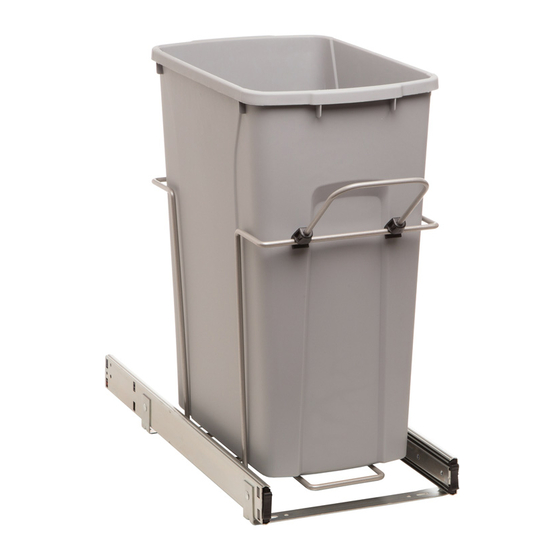
Single Pullout Waste Bin
Inspect all parts and read all instructions prior to beginning assembly and installation.
Tools Required
• Phillips Head Screwdriver
Parts Included
Waste Bin (1)
Wire Cage (1)
1
Installation Instructions
Optional
• Drill with 1/16" (1.5mm) bit for
drilling pilot holes
• Pencil
Sliding Base Assembly (1)
Clip-On Handle (1)
Mounting
Straps Sliding Members
Cage Locking Clip (1)
Mounting Screws
Advertisement
Table of Contents

Related Manuals for Knape & Vogt Simply Put SP-BSC10-1-35-P


Summary of Contents for Knape & Vogt Simply Put SP-BSC10-1-35-P
- Page 1 Single Pullout Waste Bin Installation Instructions Inspect all parts and read all instructions prior to beginning assembly and installation. Tools Required Optional • Phillips Head Screwdriver • Drill with 1/16" (1.5mm) bit for drilling pilot holes • Pencil Parts Included Waste Bin (1) Sliding Base Assembly (1) Clip-On Handle (1)
- Page 2 Fully extend sliding members out of the cabinet. Place the slotted holes on the cage onto the tabs on the left hand sliding member. (2A) Rest the cage on top of the clip retainers on the right hand sliding member, but, DO NOT PUSH DOWN.
- Page 3 Cubo de basura desmontable simple Instrucciones de Instalación Inspeccione todas las piezas y lea todas las instrucciones antes de comenzar con el armado y la instalación. Herramientas necesarias Opcional • Destornillador Phillips • Taladro con broca de 1/16 pulgadas (1.5 mm) para taladrar agujeros pilotos •...
- Page 4 Extender completamente los brazos deslizantes fuera del gabinete. Encajar los orificios del soporte en las pestañas del brazo deslizante de la izquierda. (2A) Colocar el soporte encima de los retenedores en el brazo deslizante de la derecha, pero sin presionar hacia abajo. Cerrar la unidad para que el soporte de alambre quede por completo dentro del gabinete.
Need help?
Do you have a question about the Simply Put SP-BSC10-1-35-P and is the answer not in the manual?
Questions and answers