Table of Contents
Advertisement
Quick Links
- 1 General Maintenance and Cleaning
- 2 General Maintenance and Service Plan for Ceramill Matik
- 3 Cleaning the Milling Chamber
- 4 Cleaning and Lubricating the Collet
- 5 Checking the Coolant/Lubricant (C/L)
- 6 Changing the Coolant/Lubricant
- 7 Changing the Filter Fleece
- 8 Maintenance Confirmations by Technician
- Download this manual
Advertisement
Table of Contents

Related Manuals for Amann Girrbach Ceramill matik


Summary of Contents for Amann Girrbach Ceramill matik
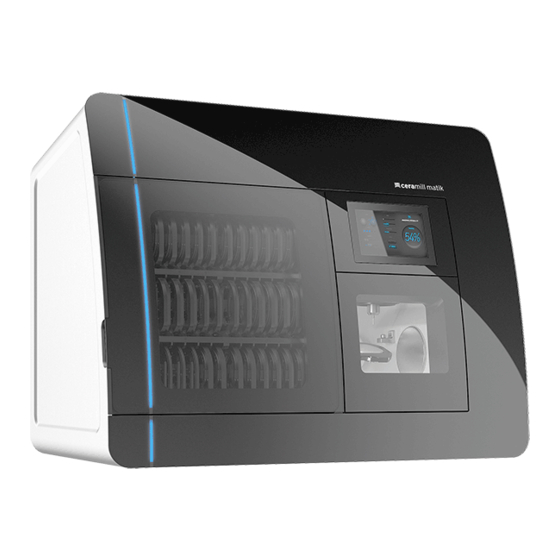
- Page 1 Maintenance instructions...
-
Page 3: Table Of Contents
3 General Maintenance and Service Plan quality, reliability and innovation; the basis for for Ceramill Matik ....5 long life and perfect operation. _________________________________________... -
Page 4: General Maintenance And Cleaning
E X P L A N A T I O N O F S Y M B O L S Explanation of Symbols General Maintenance Other symbols in the Manual NOTE: and Cleaning Instruc- Warning indications tions Possible machine damage through dried-in Symbol Meaning coolant/lubricant and bound in milling dust. -
Page 5: General Maintenance And Service Plan For Ceramill Matik
G E N E R A L M A I N T E N A N C E A N D S E R V I C E P L A N F O R C E R A M I L L M A T I K General Maintenance and Service Plan for Ceramill Matik... -
Page 6: Maintenance Work
M A I N T E N A N C E W O R K Maintenance Work Cleaning the milling chamber 3. Screw in accessory as required. This ensures that the collet cannot become 1. Take water gun out of base cabinet. 2. -
Page 7: Cleaning And Lubricating The Collet
M A I N T E N A N C E W O R K Cleaning and lubricating the collet NOTE: Possible damage to the collet! ▷ Only use the provided collet grease for lubrication of the collet cone. Do not use other types of grease. - Page 8 M A I N T E N A N C E W O R K 7. Clean collet cone with collet brush [4] from 8. Remove a small quantity of collet 9. Apply collet grease extensively onto collet 6. Clean collet with felt cone [2]. both sides.
-
Page 9: Checking The Coolant/Lubricant (C/L)
M A I N T E N A N C E W O R K Checking the coolant/lubricant (C/L) NOTE: Health hazards are possible through improper handling of C/L! ▷ Use only C/L recommended by the manufacturer! ▷ Observe the safety instructions and handling regulations for C/L! ▷... - Page 10 M A I N T E N A N C E W O R K 5. Remove refractometer and pipette from the drawer. 7. Apply coolant/lubricant from the pipette 8. Close the lid of the refractometer. 9. Hold the refractometer against a light 6.
- Page 11 M A I N T E N A N C E W O R K 14. If required, move the filter-strap drawer until screws on both sides are engaged in the slotted hole. 15. Close the Cleanstream drawer.
-
Page 12: Changing Coolant/Lubricant (C/L)
M A I N T E N A N C E W O R K Changing coolant/lubricant (C/L) NOTE: Health hazards are possible through improper handling of C/L! ▷ Use only C/L recommended by the manufacturer! ▷ Observe the safety instructions and handling regulations for C/L! ▷... - Page 13 M A I N T E N A N C E W O R K 7. When the tank is empty: Shut wastewater 6. Open wastewater valve. valve. 5. Connect wastewater hose. The tank drains. 8. Clean tank with a cloth. 9.
- Page 14 M A I N T E N A N C E W O R K 15. Close the lid of the refractometer. 16. Hold the refractometer against a light 17. Refill coolant or water, as required (steps The measuring surface must be com- source and look through the ocular (eye- The read value should be between 12 to 16).
-
Page 15: Changing The Airstream Filter Bag
M A I N T E N A N C E W O R K Changing the Airstream filter bag 1. Disconnect hose and remove Airstream 2. Unscrew wing bolts on side of Airstream unit from base cabinet. unit. 3. Remove side cover. 4. -
Page 16: Changing The Filter Fleece
M A I N T E N A N C E W O R K Changing the filter fleece 1. Fully open Cleanstream drawer. 2. Remove upper cover. 4. Fold bracket up and remove roll. 3. Unscrew wing bolts and remove side cover. 9. - Page 17 M A I N T E N A N C E W O R K 12. Remove the adhesive-tape covering from 10. Insert roll with adhesive tape: the roll. 11. Pull fleece downward. 13. Press fleece against adhesive tape. 14. Adapt the fleece to the interior contour. 15.
-
Page 18: Changing The Filter Cartridge
M A I N T E N A N C E W O R K Changing the filter cartridge 2. Pull up both knobs on the right and left side of the filter-strap drawer and turn them 1. Fully open Cleanstream drawer. by 90°. - Page 19 M A I N T E N A N C E W O R K 13. Turn both knobs on the right and left side 14. If required, move the filter-strap drawer of the filter-strap drawer by 90°. until screws on both sides are engaged in 11.
-
Page 20: Maintenance Confirmations
M A I N T E N A N C E C O N F I R M A T I O N S Maintenance Confirmations Maintenance confirmations by customer (weekly) Maintenance Date Date Date Date Date Date Date Date Date Date Date... -
Page 21: Maintenance Confirmations By Customer (As Required)
M A I N T E N A N C E C O N F I R M A T I O N S Maintenance confirmations by customer (as required) Maintenance Date Date Date Date Date Date Date Date Date Date Date Date... -
Page 22: Maintenance Confirmations By Technician
M A I N T E N A N C E C O N F I R M A T I O N S Maintenance confirmations by technician 1. Maintenance 2. Maintenance 3. Maintenance 4. Maintenance Initials: Signature: Initials: Signature: Initials: Signature: Initials:... - Page 24 Made in the European Union ISO 13485 ISO 9001 Manufacturer | Hersteller Distribution | Vertrieb Distribution | Vertrieb D/A Amann Girrbach AG Amann Girrbach GmbH Herrschaftswiesen 1 Dürrenweg 40 6842 Koblach | Austria 75177 Pforzheim | Germany Fon +43 5523 62333-105...
Need help?
Do you have a question about the Ceramill matik and is the answer not in the manual?
Questions and answers