
Related Manuals for Fluidmaster K-507A-008


Summary of Contents for Fluidmaster K-507A-008
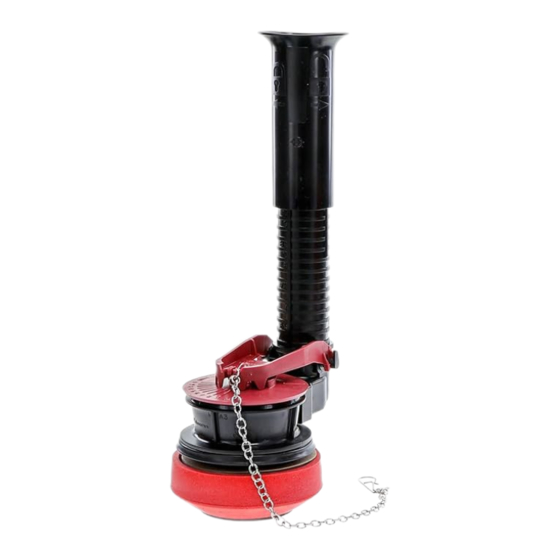
- Page 1 K-507A-008 ADJUSTABLE 2˝ FLUSH VALVE REPAIR KIT HELPFUL TOOL INCLUDED! VIDEO HOW-TO VIDEO VISIT: FLUIDMASTER.COM K-507A-008 PRODUCT PAGE SPANISH - Page 19...
-
Page 2: Getting Started
FLUSH VALVE SEE INSTRUCTION VIDEO ON WEBSITE FOR REFERENCE Bucket Sponge Overflow Pipe HOW-TO VIDEO Scissors Large Adjustable VISIT: FLUIDMASTER.COM TURN Pliers (Optional) K-400H-021 PRODUCT PAGE CLOCKWISE 502 Universal Flapper Red Wrench B: DRAIN WATER Flush toilet to drain most of the water from the tank. - Page 3 STEP 2: REMOVE OLD PARTS E: REMOVE TANK FROM BOWL A: REMOVE CONNECTOR Using plyers, unscrew nuts from Remove water supply under the bowl and remove bolts connector from bottom of fill from tank. valve by twisting connector nut to LEFT the left (clockwise).
- Page 4 STEP 3: INSTALL FLUSH VALVE STEP 3: INSTALL FLUSH VALVE A: REMOVE FLUSH VALVE PIECES FOR INSTALLATION. C: USE RULER ON THE RED WRENCH TO MEASURE AND ADJUST NEW FLUSH VALVE Remove cardboard from under flapper and discard. Remove gasket (a), locknut (b) and friction washer (c) (cardboard) Mark the flush valve 1”...
- Page 5 STEP 4: STEP 4: INSTALL TANK-TO-BOWL GASKET GASKET FOR GERBER TOILETS ® GERBER TOILETS: A: IDENTIFY YOUR GASKET ® Tear the three perforated tabs off the black gasket. All Other Gerber Kohler ® ® (Below) (p.9) (p.10) B: INSTALL LOCKNUT Place the black gasket (a) onto the bottom of the valve, followed by the friction washer (b) and locknut (c).
- Page 6 STEP 4: STEP 4: GASKET FOR KOHLER TOILETS GASKET FOR KOHLER TOILETS ® ® (CONT.) KOHLER TOILETS: ® Use the red wrench to tighten the locknut 1/2 turn beyond hand- Position black gasket onto bot- tight. Do not overtighten. tom of tank and press plugs into holes.
-
Page 7: Step 6: Finishing Steps
STEP 5: SECURE TANK TO BOWL STEP 6: FINISHING STEPS A: INSTALL RUBBER WASHERS ATTACH REFILL CLIP TO Rubber OVERFLOW PIPE Place one rubber washer on each washer tank bolt. Note: If refill tube is too long to fit inside tank with lid closed, remove refill tube from fill valve refill port, cut tube and reattach to port. - Page 8 Hint: The higher the number, the longer the flapper stays open for more water flushed. #FixedMyToilet #Fluidmaster C: FINAL SETTING Once unable to flush, adjust dial up one for final setting. Still not working exactly right? See the next page for Troubleshooting.
-
Page 9: Troubleshooting
TROUBLESHOOTING TROUBLESHOOTING WATER LEVEL IN BOWL IS TOO LOW WATER FROM REFILL TUBE MUST FLAPPER MAY BE CLOSING TOO SOON FLOW THROUGH OVERFLOW PIPE Give flapper chain approximately 1/2" of slack. (small “j” shape) Make sure the refill tube is supplying water down Refill Tube overflow pipe. -
Page 10: Guía De Instalación Rápida
NOTES GUÍA DE INSTALACIÓN RÁPIDA RESUMEN DE PIEZAS HERRAMIENTAS NECESARIAS VÁLVULA DE DESCARGA Cubeta Esponja Tubo de Desagüe Tijeras Alicates Ajustables (Opcional) Grandes Tapón Llave Roja Universal 502 Arandela de Fricción Arandela de Goma (x3) Arandela de Acero Inoxidable (x3) Contratuerca Tuerca Hexagonal Grande (x3) Empaquetadura de... - Page 11 GUÍA DE INSTALACIÓN RÁPIDA GUÍA DE INSTALACIÓN RÁPIDA PASO 1: PREPARE EL TANQUE PASO 3: INSTALE LA VÁLVULA DE DESCARGA (IMÁGENES: P.3) (IMÁGENES: P.6) REMUEVA PARTES DE LA VÁLVULA DE DESCARGA PARA LA INSTALACIÓN. CIERRE EL AGUA. Remueva el cartón debajo del tapón y tire. Remueva la empaquetadura (a), DRENE EL AGUA.
- Page 12 GUÍA DE INSTALACIÓN RÁPIDA GUÍA DE INSTALACIÓN RÁPIDA PASO 4: INSTALE LA EMPAQUETADURA DE TANQUE- INODOROS KOHLER ® (IMÁGENES P.10-11) A-TAZA Coloque la empaquetadura negra en el fondo del tanque y presione los tapones (IMÁGENES: P.8) en los orificios. Asegúrese de que la empaquetadura del tanque esté al ras con el fondo del tanque del inodoro.
- Page 13 GUÍA DE INSTALACIÓN RÁPIDA GUÍA DE INSTALACIÓN RÁPIDA PASO 7: AFINE LA DESCARGA PASO 6: PASOS PARA FINALIZAR (IMÁGENES P.14) (IMÁGENES P.13) PRUEBA DE DESCARGA. CONECTE EL CLIP DE RELLENO A LA VÁLVULA DE DESCARGA. Descarte 3 cuadros de papel higiénico en la taza y después descargue. NOTA: Si la manguera de relleno es muy larga para caber dentro del tanque con la tapa del tanque cerrada, remueva la manguera de relleno del puerto de relleno, AJUSTE PARA DESCARGA DE MAYOR RENDIMIENTO.
-
Page 14: Solución De Problemas
• Si el inodoro no está nivelado y se inclina hacia la izquierda o hacia la derecha, afloje o apriete una de las dos tuercas frontales. #FixedMyToilet Para asistencia para la instalación, comuníquese ¿PREGUNTAS #Fluidmaster con nuestro departamento de servicio técnico. ADICIONALES? EMAIL, CHAT LLAME nuestro número gratuito. -
Page 15: Additional Questions
’n Sparkle® de Fluidmaster para aquellos usuarios que desean utilizar limpiadores de tazas dentro del tanque SIN ANULAR la GARANTÍA DE FLUIDMASTER, ya que este sistema no daña los componentes. NO apriete demasiado las tuercas o el tanque, ya que la taza se puede agrietar.
Need help?
Do you have a question about the K-507A-008 and is the answer not in the manual?
Questions and answers