Table of Contents
Advertisement
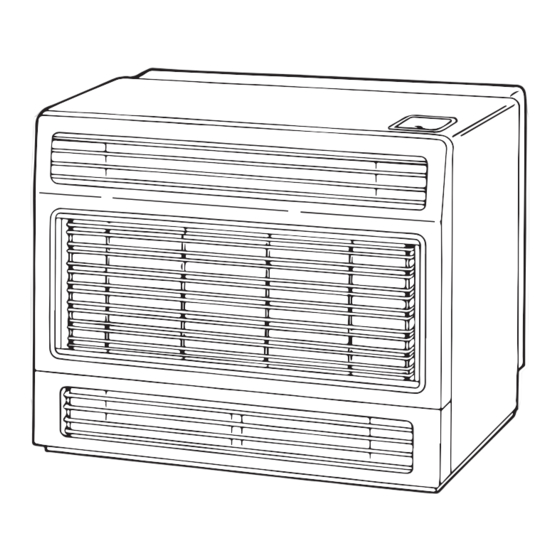
Operation & Installation Manual
SPECTRUM 28
Radiant /Convector Space Heater
This appliance shall be installed in accordance with:
• Manufacturer's Installation Instructions
• Current AS/NZS 3000 & AS/NZS 5601
• Local Regulations and Municipal Building Codes including local OH&S requirements
This appliance must be installed, maintained and removed only by an Authorised Person.
For continued safety of this appliance it must be installed and maintained in
accordance with the manufacturers instructions.
To suit Models
REH281 EB (Inbuilt)
REH281 EC (Console)
Advertisement
Table of Contents

Related Manuals for Rinnai SPECTRUM 28 REH281 EB


Summary of Contents for Rinnai SPECTRUM 28 REH281 EB
- Page 1 Operation & Installation Manual SPECTRUM 28 Radiant /Convector Space Heater To suit Models REH281 EB (Inbuilt) REH281 EC (Console) This appliance shall be installed in accordance with: • Manufacturer’s Installation Instructions • Current AS/NZS 3000 & AS/NZS 5601 • Local Regulations and Municipal Building Codes including local OH&S requirements This appliance must be installed, maintained and removed only by an Authorised Person.
- Page 2 We trust you will have many years of comfort and enjoyment from your appliance. BEFORE PROCEEDING WITH THE OPERATION OR INSTALLATION OF YOUR NEW HEATER PLEASE READ THIS MANUAL THOROUGHLY AND GAIN A FULL UNDERSTANDING OF THE REQUIREMENTS, FEATURES AND OPERATION OF YOUR NEW APPLIANCE. Rinnai REH281 - SPECTRUM 28 OIM...
-
Page 3: Table Of Contents
Installation Instructions Specifications ������������������������������������������������������������������������������������������������������������������������������������������������������������������� 16 Console Installation ���������������������������������������������������������������������������������������������������������������������������������������������������������� 16 Unpacking �������������������������������������������������������������������������������������������������������������������������������������������������������������������������� 16 Included in Carton ������������������������������������������������������������������������������������������������������������������������������������������������������������� 16 Before Installation ������������������������������������������������������������������������������������������������������������������������������������������������������������� 16 Installation General ����������������������������������������������������������������������������������������������������������������������������������������������������������� 16 Location ������������������������������������������������������������������������������������������������������������������������������������������������������������������������������ 17 TV & Ornamentation Warning ������������������������������������������������������������������������������������������������������������������������������������������� 17 Rinnai REH281 - SPECTRUM 28 OIM... - Page 4 Flue Terminal Location ������������������������������������������������������������������������������������������������������������������������������������������������������ 21 Flueing Installation into a Masonry Fireplace Connecting to Twin Skin Flue System Testing - Console and Inbuilt Installation & Commissioning Checklist ������������������������������������������������������������������������������������������������������������������������� 28 Installation Record ������������������������������������������������������������������������������������������������������������������������������������������������������������ 29 Specifications Wiring Diagram ������������������������������������������������������������������������������������������������������������������������������������������������������������������ 31 Contacts Rinnai REH281 - SPECTRUM 28 OIM...
-
Page 5: Warnings & Important Information
The appliance is not intended for use by young children or infirm persons without supervision. Young children and the infirm SHOULD be supervised at all times when in the vicinity of this heater while it is in operation. Rinnai REH281 - SPECTRUM 28 OIM... -
Page 6: General Safety Warnings
DO NOT MODIFY THIS APPLIANCE. Modifying from original specifications may create a dangerous situation and will void your warranty. ONLY the flue components specified by Rinnai MUST be used. Unpack the heater and check for damage. DO NOT INSTALL A DAMAGED HEATER. If the heater is damaged, contact your supplier for advice. -
Page 7: Operational Safety Warnings
DO NOT spray aerosols in the vicinity of this appliance while it is in operation. Most aerosols contain flammable substances which can be a heater hazard if used near this heater when it is in use. Rinnai REH281 - SPECTRUM 28 OIM... -
Page 8: Safety Devices
750 mm in front of the heater. When the heater is operated for the first time or after long periods of non use a slight odour may be emitted, this is normal. However if odours persist switch ‘OFF’ the appliance and contact Rinnai. SAFETY DEVICES... -
Page 9: Console Carton Contents / Item Checklist
Screw 8g x 10mm. Screw 8g x 40mm. * Installer please note that this item is shipped inside the heater, below the gas control on the bottom right hand side of the appliance. NOTE Rinnai REH281 - SPECTRUM 28 OIM... -
Page 10: Inbuilt Carton Contents / Item Checklist
½” BSP flared nut by barrel union 90° elbow * * Installer please note that this item is shipped inside the heater, below the gas control on the bottom right hand side of the appliance. NOTE Rinnai REH281 - SPECTRUM 28 OIM... -
Page 11: General Information
750mm in front of it. SERVICE Rinnai Australia has a service and spare parts network in all states. Our service network personnel are fully trained and equipped to give the best service on your Rinnai appliance. If your appliance needs service, please contact Rinnai, refer to the back cover for contact details. -
Page 12: Operation
If the burner does not remain alight, push the button again and release it, this will return it to the “OFF” position. Wait 30 seconds, then repeat the ignition procedure. (The ignition button must be in the “OFF” position before attempting re-ignition). After ignition the heater is at its lowest setting with one burner alight. Rinnai REH281 - SPECTRUM 28 OIM... -
Page 13: To Increase The Heat
Press and release the buttons in order from right to left until all three buttons are in the “OFF” position (UP) position. The fan will stop when the heater cools down. Ensure all burners are extinguished. Rinnai REH281 - SPECTRUM 28 OIM... -
Page 14: Care & Maintenance
Use the following chart to help determine whether a service call is required, however if you are unsure about the way your heater is operating, or if you have any other faults or problems, please refer to your installer or a Rinnai Customer Care Centre Consultant. -
Page 15: Fan Filter
Service calls of this nature may be chargeable. NOTE Faults caused by insufficient gas supply, gas quality, installation errors or operation errors are not covered by the Rinnai warranty. Refer to separate Warranty Manual for details. SAFETY DEVICES Overheat Switch This device automatically cuts off the gas if the heater exceeds a pre-determined temperature. -
Page 16: Installation Instructions
Undo straps, lift carton off heater. Never lift heater out of carton by top louvres. • Check for damage. If the heater is damaged contact your supplier or Rinnai for advice BEFORE INSTALLATION. • • Check heater supplied is correct for the gas type in your area. -
Page 17: Location
For durability of surfaces you should contact the relevant manufacturer for their specification. RINNAI DOES NOT TAKE ANY RESPONSIBILITY FOR ANY DAMAGE OCCURRING TO ANY ITEMS INSTALLED ABOVE AND IN THE VICINITY OF THE HEATER. -
Page 18: Installation Instructions (Inbuilt)
INLET UNION For ease of connection a combined inlet union/ copper elbow is provided with every heater. It is situated at the bottom right hand side below the control. Rinnai REH281 - SPECTRUM 28 OIM... -
Page 19: Remove Inlet Union From Unit
PURGE SUPPLY OF AIR AND SWARF All foreign materials such as filings must be purged from the gas supply, as they could cause the gas valve to malfunction. DON'T FORGET TO PUT FLARE NUT ON TUBE BEFORE FLARING. Rinnai REH281 - SPECTRUM 28 OIM... - Page 20 TEST OPERATION See page 26. COWL An approved cowl must be installed on all chimneys. Size: Minimum 100mm diameter. Rinnai REH281 - SPECTRUM 28 OIM...
-
Page 21: Flue Terminal Location
The flue system must be fully assembled and secured in place before the heater is installed into the enclosure. Refer to separate Flueing Installation Manual for Rinnai Flamefire heaters. O p ening into a b u il d i n g... - Page 22 550mm between studs. Check to make sure ceiling and roof structure will not obstruct flue. *Twin skin flue NOT supplied by Rinnai. CUT OPENING IN WALL Wall box measures 330mm X 100mm, but opening required is 335mm X 160 mm. This is to allow for ventilation around the wall box.
- Page 23 Secure top spacer with the two screws provided. THE HEATER IS NOW SECURED TO THE WALL. CONNECT GAS and CHECK FOR GAS LEAKS: See page 19 & 20. TEST UNIT and INSTRUCT CUSTOMER: See page 26. Rinnai REH281 - SPECTRUM 28 OIM...
-
Page 24: Installation Into A Masonry Fireplace
See page 23. CONNECT GAS and CHECK FOR GAS LEAKS: See page 19 & 20. TEST UNIT INSTRUCT CUSTOMER: See page 26. This installation method uses an inbuilt appliance connected to a twin skin flue system. Rinnai REH281 - SPECTRUM 28 OIM... -
Page 25: Connecting To Twin Skin Flue System
INSTALLATION USING TWIN SKIN FLUE AND INSULATED BOX FOR TIMBER FRAME OPENINGS Cover kit must be fitted to sides of heater firebox. Kit is available from Rinnai. This installation method is required for and uses an inbuilt appliance connected to a commercially available twin skin flue system. -
Page 26: Testing - Console And Inbuilt
When you are satisfied that the heater is working correctly, re-assemble front panels, refit Fan Filter. If you are unable to get the unit to operate correctly, contact your agent or Rinnai for advice. Check page 14 "Fault Finding" first. EXPLAIN INSTRUCT CUSTOMER ON USE OF UNIT. - Page 27 After a minimum of 5 minutes of operation or when the unit has warmed up, check for spillage as shown in pictorial instructions below. If unsure contact Rinnai for advice. DOWNDRAUGHT DIVERTER TESTING The downdraught diversion vent is along this area, test for spillage along this area behind the wire guard.
-
Page 28: Installation & Commissioning Checklist
8. Is the end-user fully aware of operating procedure? 9. Has the wire guard been fitted? 10. Has the customer been advised not to remove the guard? 11. Has the customer been advised to service the heater every two years? Rinnai REH281 - SPECTRUM 28 OIM... -
Page 29: Installation Record
Serial Number * Installation Address: * This information will need to be copied from the data plate, located on the inside of the appliance. Ensure this Operation and Installation manual is left with the customer. IMPORTANT Rinnai REH281 - SPECTRUM 28 OIM... -
Page 30: Specifications
Rinnai part number 90192303. Tangential 2 speed 40 watt rating. Bottom right hand side, behind front panel. Data Plate Rinnai are continually updating and improving products, therefore specifications are subject to change without prior notice. NOTE Rinnai... -
Page 31: Wiring Diagram
SPECIFICATIONS WIRING DIAGRAM Rinnai REH281 - SPECTRUM 28 OIM... - Page 32 P.O. Box 460 Braeside, Victoria 3195 AU45204 Rinnai has a Service and Spare Parts network with personnel who are fully trained and equipped to give the best service on your Rinnai appliance. If your appliance requires service, please call our National Help Line. Rinnai recommends that this appliance be serviced at least every 2 years.
Need help?
Do you have a question about the SPECTRUM 28 REH281 EB and is the answer not in the manual?
Questions and answers