Table of Contents
Advertisement
FS81 User Manual v1.1
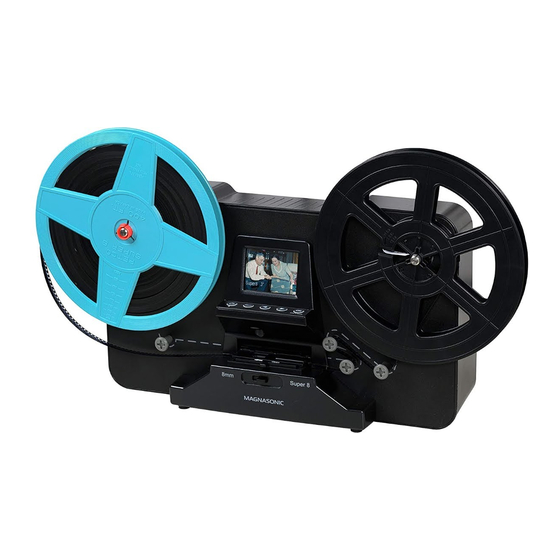
Super 8/8mm Film Scanner
Thank you for your purchase of this Magnasonic product. Please read this user manual
carefully before using product to ensure proper use. Keep this manual in a safe place for
future reference.
magnasonic.com/support
be exactly as shown. © MAGNASONIC®, MAGNASONIC®, the MAGNASONIC® marks may be registered. All other
trademarks are property of their respective owners
Advertisement
Table of Contents

Related Manuals for Magnasonic FS81


Summary of Contents for Magnasonic FS81
- Page 1 Keep this manual in a safe place for future reference. magnasonic.com/support be exactly as shown. © MAGNASONIC®, MAGNASONIC®, the MAGNASONIC® marks may be registered. All other trademarks are property of their respective owners...
- Page 2 Thank you for your purchase of your Magnasonic product. We hope you enjoy your experience. Help others make the right choice, leave a product review and share your experience. Questions? Give us a chance to help, we’re just a click away.
-
Page 3: Table Of Contents
Formatting SD Card ..............14 Changing the Language ............14 Cleaning and Care ............... 15 Scanning Error ................15 FAQ / Troubleshooting............... 16 Appendix A ..................16 ................17 Important Safety Instructions ..........18 FCC Information ................18 Magnasonic® Warranty .............. 19... -
Page 4: What's Included
What’s Included Super 8/8mm Film Scanner 7” Reel Reel Adapter (x2) Power Adapter USB Cable TV Out Cable (RCA) LIFETIME CUSTOMER SUPPORT Cleaning Cloth User Manual Lifetime Customer Support 1 Year Warranty... -
Page 5: Product Information
Product Information Front 1. Left Reel Shaft 2. LCD Display 3. Film Insert Door 4. Film Type Switch 5. Right Reel Shaft Super 8 Back DC 12V Mini USB Port TV Out Port SD Card Slot Power Port(RCA) Buttons MENU Power Main Menu Backward... -
Page 6: Powering On Your Super 8/8Mm Scanner
Powering on Your Super 8/8mm Scanner 1. Insert an SD card (not included) into the SD card slot at the back of to scan and save video. IMPORTANT: Inserting an SD Card after powering on the scanner will cause the scanner to DC 12V 2. -
Page 7: Preparing Your Film
Preparing Your Film Super 8... - Page 8 Film Route Line Super 8 Film Slot...
-
Page 9: Selecting Film Type
Selecting Film Type Super 8 Super 8... -
Page 10: Adjusting Your Scan Settings
Adjusting Your Scan Settings Exposure (Brightness) IMPORTANT: Exposure can only be adjusted before recording video. You can adjust the exposure by going to Exposure on the main menu. Use the buttons to change the brightness value between 2.0 (brighter) and –... -
Page 11: Scanning Your Film
Scanning Your Film button to exit. You should see the scanning mode screen below. Scanning Mode Screen Current set exposure value Reel size Film Type This icon displays when an Super8 7" SD card is inserted IMPORTANT: Make sure that you are done changing your Exposure, Sharpness, and Frame Adjustment settings before moving onto the next step. -
Page 12: Viewing Your Scanned Videos
Viewing Your Scanned Videos Press the button to enter the main menu. Press the button to select Playback and press the button to enter playback mode. Press the button to play or pause the selected video. Press the buttons to move between videos. Press the button again to stop playback on any video and enter the Playback MENU... -
Page 13: Rewinding Your Film
Rewinding Your Film Note: The red reel adapter may need to be removed. if necessary. Remember to rotate the reel 2-3 times to secure it in place. Super 8 Press the button to open the main menu. MENU Use the button to select Fast Forward and press the button to select it. -
Page 14: Downloading Video To Your Pc
Downloading Video to Your PC Note: The scanner will not scan directly to your PC. Plug the other end of the USB cable into the USB port on your PC. Ensure there is an SD card in the SD card slot on the scanner. Press the button on the scanner to turn it on. -
Page 15: Cleaning And Care
Clean inside of the product only with a dry cloth. Scanning Error below steps. installed under the white tabs. Press the button to clear the error message and attempt scanning again. MENU determine the root cause of the issue. If the issue persists visit www.magnasonic.com/contact for further assistance. -
Page 16: Faq / Troubleshooting
FAQ / Troubleshooting Issue Solution How can I get the best quality scan possible? How should I prepare the be done with the included cleaning cloth. possible scan? I’ve noticed a consistent There is likely a small amount of dust inside your unit. Use the included cleaning cloth to ensure there is no scanned. - Page 17 3.53 Mega pixels (2304 x 1536) 1/3” CMOS Image Sensor sensor 2.31” color TFT LCD Display Automatic White Balance Automatic/Manual (-2.0 EV ~ +2.0 EV) Exposure Control Supported Film Type English, French, German, Italian, Spanish, Languages Chinese Video Recording (no sound) Scanning Method 1080p (1920 x 1080) Resolution...
-
Page 18: Important Safety Instructions
Important Safety Instructions Do not attempt to dissemble or modify any part of the scanner. If any of the following conditions are present, stop using immediately, unplug the power A. If there is any smoke or unusual smell while using. B. -
Page 19: Magnasonic® Warranty
In the unlikely event that Magnasonic® Warranty Thank you for choosing Magnasonic. We guarantee your investment in our products is a solid one! Extensive thought, research, planning, and design goes into every product we make. - Page 20 If in any situation your purchase displays a manufacturer’s defect during the warranty period and does not function correctly, Magnasonic will repair your product and cover all parts, labour, and return costs upon delivery of the Magnasonic product together with proof of purchase.
Need help?
Do you have a question about the FS81 and is the answer not in the manual?
Questions and answers
if i san one film on the sd card do i need to protectthe file before scanning other filmmto keep all my files on the sd card
The Magnasonic FS81 saves scanned videos directly onto an SD card, but there is no mention of automatic file overwriting. To prevent accidental loss of previous scans, it is recommended to back up files before scanning new films.
This answer is automatically generated