Advertisement
Quick Links
Advertisement

Subscribe to Our Youtube Channel
Summary of Contents for BASKETBALL PROBASE probase01
- Page 1 GUIDE INSTALLATION...
-
Page 2: Important Safety Notice
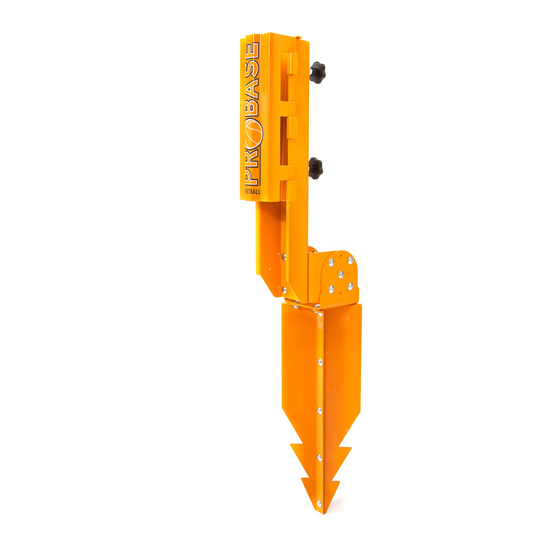
WARNING Before using this product, please read the following carefully: Your PROBASE and your portable basketball hoop MUST be assembled and installed according to the instructions. Failure to comply with the instructions may result in SERIOUS INJURY. PROBASE Inc. is not responsible for any health or safety concerns or any material breakdown once the buyer has installed the PROBASE. - Page 3 INSTALLATION GUIDE COMPONENTS Important Assemblies including 15 mm yellow flange nuts (integrated washer nuts), you will not have flat washers in your kit. Stake (2 identical components) Tapping block Holder (plastic or wood) Main pole holder Handle bolts Pivot Bolts Pivot base 15 or 17 mm nuts Removable front cover Flat washers Assemblies including...
-
Page 4: Exploded View
INSTALLATION GUIDE EXPLODED VIEW - 4 -... - Page 5 INSTALLATION GUIDE TOOLS NEEDED Crowbar or steel rod Sledgehammer Level 15 or 17 mm open key wrench or ratchet tool - 5 -...
- Page 6 INSTALLATION GUIDE CHOOSE YOUR SPOT Choose a location that allows a stake to be pushed in and that is located directly behind a solid surface such as pavement or a concrete curb. MAKE A PILOT HOLE Make a pilot hole about 24 inches deep using a pinch point crowbar or a steel rod.
- Page 7 INSTALLATION GUIDE ASSEMBLE THE PIVOT BASE TO THE STAKE Assemble the pivot base (D) to the upper part of the stake, aligning the 4 holes of each part. Insert 4 bolts (J), 4 flat washers* (L) and 4 nuts (K) into the 4 holes, and tighten the bolts firmly. FASTEN THE BOLTS Fasten 8 bolts (J), 8 flat washers* (L) and 8 nuts (K), into the 8 outer holes located on the side of the...
- Page 8 INSTALLATION GUIDE PREPARING THE TAPPING BLOCK (plastic or wood) Place the tapping block (G) inside the pivot base (D). Insert the tapping block holder (H) into the grooves of the tapping block and push them between the bolts to the base of the tapping block.
- Page 9 INSTALLATION GUIDE IMPORTANT NOTICE ABOUT THE WOODEN OR PLASTIC TAPPING BLOCK The wooden or plastic tapping block (G) has been designed to resist to one single installation. The tapping block (G) is NOT GUARANTEED. Uncontrollable factors such as compacted or rocky grounds, clay soils, the size of the sledgehammer or the striking power may damage the block during the installation.
- Page 10 INSTALLATION GUIDE REMOVE TAPPING BLOCK, TAPPING BLOCK HOLDER AND HARDWARE Once the stake is firmly inserted into the ground, remove the tapping block (G), the tapping block holder (H) the 8 bolts (J), the 8 flat washers*, the 8 nuts and set aside. 10.1 INSERT THE PIVOT Insert the pivot (C) into the pivot base (D). 11.1 SECURE THE TWO PIVOT PARTS TOGETHER Align the middle holes of the two pivot parts and secure with 2 bolts (J),...
- Page 11 INSTALLATION GUIDE 12.1 12.2 ASSEMBLE THE MAIN POLE HOLDER TO THE PIVOT Assemble the main pole holder (B) to the pivot using 1 bolt (J), 1 flat washer (L) and 1 nut (K) installed in the center hole. 12.3 12.4 Tighten firmly. 13.1 13.2 LEVEL THE MAIN POLE HOLDER Level the main pole holder (B) crosswise and lenghtwise.
- Page 12 INSTALLATION GUIDE 14.1 14.2 INSERT HARDWARE Once the main pole holder is levelled, insert the remaining bolts (J), flat washers* (L), nuts (K) in each of the unused holes. 14.3 Tighten firmly. 15.1 INSERT THE POLE Insert the pole of your basketball hoop into the main pole holder (B) by placing it on the ground and pulling it up.
- Page 13 INSTALLATION GUIDE 16.1 16.2 SECURE THE INSTALLATION Once the pole is inside, secure the installation by installing the removable front cover (E). 17.1 17.2 INSERT THE PRESSURE PLATE Insert the pressure plate (F) behind the pole. 18.1 18.2 INSERT THE HANDLE BOLTS Screw the 2 handle bolts (I) into the 2 welded nuts on the back of the main post holder (B).


Need help?
Do you have a question about the probase01 and is the answer not in the manual?
Questions and answers