Table of Contents
Advertisement
Available languages
Available languages
Advertisement
Chapters
Table of Contents

Related Manuals for AUX FH Series


Summary of Contents for AUX FH Series
- Page 1 INVERTER SERIE FH ASW-FH CL80001 ~ CL80004...
- Page 2 ....................................................
-
Page 3: Table Of Contents
Manual de Instalación y Usuario ÍNDICE MANUAL DE USUARIO ....................Leer antes de la operacion....................Precauciones de seguridad ................... Descripcion de las partes ....................Instrucciones de funcionamiento ................... Cuidado y mantenimiento ..................... Solucion de problemas ....................MANUAL DE INSTALACION ..................Precauciones de seguridad .................. -
Page 4: Manual De Usuario
MANUAL DE USUARIO Lea el presente manual con detenimiento antes de usar el aire acondicionado y consérvelo para futuras consultas. AIRE ACONDICIONADO Tipo INVERTER El diseño y las especificaciones del presente manual están sujetos a cambio sin previo aviso para la mejora del producto. Contacte con su agente de ventas o fabricante para más informa- ción Lea el presente manual:... -
Page 5: Leer Antes De La Operacion
LEER ANTES DE LA OPERACION ATENCIÓN Contacte con un técnico de servicio autorizado para la reparación y el mantenimiento de la unidad. Contacte con un instalador autorizado para la instalación de la unidad. El uso de este electrodoméstico no está pensado para personas (niños incluidos) con una reducida capacidad física, sensorial o mental, o que carezcan de experiencia y conocimientos a menos que estén siendo supervisados o instruidos en el uso del electrodoméstico por parte de una persona que se responsabilice de su seguridad. -
Page 6: Precauciones De Seguridad
PRECAUCIONES DE SEGURIDAD Para evitar lesiones al usuario y otras personas así como daños materiales, se deben respetar las siguientes instrucciones. El uso incorrecto de la unidad por no leer las instrucciones puede causar daños físicos y materiales. Las indicaciones se clasifican según los dos símbolos siguientes: ATENCIÓN Indica posibilidad de muerte o daño grave. - Page 7 PRECAUCIONES DE SEGURIDAD ATENCIÓN No utilice agua para limpiar Ventile la habitación debi- Cuando se deba sustituir el el aire acondicionado. damente cuando use la filtro metálico, no toque las unidad con calderas, etc. partes metálicas de la unidad. El agua puede penetrar en la Podría haber carencia Podría provocar daño físico.
-
Page 8: Descripcion De Las Partes
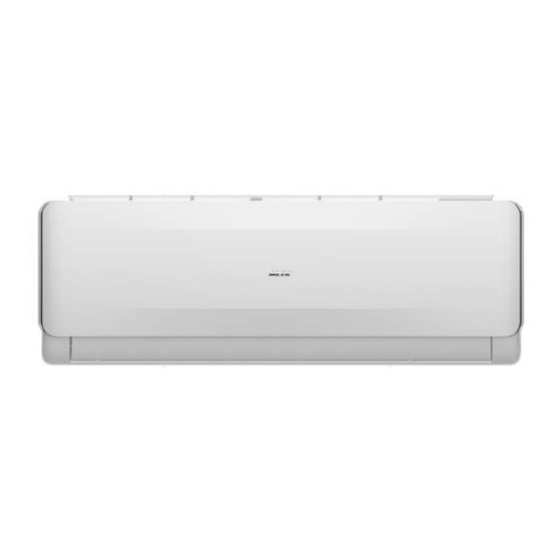
DESCRIPCION DE LAS PARTES ★ Unidad interior Unidad interior Unidad exterior ★ Unidad exterior NOTA: Todas las ilustraciones de este manual son solo explicativas. Su aire acondicionado puede ser algo diferente. La forma real prevalecerá. -
Page 9: Instrucciones De Funcionamiento
INSTRUCCIONES DE FUNCIONAMIENTO Temperatura de funcionamiento Refrigeración 18 ~ 32 ºC Interior 0 ~ 30 ºC Calefacción Refrigeración -10 ~ 47 ºC Exterior Calefacción -10 ~ 30 ºC Funcionamiento manual El funcionamiento manual puede emplearse de modo temporal si el mando a distancia no funciona o si la unidad precisa de mantenimiento. - Page 10 INSTRUCCIONES DE FUNCIONAMIENTO Control de la dirección del flujo de aire Funcionamiento de la unidad Modo AUTO Ajuste correctamente la dirección del flujo de aire. De lo contrario, podría causar sensaciones molestas Al seleccionar el modo de funcionamiento AUTO, la unidad eligirá...
-
Page 11: Cuidado Y Mantenimiento
CUIDADO Y MANTENIMIENTO Limpieza de la rejilla y la carcasa Apague el sistema antes de proceder a su limpieza. Utilice un trapo suave y seco para limpiar la unidad. No use lejías ni materiales abrasivos. NOTE: El cable de corriente debe estar desconectado antes de proceder a la limpieza de la unidad interior. - Page 12 CUIDADO Y MANTENIMIENTO Mantenimiento Si va a dejar la unidad si funcionamiento durante un largo periodo, lleve a cabo lo siguiente: Haga funcionar el ventilador interior durante varias horas para secar el interior de la unidad. Pare la unidad, desconéctela de la alimentación y retire las pilas al mando a distancia. Limpie los filtros.
-
Page 13: Solucion De Problemas
SOLUCION DE PROBLEMAS Los siguientes sucesos podrían ocurrir durante el funcionamiento normal de la unidad: Protección del aire acondicionado: Protección del compresor El compresor no puede volver a ponerse en marcha hasta transcurridos 3 minutos de su parada. Aire anti-frío (solo en modelos frío/calor) La unidad no está... - Page 14 SOLUCION DE PROBLEMAS Si se produce alguno de los siguientes errores, detenga el aire acondicionado inmediatamente, desconecte la corriente y, a continuación, vuelva a conectarlo. Si el problema persiste, desco- necte la corriente y contacte con el servicio de atención al cliente más próximo. El indicador de funcionamiento u otros indicadores continúan parpadeando.
- Page 15 SOLUCION DE PROBLEMAS Listado de códigos de error: Código de Error Indicador "COOLING" Indicador "HEATING" Indicador "TIMER" Descripción 1 parpadeo Error del sensor de temperatura ambiente unidad interior 2 parpadeos Error del sensor de temperatura de tuberia unidad exterior 3 parpadeos Error del sensor de temperatura de tuberia unidad interior Error del ventilador de la unidad interior o problema de la E4/Fb...
-
Page 16: Manual De Instalacion
MANUAL DE INSTALACIÓN Lea el presente manual con detenimiento antes de usar el aire acondicionado y consérvelo para futuras consultas. AIRE ACONDICIONADO Tipo INVERTER El diseño y las especificaciones del presente manual están sujetos a cambio sin previo aviso para la mejora del producto. Contacte con su agente de ventas o fabricante para más informa- ción Lea el presente manual:... -
Page 17: Precauciones De Seguridad
PRECAUCIONES DE SEGURIDAD PRECAUCIONES DE INSTALACIÓN Lea el presente manual de instalación con detenimiento para asegurar la correcta instalación de la unidad. Si el cable de corriente está dañado, deberá ser sustituido exclusivamente por personal cualificado. La instalación será realizada exclusivamente por personal autorizado y en cumplimiento con la regulación nacional sobre conexiones eléctricas. -
Page 18: Instalacion
INSTALACIÓN ELECCIÓN DE LA MEJOR UBICACIÓN Unidad Interior No debería haber ninguna fuente de calor o corriente cerca de la unidad. No debería haber ningún obstáculo bloqueando la circulación del aire. Un lugar donde sea fácil realizar el drenaje Un lugar donde se tenga en cuenta la prevención de ruido. - Page 19 INSTALACIÓN UNIDAD INTERIOR COLOCACIÓN DE LA PLACA DE MONTAJE NOTA: NOTA: La pared que monta es suficientemente fuerte Encajar la placa de montaje y y sólida para evitar la vibración.. perforar la pared de acuerdo con su estructura y los correspondientes Colocación de placa de montaje puntos de montate.
-
Page 20: Instalacion De La Unidad Interior
INSTALACIÓN UNIDAD INTERIOR COLOCACIÓN DE LA MANGUERA DE DRENAJE Drenaje 1. Ponga la manguera de drenaje con pendiente descendiente .No instale la manguera Coloque y fije la manguera de de drenaje como se ilustra en las Figuras. desagüe al 2. Al conectar el conector de la manguera de drenaje conducto como aísle la parte de conexión del tubo de drenaje se indica en las... - Page 21 INSTALACIÓN UNIDAD INTERIOR CONEXIÓN ELÉCTRICA A LA UNIDAD INTERIOR Trabajos Electricos Normas de seguridad eléctrica para la instalación inicial 1. Si hay un problema serio de seguridad acerca de la fuente de alimentación, los técnicos deben negarse a instalar el aire acondicionado y explicárselo al cliente hasta que se resuelva el problema. 2.
-
Page 22: Instalacion De La Unidad Exterior
INSTALACIÓN UNIDAD EXTERIOR PRECAUCIÓN DE LA UNIDAD EXTERIOR Instale la unidad exterior sobre una base rígida para evitar aumentar el ruido y vibración. Determinar la dirección de salida de aire, donde el aire descargado no esté bloqueado. En caso de que el sitio de instalación esté expuesto a fuertes vientos, como una playa, asegúrese de que el ventilador funciona correctamente poniendo la unidad longitudinalmente en la pared o usando placas de blindaje o anti-polvo. - Page 23 INSTALACIÓN UNIDAD EXTERIOR CONEXIÓN ELÉCTRICA DE LA UNIDAD EXTERIOR 1. Retire la tapa de la caja de conexión eléctrica de la unidad exterior aflojando el tornillo. 2. Conecte los cables conectivos a los terminales como se identifica con sus números coincidentes en el bloque de terminales de las unidades interior y exterior.
- Page 24 INSTALACIÓN UNIDAD EXTERIOR 2. Cuando se usa la bomba de vacio Manómetro priete completamente las tuercas cónicas, A, B, C, D, conecte la válvula manométrica con la válvula de carga de la bomba de -76cmHg vacio, conecte la válvula de gas de la unidad exterior a la entra del manómetro.
-
Page 25: Control Remoto
CONTROL REMOTO Lea el presente manual con detenimiento antes de usar el aire acondicionado y consérvelo para futuras consultas. - Page 26 CONT R OL R EMOTO iFEEL...
- Page 27 CONT R OL R EMOTO TRA NS MIT DIGITAL ON/OFF RUNNING S ET ROOM MODE RUNNING MODE SPEED TIMER ON OFF TI MER FEE LING iFEEL 1 ON/OFF Pulsar este botón para seleccionar entre grados Celsius "ºC" o entre grados Fahrenheit "ºF". 3.
- Page 28 CONT R OL R EMOTO 5. iFEEL "iFEEL" 6. TIMER 7. HEALTH / iCLEAN Esta función realiza una auto limpieza en la unidad interior. Cuando se activa la función "iClean", inicialmente la unidad funciona en modo refrigeración con el ventilador a baja velocidad, durante este período el agua de condensación arrastra el polvo de la batería.
- Page 29 CONT R OL R EMOTO 9. TURBO 10. MODE AUTO COOL HEAT 11. SLEEP Esta función ayuda a ahorrar energia y aporta un mayor comfort durante la noche. Si se activa, el equipo incrementa (en refrigeración) o disminuye (en calefacción) automáticamente la temperatura de consigna 1ºC cada hora durante las primeras 2 horas, el equipo se detiene automaticamente a las 7 horas desde la activación de la función.
- Page 30 CONT R OL R EMOTO 14 . Anti-F *La función Anti-F puede funcionar cuando la unidad se apaga con el mando a distancia en los modos COOL, DRY, o AUTO. El equipo funcionará en modo HEAT, con el ventilador a baja velocidad durante 3 minutos antes de la parada, para eliminar la humedad dentro del evaporador con el fin de evitar que un desprendimiento de mal olor de moho.
- Page 31 CONT R OL R EMOTO...
- Page 32 CONT R OL R EMOTO...
- Page 33 CONT R OL R EMOTO...
- Page 34 Installation and Owner's Manual CONTENT OWNER'S MANUAL ...................... Read before operation ....................Safety precautions ......................Names of parts ....................... Operating instructions ....................Care and maintenance ....................Troubleshooting ......................INSTALLATION MANUAL ..................... Safety precautions ......................Installation ........................Indoor unit installation ....................Outdoor unit installation ....................
-
Page 35: Owner's Manual
OWNER´S MANUAL Before using your air conditioner, please read this manual carefully and keep it for future reference.. INVERTER SPLIT-TYPE ROOM AIR CONDITIONER The design and specifications are subject to change without prior notice for product improvement. Consult with the sales agency or manufacturer for details. -
Page 36: Read Before Operation
READ BEFORE OPERATION CAUTION Contact an authorised service technician for repair or maintenance of this unit. Contact the authinstaller for installation of this unit. This appliance is not intended for use by persons(including children) with reduced physical, sensory or mental capabilities, or lack of experience and knowledge, unless they have been given supervision or instruction concerning use of the appliance by a person responsible for their safety. -
Page 37: Safety Precautions
SAFETY PRECAUTIONS To prevent injury to the user or other people and property damage, the following instructions must be followed. Incorrect operation due to ignoring of instructions may cause harm or damage. The seriousness is classified by the following indications. This symbol indicates the possibility of death or serious injury. - Page 38 SAFETY PRECAUTIONS CAUTION Do not clean the air Ventilate the room well When the air filter is to be conditioner with water. when used together removed, do not touch the with a stove, etc. metal parts of the unit. Water may enter the unit and An oxygen shortage It may cause an injury.
-
Page 39: Names Of Parts
NAMES OF PARTS ★ IndoorUnit Air inlet Indoor Unit 、 1 Fron t pan el 、 2 A ir filter 、 Auto button 、 4 Louver 、 5 S ign al receptor Air outlet 、 6 S upply c ord 、... -
Page 40: Operating Instructions
OPERATING INSTRUCTIONS Operating temperature Cooling 18 ~ 32 ºC Indoor 0 ~ 30 ºC Heating Cooling -10 ~ 47 ºC Outdoor Heating -10 ~ 30 ºC Manual operation Manul operation can be used temporarily in case the remote controller is disable or maintenance necessary. - Page 41 OPERATING INSTRUCTIONS Airflow direction control How the air conditioner works Adjust the air flow direction properly otherwise, it AUTO operation When you set the air conditioner in AUTO mode, it will might cause discomfort or cause uneven room automatically select cooling, heating(cooling/heating temperatures.
-
Page 42: Care And Maintenance
CARE AND MANTENANCE Care and maintenance Cleaning the Grille, Case and Remote Controller Turn the system off before cleaning. To clean, wipe with a soft, dry cloth. Do not use bleach or abrasives. NOTE: Supply power must be disconnectd before cleaning the indoor unit. - Page 43 CARE AND MANTENANCE Maintenance If you plan to idle the unit for a long time, perform the following: 1 . Cl ean th e i nd oor unit and ai r filt er. 2. Select FAN only mode, let the indoor fan run for a while to dry the inside of the unit. 3.
-
Page 44: Troubleshooting
TROUBLESHOOTING The following events may occur during normal operation. Protection of the air conditioner. Compressor protection The compressor can't restart for 3 minutes after it stops. Anti-cold air (Cooling and heating models only) The unit is designed not to blow cold air on HEAT mode, when the indoor heat exchanger is in one of the following three situations and the set temperature has not been reached. - Page 45 TROUBLESHOOTING Stop the air conditioner immediately if one of the following faults occur. Disconnect the power and contact the nearest customer service center. If the E( 0,1..) or P( 0, 1 ..) code appears on the LED(LCD)window, disconnect the power and contact the service people. Trouble Fuse blows frequently or circuit breaker trips frequently.
- Page 46 TROUBLESHOOTING Error code list: Error code COOLING indicator HEATING indicator TIMER indicator Description 1 blink Indoor environment temprature sensor fault 2 blinks Outdoor pipe temprature sensor fault 3 blinks Indoor pipe temprature sensor fault E4/Fb 4 blinks Indoor fan motor circuit fault E5/5E 5 blinks Indoor and outdoor communication failure...
-
Page 47: Installation Manual
INSTALLATION MANUAL Before using your air conditioner, please read this manual carefully and keep it for future reference.. INVERTER SPLIT-TYPE ROOM AIR CONDITIONER The design and specifications are subject to change without prior notice for product improvement. Consult with the sales agency or manufacturer for details. -
Page 48: Safety Precautions
SAFETY PRECAUTIONS INSTALLATION PRECAUTIONS Please read this installation manual carefully before operating the unit to ensure correct installation. If the power cord is damaged, replacement work shall be performed by authorised personnel only. Installation work must be performed in accordance with the national wiring standards by authorised personnel only. -
Page 49: Installation
INSTALLATION SELECT THE BEST LOCATION Indoor unit There should not be any heat source or stream near the unit. Above 15cm There should not be any obstacles blocking the air circulation. A place where air circulation in the room is good. A place where drainage can be easily done. -
Page 50: Indoor Unit Installation
INDOOR UNIT INSTALLATION INSTALLATION PLATE MOUNTING NOTE: NOTE: The mounting wall is strong and solid Mount the Installation Plate and drill enough to prevent it from the vibration. holes in the wall according to the wall structure and corresponding Installation Plate Mounting mounting points on the installation 1. - Page 51 INDOOR UNIT INSTALLATION CONNECTIVE PIPE AND DRAINAGE INSTALLATION Dr ai nag e 1. Run the drain hose sloping downward. Do not install the drain hose as illustrated in wrong figures. 2. When connecting extension drain hose, insulate the connecting part of extension drain hose with a shield pipe, do not let Wrong the drain hose slack.
- Page 52 INDOOR UNIT INSTALLATION CONNECT THE CABLE TO THE INDOOR UNIT Electrical work Electric safety regulations for the initial Installation 1. If there is serious safety problem about the power supply, the technicians should refuse to install the air conditioner and explain to the client until the problem is solved. 2.
-
Page 53: Outdoor Unit Installation
OUTDOOR UNIT INSTALLATION OUTDOOR INSALLATION PRECAUTION Install the outdoor unit on a rigid base to prevent increasing noise level and vibration. Determine the air outlet direction where the discharged air is not blocked. In the case that the installation place is exposed to strong wind such as a seaside, make sure the fan operating properly by putting the unit lengthwise along the wall or using a dust or shield plates. - Page 54 OUTDOOR UNIT INSTALLATION CONNECT THE CABLE TO THE OUTDOOR UNIT 1. Remove the electrical control board cover from the outdoor unit by loosening the screw. 2. Connect the connective cables to the terminals as identified with their respective matched numbers on the terminal block of indoor and outdoor units.
- Page 55 OUTDOOR UNIT INSTALLATION 2. When using the Vacuum Pump 1. Completely tighten the flare nuts, A, B, C, D, connect the manifold valve charge hose to a charge port of the packed valve on the gas pipe side. 2. Connect the charge hose connection to the vacuum pump. 3.
-
Page 56: Remote Controller
REMOTE CONTROLLER Please read this Owner's Manual carefully before operation. Save this manual in a safe place for future reference. - Page 57 REMOTE CONTROLLER AIR-CONDITIONER REMOTE CONTROLLER INSTRUCTIONS iFEEL “ ” Read this instructions carefully so that ● you can use the air-conditioner safely and correctly. “ ” Take good care of the instructions ● that it can be referred to at any time.
- Page 58 REMOTE CONTROLLER Buttons description Note: The remote controller display all symbols during power-on and only those corresponding to current operation the rest of the time. iFEEL 1 ON/OFF Press this button to turn on/off the unit. This will clear the existing timer and SLEEP settings. Press this button to set the temperature display to Fahrenheit, which is displayed by default in Celsius.
- Page 59 REMOTE CONTROLLER 4. DISPLAY Press this button to turn on/off the display. This is for the convenience of users who are unconformable sleeping with the backlight on. 5. iFEEL Press this button to set the temperature display on the remote controller to ambient temperature and press this button again to set it to preset temperature.
- Page 60 REMOTE CONTROLLER 9. TURBO Press this button only in COOL or HEAT mode to set TURBO on or off to speedy the cooling or heating. When TURBO is on, the air speed is HIGH. When TURBO is off, the air speed will restore to previous status.
- Page 61 REMOTE CONTROLLER 14 .Anti-F The Anti-F functions when the unit is turned off with the remote controller in COOL, DRY or AUTO mode. It will operate in HEAT mode (FAN mode for cool only units), with the internal fan running with weak flow for 3 minute before stop, to remove the moisture within the evaporator so as to prevent it from giving off bad smell from mold.
- Page 62 REMOTE CONTROLLER...
- Page 63 REMOTE CONTROLLER...
- Page 64 REMOTE CONTROLLER Attention 1.Aim the remote con troller toward s the receiver on the air- conditio ner. 2.The remote controller s hould be within 8 meters away from the receiver. 3.No obstacle s be tween the re mo te controller and receiver. 4.Do not drop or throw the remote con trolle r.
- Page 66 C/ PROVENZA 392 P2 08025 BARCELONA SPAIN (+34) 93 446 27 80...
Need help?
Do you have a question about the FH Series and is the answer not in the manual?
Questions and answers