
Related Manuals for HISEER AS10S/L


Summary of Contents for HISEER AS10S/L
- Page 1 AIR TO WATER HEAT PUMP ---------- Standard EVI AS10S/L & AS13S/L AS20S/L Operation, installation &maintenance manual V.201510 The installation of this unit is to adhere to all local Building Codes and Standards...
-
Page 2: Table Of Contents
Index Nomenclature ............................ 2 Working principle ..........................3 Specialist Tools ..........................4 Pre-installation ..........................5 Installation Location ......................... 7 Positioning ............................8 Buffer Tank ............................9 Frost Protection ..........................10 System Overview Heating Hot Water Production ................11 System Overview Heating, Cooling with Hot Water Production with Boiler back up ....13 System Overview Multiple Units in Series Cascade Connection ........... -
Page 3: Nomenclature
Nomenclature... -
Page 4: Working Principle
Working principle Working principle Buffer tank ② ⑤ ③ ① ⑥ ④ HEAT PUMP 1. The low pressure and low temperature liquid refrigerant coming out of expansion valve exacts heat energy from the air through finned coil heat exchanger ① and evaporates into gas state. 2. -
Page 5: Specialist Tools
Tools Specialist Specialist Tools Specialist tools that might be used on installation, commissioning and maintenance. The tools as exclusive tools for R410A refrigerant. 1 Gauge manifold ·Only for R410A ·Use the existing fitting specifications.(G1/4”) ·Use high-tension side pressure of 5.3MPa·G or over. 2 Charge hose ·Only for R410A ·Use pressure performance of 5.09MPa·G or over. -
Page 6: Pre-Installation
Pre-installation Pre-Installation Movement and Storage The unit must not be transported, moved or stored at greater than a 30° angle from the upright position. Store the unit in a dry area until required. The unit must be installed by a suitably qualified tradesperson and all electrical wiring must be completed by a licensed electrical contractor in accordance with all local Standards. - Page 7 Pre-Installation Do not un-weld or flame cut the refrigerant lines including any refrigerant circuit components until the entire refrigerant (liquid and vapour) has been removed from unit. Traces of vapour should be displaced with dry nitrogen. Refrigerant in contact with an open flame will produces toxic gases. Ensure that the necessary safety protection equipment is available when servicing.
-
Page 8: Installation Location
Installation Location Installation Location The unit must be installed on a solid level surface on a concrete pad foundation not connected to the house foundation. Rubber cushions can be added to reduce vibration and noise if required. The unit should be place so that it is well away from bedrooms or noise sensitive areas including neighbour’s section boundaries. -
Page 9: Positioning
Positioning Positioning 600mm ≥ 600mm ≥... -
Page 10: Buffer Tank
Buffer Tank Buffer Tank A buffer tank is recommended to ensure a trouble free heat pump operation. A suitable buffer tank can avoid excessive heat pump cycling (switching on and off). The buffer tank provides a hydraulic separation from the volume flow in the heat pump and heating circuits. -
Page 11: Frost Protection
Frost Protection Frost Protection The plate heat exchanger, the piping and the hydraulic pump can be damaged by frost, despite the built-in anti-freeze protection of the unit. In frost prone areas refer to installation location instructions. To avoid freezing-up of the water contained in the system, one of the precautions must be taken during winter: 1. -
Page 12: System Overview Heating Hot Water Production
Systems Overview System Overview Heating Hot Water Production Buffer tank ② ⑤ ③ ① ⑥ ④ HEAT PUMP Name Description Included Name Description Included Circulation pump External Inlet water temperature sensor Internal External Air vent valve Outlet water temperature sensor Internal Soft joint External... - Page 13 Systems Overview Heating Mode Working Principle: On heating mode a. When SF04:enable compensation=NO, When the Inlet water temperature RTc-ST04 (RTc is the actual Inlet water ≤ temperature of the last stop) ,the compressor will start to heat. After outlet water temp. ST02, compressor will stop.
-
Page 14: System Overview Heating, Cooling With Hot Water Production With Boiler Back Up
Systems Overview System Overview Heating, Cooling with Hot Water Production with Boiler back up Name Description Included Name Description Included Circulation pump Internal (optional) Inlet water temperature sensor Internal 3 way valve External Outlet water temperature sensor Internal External Hot water tank Outdoor temperature sensor Internal External... - Page 15 Systems Overview 1. Heating Mode Working Principle: On heating mode, Three way valve (VXV) will open AB-A. 1.) When SF04 enable compensation=NO: a. When the inlet water temp. B1 ≤ RTc-ST04, (RTc is the actual measured inlet water temp. of last stop) the compressor will start to heat .After outlet water temp.
-
Page 16: System Overview Multiple Units In Series Cascade Connection
Systems Overview System Overview Multiple Units in Series Cascade Connection Buffer tank HEAT PUMP 1 HEAT PUMP 2 Name Description Included ? Name Description Included ? Circulation pump Internal(Option) Inlet water temperature sensor Internal 3 way Valve External Outlet water temperature sensor Internal External Hot water tank... - Page 17 Systems Overview Multiple Units in Series Connection (1) Heating working principle To set two or more units in parallel operation, set the primary unit to the required parameters, other units could have 2~5°C difference of ST01,ST02 and ST05 to allow for energy stage control.
-
Page 18: Installation
Installation Installation 1. The pipe installation must adhere to the local Building Code, standards and any local council requirements. 2. Ensure that the water flow and returns are correct and not reversed. Reversing the water flow will reduce the output of the unit; refer to the labels on the unit for the correct water flow direction. -
Page 19: Electrical Connection
Electrical connection Electrical Connections Power Connection Before connecting the power supply, please confirm the unit suits the power supply. Breaker protection must be installed according to the max value stated in the nameplate attached to the unit inside of the front panel. ... - Page 20 Electrical Connections Outdoor Ambient Temperature Sensor: The outdoor temperature sensor (B3) is a standard component and is prewired and positioned in the unit. The probe is located at the back of the unit in a protective casing. The outdoor sensor is terminated on the PC board B3 and GND. Temperature sensor for hot water: The hot water sensor (B4) is connected to terminal positions B4 and GND on the main board, the other terminal must be put into hot water cylinder temperature sensor probe...
- Page 21 Electrical Connections The unit has two ways to turn ON/OFF heating functions. SF14: A/C On/Off way 1.) remote 2.) keyboard A/C Switch: SF14 set to “keyboard”(factory default setting). Then the A/C switch could not control the unit any more, wired remote control will take over control the unit . If SF14 set = “remote”.
- Page 22 Electrical Connections The unit has two ways to turn ON/OFF domestic hot water functions. SF13: HW On/Off way 1.) remote 2.) keyboard Hot Water Switch: When SF13 set= “remote”, Keyboard can not be used to turn On/Off the DHW and no DHW timezone On/Off function.
- Page 23 Electrical Connections External Water Pump Connection (N02) There is a connection port (1-2) at the terminal block for connecting circulation water pump.. If PWM pump is adopted, PWM signal is connected to D1-D2 Three Way Valve Connection (NO7 NC7) A 3 way valve could be connected to terminal (7-8-9) for domestic hot water production.
- Page 24 Electrical Connections Auxiliary Heating Electric Heater or Boiler (NO4) There is a connection port (10-11) which can be used to activate and de-activate an auxiliary electric heater or a boiler. The max current is 1 Amps therefore a contactor must be applied to control auxiliary electric heater or boiler. Hot Water Electric Heater (NO8) There is a connection port (12-13) used to activate and de-activate hot water electric heater .
-
Page 25: User Guide
User Guide User Guide User interface Find the user interface and connection cable from compressor room . Standard factory delivered connection cable is 10m. User interface should be installed indoor. It could be installed about 1.5m up from the floor ,out of reach of children. - Page 26 User Guide Symbol explanation Heating mode Cooling mode Domestic hot water mode Domestic hot water mode + Heating mode Domestic hot water mode + Cooling mode Water pump Compressor Menu Tree Code Indication Code Indication Compressor settings Setpoints Condenser settings User interface Evaporator settings Alarm settings...
- Page 27 User Guide Access Rights Three groups of users with different privilege levels are described below. Privilege Level Main Activities Special Password required View information Manufacturer Configure and commission applications by and status Acknowledge setting/adjusting parameter values ...
- Page 28 User Guide Press button, it display the unit current air conditioning (AC) and domestic hot water (HW) On/Off status. pre-set mode heating, display status(heat). Black cursor flashes on “OFF” on AC status(heat) , press button, it display Press button to enter. It displays: Press button, black cursor flashes on “OFF”...
- Page 29 User Guide I/O input/output This menu display the unit measured temperature sensors value , digital switch on/off state, components on/off state. AC inlet temp AC outlet temp. Ambient temp. Hot water temp. Discharge temp. Suction temp. Suction pressure and temp. Discharge pressure and temp.
- Page 30 User Guide Change System mode Button Operation: Prg User System mode System mode only could be changed on heating/cooling unit (SF01 unit type setting cooling + heating). When unit is off state, press “Prg” to main menu, press up or down button to User, press Enter button to enter , it display Press Enter button, Heating will flash, press up or down button to change to Cooling, Press Enter button to confirm.
- Page 31 User Guide User Parameters Para- Descriptions Min. Max. Unit meter fault System mode Cooling or heating ST01 Setting temperature at cooling mode ST11 ST12 ºC ST02 Setting temperature at heating mode ST13 ST14 ºC ST03 Setting temperature difference at cooling mode ºC ST04 Setting temperature difference at Heating mode...
- Page 32 User Guide Heating compensation curve setting The control temperature for heating mode has two methods: fixed and changeable temperature. The fixed temperature is a fixed value and directly set by the user from the set area. The changeable temperature is determined by values of ST05, ST06 and the actual outdoor temperature measured by the OT sensor probe.
- Page 33 User Guide With the drop of the outdoor temperature, the control temperature become higher and higher to meet the large heating requirement. With the increase of the outdoor temperature, the control temperature become lower and lower, so that the heat pump works under low pressure to keep low energy consumption.
- Page 34 User Guide The calculated control water temperature will not be over ST14 Maximum heating temperature and will not be lower than ST13 Minimum heating temperature Cold weather conditions When the room temperature is too low, You could increase ST06 . ...
- Page 35 User Guide Three curves of different ST05 setting:...
- Page 36 User Guide If SF04: Enable compensation =Yes, S10 menu is popped up : Press to change ST05 and ST06, OT is actual measured ambient temp. Actual control temp. ST will be displayed. Press to menu S11: You could input any OT value ,press and relative heating control temp.
- Page 37 User Guide Timezone on/off Timezone activates the pre-set timer programs. Timezone function is only valid when unit ON/OFF method is “by keyboard”. TR09:AC timerzone is for space heating When TR09 is set YES, two different time periods is available to set in every day from Sunday to Saturday.
- Page 38 User Guide Compressor Operating hours Display compressor operating hours. Night mode Outdoor fan could be set to run in lower speed at night to reduce noise level Default setting of night mode is activated from 22:00 to 6:00. The night mode time could be adjusted by the user. Insert User default This function is to store user setting to factory default setting .
- Page 39 Service Guide Access Service Level Parameter data Display Procedures press <Prg> to main menu, press Down button to Parameter, Press Enter button, Press Enter and 0 will flash, press Down button to the correct figure, press Enter to confirm. Likewise, change the other 3 figure .After 4 correct figure are inputted, It will enter Service level parameter.
-
Page 40: Service Parameters
Service Parameters Service Parameters: Para- Descriptions Min. Max. Unit meter fault Water pump control Continuous EV01 Continuous work or work by regulation mode work Water pump set temp. EV03 ℃ difference on cooling Water pump set temp. EV04 ℃ difference on heating SF01 Unit type Only heating or Cooling + Heating... -
Page 41: Service Guide
Service Guide Cooling demand In: B1,B2 On: B1>B1a+ST03(B1a is the measured sensor B1 temperature when the unit off condition is met. The first time unit on condition B1a=ST01+5) Off: B2<ST01 Heating demand In: B1,B2 On: B1<B1c-ST04(B1c is the measured sensor B1 temperature when the unit off condition is met. - Page 42 Service Guide Control process Turn on process at heating mode 1.) Start water pump , check water flow switch 2.) 5 seconds after water flow switch closes, if there is heating demand, start fan and compressor Turn off process at heating mode 1.) Switch off compressor 2.) After 5 second’s delay, switch off fan motor 3.) After 30 seconds’...
- Page 43 Service Guide Auxiliary Electric heater or boiler control (NO4) Auxiliary heater or boiler only could be switched on when all of conditions below are met. 1.) Heating mode running; 2.) Compressor has run over 300s 3.) OT≤ST07; 4.) ST ≤ST02-ST04-1; Auxiliary heater or boiler only could be switched off when any of conditions below is met.
- Page 44 Service Guide The EC fan running control (Y1) On cooling mode, ambient temperature≥CN05,fan runs as CN01, ambient temperature≤CN06, fan runs as CN03, CN06<ambient temperature<CN05,fan runs on the speed proportionally between CN03 and CN01. Heating mode,ambient temperature≤CN07,fan runs CN02, ambient temperature≥CN08,fan runs as CN03, CN07<ambient temperature<CN08,fan runs on the speed proportionally between CN03 and CN02.
- Page 45 Service Guide The pump PWM running control (Y3) On cooling mode, when compressor is on, pump PWM runs as EV05 for 3 minutes, then runs with (Inlet temperature-Outlet temperature)=EV03 as target via PID control . when compressor is off, pump PWM runs as EV06. On heating mode, when compressor is on, pump PWM runs as EV05 for 3 minutes, then runs with (outlet temperature - Inlet temperature)...
- Page 46 Manufacturer parameters Access Manufacturer Level Parameter data Display Procedures press <Prg> to main menu, press Down button to Parameter, Press Enter button, Press Enter and 0 will flash, press Down button to the correct figure, press Enter to confirm. Likewise, change the other 3 figure .After 4 correct figure are inputted, It will enter Service level parameter.
- Page 47 Manufacturer parameters Para meter Descriptions Default Min. Max. Unit CM01 Compressor minimum ON time Sec. CM02 Compressor minimum OFF time 1000 Sec. CN01 EC fan Max. speed (cooling) CN02 EC fan Max. speed (heating) CN03 EC fan Min.. speed CN04 EC fan Max speed (night mode) CN05 EC fan PWM start ambient temp.
-
Page 48: Commissioning And Adjusting
Commissioning and Adjusting Commissioning and Adjusting Preparations- Filling and Flushing 1. Before commissioning, ensure the whole system has been properly flushed and filled with water. 2. Check the pipe work system for leaks. 3. The heating system is filled with water and inhibitor to the required pressure between 100-200 kPa or 15-30PSI. - Page 49 Commissioning and Adjusting Air in the System after Startup Air will initially be released from the water as its heated and further venting may be required. If a bubbling sound can be heard from the heat pump, the circulation pump, underfloor and or radiators then the entire system will require further venting.
-
Page 50: Commissioning Form
Commissioning Form Commissioning Form Commissioning Form Client / Installation address: Telephone Number Installer: Commissioned by Heat pump Model: Heat pump serial number: Commissioning date: The heating system has been filled and pressure tested YES ( ) Expansion vessel for heating is sized, fitted & charged in accordance with manufacturer’s instructions YES ( ) The heat pump is fitted on a solid/stable surface capable of taking its weight YES ( ) -
Page 51: Alarms
Alarms Alarms The alarms are divided into two groups: auto reset alarms and manual reset alarms. 1. Auto reset alarm, the user is not required to acknowledge and reset it. 2. The corresponding device will be automatically restarted once the alarm status disappears. - Page 52 Alarms Auto Reset Alarms The following are codes for auto reset alarms with their meanings. Codes Meaning AL03 Low outlet water temperature (ST<AR01) AL05 High outlet water temperature (ST>AR03) AL17 Water flow switch AL26 Antifreeze AL35 Low suction pressure ,lower than 1.5bar AL36 High discharge pressure ,higher than 42bar AL37...
- Page 53 Alarms Viewing Alarm history Display Procedures Press <Prg> button , then then press down button to Alarm History, press <Enter> to confirm. Press <up> or <down> to view other alarms If no alarm is generated, the word “No alarm!” will be displayed. Acknowledging and Resetting Manual Reset Alarms Any alarm detected by the system, either an auto reset alarm or a manual reset alarm will be displayed on the LCD.
- Page 54 Alarms Low outlet water temperature protection (Code: AL03) At any mode, if ST≤AR01, the compressor is off ,after 5 seconds delay, the fan motor will be stopped, PWM water pump will run as EV05, other parts will keep its original state. A continuous blink warning code AL03 will appear on the LCD, it will record the instant inlet water temperature RT1 and will return to normal working after inlet water temperature RT≥RT1+ ST03.
- Page 55 Alarms High pressure protection (Code: AL36) It does not scan high pressure on defrosting period and within 10 seconds after defrosting stop. At other time if B12(HPS)≥AR15 , the compressor is off ,after 5 seconds delay, the fan motor will be stopped, PWM water pump will run as EV06, other parts will keep its original state.
- Page 56 Alarms Temperature Sensor trouble (auto reset) If the temperature sensor is below -35C or higher 150C in 4.5 seconds, it will display sensor trouble. sensor code Program trouble dealing action AL71 Unit will continue to run until it reaches preset temperature. CM02 later, it will start again.
-
Page 57: Maintenance
Maintenance Maintenance To ensure the optimal performance of the unit regular maintenance is essential. Failure to undertake regular maintenance can reduce the unit performance and of the system shorten the life of the unit . Exterior Maintenance 1. Make regular checks throughout the year that the inlet grill is not blocked or clogged by leaves, snow or anything else. - Page 58 Maintenance If there is not enough refrigerant in the system, this is indicated by gas bubbles in the moisture sight glass .the unit will have poor performance. If the low refrigerant charge is significant, large bubbles appear in the moisture sight glass and the suction pressure drops, then the compressor suction superheat will also be high.
- Page 59 Maintenance Mechanical Maintenance 1. Check the tension of the fan motor, fan wheel, compressor and control box fixing bolts. 2. Check that no water has penetrated into the control box. Evaporator Coil It is recommended that the finned coils are inspected regularly to check the degree of fouling.
-
Page 60: Dimensions
Dimensions Dimensions AS10S/L AS13S/L 1096 AS20S/L... -
Page 61: Water Pressure Plots
Water Pressure Plots Water Pressure Plots AS10S/L m 3/h Optional high efficiency pump curve (AS10S/L ) UPM3 FLEX AS 25-70 130... - Page 62 Water Pressure Plots AS13S/L m3/h Optional high efficiency pump curve (AS13S/L)
- Page 63 Water Pressure Plots AS20S/L m 3 /h...
-
Page 64: Temperature And Sensor Resistance Table
Temperature and sensor resistance table Temperature and sensor resistance table... - Page 65 Temperature and sensor resistance table...
-
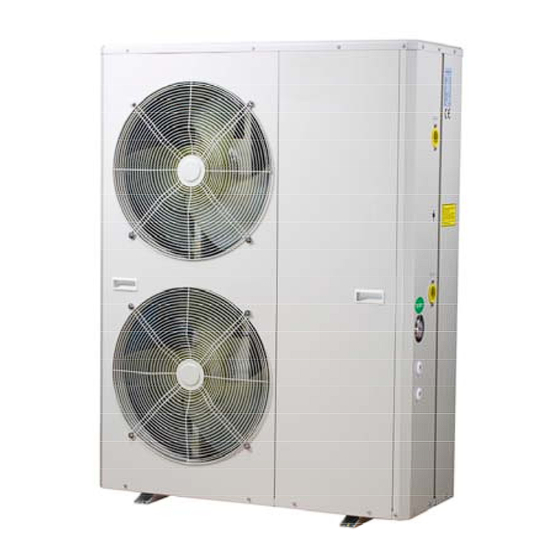
Page 66: Components
Components Components AS10S/L AS13S/L 1. Finned coil heat exchanger 2. EC Fan motor 3. Fan blade 4. De-icing heater(option package 1) 5. Liquid receiver 6. Plate heat exchanger 7. Filter 8. Compressor 9. Differential pressure flow switch(option package 1) 10. Phase relay 11. -
Page 67: Technical Specifications
Technical Specifications Technical Specifications AIR TO WATER HEAT PUMP AS10S/L AS13S/L AS20S/L Heat output/Power consumption/COP at 7/35℃ 10.7/2.48 COP 4.31 14.85/3.5 COP 4.24 20.8/4.92 COP 4.22 Heat output/Power consumption/COP at 7/45℃* 11.0/3.28 COP 3.35 14.96/4.6 COP 3.25 20.7/6.22 COP 3.33 Heat output/Power consumption/COP at 7/55℃*...
Need help?
Do you have a question about the AS10S/L and is the answer not in the manual?
Questions and answers