IFM PQ3 Series Operating Instructions Manual

IFM PQ3 Series Operating Instructions Manual

Pressure sensor

Advertisement

Operating instructions
Pressure sensor
UK
PQ3xxx

Advertisement

Table of Contents
loading
Need help?

Need help?

Do you have a question about the PQ3 Series and is the answer not in the manual?

Questions and answers

Mannie
March 8, 2025

How to change between posotive and negative preasure

1 comments:
Mr. Anderson
March 8, 2025

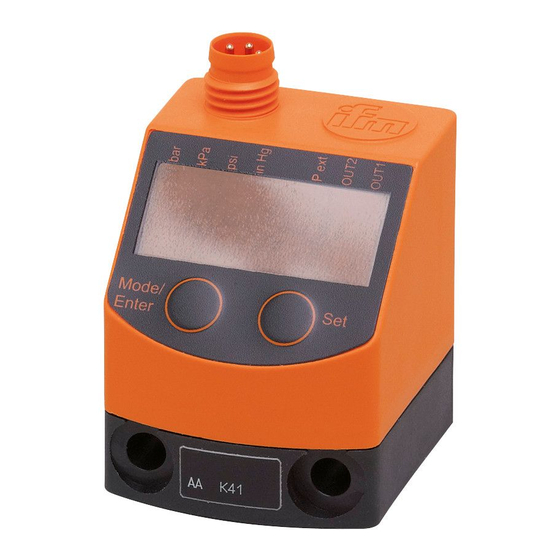
The IFM PQ3 Series does not explicitly mention a direct setting to switch between positive and negative pressure. However, zero-point calibration ([coF] or [tcoF]) allows adjustment within -2% to 2% of the measuring span, which may help fine-tune measurements. Additionally, the system pressure setting ([SySP]) can optimize differential pressure measurement. If measuring both positive and negative pressures, ensure correct connections: low pressure to the auxiliary M5 port and high pressure to the G1/8 port.

This answer is automatically generated

Subscribe to Our Youtube Channel

Summary of Contents for IFM PQ3 Series

  • Page 1 Operating instructions Pressure sensor PQ3xxx...
  • Page 2: Table Of Contents

    Contents 1 Preliminary note ���������������������������������������������������������������������������������������������������3 1�1 Symbols used ������������������������������������������������������������������������������������������������3 2 Safety instructions �����������������������������������������������������������������������������������������������3 3 Functions and features ����������������������������������������������������������������������������������������4 3�1 Use of the main connection G1/8 ������������������������������������������������������������������4 3�2 Use of the auxiliary connection M5 ����������������������������������������������������������������5 4 Function ���������������������������������������������������������������������������������������������������������������5 4�1 Output signals ������������������������������������������������������������������������������������������������5 4�2 Switching function ������������������������������������������������������������������������������������������5 4�3 IO-Link �����������������������������������������������������������������������������������������������������������6 4�3�1 General information ������������������������������������������������������������������������������6...
  • Page 3: Preliminary Note

    9�3�3 Configuration of the display ����������������������������������������������������������������15 9�3�4 Zero-point calibration ��������������������������������������������������������������������������16 9�3�5 Differential pressure measurement: optimisation of the sensor accuracy �������������������������������������������������������������������������������������������������������16 9�4 Service functions �����������������������������������������������������������������������������������������16 9�4�1 Read min/max values for the system pressure ����������������������������������16 9�4�2 Reset all parameters to factory setting �����������������������������������������������17 10 Operation ���������������������������������������������������������������������������������������������������������17 10�1 Read set parameters ���������������������������������������������������������������������������������17 10�2 Error indications �����������������������������������������������������������������������������������������17...
  • Page 4: Functions And Features

    • The product must be suitable for the corresponding applications and environmental conditions without any restrictions� • Only use the product for its intended purpose (→ Functions and features). • Only use the product for permissible media (→ Technical data). •...
  • Page 5: 3�2 Use Of The Auxiliary Connection M5

    3.2 Use of the auxiliary connection M5 Observe the respective notes in these instructions for measurement accuracy optimisation for differential pressure measurements (→ chapter 9�3�5 Differential pressure measurement)� Application: compressed air (other media on request); use for differential pressure measurement; connection of the low pressure side� In particular for filter monitoring, the output side of the filter (i�e�...
  • Page 6: 4�3 Io-Link

    In addition communication is possible via a point-to-point connection with a USB adapter cable� You will find more detailed information about IO-Link at www�ifm�com� 4.3.2 Device-specific information You will find the IODDs necessary for the configuration of the IO-Link unit and detailed information about process data structure, diagnostic information and parameter addresses at www�ifm�com�...
  • Page 7: Installation

    5 Installation Before installing and removing the unit: Make sure that no pressure is applied to the system� ► Screw the pressure connection or adapter G1/8 to the main pressure connection (1) and tighten: • Maximum tightening torque: 8 Nm� •...
  • Page 8: 5�3 Panel Mounting

    5.3 Panel mounting ► Fix the unit with 2 M4 x 35 screws (1) (not included) to the rear panel� Maximum tightening torque: 0�5 Nm� 6 Electrical connection The unit must be connected by a qualified electrician� The national and international regulations for the installation of electrical equipment must be adhered to�...
  • Page 9: Operating And Display Elements

    7 Operating and display elements 1 2 3 4 5 6 7 8 Mode/Enter Set 1 to 8: Indicator LEDs - LED 1 to LED 4 = system pressure / differential pressure in the unit of measurement which is indicated on the label� - LEDs 5, 6, 7: not used�...
  • Page 10: Menu

    8 Menu 8.1 Menu structure...
  • Page 11: 8�2 Explanation Of The Menu

    8.2 Explanation of the menu SP1/rP1 Upper / lower limit value for system pressure at which OUT1 switches� FH1/FL1 Upper / lower limit for the acceptable range (monitored by OUT1)� Extended functions / opening of menu level 2� Restore factory setting� Switch-on delay for OUT1�...
  • Page 12: Parameter Setting

    9 Parameter setting During parameter setting the unit remains in the operating mode� It continues to monitor with the existing parameters until the parameter setting has been completed� 9.1 Parameter setting in general 3 steps must be taken for each parameter setting: Select parameter ►...
  • Page 13 ► Press [Set] and keep it pressed until Mode/Enter Set the valid code no� is displayed� ► Briefly press [Mode/Enter]� When delivered by ifm electronic: no access restriction� ► Briefly press [Set]� > The first parameter of the submenu is displayed (here: [rES])�...
  • Page 14: 9�2 Set Output Signals

    9.2 Set output signals 9.2.1 Set the unit of measurement for system pressure ► Select [uni] and set the unit of measurement: [bAr], [kPa], [PSi], [inHg]� 9.2.2 Set the output function ► Select [ou1] and set the function: - [Hno] = hysteresis function/normally open, - [Hnc] = hysteresis function/normally closed, - [Fno] = window function/normally open, - [Fnc] = window function/normally closed�...
  • Page 15: 9�3 User Settings (Optional)

    9.3 User settings (optional) 9.3.1 Set delay for the switching outputs • [dS1] = time delay for SP1 / FH1� If the system pressure exceeds SP1 or if the system pressure enters the acceptable range (window), the output changes the switching status when the time dS1 has elapsed� •...
  • Page 16: 9�3�4 Zero-Point Calibration

    9.3.4 Zero-point calibration ► Select [coF] and set a value between -2 % and 2 % of the measuring span� The internal measured value "0" is shifted by this value� As an alternative: Automatic adjustment of the offset in the range 0 bar ± 2 % of the measuring span�...
  • Page 17: 9�4�2 Reset All Parameters To Factory Setting

    9.4.2 Reset all parameters to factory setting ► Select [rES]� ► Press [Set] and keep it pressed until [----] is displayed� ► Briefly press [Mode/Enter]� We recommend noting down your own settings before carrying out a reset (→ 12 Factory setting). 10 Operation After power on, the unit is in the Run mode (= normal operating mode)�...
  • Page 18: Factory Setting

    11 Factory setting Factory setting User setting SP1 / FH1 25% VMR * rP1 / FL1 23% VMR * SySP cLor r-on * = the indicated percentage of the final value of the measuring range (VMR) of the corresponding sensor is set in bar...
  • Page 19 More information at www�ifm�com...

This manual is also suitable for:

Pq3809Pq3834

Table of Contents