Advertisement
Quick Links
Advertisement

Related Manuals for ROBBE EOLO R 22


Summary of Contents for ROBBE EOLO R 22
- Page 1 Mike’s Entirely in English...
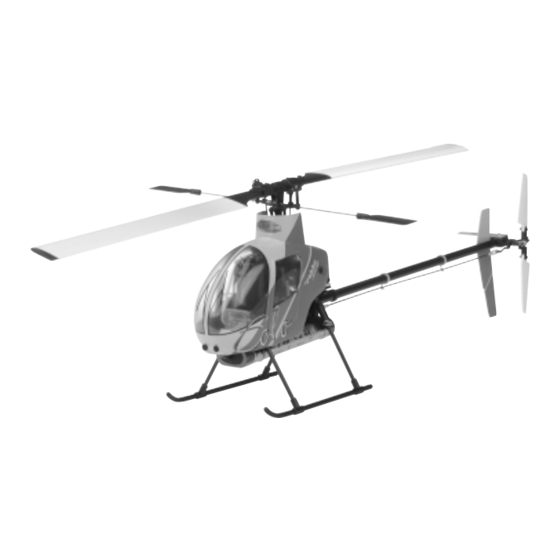
- Page 2 If you think you have cause for complaint, or wish to make a claim under guarantee, please note that you must state the Control Number and include proof of purchase. Introduction The Eolo R 22 model helicopter you have purchased is a member of the robbe- Replacement screws Schlueter family of helicopter products.
- Page 3 Controlling a model helicopter the raised marker lug on the link, which should always be on the outside of the joint. The most important feature which differentiates a helicopter trom a fixed-wing How a model helicopter works: aircraft is that its power element - the main rotor - is also the essential control element.
- Page 4 EOLO English instructions for Stage 1 1.1 Assembling the rotor shaft pivot bracket, freewheel hub and main rotor shaft. - Fix the pre-assembled rotor shaft front bracket S5028 to the chassis S5000 using the screws S0079. - Attach the pre-assembled freewheel hub S5030 to the 75-tooth gear S5094 using the screws S4354 and washers S4366.
- Page 5 EOLO English instructions for 1.2 Assembling the primary gearbox stage - Fit the flanged ballraces S5044 in the chassis as shown. - Press the 16-tooth pinion S5032 into the 60-tooth gear S5084, and place this gearbox stage between the flanged ballraces.
- Page 6 EOLO English instructions for 1.3 Assembling the tail rotor drive system - Slide the tail rotor drive coupling S5025 onto the short tail rotor drive shaft S5024 as far as it will go, and tighten the grubscrew S0041 onto the ma- chined flat in the tail rotor drive shaft.
- Page 7 EOLO English instructions for MODIFIED TAIL ROTOR DRIVE - FRONT 1.3a Assembling the tail rotor drive system - Slide the long coupling S5114 through the rear bearing S4035, housing S5056 and front bearing S4035 and seat the bearings firmly in the housing.
- Page 8 EOLO English instructions for 2.1 Completing the tail boom - Press the bearing plugs (11 diax 10) S5101 into both ends of the tad boom (12 diax 11 diax 444) S5022 using the plastic tube (9 diax 7.1 dia x 150) S5093. They are positioned correctly when the tube ends flush with the tail boom.
- Page 9 EOLO English instructions for - Install the front platform S5074 and the rear platform S5081 in the chassis. - Press the tail boom support bracket S5057 into the chassis, and fit the screw S3370 to secure it. - Slide the front (slotted) end of the tail boom into the tail boom support bracket as far as it will go.
- Page 10 EOLO English instructions for The four skid support components which constitute the skid support S5095 are marked V1. V2. H3 and H4. Note: V = front, H = rear. Fix these carts to the chassis using the screws S0116 and washers S4368.
- Page 11 EOLO English instructions for Assemble all the undercarriage parts as shown, and glue them together using ropoxi, No. 5066. 3.1 Installing the swashplate guide end servo mounts...
- Page 12 EOLO English instructions for - Remove the swashplate guide S5082 from the servo mount injection moulding S5082, and press it into the upper servo mount, Fix it in place using the screw S0029. - Slide the top and bottom servo mounts onto the rotor shaft pivot bracket.
- Page 13 EOLO English instructions for from the transmitter. - Cut down the servo output devices as shown in the drawing, leaving a single arm. Ensure that the arms are mounted on the servos exactly at right-angles. Tip: most makes of servo feature a splined output shaft.
- Page 14 EOLO English instructions for 19 mm dimension as shown in the draw- ing. - Press the ball-links on the prepared pushrods onto the linkage balls on the outer ring of the swashplate S5004. Note: when pressing the ball-links onto the...
- Page 15 EOLO English instructions for - Slide the blade pivot shaft S5051 through the centre piece S5049 and fit the addi- tional parts on both ends of the shaft exactly as shown in the drawing. Note: it is absolutely essential to orientate the axial bearings S3364 correctly, i.e.
- Page 16 EOLO English instructions for - Slide the flybar S5021 through the trans- verse shaft, set it central, and grease it lightly where it contacts the transverse shaft. - Fit the additional parts to the collective pitch compensator hub S5087 as shown.
- Page 17 EOLO English instructions for holders. - Slip the double ball-links S5091 onto the flybar, and press them onto the appropriate linkage balls. Note: when fitting the double ball-links onto the linkage balls note the position of the raised lug on the links. The lug must always be on the outside of the joint.
- Page 18 EOLO English instructions for secure it with the screw S0114 and the self-locking nut S0090. - Fit the ball-links S5043 on the pushrods S5045 / S5046 and set them to the lengths shown in the drawing. - Attach the pushrods to the rotor head and the swashplate inner ring.
- Page 19 EOLO English instructions for AMMENDMENT...
- Page 20 EOLO English instructions for - Fit insulating sleeves (13 mm long) to the capacitor and solder it to the terminals of the electric motor S5038. - Fit the 16-tooth pinion S5029 on the output shaft of the electric motor, but do not tighten the screw fully.
- Page 21 EOLO English instructions for - Place the ballraces S4035 and S43351 in the tail rotor gearbox hous- ing S5064. - Slide the tail rotor drive shaft S5024 into the tail rotor coupling S5025 as far as it will go, and tighten the grubscrew S0041 onto the machined flat.
- Page 22 EOLO English instructions for MODIFIED TAIL ROTOR DRIVE - REAR Stage 7 7.1 Assembling the tail rotor gearbox - Place the ballraces S4035 and S43351 in the tail rotor gearbox hous- ing S5064. - Slide the tail rotor drive shaft S5114 through the ballraces S4035 and S43351.
- Page 23 EOLO English instructions for the actuator bridge S5073 to the point where the control ring S5072 rotates freely but without any slop. - Oil the tail rotor shaft lightly and push the control bridge onto it. - Press the spacer ring S5060 into the arm on the tail rotor gearbox housing.
- Page 24 EOLO English instructions for - Fit the tail rotor hub S5061 on the tail rotor shaft, set it flush with the outside end, and tighten the grubscrew S0041 onto the machined flat to secure it. - Fit the remaining parts on the tail rotor hub.
- Page 25 EOLO English instructions for rotor drive shaft coupling. - Secure the drive shaft by tightening the grubscrew S0041 onto the machined flat. - Attach the vertical stabiliser S5065 to the tail boom using the screws S0074and the stabiliser bracket S5066.
- Page 26 EOLO English instructions for support bracket and the tail rotor servo holder using the plastic oval washer S5100. - Clamp the tail rotor servo mount to the tail boom using the screw S4300. - Set the tail rotor servo to centre from the transmitter.
- Page 27 EOLO English instructions for platform. Fix the receiver and gyro to the rear platform using double-sided adhesive tape, No. 1537. 9.2 Installing the speed controller and battery Fix the speed controller to the front platform using double-sided adhesive tape, No. 1537.
- Page 28 EOLO English instructions for work involving the unit. Solder the motor cables attached to the speed controller to the terminals of the electric motor. Take care to maintain correct polarity: red dot on motor to positive wire from speed controller.
- Page 29 EOLO English instructions for Stage 10 10 Finishing and installing the cabin Note: for reasons of clarity this drawing does not show the internal parts of the chassis. Drill 5mm dia holes in the cabin S5102 at the points marked X...
- Page 30 EOLO English instructions for Cut out the two 10 mm dia holes at the marked points on the top of the cabin. These provide cooling air to the electric motor. - Mask out the glazed area of the cabin before applying the external painted finish.
- Page 31 EOLO English instructions for The film must be completely smooth, with no trapped air bubbles or creases. - Since the blades are made of a natural material (wood) they may differ in weight and weight distribution even though they appear identical.
- Page 32 EOLO English instructions for - The lighter blade will now rise; apply a piece of the coloured tape (supplied) to the lighter tip and add more or less tape until the rotor blades balance exactly level. 11.3 Installing the main rotor blades...
- Page 33 EOLO English instructions for Basic requirement: You need a radio control system designed for helicopter use. Check that the servos are connected to the receiver in the sequence described in the operating instructions. Procedure:...
- Page 34 EOLO English instructions for Switch on the transmitter - Apply a forward pitch (forward cyclic) - Select a vacant model memory command: the swashplate should tilt - Program the model memory to the Heli forward. mixer type - Use the servo reverse facility on your...
Need help?
Do you have a question about the EOLO R 22 and is the answer not in the manual?
Questions and answers