Advertisement
Quick Links
Model:
2AQ4R-HP-H005
User manual - Turntable with bluetooth transmission
Gebruikshandleiding - Platenspeler met Bluetooth-overdracht
Bedienungsanleitung - Plattenspieler mit Bluetooth-Übertragung
Guide d'utilisation - tourne-disque avec transmission Bluetooth
Manual de usuario – Tocadiscos con transmisión Bluetooth
Advertisement

Related Manuals for LENCO HP-H005


Summary of Contents for LENCO HP-H005
- Page 1 Model: 2AQ4R-HP-H005 User manual - Turntable with bluetooth transmission Gebruikshandleiding - Platenspeler met Bluetooth-overdracht Bedienungsanleitung - Plattenspieler mit Bluetooth-Übertragung Guide d’utilisation - tourne-disque avec transmission Bluetooth Manual de usuario – Tocadiscos con transmisión Bluetooth...
- Page 2 Index English ......................2 Nederlands....................24 Deutsch ...................... 48 Français ...................... 73 Español....................... 98 Version: 1.0...
- Page 3 HP-H005 English CAUTION: Usage of controls or adjustments or performance of procedures other than those specified herein may result in hazardous radiation exposure. This unit should not be adjusted or repaired by anyone except qualified service personnel. PRECAUTIONS BEFORE USE KEEP THESE INSTRUCTIONS IN MIND: Do not use this device near water.
- Page 4 10. Warning! Never insert an object into the product through the vents or openings. High voltage flows through the product and inserting an object can cause electric shock and/or short circuit internal parts. For the same reason, do not spill water or liquid on the product. 11.
- Page 5 22. To clean the device, use a soft dry cloth. Do not use solvents or petrol based fluids. To remove severe stains, you may use a damp cloth with dilute detergent. 23. The supplier is not responsible for damage or lost data caused by malfunction, misuse, modification of the device or battery replacement.
-
Page 6: Installation
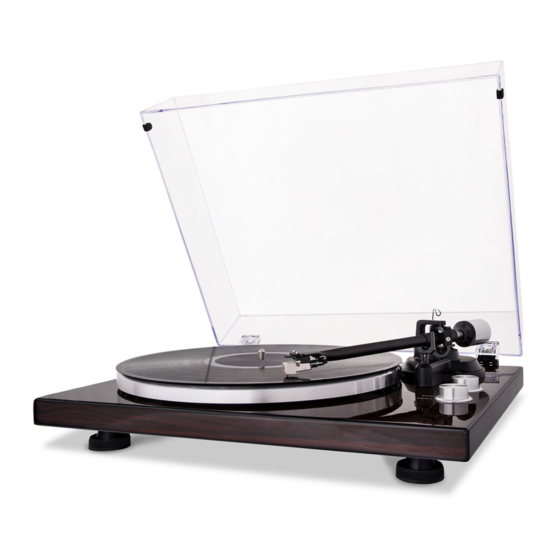
33. This product is intended for non professional use only and not for commercial or industrial use. 34. Make sure the unit is adjusted to a stable position. Damage caused by using this product in an unstable position or by failure to follow any other warning or precaution contained within this user manual will not be covered by warranty. - Page 7 COMPONENTS, FEATURES AND CONNECTIONS Counterweight Anti-skating Stub Turntable Platter Tonearm Lift Lever Tonearm Rest 33/45 Selector Tonearm Stop/Start Knob Cartridge 10. Lid 15. Anti-skating Weight 11. Lid Hinge 16. USB-PC port 12. Ground Connector 17. AC-DC Power Jack 13. PHONO & Line Out Jacks 18.
- Page 8 Please check thoroughly and make sure you find the following items that come along with this package: 1) Unit 7) Instruction Manual 2) Adaptor with EU-UK plug-end 8) Cartridge Alignment Protractor 3) Counterweight 9) USB-PC Cable 4) Platter with Belt 10) 2pcs lid spare rubber 5) 45 RPM Adaptor 11) Anti-skating Weight...
- Page 9 Cartridge Down force Adjustment The Counterweight supplied is suitable for cartridges weighing between 3.0-6.0g. - Gently push and turn the Counterweight onto the rear of the tonearm (with the scale facing toward the front of the turntable). - Remove the cartridge protection cap. - Lower the tonearm lift and position the cartridge in the space between tonearm rest and platter.
- Page 10 - Rotate the counterweight counter clockwise (seen from the front) to adjust the down force according to the cartridge manufacturer’s recommendations. One mark on the scale represents 0.05g of down force. NOTE: The recommended down force for the factory fitted cartridge is 3.5±0.5g.
- Page 11 Connection to the Amplifier This turntable uses a moving magnetic cartridge. Set the PHONO & Line Out Switch on PHONO mode. Connect the phono out cables to the phono input on your amplifier of pre-amplifier (phono stage). Line inputs such as CD, Tuner, Tape, or Video are not suitable for phono inputs.
- Page 12 Operation Turntable Operation Connect the included power adapter to unit and press the power rocker switch to be “ON” position. Remove the needle cover from the cartridge. Place the slipmat on the platter and place a record on the slipmat. If using 45 RPM records, put the 45 RPM adapter on the center spindle before placing the record on the platter.
- Page 13 with, the Bluetooth transmitter will become inactive and the LED will turn off. To disconnect pairing, power off the turntable or turn off Bluetooth pairing on your Bluetooth speaker. Recording the LP into PC through USB jack: For installing and recording step please reference to the BRIEF INTRODUCTION OF AUDACITY.
- Page 14 2.2) Choose “Edit” menu, then choose “Preferences”; 2.3) Audacity Preferences NOTE: you need to check your computer audio properties, the sound recording should be selected: SSS USB Audio Device” as below:...
- Page 15 2.4) Adjust the output and input volume Output volume Input Volume 2.5) Select the record button ● to record the disc, the left and right tracks will show on the interface:...
- Page 16 2.5.1 Press this button , start recording. 2.5.2 Click the button to skip to start; 2.5.3 Click the button to skip to end; 2.5.4 Click the button to play; 2.5.5 Click the button to pause the record play; 2.5.6 Click the button to stop the recording.
- Page 17 If do not see the sound wave on the interface, when recording, please adjust the line in volume as follows: Specific Steps as follows: 1) Download “lame_enc.dll” file, and install it to the software list. 2) Open the “Audacity” software, click Main Menu, Select “edit”, “Parameter”, “File Formats”, and click the “Searcher”.
- Page 18 “Llame_enc.dll”, and find the file’s location. 4) After you find the “lame_enc.dl” file, open it and click “Y” to finish the installation.
- Page 19 Maintenance and Cleaning Your turntable requires little of no regular maintenance. Remove dust with a slightly damp antistatic cloth. Never use a dry cloth, this will create static electricity and attract more dust! Antistatic cleaning agents are available at specialist stores, but must be applied sparingly to avoid damage to rubber parts.
- Page 20 Red Right channel positive (R+) Black Right channel negative (R-) Adjust the cartridge’s position to make sure it is precisely aligned on the headshell so that the stylus will be tracking the grooves in parallel perfectly. To achieve this, place the included paper cartridge alignment protractor over the turntable spindle, carefully lift the tone arm and place the tip of the stylus on the points marked 130mm and 250mm respectively.
- Page 21 Frequency response 20Hz-20kHz Recommended load resistance 47kohms Channel balance <2.5dB Amplifier connection MM - input Channel separation >18dB Recommended tracking force 3.5±0.5g Output voltage 2.5mV Weight Potential Incorrect Use and Fault Conditions These turntables are manufactured to the highest standards and undergo strict quality controls before leaving the factory.
- Page 22 - No ground connection from cartridge, arm, or arm cable to amplifier or ground loop. - Turntable too close to speakers. Distorted of inconsistent sound from one or both channels: - Turntable is connected to wrong input of amplifier. - Needle or cantilever damaged. - Drive belt overstretched or dirty.
- Page 23 Guarantee Lenco offers service and warranty in accordance with the European law, which means that in case of repairs (both during and after the warranty period) you should contact your local dealer. Important note: It is not possible to send products that need repairs to Lenco directly.
- Page 24 Directive (2014/30/EU) and the Low Voltage Directive (2014/35/EU) issued by the Commission of the European Community. Hereby, Lenco Benelux BV, Thermiekstraat 1a, 6361 HB Nuth, The Netherlands, declares that this product is in compliance with the essential requirements. The declaration of conformity may be consulted at techdoc@lenco.com...
-
Page 25: Fcc Statement
FCC STATEMENT 1. This device complies with Part 15 of the FCC Rules. Operation is subject to the following two conditions: (1) This device may not cause harmful interference, and (2) This device must accept any interference received, including interference that may cause undesired operation. 2.
Need help?
Do you have a question about the HP-H005 and is the answer not in the manual?
Questions and answers