Defender Guard IP4MCB1 User Manual
Hide thumbs
Also See for Guard IP4MCB1:
- Quick start manual (15 pages) ,
- Quick start manual (12 pages) ,
- Quick start manual (12 pages)
Table of Contents
Advertisement
Advertisement
Table of Contents

Subscribe to Our Youtube Channel
Related Manuals for Defender Guard IP4MCB1


Summary of Contents for Defender Guard IP4MCB1
- Page 1 User Manual IP4MCB1...
- Page 2 ® ® • DEFENDER is not responsible or liable in any way for any damage, vandalism, theft or any other action that may occur while a DEFENDER product is in use ® ® by the purchaser.
- Page 3 COMPLIANCE DEFENDER FCC STATEMENT ® This equipment has been tested and found to comply with the limits for a Class B digital device, pursuant to Part 15 of the FCC Rules. These limits are designed to provide reasonable protection against harmful interference in a residential installation.
-
Page 4: Table Of Contents
Getting to Know your Camera Powering On Your Camera Setting up Your Camera How do I get started with creating a Defender account? Account Setup Getting to know the home screen How do I setup my camera using a Wi-Fi network? Ensure your phone is connected to a 2.4 GHz Wi-FI network before proceeding! -
Page 5: Overview
Mobile App via a Wi-Fi or Cellular network NOTE: Your Defender Guard camera can only connect over 2.4 GHz Wi-Fi and not 5 GHz connections. You can also setup a wired connection directly to your camera. See page 7 for more details. -
Page 6: What's Included
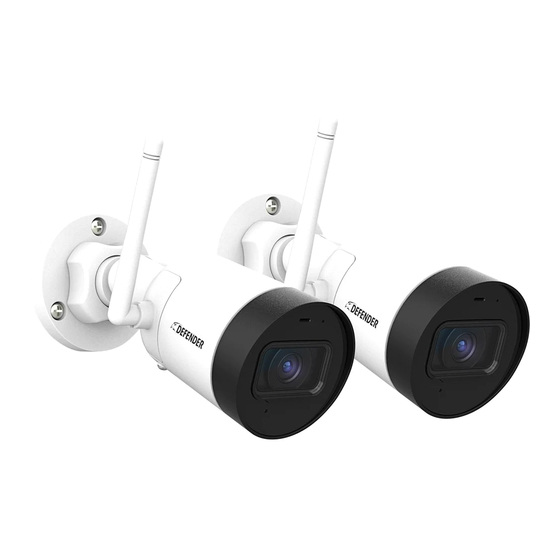
LIFETIME Customer Support Ethernet Quick Start Guide Free Lifetime Customer Cable Shield Support & Access to the Defender Guard App IMPORTANT: The Camera Power Supply is not waterproof. GETTING TO KNOW YOUR CAMERA Antenna Detachable Mounting Base Microphone Night Vision Sensor... -
Page 7: Powering On Your Camera
How do I get started with creating a Defender account? First, download the Defender Guard app from the Google Play Store or Apple App Store. Scan the QR code to go directly to the Store pages, for your convenience. Then, proceed to download the app using... -
Page 8: Account Setup
Account Setup 1. Tap Sign Up to begin creating an account. 2. Select your country, then tap next. 3. Enter an email you’d like to use for your 4. You will receive a verification code within 15 account. Then enter a password. Ensure mins at the email you used in Step 3. -
Page 9: Getting To Know The Home Screen
Getting to know the home screen Do Not Disturb Toggle Add Camera Live View Device Settings Device Menu Account Settings Notifications Menu How do I setup my camera using a Wi-Fi network? Once your camera is powered on and the app is downloaded on your device with an active account, it is recom- mended you first perform a Network Quality Check at the location where you intend to mount your camera: 1. -
Page 10: Ensure Your Phone Is Connected To A 2.4 Ghz Wi-Fi Network Before Proceeding
Ensure your phone is connected to a 2.4 GHz Wi-FI network before proceeding! Now, follow these steps to connect your camera to the Wi-Fi network: 4. After powering on your 5. Tap the + icon to add a 6. Scan the QR code on the device, wait 60 seconds for new camera. -
Page 11: How Do I Setup My Camera Using A Wired Connection
10. Turn up the volume on 11. Enter a password to protect 12. If you like, you change the your device and it will your camera. default camera name to your communicate securely own choosing. Ensure time with your camera. settings are correct. -
Page 12: How Do I Manage Multiple Cameras And Accounts
How do I manage multiple cameras and accounts? Depending on your network speed, it is recommended you do not pair more than 6 cameras to 1 user account or share 1 camera with more than 6 user accounts. To add a new camera, follow the steps in How do I setup my camera using a Wi-Fi network? How do I manage multiple cameras and accounts? -
Page 13: How Do I Install And Mount My Camera
How do I install and mount my camera? Before mounting your camera, it is strongly advised that you test your intended location with the Network Quality Check tool. See Steps 1-3 in How do I install and mount my camera? You’ll need the following before installation: •... -
Page 14: Using The App
USING THE APP How do I navigate the home screen? Camera Name Do Not Disturb Global Live View Tap to add Camera (for multiple cameras) Device Settings Tap for Live View Reorder Cameras Device Menu Account Settings Notifications Menu... -
Page 15: How Do I Use Live View To Stream Live Video
How do I use Live View to stream live video? Back to home screen Device Details Share camera with other users Switch stream quality Tap to see mutliple camera feeds at once Mute audio feed Pause live view Switch to full-screen view (or rotate your device, if supported) View recorded videos Take snapshot... - Page 16 In either full screen landscape or regular portrait live view mode, tapping on to enter the multiple camera feed mode will always start with the active camera feed. To add additional cameras to your screen: 1. Tap on the empty feed you’d like to assign to a particular camera. 2.
-
Page 17: How Do I Setup Motion Notifications
How do I setup motion notifications? Motion notifications will be pushed to your device as motion is detected. If you tap on a notification within 60 seconds, you will see a recording of all activity up until the motion is detected. After 60 seconds, your camera will finish recording, and you can access the full recording with all motion (depending on the type, magnitude, and length of motion, it may take longer than 60 seconds. -
Page 18: How Do I Manage My Notifications
How do I manage my notifications? To disable all notifications from all cameras, you’ll need to activate Do Not Disturb (DND) mode from the app home screen, or through Me if you’d like to set a notification schedule. When DND is disabled, your notifications will be pushed to your device according to the Notification Window you set. -
Page 19: How Do I Disable Notifications
How do I disable notifications? To disable notifications on specific cameras and not all paired cameras, follow these steps: 1. On the Device Main 2. Tap Notifications. 3. Turn ON Notifications to Menu, tap to access receive notification alerts. device settings. You can also turn on Device Offline to be notified when your camera is offline. -
Page 20: How Do I Setup A Motion Region
How do I setup a motion region? A motion region allows you to specify active regions for motion detection. Use this function to prevent motion notifications from passing cars, trees/plants, and very high traffic regions in the camera’s field of view. 1. -
Page 21: How Do I Setup Continuous Recording
How do I setup continuous recording? With continuous recording, your Defender Guard camera will store an uninterrupted video record to your SD card. This option will consume more storage space on your SD card and will overwrite older video footage once storage is full. -
Page 22: How Do I View And Share Recordings
How do I view and share recordings? Recordings are saved to your camera’s SD card. You can stream recordings to view them, but you will need to take snapshots or videos of the recordings to share them or save them to your device. To view your recordings: 1. - Page 23 To save parts of your recordings or live stream via snapshots or video, follow these steps: 1. While viewing a recording, tap either the 2. If you are in Live View, you can tap the same snapshot or video buttons to save buttons.
- Page 24 6. If you would like share, delete, 7. Using the options at the 5. Share ,rename or save multiple items at bottom of the screen, you ,delete , or save once, tap and then select can delete, share, or save all items to your phone from all items.
-
Page 25: Settings And Troubleshooting
SETTINGS AND TROUBLESHOOTING How do I change my account password or delete my account? 1. On the Device main menu, tap Me. 2. Tap Settings. 3. Tap Account and Security, then 4. If you wish to delete your account permanently, tap Change Password. -
Page 26: How I Log Out Of My Current Account
How I log out of my current account? You cannot log into the same account from multiple devices, for security reasons. If you would like to share your camera across multiple devices, you will need to share the device. Logging into your account from different devices will automatically log you out of inactive sessions. -
Page 27: How Do I Use Faceid, Touchid, Or Biometrics To Log In
How do I use FaceID, TouchID, or biometrics to log in? Biometric login is available whenever you’d like to log in after the app has been inactive for a long time or the app has been force quit and reopened. 1. -
Page 28: How Do I Enable Streaming Over Cellular Connection
How do I enable streaming over cellular connection? NOTE: Streaming over cellular connection will consume large amounts of data from your data plan due to the nature of streaming. 1. On the Device main 2. Tap Settings. 3. Tap Exit Current Account of menu, tap Me your current account. -
Page 29: How Do I Format My Sd Card
How do I format my SD card? Formatting your SD card may be necessary at times when you would like to free up space, you receive an error indicating the SD card may be corrupted, or when swapping SD cards and you’d like to ensure personal data is not stored on the card. -
Page 30: How Do I Swap/Remove My Sd Card Or Reset My Camera
How do I swap/remove my SD card or reset my camera? Occasionally, you will need to reset your camera to fix issues with connectivity, consistent crashing, or if pairing freezes/does not work. Resetting your camera will not delete files on the SD card, but it will format your camera and its settings to factory default. -
Page 31: Technical Specifications
TECHNICAL SPECIFICATIONS 2.8 in 3.3 in 6.5 in IMAGE SENSOR ......4.0MP, 1/3” CMOS FIELD OF VIEW (FOV) ....123o Diagonal HOUSING ........Plastic and metal NIGHT VISION RANGE ....Up to 30M (100ft) EFFECTIVE PIXELS ......2560*1440 POWER SUPPLY ......DC 12V, 1.0A WI-FI .......... - Page 32 DEFENDER-USA.COM © 2019 Defender. All rights reserved.
Need help?
Do you have a question about the Guard IP4MCB1 and is the answer not in the manual?
Questions and answers