Advertisement
EN
m0511
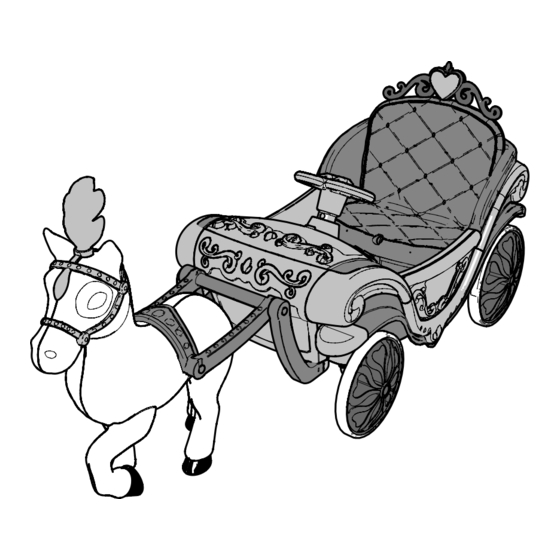
H-RO-Princess-Hrse
07-26-18
Date Code Label
Here
Battery Ride-on
Owner's Manual
This manual contains important safety, assembly,
operation and maintenance information.
Please read and fully understand this manual before
operation.
Save this manual for future reference.
Always wear approved helmet and safety equipment when
using this product.
BC
Advertisement

Related Manuals for Huffy Disney Princess Royal Horse and Carriage


Summary of Contents for Huffy Disney Princess Royal Horse and Carriage
- Page 1 m0511 H-RO-Princess-Hrse 07-26-18 Date Code Label Here Battery Ride-on Owner’s Manual This manual contains important safety, assembly, operation and maintenance information. Please read and fully understand this manual before operation. Save this manual for future reference. Always wear approved helmet and safety equipment when using this product.
-
Page 2: Table Of Contents
Owner’s Manual Index Safety and Warnings ...................2-5 Assembly and Parts ....................6-13 Operation and Charging Battery ............14-15 Maintenance and Service ................15-16 • General Info, Battery Storage, Replacement and Disposal Troubleshooting ....................17-18 Warranty ..........................19 Contact Information ..........Back Cover WARNING! •... - Page 3 WARNINGS Here are basic, common sense safe riding practices you should read aloud to your child and anyone who may use the vehicle. It is the responsibility of the adult to educate the child, determine if they are fi t to operate the vehicle, and supervise use.
- Page 4 Helmet Warning Information WARNING: ALWAYS WEAR YOUR HELMET WHEN RIDING THIS PRODUCT! • Helmet should sit level on your head and low on your fore- head. Exposed forehead can result in serious injury. • Adjust the strap sliders below the ear on both sides. •...
- Page 5 BATTERY & CHARGER WARNINGS: The following safety hazards may result in serious injury or death to the user of the vehicle: • Battery Charger for Indoor use only. • Use of a battery or charger other than the supplied rechargeable battery and charger may cause a fi re or explosion.
-
Page 6: Assembly And Parts
Parts View 13 14... - Page 7 Parts List Description Description Horse 12 Steering Wheel Head Piece 13 Power and Directional Switches with Panel Harness 14 Foot Pedal and Switch Harness Brackets pair 15 Battery Bracket Harness sub Frame 16 Seat Harness Bolts (x4) 17 Seat Locking Pin Storage Door with snap 18 Door Hinges Axle Washers (x4)
- Page 8 Installing the Rear Wheels: STEPS (TURN UNIT UP SIDE DOWN): NOTE: The Rear Wheels are the two larger wheels with Gears 1. NOTE: Axle and Motor may be pre-installed at factory - Ensure Washers are in position before assembly. If UN-assembled: Position Motor so that the Axle fits fully through from the right side.
- Page 9 Install the Front Wheels: STEPS (TURN UNIT UP SIDE DOWN): NOTE: The Front Wheels are the two smaller wheels. Ensure Washers are in place on Axles as shown. Install each Wheel fully onto Axle until it SNAPS into place. If needed, push Lock Button when installing.
- Page 10 Install Steering Wheel: STEPS: Position Steering Wheel over Locking Tabs and pointing FORWARD. Connect Power Plugs firmly and completely. - Tuck plug and excess wire into car body and steering wheel. Press Steering wheel down over Locking Tabs until Lock Buttons SNAP locked.
- Page 11 Connect Battery and Install Seat: STEPS: If in place, remove Seat by turning Lock Knob counter-clockwise. Lift front edge of Seat UP and move forward to release Seat back from Slots Connect Power Plugs firmly and completely. Install Seat by tilting back and inserting Tabs into Slots Put front edge of Seat down and Lock into place by turning Lock Knob...
- Page 12 Attaching Horse:...
- Page 13 Attaching Horse: NOTE: Turn unit on each side for easier Harness Installation. STEPS: VIEW Unfold Harness Assembly as shown. VIEW Position Horse in front of Carriage so that Harness Ends line up with Body/Harness Mounts SNAP each Harness End firmly in place. NOTE: All Caster Wheels may not sit on the ground evenly.
-
Page 14: Operation And Charging Battery
Charging the Drive Battery: IMPORTANT! Before using the unit for the fi rst time the battery needs to be charged for at least 8 to 12 hours - no more than 20 hours. Once battery is depleted, recharge for 8 to 12 hours - no more than 20 hours. IMPORTANT! STEPS: Check the drive battery and charger (supply... -
Page 15: Maintenance And Service
Operation: • Press Power Button turn on unit. • Push Forward / Reverse Switch to chose direc- tion. • Press Foot Switch move vehicle in desired direction. • Press Steering Wheel Switch for sound and/ or light features. Maintenance Repair and Service GENERAL: •... - Page 16 Drive Battery Replacement FOLLOW THESE STEPS IF THE BATTERY NEEDS TO BE REPLACED: Drive Battery Replacement Remove Seat FOLLOW THESE STEPS IF THE BATTERY Remove Battery Compartment Cover NEEDS TO BE REPLACED: and screws. Remove the Screws and Deck/Seat Disconnect the battery connectors Remove Hold-down Bracket and Screws Remove Hold-down Bracket and Screws Carefully lift the Battery...
-
Page 17: Troubleshooting
Troubleshooting Guide The following are examples of potential problems. Completely read through this manual and the troubleshooting guide table before calling. If you still need help resolving the problem please contact Customer Service. NOTE: Vehicle should be turned off and fully changed before doing troubleshooting. Problem Possible Cause Solution... - Page 18 Troubleshooting Guide - continued BEFORE YOU CALL SUPPORT: What is the model and date code? When was the product purchased? Has the product ever worked for a time or has never worked at all since purchase? • Yes, When did the product last operate correctly? •...
-
Page 19: Warranty
Limited Warranty - US General: • Modifi ed with the addition of a motor • Ridden by more than one person at a time Part or model specifi cations are subject to change • Rented, sold, or given away without notice. •... - Page 20 [ In the US and Canada] PLEASE BEFORE RETURNING TO STORE: Contact Huff y Customer Service. We are glad to assist you with any parts or assembly problems you might have! VEUILLEZ NOTER : AVANT DE RETOURNER AU MAGASIN : Communiquez avec le service à...
Need help?
Do you have a question about the Disney Princess Royal Horse and Carriage and is the answer not in the manual?
Questions and answers
There is no sound when I press this button ?
There may be no sound when pressing the button on the Huffy Royal Horse and Carriage due to battery issues. The battery might be dead, improperly connected, or not installed correctly. Ensure the connectors are properly attached (red to red, black to black), and the battery is charged and securely in place. Also, check if the vehicle is turned on.
This answer is automatically generated
I need the plug and cord to the huffy Disney princess and carriage v6 what should I be buying?
The Huffy Royal Horse and Carriage uses a battery charger with a cord and plug. The charger must be regularly checked for damage to the cord, plug, and enclosure. If damaged, it must not be used until repaired. The specific type of plug and cord is not detailed, so only the original or compatible replacement from the manufacturer should be used.
This answer is automatically generated