Table of Contents
Advertisement
Advertisement
Table of Contents

Subscribe to Our Youtube Channel
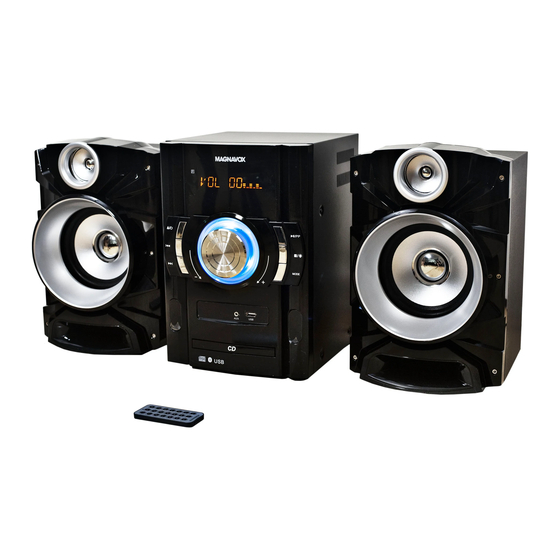
Summary of Contents for Magnavox MM440
- Page 2 FCC COMPLIANCE STATEMENT: This device complies with part 15 of the FCC Rules. Operation is subject to the following two conditions: (1) This device may not cause harmful interference, and (2) this device must accept any interference received, including interference that may cause undesired operation. Note: This equipment has been tested and found to comply with the limits for a Class B digital device, pursuant to Part 15 of the FCC Rules.
- Page 8 LOCATION OF CONTR0LS MAN UNIT: Front: 1. Remote Receiver 2. LED Display 3. VOLUME Control Knob ((Disc Tray Open-Close)/(Standby) Button 5. I◄◄ (Skip backward/Radio program down) Button 6. ►►I (Skip forward/Radio program up) Button 7. AUX (In) Jack 8. CD Disc Tray 9.
- Page 9 Rear: 1. FM ANT (Antenna) 2. POWER Switch 3. DC 15V (In) Jack 4. Speaker R (right) Clips 5. Speaker L (left) Clips...
- Page 10 REMOTE CONTROL: (Standby) Button Numeric Buttons PROG (Program) Button ◄◄ (Fast rewind/Radio tuning down) Button I◄◄ (Skip backward/Radio program down) Button REP (Repeat) Button ►II/PP (Play-Pause/Radio Program Preset) Button (Disc Tray Open/Close) Button 5+ Button 10. MODE Button 11. ■ (Stop) Button (Mute) Button 13.
- Page 11 CONNECTION: Connect the Speaker Connection Wires from Speaker Boxes to Speaker Out Clips on the rear of unit as illustrated below:...
- Page 12 POWER SOURCE: Main unit: Connect the small plug from the supplied AC/DC Adaptor to the DC 15V (In) Jack on the rear of unit then plug the AC/DC Adaptor to a AC wall outlet having AC 100-240V~; 50/60Hz as illustrated below: NOTES: ...
- Page 13 Remote Control: First time use: Remove and discard the insulation film as illustrated below: Replacing the button cell when it is drained as follows: Push and slide out the button cell holder as illustrated below. Replace the button cell with new CR2025 button cell with the polarity markings on the rear of the Remote Control.
- Page 14 Do not dispose of battery in fire. Battery may explode or leak. 7. Clean the battery contacts and also those of the device prior to battery installation. This product contains a coin/button cell battery. If the coin/button cell battery is swallowed, it can cause severe internal burn in just 2 hours and can lead to death.
- Page 15 OPERATION: GENERAL OPERATION: Connect the Speaker Boxes to the unit as previously instructed. Connect the unit to AC power as previously instructed. Slide the POWER Switch to ON position to power on the unit to standby mode. "O" will appear on the display. Press and hold the (Standby) Button on the unit or press the button on...
- Page 16 When finished listening, press and hold the (Standby) Button on the unit or press the button on the Remote Control to turn the unit to Standby Mode. NB: If you will not use the unit for an extended period of time, slide the POWER Switch to OFF position to power off the unit then unplug the AC/DC Adaptor from AC wall outlet.
- Page 17 Notes: When the external BT Device has searched the unit, our model number “MM440” will appear on the display of external BT Device. If while pairing you are asked for a code please try "0000" or "1234".
- Page 18 Wait a few seconds until the unit is automatically paired to the external BT Device. The indicator “ ” on the display will stop blinking. After pairing is complete you may now play music with your external BT Device. FM RADIO: Power on the unit as previously instructed.
- Page 19 AUX (AUX/LINE IN): Listen from an external Audio Player such as a Cell phone, MP3 Player, Discman …etc. Connect one end of the Audio Connection Cable (not included) to the AUX Out/Line Out/Phone Jack on the external Audio Player. Connect the other end of the cable to the AUX (Aux/Line In) Jack on the front of unit as illustrated below: Power on the unit as previously instructed.
- Page 20 USB: To play the music in external USB Device: In standby mode, insert the USB Device into the USB Port on the front of unit as illustrated below: Power on the unit as previously instructed. Press the Mode Button on the Unit or Remote Control repeatedly until “ ”...
- Page 21 Use the Numeric & 5+ buttons on the Remote Control to select and plays the desired tracks. For examples: To play the 4th track on the USB device, press the “4” Button. “0004” will appear on the display then the unit will start to play it. To play the 14th track on the USB device, press the “5+”...
- Page 22 Volume level too high Reduce the volume level by turning the VOLUME Control Knob on the unit counterclockwise or press the VOL – Button on Sound distortion the Remote Control Volume level of the Reduce the volume level connected/paired device too of the connected/paired high device...
- Page 23 Radio reception not good The direction or location no Unwind and extended the good for radio reception FM wire antenna on the rear of unit to its full length and/or reassemble the other direction/location to improve the reception USB Device not function Unit is not in USB mode Press the MODE Button on the Unit or Remote...


Need help?
Do you have a question about the MM440 and is the answer not in the manual?
Questions and answers
Lost remote have a universal remote What are the remote codes for a 3 piece cd shelf system