
Related Manuals for GTCO CalComp DrawingBoard VI


Summary of Contents for GTCO CalComp DrawingBoard VI
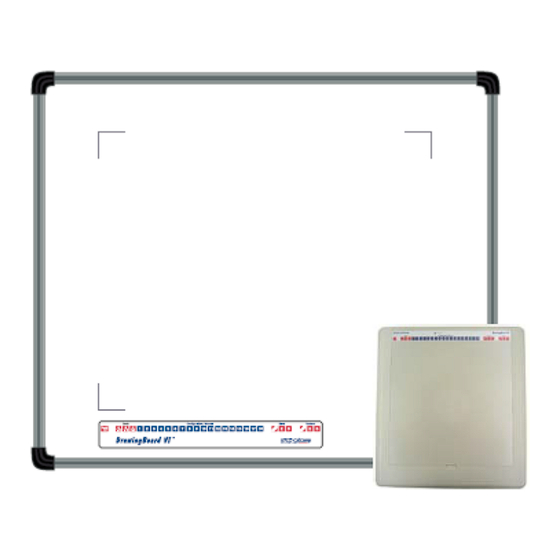
- Page 1 DrawingBoard VI 1 DRAWINGBOARD VI™ USER’S GUIDE THE DRAWINGBOARD VI FAMILY OF SMALL FORMAT AND LARGE FORMAT DIGITIZERS...
-
Page 2: Table Of Contents
DrawingBoard VI 2 Table of Contents Introduction Parts Checklist What You Will Need to Use DrawingBoard VI PC Requirements For a USB Installation For an Optional Serial Installation DrawingBoard VI Overview Active Area Menu Strip Indicator Light Transducers Preparing the Large Format DrawingBoard VI... -
Page 3: Introduction
A digitizer is an electronic tablet work surface. The position of a transducer, a handheld cursor or stylus pen, on the work surface of the DrawingBoard VI is converted – digitized – into data for computer processing. Data output from the DrawingBoard VI digitizer is in the form of an X/Y coordinate pair that pinpoints the precise location of the transducer on the tablet surface. -
Page 4: Parts Checklist
In order to send data to a digitizing application, DrawingBoard VI must be physically connected to a computer and should be able to transmit data in such a way that the digitizing application recognizes and understands it. -
Page 5: What You Will Need To Use Drawingboard Vi
What You Will Need to Use DrawingBoard VI PC Requirements DrawingBoard VI is equipped with both a USB and RS-232 serial interface, which requires an optional RS-232 cable and power supply. It is compatible with a majority of industry-standard PCs. TabletWorks Driver is provided by GTCO CalComp and is the only software described in this manual. -
Page 6: Drawingboard Vi Overview
Configuration keys for greater productivity. Indicator Light The power/proximity LED in the upper right corner of the large format DrawingBoard VI frame or the proximity/configuration light above the Menu Strip on the small format tablet is the Indicator Light. -
Page 7: Transducers
DrawingBoard VI 7 Transducer Two types of transducers can be used with DrawingBoard VI: pens and cursors. Both are available in corded and cordless versions. The corded transducers receive power from the digitizer. Cordless transducers are powered by batteries. They will go into a battery-saving... -
Page 8: Software Configuration
Software drivers provide the communication bridge between your digitizing software application and DrawingBoard VI. Install only the drivers necessary for the DrawingBoard VI to work with your application software. If you are not sure which drivers are required, consult with your application vendor. -
Page 9: Hardware Configuration
When you use the USB interface, no data output configuration is required. When you use the optional serial interface, DrawingBoard VI must be configured to send data in a format that is compatible with the application software. Different applications have different requirements when interacting with a digitizer. -
Page 10: Optional Rs-232 Serial Connection
DrawingBoard VI 10 NOTE: Power is supplied through the USB port. No additional power source is needed for a USB installation. Optional RS-232 Serial Connection 1. Connect the RS-232 serial cable to the serial jack on the Connector Panel. The connector is keyed and will fit only the correct jack. -
Page 11: Tablet Power-On
TabletWorks. TabletWorks is a Windows program included with the digitizer software that helps you use the full capabilities of your DrawingBoard VI. You can map your digitizer to the screen area and program stylus and cursor buttons with custom macros. -
Page 12: Selecting A Pre-Programmed Setup
Key controls the first Save Area. The setup saved to this area is activated whenever you Default power-up the digitizer. We recommend you save the setup you use most often as Selecting a Pre-Programmed Setup There are three pre-programmed setups available with DrawingBoard VI: GTCO CalComp DP5 High Resolution Binary ... -
Page 13: Selecting A Custom Setup
DrawingBoard VI 13 The following table lists the tablet options used by the pre-programmed setups. Default Save 2 Save 3 Mode Track Point Baud Rate 9600 9600 9600 Data Bits Parity None Even Data Rate 125 pps 150 pps 125 pps... -
Page 14: Tablet Options
DrawingBoard VI 14 6. Exit Configuration Mode by clicking on the Config/Exit key. Tablet Options The following sections show the various tablet options available through Configuration keys on the Menu Strip. Follow the procedure described on the previous page, using the keys shown for the option. - Page 15 DrawingBoard VI 15 Setting up increment mode Turning on prompt mode Setting up data rate for CalComp 2000 format Setting up data rate for Summagraphics MM ASCII format...
- Page 16 DrawingBoard VI 16 Setting up data rate for Summagraphics MM binary format Setting up resolution Resolutions up to 10,000 lpi are available on the large format tablets for applications that support it.
- Page 17 DrawingBoard VI 17 Setting up format...
- Page 18 DrawingBoard VI 18 Adding line feed Setting up data/stop bits Setting up baud rate Setting up parity Setting corded frequency * No longer Applicable Using Summagraphics MM or CalComp 2000 commands...
- Page 19 DrawingBoard VI 19 Using ESC for 9X00 commands Sending data out of proximity Turning on pressure pen data Turning on pen height data Turning on pen tilt data Turning on pen tilt correction Setting up CTS line enable Removing CR on ASCII formats...
-
Page 20: Recommended Setups For Common Pc Software Applications
DrawingBoard VI 20 Controlling pen sound Controlling tablet speaker Recommended Setups for Common PC Software Applications The following sections show the Configuration key setups for some common PC software Selecting a Custom Setup packages. Setup the Configuration keys as shown below (see ). - Page 21 DrawingBoard VI 21...
- Page 22 DrawingBoard VI 22...
- Page 23 DrawingBoard VI 23...
-
Page 24: Restoring A Pre-Programmed Setup
DrawingBoard VI 24 Restoring a Pre-Programmed Setup When you save a custom setup to one of the Save areas, the pre-programmed setup will be overwritten. To restore the original setup, place the Configuration keys as shown below, Selecting a Pre-Programmed Setup following the steps in the procedure. -
Page 25: Learning The Basics
DrawingBoard VI 25 Learning the Basics You will find that using your DrawingBoard VI tablet is as easy or easier, than using a mouse. The DrawingBoard VI transducers are more accurate than a mouse, giving you greater control over your movements. -
Page 26: Learning Basic Movements
DrawingBoard VI 26 Learning Basic Movements The DrawingBoard VI transducers provide all the basic movements of a mouse, including clicking, double-clicking and dragging. Clicking and Double-Clicking Clicking is the action of making a selection. You may be selecting a key on the digitizer surface, or making a selection from your computer monitor screen. -
Page 27: Caring For The Tablet And Transducer
DrawingBoard VI 27 Caring for the Tablet and Transducer Follow these precautions at all times to avoid damaging your DrawingBoard VI: Avoid discharging static electricity to the tablet. Do not place heavy objects on the tablet surface. ... -
Page 28: Replacing The Pen Tip
DrawingBoard VI 28 Replacing the Pen Tip To replace the pen tip, grasp the tip and pull straight out (see figure). Insert the new tip and press until it clicks into place. Replacing the Cordless Pen Batteries The pens require two 393 silver oxide batteries. The average battery life is 200 hours. - Page 29 DrawingBoard VI 29 To replace the batteries: 1. Unscrew the pen cap. Hold the pen from the bottom and gently slide off the pen cover to expose the batteries. 2. Remove the old batteries by turning the pen over and gently tapping it, letting the batteries fall into your other hand.
-
Page 30: Troubleshooting
DrawingBoard VI 30 Troubleshooting GTCO CalComp wants your experience with DrawingBoard VI to be a successful one. If you ever encounter a problem, please follow the steps below. User’s Guide 1. Review this to verify you have performed the correct steps. -
Page 31: Tablet Checklist
DrawingBoard VI 31 Tablet Checklist Is the tablet power supply plugged into the digitizer and into a live outlet? Is the tablet power switch on? Does the Indicator light glow steadily when the transducer is in prox inside the Active Area? Does the Indicator LED Blink when the transducer is outside the Active Area? ... -
Page 32: Software Checklist
DrawingBoard VI 32 Software Checklist Does the tablet work with some software? If your tablet currently works with some software packages, you know that the tablet, USB or serial port and computer work. Even if the software package you are trying to install and the software that is working both support the same tablets, it does not always mean that you can use the same tablet settings. -
Page 33: Troubleshooting Chart
DrawingBoard VI 33 Troubleshooting Chart The following tablet lists common DrawingBoard VI problems, their causes and their solutions. Problem Cause Solution *Frozen screen pointer Transducer is in Sleep Mode. Press any button on the transducer. Menu Strip is in Configuration If the configuration light is Mode. -
Page 34: Returning Your Tablet For Repair
Technical Support will assist you in determining if your tablet is defective and will help you obtain a Return Merchandise Authorization (RMA) number. Important: Please do not return your product without first discussing the issue with, and receiving an RMA from GTCO CalComp Technical Support. -
Page 35: Glossary
DrawingBoard VI 35 Glossary Accuracy The similarity of a distance measured by the tablet with the actual distance. When we specify that the accuracy of a tablet is ± .010 inches, we mean that every point in the Active Area is within .010 inches of where it should be. - Page 36 Active Area Area on the tablet surface intended for digitizing. Referred to as the Format The form in which data is sent from the tablet. DrawingBoard VI tablet can output 32 different formats. Frequency Number of waves that pass a fixed point in one second.
- Page 37 The conditions that must be met before the tablet sends information to the computer. Output Format System of characters used by the DrawingBoard VI tablet for outputting data. Parity Type of error detection where a bit is inserted into every character the digitizer transmits.
-
Page 38: Regulatory Statements And Warranty
DrawingBoard VI 38 Serial Transmission Data transmission protocol where each bit of the data character is sent one at a time over a single circuit. This system saves on transmission circuitry, but is usually slower than parallel transmission. Stop Bits One or two stop bits are transmitted with each data byte. -
Page 39: Canada
In order to avoid the dissemination of the hazardous substances into the environment and to diminish the pressure on our natural resources, GTCO CalComp encourages you to return this product to the appropriate take-back system facility. These facilities reuse or recycle most of the materials in this equipment in a responsible way. -
Page 40: Japan
DrawingBoard VI 40 Japan Bescheinigung des Herstellers/Importeurs Heirmit wird bescheinigt, dass der/die/das DrawingBoard VI (Geraet, Typ, Bezeichnung) im Uebereinstimmung mit den Bestimmungen der Vfg 1046/1984 (Amtsblattverfuegung) Funk-Entstort ist. Der Deutschen Bundespost wurde das Inverkehrbringen dieses Geraetes angezeigt und die Berechtigung zur Ueberpruefung der Serie auf Einhaltung der Bestimmungen eingeraumt. -
Page 41: Limited Warranty For The Drawingboard
Any damage in shipment of the product (claims must be presented to the carrier). d. Any other cause which does not relate to a manufacturing defect. GTCO CalComp will pay all labor and material expenses for covered items, but will not pay for the following: 1. - Page 42 Return Material Authorization Number (RMA#) and shipping instructions by calling: 1.800.220.1137 2. Ship the product to GTCO CalComp with the RMA# marked clearly on the outside of the box. Without a clearly marked RMA# on the shipping box, GTCO CalComp reserves the right to refuse the shipment.
- Page 43 Technologies assumes no responsibility for technical, or editorial errors, or omissions that may appear in this document, or for the use of this material. Nor does GTCO CalComp by Turning Technologies make any commitment to update the information contained in this document. This document contains proprietary information which is protected by copyright.
Need help?
Do you have a question about the DrawingBoard VI and is the answer not in the manual?
Questions and answers