Table of Contents
Advertisement
Quick Links
Download this manual
See also:
User Manual
Advertisement
Table of Contents
Troubleshooting

Related Manuals for GTCO CalComp Roll-Up III


Summary of Contents for GTCO CalComp Roll-Up III
- Page 1 ROLL-UP III™ USER’S GUIDE THE PORTABLE LARGE FORMAT DIGITIZER...
-
Page 2: Table Of Contents
Table of Contents Introduction Parts Checklist What You Will Need to Use Roll-Up III Setting Up Your Roll-Up III Software Configuration Configuring Non-Wintab Applications Installing the TabletWorks Driver Hardware Configuration USB Connection RS-232 Serial Connection Using the SuperSet Menu Changing the Digitizer’s Orientation... -
Page 3: Introduction
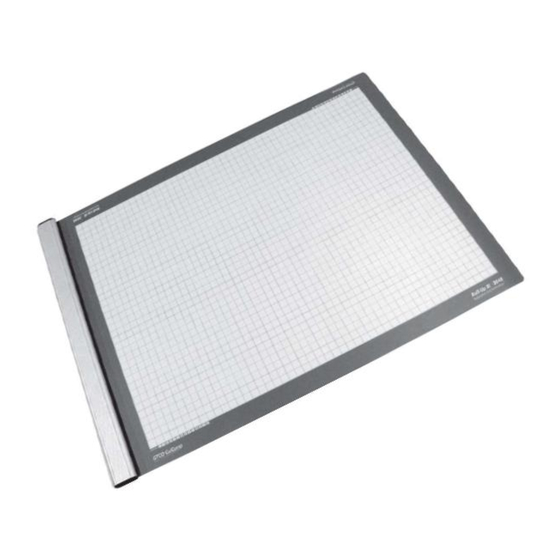
A digitizer is an electronic tablet work surface. The position of a transducer, a handheld cursor or stylus, on the work surface of the Roll-Up III is converted – digitized – into data for computer processing. Data output from the Roll-Up III digitizer is in the form of an X/Y coordinate pair that pinpoints the location of the transducer on the tablet surface. -
Page 4: Parts Checklist
Software drivers provide the communication bridge between your digitizing software application and the Roll-Up III. You should install only the drivers necessary for the Roll-Up III to work with your application software. The GTCO CalComp TabletWorks Driver supports Wintab and TabCon-compatible applications. -
Page 5: Installing The Tabletworks Driver
CAD and estimating applications using a simple code system. The SuperSet Menu on the surface of the Roll-Up III is used to enter the appropriate code for the software being used. A table in the Using the SuperSet Menu section of this manual lists the SuperSet Codes for a wide variety of applications. -
Page 6: Usb Connection
1. Connect the interface cable to the USB jack on the Roll-Up III Connector Panel. The connector is keyed and will fit only the correct jack. Do not force it. -
Page 7: Rs-232 Serial Connection
If an appropriate SuperSet Code is not listed in Table 2, use the Custom Configuration Menu stored in the slot on the end of the Roll-Up III housing to configure your Roll-Up III. 1. Plug the power supply into an AC outlet. Connect the power supply to the appropriate Roll-Up III jack on the Connector Panel. -
Page 8: Using The Superset Menu
Plug-N-Play is disabled. Changing the Digitizer’s Orientation Roll-Up III lets you choose between two different digitizer orientations: you can orient the digitizer with the controller Housing on your right (the factory default), or you can orient it with the Housing on your left. -
Page 9: Configuring Your Roll-Up Iii For Specific Applications
Configuring Your Roll-Up III for Specific Applications NOTE: The following is relevant only for RS-232 serial installations. USB does not require configuration. 1. In Table 1, find the application program you will be using with your Roll-Up III. Note the corresponding SuperSet Code. ... -
Page 10: Table 1: Superset Menu Codes For Selected Applications
Table 1: SuperSet Menu Codes for Selected Applications P. 8... - Page 11 P. 9...
- Page 12 P. 10...
- Page 13 P. 11...
- Page 14 P. 12...
- Page 15 P. 13...
- Page 16 P. 14...
- Page 17 P. 15...
- Page 18 P. 16...
- Page 19 P. 17...
- Page 20 P. 18...
-
Page 21: Table 2: Configuration Details For Superset Menu Codes
Table 2: Configuration Details for SuperSet Menu Codes NOTE: Max = 100 coordinates/second lpi = lines per inch lpmm = lines per millimeter P. 19... - Page 22 P. 20...
- Page 23 P. 21...
- Page 24 P. 22...
- Page 25 P. 23...
-
Page 26: Roll-Up Iii Tones
Roll-Up III Tones The Roll-Up III produces an alarm in the form of audio tones to inform you of various events. The table below describes the kinds of tones you might her while operating the digitizer. Table 3: Roll-Up Tones NOTE: You might hear tones produced by the Roll-Up III which are actually sent by your application program. -
Page 27: Introduction To The Custom Configuration Menu
Introduction to the Custom Configuration Menu The Custom Configuration Menu is used to relay configuration information to the Roll-Up III in those cases where Table 1 and Table 2 do not supply the information or a SuperSet Menu Code for the graphic application software being used. You will use the Custom Configuration Menu to configure the Roll-Up III for a specific baud rate, data format and other operating characteristics that your software requires for communication with the digitizer. -
Page 28: Output Format Options
Output Format Options GTCO: Selects GTCO-compatible formats. Choices are: Binary or ASCII. CalComp: Selects CalComp-compatible formats. Choices are: Binary, ASCII 1, ASCII 2, ASCII 3 or ASCII 4. Summa: Selects Summagraphics-compatible formats. Choices are: Binary or ASCII. ASCII formats can be modified by including or excluding a button code, decimal point, carriage return or line feed, depending on whether GTCO, CalComp or Summa formats have been selected. -
Page 29: Using The Custom Configuration Menu
Code, or if a different configuration is required, you can use the Custom Configuration Menu to configure Roll-Up III. The Custom Configuration Menu, pictured below, is stored in the slot at the end of the Roll-Up III housing. The Custom Configuration Menu replaces the 24 switches that were associated with older GTCO CalComp Digitizers. - Page 30 Custom Configuration Menu Mode will be aborted. This is indicated by three medium tones from the alarm. 5. Configure the Roll-Up III by selecting the function blocks that correspond to the settings your software will need to communicate with the digitizer.
-
Page 31: Care And Handling Of Roll-Up Iii
Do not permanently attach anything to the digitizer. Do not use sharp instruments on or near the Roll-Up III to avoid scratching or cutting it. Cuts in the digitizer will void your warranty. Do not crease, dent or abuse the digitizer. Creases can damage the digitizer structure. -
Page 32: Troubleshooting Guide
Troubleshooting Guide As with any computer peripheral, Roll-Up III problems sometimes do occur. Most of these problems are easy to find and correct. This troubleshooting guide provides clear instructions for finding and solving all common digitizer problems. In most cases, you will be able to quickly take care of the problem yourself by following these steps: 1. -
Page 33: Procedure A: Begin Troubleshooting
Install Driver: if a window pops up telling you to Install a driver every time you power on, and your application software does not use a driver, you should change the power on default SuperSet Code to , or re-install the Tabletworks driver from GTCO Calcomp Website. gtcocalcomp.com Procedure A: Begin Troubleshooting NOTE: This procedure should only be used to troubleshoot serial connections. -
Page 34: Procedure B: Troubleshooting
Procedure B: Troubleshooting P. 32... -
Page 35: The Tablet Configuration Utilities
Roll-Up II. To configure the Roll-Up III with the Tablet Configuration Utilities: 1. Make sure the Roll-Up III is plugged into a Serial Port, powered on and all the tablet drivers have been uninstalled or disabled. 2. Install the Tablet Configuration Utilities from www.gtcocalcomp.com... - Page 36 6. Select a predefined, 01 through 55, SuperSet Code, or select one of the User Defined, 90 through 98, SuperSet Codes to customize. a. User Defined (90 through 98) SuperSet Codes are initially read from the tablet when the Advanced Configuration screen opens. This is to prevent loss of custom settings.
-
Page 37: Regulatory Statements And Warranty
Regulatory Statements and Warranty Radio and Television Interference The user is cautioned that any changes or modifications not expressly approved by the party responsible for compliance could void the user’s authority to operate the equipment. This equipment has been tested and found to comply with the limits of a Class B digital device, pursuant to Part 15 of the FCC rules. -
Page 38: Japan
Der Deutschen Bundespost wurde das Inverkehrbringen dieses Geraetes angezeigt und die Berechtigung zur Ueberpruefung der Serie auf Einhaltung der Bestimmungen eingeraumt. GTCO CalComp, Inc. (Name des Herstellers/Importeurs) Dieses Geraet wurde einzeln sowohl als auch in einer Anlage, die einen normalen Anwendungsfall nachbildet, auf die Einhaltung der Funkentstoerbestimmungen geprueft. -
Page 39: European Union Directives
In order to avoid the dissemination of the hazardous substances into the environment and to diminish the pressure on our natural resources, GTCO CalComp encourages you to return this product to the appropriate take-back system facility. These facilities reuse or recycle most of the materials in this equipment in a responsible way. -
Page 40: Limited Warranty For The Roll-Up
3. Any product not sold by an Authorized Dealer of GTCO CalComp. GTCO CalComp will pay all labor and material expenses for covered items, but will not pay for the following: 1. Removal or installation charges. 2. Costs for initial technical adjustments (set up), including adjustment of user controls. - Page 41 Return Material Authorization Number (RMA#) and shipping instructions by calling: 1.800.220.1137 2. Ship the product to GTCO CalComp with the RMA# marked clearly on the outside of the box. Without a clearly marked RMA# on the shipping box, GTCO CalComp reserves the right to refuse the shipment.
- Page 42 Technologies assumes no responsibility for technical, or editorial errors, or omissions that may appear in this document, or for the use of this material. Nor does GTCO CalComp by Turning Technologies make any commitment to update the information contained in this document. This document contains proprietary information which is protected by copyright.
Need help?
Do you have a question about the Roll-Up III and is the answer not in the manual?
Questions and answers