Table of Contents
Advertisement
Quick Links
Advertisement
Table of Contents

Related Manuals for Bosch AUTODOME IP starlight 5000i NDP?5512?Z30C


Summary of Contents for Bosch AUTODOME IP starlight 5000i NDP?5512?Z30C
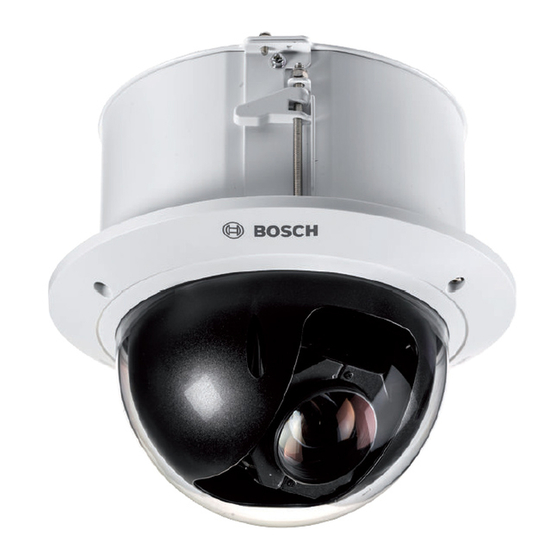
- Page 1 AUTODOME IP starlight 5000i NDP‑5512‑Z30C Installation Manual...
-
Page 3: Table Of Contents
Securing the Camera to the Ceiling Installing an In-Ceiling Camera in a Drywall Ceiling Tools Required Installation Requirements Preparing the Ceiling for Installation Securing the Camera to the Ceiling Connection Troubleshooting Maintenance Decommissioning Bosch Security Systems Installation Manual 2019-03 | 1.2 |... -
Page 4: Safety
Legal information Copyright This manual is the intellectual property of Bosch Security Systems, Inc. and is protected by copyright. All rights reserved. Trademarks All hardware and software product names used in this document are likely to be registered trademarks and must be treated accordingly. -
Page 5: Important Safety Instructions
® (NEC)), Canadian Electrical Code, Part I (also called CE Code or CSA C22.1), and all applicable local codes. Bosch Security Systems accepts no liability for any damages or losses caused by incorrect or improper installation. All-pole power switch - Incorporate an all-pole power switch, with a contact separation of at least 3 mm, into the electrical installation of the building. -
Page 6: Connection In Applications
AUTODOME IP starlight 5000i Always use Teflon tape and sealant on connector threads of any mount (sold separately by Bosch or user-supplied). Connection in applications 24 VAC power source: This unit is intended to operate with a limited power source. The unit is intended to operate at 24 VAC (if PoE+ is not available). - Page 7 GB/T 26572 X: The content of such hazardous substance in a certain homogeneous material is above the limit defined in GB/T 26572 The manufacturing datecodes of the products are explained in: http://www.boschsecurity.com/datecodes/ Bosch Security Systems Installation Manual 2019-03 | 1.2 |...
-
Page 8: Customer Support And Service
| Safety AUTODOME IP starlight 5000i Customer support and service If this unit needs service, contact the nearest Bosch Security Systems Service Center for authorization to return and shipping instructions. Telephone: 800-366-2283 Fax: 800-366-1329 Email: cctv.repair@us.bosch.com Customer Service Telephone: 888-289-0096 Fax: 585-223-9180 Email: security.sales@us.bosch.com... -
Page 9: Introduction
Verify that all the parts listed in the Parts List below are included. If any items are missing, notify your Bosch Security Systems Sales or Customer Service Representative. – Do not use this product if any component appears to be damaged. Please contact Bosch Security Systems in the event of damaged goods. –... -
Page 10: Product Description
AUTODOME IP starlight 5000i camera has an integrated 30X optical zoom to identify people at a maximum distance of 183 m (600 ft) with minimal loss of detail. 2019-03 | 1.2 | Installation Manual Bosch Security Systems... -
Page 11: Preparing Wiring
28 m (94 ft) 45 m (150 ft) 72 m (238 ft) 183 m (603 ft) Wire Gage Note: Metric wire sizes are standard DIN sizes, ISO6722, mm². Wire diameter (mm²) Bosch Security Systems Installation Manual 2019-03 | 1.2 |... -
Page 12: Preparing The Camera
Torx screwdriver. Remove the trim ring / bubble enclosure. Remove the foam insert that protects the camera block. Remove the tape holding the plastic lens protector; remove the lens protector. 3× 2019-03 | 1.2 | Installation Manual Bosch Security Systems... -
Page 13: Installing A Microsd Card (Optional)
Push the camera block until you see the card slot (item 1 in the following figure). Insert the card into the slot (item 2 in the following figure). Push the camera block into its original position (item 3 in the following figure). Proceed with installation. Bosch Security Systems Installation Manual 2019-03 | 1.2 |... -
Page 14: Installing An In-Ceiling Camera In A Suspended Ceiling
Base Plate Bar Clips Use the bracket Base Plate as a template or cut a hole-sized hole in the center of the ceiling tile with a drywall utility saw or jig saw. 2019-03 | 1.2 | Installation Manual Bosch Security Systems... - Page 15 Tighten the four (4) securing screws to the Bracket Assembly. Figure 7.3: Tighten Bracket Securing Screw Secure the Bracket Assembly to an overhead securing point with a safety wire. Figure 7.4: Secure Bracket Assembly Bosch Security Systems Installation Manual 2019-03 | 1.2 |...
-
Page 16: Securing The Camera To The Ceiling
Place the trim ring / bubble enclosure in position over the camera block, aligning the three (3) screws. Tighten the screws firmly to secure the trim ring / bubble enclosure to the in-ceiling bracket. 2019-03 | 1.2 | Installation Manual Bosch Security Systems... - Page 17 AUTODOME IP starlight 5000i Installing an In-ceiling Camera in a Suspended Ceiling | en 3× Bosch Security Systems Installation Manual 2019-03 | 1.2 |...
-
Page 18: Installing An In-Ceiling Camera In A Drywall Ceiling
Cut the hole in the ceiling with a drywall utility saw or jig saw. > 15 kg (33 lb) 178.0 (7.0) Pull the cables (24 VAC, CAT 5/CAT6, alarm and/or audio as needed) through the hole in the ceiling. 2019-03 | 1.2 | Installation Manual Bosch Security Systems... -
Page 19: Securing The Camera To The Ceiling
Insert the camera (without the trim ring / bubble enclosure) into the hole in the ceiling. Ensure not to pinch the cables. Turn each fastening screw to secure the clamps in the ceiling. Bosch Security Systems Installation Manual 2019-03 | 1.2 |... - Page 20 Place the trim ring / bubble enclosure in position over the camera block, aligning the three (3) screws. Tighten the screws firmly to secure the trim ring / bubble enclosure to the in-ceiling bracket. 2019-03 | 1.2 | Installation Manual Bosch Security Systems...
- Page 21 AUTODOME IP starlight 5000i Installing an In-Ceiling Camera in a Drywall Ceiling | en 3× Bosch Security Systems Installation Manual 2019-03 | 1.2 |...
-
Page 22: Connection
4 Network device (computer with monitor, DVR/NVR, etc.) If desired, connect the alarm and/or audio wires as identified in the following table. Label ID Description Cable Wire Color ALARM_COM Alarm Communications Red ALARM_OUT Alarm Out Brown 2019-03 | 1.2 | Installation Manual Bosch Security Systems... - Page 23 Description Cable Wire Color ALARM_IN1 Alarm In 1 White ALARM_IN2 Alarm In 2 Blue AUDIO OUT Audio Out Grey Ground Black AUDIO GND Audio Ground Green AUDIO IN Audio In Purple Bosch Security Systems Installation Manual 2019-03 | 1.2 |...
-
Page 24: Troubleshooting
Note: Refer to the Error Codes section of the manual for descriptions of the error codes that appear on the OSD. The section also lists recommended actions to resolve the error codes. 2019-03 | 1.2 | Installation Manual Bosch Security Systems... -
Page 25: Maintenance
Dry the bubble thoroughly with a dry nonabrasive cloth to prevent water spots. Never scrub the bubble with any abrasive material or cleaners. Bosch recommends cleaning the exterior of the bubble with NOVUS “No. 1” Plastic Clean & Shine (or equivalent), according to manufacturer’s instructions. Refer to www.novuspolish.com to order or to find a local distributor. -
Page 26: Decommissioning
| Decommissioning AUTODOME IP starlight 5000i Decommissioning 2019-03 | 1.2 | Installation Manual Bosch Security Systems... - Page 27 AUTODOME IP starlight 5000i Decommissioning | Bosch Security Systems Installation Manual 2019-03 | 1.2 |...
- Page 28 | Decommissioning AUTODOME IP starlight 5000i 2019-03 | 1.2 | Installation Manual Bosch Security Systems...
- Page 30 Bosch Security Systems B.V. Torenallee 49 5617 BA Eindhoven Netherlands www.boschsecurity.com © Bosch Security Systems B.V., 2019...
Need help?
Do you have a question about the AUTODOME IP starlight 5000i NDP?5512?Z30C and is the answer not in the manual?
Questions and answers