Advertisement

Nottingham
Analogue Studios
Dealer Manual

Advertisement

Table of Contents
loading
Need help?

Need help?

Do you have a question about the Deco and is the answer not in the manual?

Questions and answers

юрий
April 21, 2025

почему нельзя регулировать винт на тонарме

1 comments:
Mr. Anderson
May 10, 2025

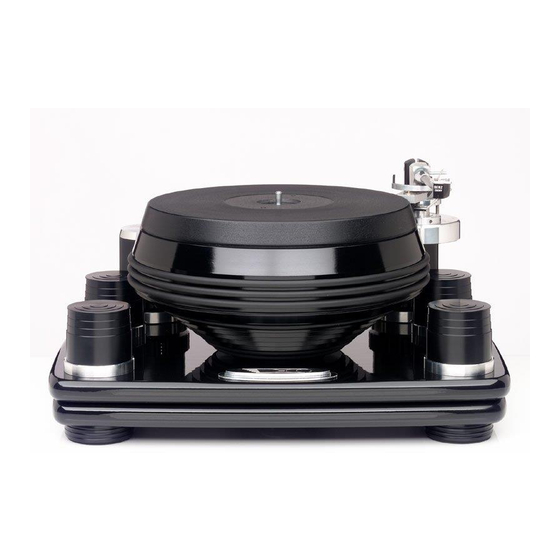
The screw on the tonearm of the Nottingham Analogue Studio Deco can't be adjusted easily once the oil is added to the bearing well, because adjusting the tonearm position may require removing the platter and repositioning the arm and arm pod. This is easier to do before adding oil.

This answer is automatically generated

Summary of Contents for NOTTINGHAM ANALOGUE STUDIO Deco

  • Page 1 Nottingham Analogue Studios Dealer Manual...
  • Page 2: Table Of Contents

    Table of Contents Essential tools Set up Specs Distance from Tone arm center to spindle Effective Mass of Tonearms Nottingham Cartridge specs Set up tips The meaning of tight Thoughts on VTA Thoughts on Bias (anti-skate) Motor height Getting the tone arm position right Installing and positioning the cartridge Getting the right amount of oil in the bearing Positioning your table –...
  • Page 3: Essential Tools

    Essential tools Included Allen Keys (metric) Spirit Level Protractor Additional tools Stylus Pressure Gauge The Shure SFG gauge works well Small Electric Screwdriver With a clutch so you won’t over tighten Cartridge Mounting Screws - Spares are helpful so when you drop them you don’t have to go crazy looking for them A Good pair of Needle Nosed Pliers Not Tweezers! A Ruler w/ Metric scale...
  • Page 4: Set Up Specs

    Set up Specs Distance from Tone arm center to spindle Interspace and RB-250 222 mm Space Arm 210 mm Anna (10”) 222 mm Anna (12”) 294 mm Effective Mass of Tone arms* RB-250 11.25 grams Interspace 11.25 grams Space Arm 12.5 grams Anna (10”) 13 grams...
  • Page 5: Set Up Tips

    Set up tips The meaning of tight There is a great deal of debate about how tightly you should tighten all of the little screws and bolts when setting up a turntable. While we will not offer our thoughts on other manufacturers recommendations, we thought you should know about our recommendations for our turntable.
  • Page 6: Getting The Tone Arm Position Right

    Installing and positioning the cartridge My suggestion is to install the cartridge on the tone arm while the tone arm is free from the table. It will be much easier to attach wires and get the mounting screws threaded while the arm is free and on its back. Get the screws just snug enough to hold the cartridge in place but loose enough so that you can move it when you are lining things up with the protractor.
  • Page 7: What About The Plinth

    What about the plinth A plinth is supplied with each table. In the case of the Space Deck and the Horizon this is done to supply a platform with a predictable behavior. It is possible to use the tables without the plinth, but be careful! As we mentioned in the section above, many things that claim to do a “better”...
  • Page 8: Maintenance & Service

    Maintenance & Service Cleaning Belts The belt should last a very long time. Occasionally you may want to clean it (especially if you have smokers in the house or if the house is dusty). All you have to do is wash it in some gentle liquid hand soap, rinse it carefully and let it dry. Changing Oil Tom Fletcher says: “Oil wears out under rotation –...
  • Page 9 NOTTINGHAM ANALOGUE STUDIO 128 CORDY LANE, UNDERWOOD, NOTTINGHAM NG16 5FD Design and Manufacture of Quality Audio Equipment Telephone: +(44) (0) 1773 762947 Fax: +(44) (0) 1773 533566 V.A.T. REGISTRATION NO. 667 3729 92 ASSEMBLY INSTRUCTIONS FOR THE HORIZON TURNTABLE Put approximately ½ of a capful of oil into the bearing well. Lower the platter assembly into the bearing well and allow it to settle.
  • Page 10 NOTTINGHAM ANALOGUE STUDIO 128 CORDY LANE, UNDERWOOD, NOTTINGHAM NG16 5FD Design and Manufacture of Quality Audio Equipment Telephone: +(44) (0) 1773 762947 Fax: +(44) (0) 1773 533566 V.A.T. REGISTRATION NO. 667 3729 92 ASSEMBLY INSTRUCTIONS FOR THE HORIZON SE TURNTABLE Put approximately ½...
  • Page 11 NOTTINGHAM ANALOGUE STUDIO 128 CORDY LANE, UNDERWOOD, NOTTINGHAM NG16 5FD Design and Manufacture of Quality Audio Equipment Telephone: +(44) (0) 1773 762947 Fax: +(44) (0) 1773 533566 V.A.T. REGISTRATION NO. 667 3729 92 SPACEDECK INSTRUCTIONS Place the turntable on a level surface. Half fill the bearing hole with oil. Carefully lower the platter assembly into the bearing well centrally and allow to sink slowly under it’s own weight.
  • Page 12 NOTTINGHAM ANALOGUE STUDIO 128 CORDY LANE, UNDERWOOD, NOTTINGHAM NG16 5FD Design and Manufacture of Quality Audio Equipment Telephone: +(44) (0) 1773 762947 Fax: +(44) (0) 1773 533566 V.A.T. REGISTRATION NO. 667 3729 92 SPACEDECK DIAGRAM CAPHEAD BOLTS DO NOT NON ADJUSTABLE...
  • Page 13 NOTTINGHAM ANALOGUE STUDIO 128 CORDY LANE, UNDERWOOD, NOTTINGHAM NG16 5FD Design and Manufacture of Quality Audio Equipment Telephone: +(44) (0) 1773 762947 Fax: +(44) (0) 1773 533566 V.A.T. REGISTRATION NO. 667 3729 92 HYPERSPACE INSTRUCTIONS Place the turntable on a level surface. Put two capfuls of oil into the bearing well. Carefully lower the platter assembly into the bearing well centrally and allow to sink slowly under its own weight.
  • Page 15 NOTTINGHAM ANALOGUE STUDIO 128 CORDY LANE, UNDERWOOD, NOTTINGHAM NG16 5FD Design and Manufacture of Quality Audio Equipment Telephone: +(44) (0) 1773 762947 Fax: +(44) (0) 1773 533566 V.A.T. REGISTRATION NO. 667 3729 92 DAIS INSTRUCTIONS Well done, you have found the instructions! Now, carefully unpack both boxes. OK – we know it looks like a ‘kit’...
  • Page 16 NOTTINGHAM ANALOGUE STUDIO 128 CORDY LANE, UNDERWOOD, NOTTINGHAM NG16 5FD Design and Manufacture of Quality Audio Equipment Telephone: +(44) (0) 1773 762947 Fax: +(44) (0) 1773 533566 V.A.T. REGISTRATION NO. 667 3729 92 ASSEMBLY INSTRUCTIONS FOR ‘HEAVY DUTY KITS’ Remove the arm from the turntable.
  • Page 17 NOTTINGHAM ANALOGUE STUDIO 128 CORDY LANE, UNDERWOOD, NOTTINGHAM NG16 5FD Design and Manufacture of Quality Audio Equipment Telephone: +(44) (0) 1773 762947 Fax: +(44) (0) 1773 533566 V.A.T. REGISTRATION NO. 667 3729 92 WAVE MECHANIC POWER SUPPLY Why a power supply? But first, why an AC turntable motor?
  • Page 18 3. Supply waveform This is an aspect that has been becoming universally and insidiously more of a problem over the years largely as a result of the “switched mode” power supplies that have generally supplanted transformers in much modern electronic equipment. The supply waveform does not now have a clean sinusoidal shape, but shows drastically clipped peaks –...
  • Page 19 NOTTINGHAM ANALOGUE STUDIO 128 CORDY LANE, UNDERWOOD, NOTTINGHAM NG16 5FD Design and Manufacture of Quality Audio Equipment Telephone: +(44) (0) 1773 762947 Fax: +(44) (0) 1773 533566 V.A.T. REGISTRATION NO. 667 3729 92 Pulley Installation An adjustment has been made to the packing of Nottingham’s turntables to ensure that the motor/pulley assembly can better withstand the rigors of shipping in the United States.
  • Page 20 NOTTINGHAM ANALOGUE STUDIO 128 CORDY LANE, UNDERWOOD, NOTTINGHAM NG16 5FD Design and Manufacture of Quality Audio Equipment +(44) (0) 1773 762947 Telephone: +(44) (0) 1773 533566 Fax: V.A.T. REGISTRATION NO. 667 3729 92 Rega Tonearm Instructions With the cartridge fitted and aligned using the alignment protractor supplied, ensure that the bias adjustment slider is set to zero.
  • Page 21 NOTTINGHAM ANALOGUE STUDIO 128 CORDY LANE, UNDERWOOD, NOTTINGHAM NG16 5FD Design and Manufacture of Quality Audio Equipment Telephone: +(44) (0) 1773 762947 Fax: +(44) (0) 1773 533566 V.A.T. REGISTRATION NO. 667 3729 92 INTERSPACE ARM INSTRUCTIONS Place the arm in the collet facing forward. Carefully put the stylus into the cartridge body and raise the arm out of the collet.
  • Page 22 NOTTINGHAM ANALOGUE STUDIO 128 CORDY LANE, UNDERWOOD, NOTTINGHAM NG16 5FD Design and Manufacture of Quality Audio Equipment Telephone: +(44) (0) 1773 762947 +(44) (0) 1773 533566 V.A.T. REGISTRATION NO. 667 3729 92 SPACEARM and ANNAARM INSTRUCTIONS Attach the cartridge to the arm and place the arm into the hole. The headshell should face directly to the front when the arm is ‘parked’.
  • Page 23 1. Initially mount the cartridge midway in the headshell slots. Polaris Plus 2. Level the ‘playing field’; set a nominal tracking force and arm height, and zero the bias (‘antiskating’) force. Stylus Alignment 3. Slip hole ‘A’ of the gauge over the turntable spindle. 4.
  • Page 24: Horizon

    General Specifications Model Dimension (w/d/h inches) Weight / Shipping Weight Deco 20 x 18 x 9.5 Dais 19 x 15 x 12 Hyperspace 19 x 15 x 10 Space w/ heavy kit 18 x 14.25 x 8 Space Deck 18 x 14.25 x 8 Horizon SE 19 x 13.25 x 7.25...
  • Page 25 Nottingham Arm Boards Following you will find a grid for specifying and ordering mounting systems for the most commonly requested tonearms for each of the Nottingham Analogue turntables. All information is based on the assumption that the turntable in question is a current model and is equipped with the standard mount for a Nottingham tonearm.
  • Page 26: Prices

    Collet Arm base Arm base Collet Arm base Left Side Arm base Arm base Arm base Arm base Arm base Deco Right side Collet Arm base Arm base Collet Arm base Left side Arm Base Arm base Arm base Arm base Arm base * (15&20)

Table of Contents

Save PDF