Table of Contents
Advertisement
Advertisement
Table of Contents

Subscribe to Our Youtube Channel
Related Manuals for Moore Industries SPA


Summary of Contents for Moore Industries SPA
- Page 1 April 2016 Site-Programmable AC 224-770-00E Current & Voltage Alarms...
-
Page 2: Table Of Contents
Programmable Input Failure Alarms ................3 Universal Mounting ......................3 Specifications ......................4 Internal Settings ..................... 5 Programming the SPA AC Input Alarm Trip ..........8 View Settings ........................8 Password ........................10 Configure Options ......................10 Scaling Input “Smart Scaling” ..................12 Applying Input “Bench Ranging”... -
Page 3: The Spa Ac Input Alarm Trip
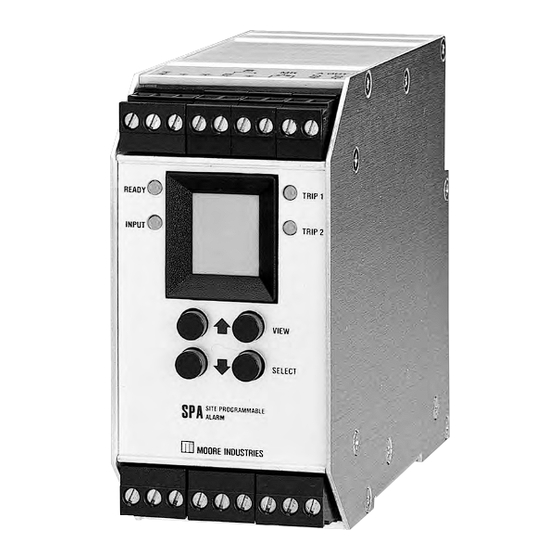
WARNING - Hazardous procedure or condition that Universal Mounting could injure the operator. The SPA is housed in a “universal” DIN case that can be mounted on both 32mm G-type (EN50035) and Caution - Hazardous procedure or condition that could 35mm Top Hat (EN50022) DIN-rail. -
Page 4: Specifications
Site-Programmable AC Current & Voltage Alarms Specifications Performance Performance Repeatability: Power Consumption: Ambient Relative Humidity: Trip point repeats within (continued) Conditions 2-4W, nominal; 0–95% non-condensing ±0.1% of input span 6W, maximum (continued) RFI/EMI Protection: Display Accuracy: Input Impedance: 160KΩ 10V/m, 20 to 1000MHz, as ±1 digit;... -
Page 5: Internal Settings
Site-Programmable AC Current & Voltage Alarms The SPA housing is fitted with a sliding access door in Internal Settings its bottom panel. Figures 1, 2, and 3 show the panel The Failsafe/Non-failsafe relay and the password and the location of each of the controls for setting:... - Page 6 Figure 2. Setting the Internal DIP Switches for Failsafe or Non-Failsafe Alarm Function SLIDING PANEL FRONT BACK SPA UNDERSIDE SET FAILSAFE/NON-FAILSAFE FAILSAFE EXAMPLE: NON-FAILSAFE ALARM 1 = NON-FAILSAFE ALARM 2 = FAILSAFE NOTE: THIS 4-POSITION SIP SWITCH MAY VARY IN LOCATION BASED ON THE TYPE OF SPA USED The Interface Solution Experts...
- Page 7 Site-Programmable AC Current & Voltage Alarms Figure 3. Setting the Internal DIP Switches for Current Source/Sink or Voltage (AO-equipped SPAs only) SLIDING PANEL FRONT BACK SPA UNDERSIDE SET CURRENT-SOURCE/SINK OR VOLTAGE SINK SOURCE CURRENT VOLTAGE CURRENT The Interface Solution Experts...
-
Page 8: Programming The Spa Ac Input Alarm Trip
The SPA operating parameters are set, and the set- tings are stored in on-board, non-volatile EEPROM. On power-up, the AC-input SPA defaults to a display of There are four push buttons on the unit front panel; the measured value. Pressing the VIEW button ac- VIEW, SELECT, an UP arrow, and a DOWN arrow. -
Page 9: Password
Site-Programmable AC Current & Voltage Alarms Figure 4. The SPA ACIPRG & ACVPRG Main Menu push buttons to scroll through menus and sub-menus. Use SELECT push button to access menu and/or make a choice. Front Panel Push Buttons Inactive during operation. -
Page 10: Configure Options
AAC or VAC, depending on the type of SPA. Its scaling is tied to any input scaling 3. Press SELECT to begin the process of setting performed (set in another menu). If equipped with the the desired engineering units to be displayed –AO option, SPA output can be scaled independently... - Page 11 Site-Programmable AC Current & Voltage Alarms Figure 5. The Configure Options Menu OR "CONF EXIT" IF VIEW ENTR PASSWORD JUMPER PASS IS NOT INSTALLED SELECT LINR CUST FUNC EXIT FUNC SELECT VIEW CUST FUNC VIEW SELECT CONF VIEW OPTS VIEW SELECT CUST LINR...
-
Page 12: Scaling Input "Smart Scaling
3. SELECT the “SET FULL” menu, and use the arrow buttons to set the display to show This feature of the SPA allows users to set the zero the known full scale input from the intended and full scale values of the input from the intended application. - Page 13 CONF SET LINEAR MAIN MENU: SELECT OR CUSTOM ENGINEERING UNITS INCREMENT XXXX (ZERO) VIEW SCLE EXIT SCLE INPT SELECT DEPENDING ON TYPE OF SPA VIEW XXXX XXXX SELECT VIEW APLY INPT ZERO SELECT DECREMENT XXXX (ZERO) VIEW FULL SELECT INCREMENT...
-
Page 14: Applying Input "Bench Ranging
Current & Voltage Alarms Main Menu: Applying Input “Bench Ranging” Figure 7. The SPA Bench Scaling Setup With this method of calibrating input to the SPA, the SPA is hooked into a calibration setup and inputs are INPUT “captured” at their zero and full scale values. - Page 15 CONF OPTS FROM THE VIEW SCLE MAIN MENU: INPT SELECT "SMART" SCALING VIEW APLY EXIT DEPENDING ON INPT INPT SELECT TYPE OF SPA VIEW XXXX XXXX SELECT VIEW SAVE SCLE ZERO DSPL SELECT VIEW SAVE FULL SELECT DEPENDING ON TYPE OF SPA...
-
Page 16: Scaling The Display
CNFG EXIT OPTS DECREMENTS SCALED SCALE DISPLAY This is the menu with which the SPA user can further FULL DISPLAY AND RETURN TO THE MAIN MENU “customize” unit operations. This menu is available only in units where the “CUST FUNC” Custom Mode selection has been made in the Configure Options menu, earlier. -
Page 17: Enter Curve
Custom • Xz < Xn < Xn+1 < Xn+2 < ... < Xn+19 < Xf Mode to make the SPA display linear with respect to its scaled input. When enabled (in the “CONF OPTS”... -
Page 18: Analog Output Scaling
(if present) must also be changed. with an analog output option. Scaling for the analog output of the SPA is stored as numerical values in unit Figure 11 shows the menu for this procedure. memory. They are not stored as percentages of scale. -
Page 19: Trim Analog Output
(repeat steps 3, 4, and 5), SELECT EXIT or “EXIT OUT” if both zero and full scale output have been adjusted. TRIM FLASHING FULL Figure 12. Connections for Trimming SPA Analog Output INCREMENT VIEW DECREMENT SELECT MULTIMETER MILLIAMETER EXIT... -
Page 20: Configure Alarm
Site-Programmable AC Current & Voltage Alarms Main Menu: Configure Alarm In the “APLY TRIP” menu, the SPA must be set up with calibration equipment (see Figure 7, page 12). The Configure Alarm menu sets the trip point(s), The unit then “captures” its trip point from the input of Deadband, Trip Delay, High or Low Alarm function, and an adjustable source. - Page 21 Site-Programmable AC Current & Voltage Alarms Figure 14. The Configure Alarm Menu TRIM DISPLAYS ALRM EXIT EXIT ENGINEERING UNITS INCREASE ALRM AND DECIMAL POSITION TRIP POINT SET IN CONF OPTS CONF FROM THE AL 1 ALRM #### ENTR MAIN MENU: CONF XXXX TRIP...
-
Page 22: Change The Password
(Only available on SPA with –SW option) NOT installed, or when the jumper is installed and a The Start Timer function causes the SPA to wait on correct password has been entered. When the jumper startup for between 0 and 60 seconds before it checks is installed, unless the correct password is entered, if the motor is running. -
Page 23: Installation
G-type and Top Hat rails. Figure 18 shows the unit dimensions. Mounting To mount the SPA on Top Hat DIN-rail, seat the up- per extrusion on the unit back panel over the top lip of the rail and pivot downward until the housing locks into place. -
Page 24: Operation
SPA menu system take effect im- mediately. • All input signals to, and output signals from, Moore Industries’ products should be wired using a The settings of the internal DIP switches and security shielded, twisted pair wiring technique. - Page 25 There are at least three, and as many as four LEDs alarm is determined by the failsafe/non-failsafe on the front panel of the SPA. Each is labeled, and setting of the unit’s internal DIP switches provides a quick reference for input condition during (see Figure 4, earlier in this manual).
- Page 26 AND these manual reset termi- nals are shorted. Shorting the MR terminals “clears” all alarms. Figure 18. The Dimensions and Terminal Designations for the AC-input SPA 138mm (5.45 in) 60mm 133mm (2.36 in)
-
Page 27: Customer Service
Table 2 lists the error codes. For most of these problems, it will be necessary to return the offending SPA to the factory. A quick call to the nearest Moore Industries STAR Center will have a temporary replacement unit to you in as little as 24 hours, usually in even less time. -
Page 28: Guidelines & Certifications
(safety ground). The a low voltage current output. Products connected un-shielded part of the in/output wires should be to the SPA should be designed to receive these no longer than 2 inches. inputs. CE Certification-related Guidelines... - Page 29 Any signals less than three seconds in length are ignored. 3. The drawing in Figure 5, page 13 of the SPA AC Users’ Manual, #224-770-00, version B, has been revised. The labels in the Engineering Unit menu have been changed from DEGC and DEGF to AMPS and VOLT.
- Page 30 4. Ship the equipment to the Moore Industries location nearest you. The returned equipment will be inspected and tested at the factory. A Moore Industries rep- resentative will contact the person designated on your documentation if more information is needed.
Need help?
Do you have a question about the SPA and is the answer not in the manual?
Questions and answers