Table of Contents
Advertisement
Available languages
Available languages
• READ ALL INSTRUCTIONS BEFORE ASSEMBLY AND USE OF GATE.
KEEP INSTRUCTIONS FOR FUTURE USE.
• LIRE TOUTES LES INSTRUCTIONS AVANT D'ASSEMBLER ET D'UTILISER LA BARRIÈRE.
CONSERVER CES INSTRUCTIONS POUR UNE UTILISATION ULTÉRIEURE.
• LEA TODAS LAS INSTRUCCIONES ANTES DE MONTAR Y USAR LA REJA.
GUÁRDELAS PARA UTILIZARLAS COMO REFERENCIA.
www.regalo-baby.com
Regalo International, LLC.
3200 Corporate Center Drive, Suite 100 / Burnsville, MN 55306, USA / , É.-U. / , EE. UU.
866.272.5274 (U.S. only / aux États-Unis seulement / solo en EE. UU.) or / ou / o 952.435.1080
Made in China / Fabriqué en Chine / Hecha en China
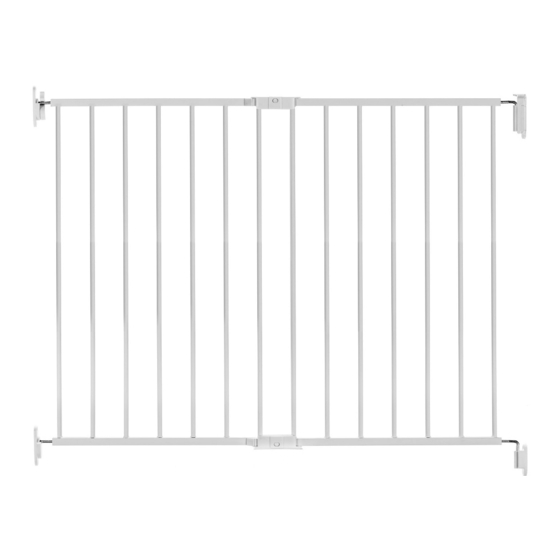
Top of Stair Safety Gate
Barrière de Sécurité pour Haut D'Escalier
Reja de Seguridad para la Parte Superior de las
Escaleras
Models / Modèles / Modelos: 1250, 1250 B
Advertisement
Table of Contents

Related Manuals for Regalo 1250 B


Summary of Contents for Regalo 1250 B
- Page 1 Barrière de Sécurité pour Haut D'Escalier Reja de Seguridad para la Parte Superior de las Escaleras Models / Modèles / Modelos: 1250, 1250 B • READ ALL INSTRUCTIONS BEFORE ASSEMBLY AND USE OF GATE. KEEP INSTRUCTIONS FOR FUTURE USE. • LIRE TOUTES LES INSTRUCTIONS AVANT D’ASSEMBLER ET D’UTILISER LA BARRIÈRE.
-
Page 2: Before Assembly
Hinge Adjuster Knob (2) Male (1) Receiver Adjustment Knob (2) Latch Assembly, Mount Wall, Hinge (1) MODEL NO. 1250, 1250 B Manufacturer recommendations: • For children ages 6 months to 24 months • When mounting: BEFORE USING PRODUCT • The minimum opening allowed is 24"... -
Page 3: Gate Assembly
Hinge Placement STEP 2 STEP 3 STEP 1 STUD STUD STUD DRYWALL DRYWALL 25" 6" MIN. DRYWALL 1 1/2" MAX. STAIRS/FLOOR STAIRS/FLOOR STAIRS/FLOOR Using the supplied 2" wood screws (I), screw Repeat with the wall mount hinge snap female The hinges get installed on the right side of the stairs (when looking down the stairs). -
Page 4: Receiver Placement
Gate Assembly (continued) STEP 4 STEP 5 COUPLER FEMALE COUPLER MALE (CORRECT ALIGNMENT) (INCORRECT ALIGNMENT) Place the second gate panel with the receiver adjustment knob In the center of the two panels place the coupler male (J), and coupler in front of the hanging main gate panel. Slide the main gate female (K). -
Page 5: Replacement Parts
• Bolt, Elevator, Overmolded International, LLC, will replace • Mount, Wall, Latch, Snap, Female • M8 x 1.25 Nut or repair it at Regalo’s option. Hardware Kit • Mount, Wall, Hinge,Snap, Female • Screw, Wood, M4 x 50MM (equivalent PROOF OF PURCHASE •... -
Page 6: Avant Le Montage
(1) charnière (1) Loquet mural (1) Tige de réglage de récepteur (2) MODÈLE N° 1250, 1250 B Recommandations du fabricant : AVANT D'UTILISER LE PRODUIT • Pour des enfants âgés de 6 à 24 mois • Lors du montage : Lire et suivre attentivement les instructions pour assurer une •... -
Page 7: Montage De La Barrière
Placement des charnières ÉTAPE 1 ÉTAPE 2 ÉTAPE 3 POTEAU POTEAU POTEAU PLACOPLÂTRE 6 PO (15,24 CM) PLACOPLÂTRE 25 PO (64 CM) PLACOPLÂTRE MINI 1,1/2 PO (3,81 CM) MAXI ESCALIER/SOL ESCALIER/SOL ESCALIER/SOL Les charnières s'installent du côté droit de En utilisant les vis à bois de 2 po (5,08 cm) (I) Répétez l'opération avec la charnière murale à... - Page 8 Montage de la barrière (a continué) ÉTAPE 4 ÉTAPE 5 COUPLEUR FEMELLE COUPLEUR MÂLE (ALIGNEMENT CORRECT) (ALIGNEMENT INCORRECT) Placez le deuxième panneau de la barrière de sorte que la tige Au centre des deux panneaux, mettez en place le coupleur mâle (J) et de réglage du récepteur se trouve devant le panneau principal le coupleur femelle (K).
-
Page 9: Pièces De Rechange
• Support mural inférieur qualité des matériaux ou aux travaux de finition et • Coupleur femelle • Boulon élévateur surmoulé d’assemblage, Regalo • Loquet mural à clipser femelle • Écrou M8 x 1,25 Hardware Kit International LLC le replacera • Charnière murale à clipser femelle •... - Page 10 (1) Perilla de ajuste de receptor (2) Ensamble de cerrojo, montaje, pared (1) NO. DE MODELO 1250, 1250 B ANTES DE USAR EL PRODUCT Recomendaciones del fabricante: Lea y siga todas las instrucciones cuidadosamente para • Para niños de 6 a 24 meses de edad garantizar que la reja y las extensiones estén correcta-...
- Page 11 Colocación de bisagra PASO 1 PASO 2 PASO 3 ENTRAMADO ENTRAMADO ENTRAMADO YESO LAMINADO YESO LAMINADO 25" 6" MÍNIMO YESO LAMINADO 1 1/2" MÁXIMO ESCALERAS/PISO ESCALERAS/PISO ESCALERAS/PISO Las bisagras se instalan del lado derecho de Utilice los tornillos de madera de 2" (I) provistos Repita el paso anterior con la bisagra hembra de las escaleras (al estar de frente a las escaleras para colocar la bisagra de pared de montaje...
- Page 12 Ensamble de la puerta (continuado) PASO 4 PASO 5 CONECTOR HEMBRA CONECTOR MACHO (ALINEACIÓN CORRECTA) Coloque el segundo panel de la puerta con la perilla de ajuste Coloque el conector macho (J) en el centro de los paneles, y con el del receptor en la parte frontal del panel principal de la puerta conector hembra (K).
-
Page 13: Piezas De Repuesto
• Perno, elevador, sobremoldeado travaux de finition et • Cerrojo, montaje de pared, encaje, macho • M8 x 1.25 Tuerca d’assemblage, Regalo Hardware Kit • Cerrojo, montaje de pared, encaje, hembra • Tornillo, madera, M4 x 50MM (el International LLC le replacera •... - Page 14 WARNING MISE EN GARDE ADVERTENCIA ENGLISH • Install according to manufacturer's instructions • To prevent serious injury or death, securely install gate or enclosure and use according to manufacturer's instructions. • Children have died or been seriously injured when gates are not securely installed. ALWAYS install and use as directed using all required parts. •...
Need help?
Do you have a question about the 1250 B and is the answer not in the manual?
Questions and answers
Looking for replacement parts for Regalo model1250: Gate assembly wall mount “hinge snap female”
Replacement parts for the Regalo model 1250 gate assembly, including the wall mount "hinge snap female," are included in the Hardware Kit #13255.
This answer is automatically generated
How do I order