Advertisement
Advertisement
Table of Contents

Related Manuals for Xomax XM-DA755


Summary of Contents for Xomax XM-DA755
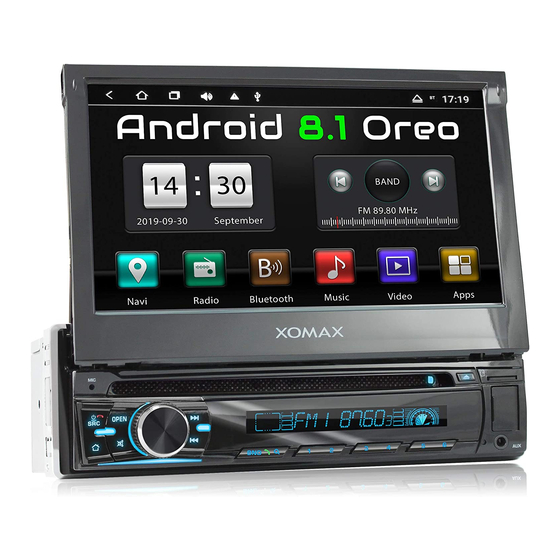
- Page 1 XOMAX User manual Multimedia car radio with Android OS XM-DA755 ENGLISH...
-
Page 2: Installation
IMPORTANT NOTICE & PRECAUTIONS Thank you for using our company multi-media player! To operate the unit correctly, please read the operation manual carefully before using. Keep this operation manual for future reference. The unit is designed only for DC 12V negative ground operation system. Make sure your vehicle is connected to DC 12V negative ground operation system. -
Page 3: Main Unit Operation
MAIN UNIT OPERATION Symbol / Function Operations & Controls RES / RST Press with a pointed object (such as a ball point) to reset the unit to its initial setting by the factory (default stage). When the unit is turned off, press to turn on the unit. / POWER When the unit is turned on, press &... -
Page 4: Battery Replacement
Press to shift the current operation mode to Bluetooth mode. For voice reception under Bluetooth operation. TFT SCREEN It shows the status of operation on the unit. This screen is also a touch display – soft touch the screen for different operations of unit Note The above mentioned symbols / functions / operations &... - Page 5 recorded with different output channels) At music playback mode, each time press & hold shortly to select desired preset equalization mode. At video playback mode under disc input, press & hold shortly to turn on or off of time display on screen. 1 –...
- Page 6 Press「▶」/「◀」to shift track upward or downward for playback. (Remarks: Not available at photo playback mode) Press「▲」/「▼」to adjust sound output level. DVD Mode / Folder/Playlist Mode At DVD menu/title display mode, press ▲/▼/▶/◀ to select the desired setting/setup and press ENT to confirm/enter. USB / SD Input Mode At video &...
-
Page 7: Main Screen
MAIN SCREEN You can use the touch screen operation to use the various functions of the device. This equipment has a total of five main screen, left or right sliding can be switched with each other. Any interface press the HOME physical buttons on the panel to return to the main screen interface, and display the application icon in the main screen interface, click any application icon to open the program. -
Page 8: Time And Date Setting
TIME AND DATE SETTING This device has the function to automatically calibrate the current time on the condition that the GPS is active. You could also manually set the date, time zone and format. Applications > Settings > Date and Time >... - Page 9 SWITCH ON THE ENTERING METHOD Applications > Settings > Language & input > Check the input method according to user's requirements, such as xunfei input method The user can install other third-party input method on its ow...
-
Page 10: Basic Settings
BASIC SETTINGS User Defined Home Screen There are 3 main screens of this device, sliding left or right to switch. In any interface you just need to click the HOME to back to main screen. Note: You could add shortcut, widget and file in the blank area of the main screen on the condition that there is enough room for placing. - Page 11 Steering Wheel Users could set the steering wheel according to hint. Note: Steering wheel interface is special for cars with buttons, but some cars’ steering button are not able for study but by “can”, such as Ford MONDEO Application>Setting > Settings >...
-
Page 12: Navigation Application
NAVIGATION APPLICATION Select appropriate map application, then it can be associated with the navigation button on the physical and navigation icon on the main screen. Applications> Settings > Car settings > Navigation options > For example: GO... - Page 13 Radio Press the RADIO button on panel or click the icon on the main menu to enter the radio interface, the specific functions and operations are as follows: The functions of Icons in the radio interface are described below: Radio interface with RDS...
-
Page 14: Bluetooth Wireless Connection
BLUETOOTH WIRELESS CONNECTION You could create a wireless connection between a mobile phone and this device for Data exchange. Note: There may be prohibition or restriction for Bluetooth devices, please abide by local laws. In order to ensure bluetooth security by the greatest degree, you should in safe and non-public place when connecting a bluetooth device. - Page 15 Choose the Bluetooth device name on the search results to match connection. It will automatically after the connection is successful jump to the matching list, and there will be a Bluetooth icon besides the successful connected Bluetooth devices Note: The following operations are performed in the Bluetooth pairing success and connect under the conditions of operation: Bluetooth Phone Book the Bluetooth interface, click “...
- Page 16 Phone To achieve the dialing function via Bluetooth In the Bluetooth interface, click “ ”to enter into the Bluetooth Dial interface. Click numbers on the interface, if the input is wrong, click to delete entering phone number; Click to end up the call. Are on a call, press the switch to the phone call, press Mute for MIC.
- Page 17 Bluetooth Music In the Bluetooth interface, click “ ” into Bluetooth Music Interface. When connected with bluetooth mobile phone, it can operate play/pause/down music function. Note: Some kind of mobile phones need to start playing music player for bluetooth music when using bluetooth music function.
-
Page 18: Audio Play
Note: the subwoofer adjustment is only effective when it is linked to external 5.1 amp. AUDIO PLAY Audio player supports the following formats: mp3/aac/flac/wav/amr/m4a/ogg Application>Music Click music application icon to enter into the music player interface, as shown below: Function details as below:... -
Page 19: Video Playing
VIDEO PLAYING Supporting form of the video player: mp4/avi/wmv/3gp/flv/saf/mov/mkv/mpg Application >Video Press Video application icon to enter into video playing interface, take a photo for example. The detail of the button function of video playing interface... - Page 20 AUX IN Before running this function, please confirm back the normal output of the video source Click > enter the Aux In mode, points On the return key to return to the interface, click the HOME button to return to the system main interface CAMERA Auto start the reverse gear, such as with a rear view mirror, the system automatically switch to the rearview mirror image output.
-
Page 21: Simple Troubleshooting
SIMPLE TROUBLE SHOOTING PROBLEMS, CAUSES & SOLUTIONS No power - Check and make sure the connecting wires are connected correctly - Check whether the fuse is blown. Replace with the proper value fuse if necessary. No sound - Check and make sure the speaker wires are connected correctly. No picture - Check whether the video wire is connected to the video device. - Page 22 GPS not operated - Check if the appropriate navigation map software has been installed and selected. - Check if the GPS antenna connected properly. Cannot connected to Wi Fi - Check if the Wi Fi antenna connected properly. Note After the above efforts, if the unit still cannot be worked normally, consult your service dealer. Never attempt to disassemble the unit by yourself.
Need help?
Do you have a question about the XM-DA755 and is the answer not in the manual?
Questions and answers