Advertisement
Quick Links
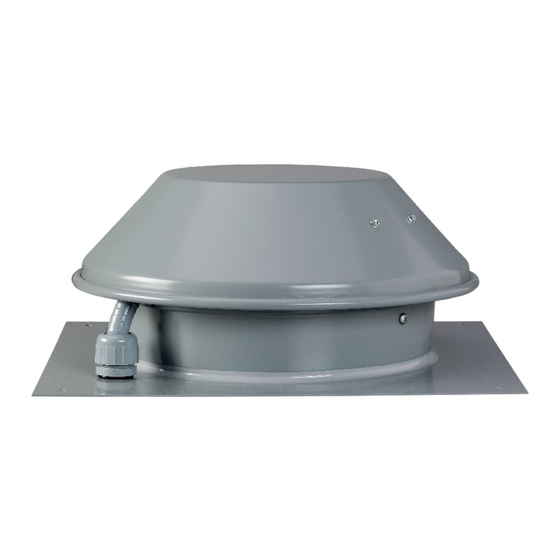
Model RE(C)
READ & SAVE THESE INSTRUCTIONS!
Installation
1. The compactness and adaptability of Models RE(C) fans permit easy installation. The straight-thru air flow fans are shipped fully assembled
and can be mounted at any angle. For various mounting and ducting options. (see Typical Installations)
2. Because this unit has rotating parts, safety precautions should be exercised during phase of installation, operation
and maintenance.
3. CAUTION: "For General Ventilation Use Only. Do Not Use To Exhaust Hazardous Or Explosive Material and Vapors."
4. Remove unit from package and inspect within 15 days after receipt. If damaged, report damage to carrier. Do Not operate this unit with
visible damage to the blower or impeller assembly.
5. Ensure centrifugal impeller has free rotation. If impeller hits orifice, check screws holding motor bracket. Adjustment can be made by loosen-
ing motor bracket screws, then pull up on motor bracket while tightening screws. Tighten all screws before operating unit. WEAR HAND PRO-
TECTION AND STAY CLEAR OF SHARP EDGES.
6. Screen guards must be installed when fan will be within reach of personnel, within (7) feet of the working area, or when advisable for safety.
Warnings
DO NOT CONNECT POWER SUPPLY until fan is completely installed. Make sure electrical service to the fan is locked in "OFF" position.
1. All units are suitable for use with solid-state speed control.
2. WARNING! TO REDUCE THE RISK OF FIRE, ELECTRIC SHOCK, OR INJURY TO PERSONS – OBSERVE THE
FOLLOWING:
a. Use this unit only in the manner intended by the manufacturer. If you have any questions, contact your manufacturer's
representative.
b. CAUTION: Before installation, servicing or cleaning unit, switch power off at service panel and lock the service disconnecting means to
prevent power from being switched on accidentally. When the service disconnecting means cannot be locked, securely fasten a prominent
warning device, such as tag, to the service panel.
c. Installation work and electrical wiring must be done by qualified person(s) in accordance with all applicable codes and
standards, including fire-rated construction.
d. Sufficient air is needed for proper combustion and exhausting of gases through the flue (chimney) of fuel burning equipment to prevent
back drafting. Follow the heating equipment manufacturer's guideline and safety standards such as those published by the National Fire
Association (NFPA), and the American Society of Heating Refrigeration and Air Conditioning Engineers (ASHRAE), and the local code
authorities.
e. When cutting or drilling into wall and ceiling, do not damage electrical wiring and other hidden utilities.
f. Ducted fans must always be vented to the outdoors.
g. If this unit is to be installed over a tub or shower, it must be marked as appropriate for the application and be connected to a GFCI
(Ground Fault Circuit Interrupter) - protected branch circuit.
h. NEVER place a switch where it can be reached from a tub or shower.
3. WARNING! Check voltage at the fan to see if it corresponds to the motor name plate.
RE(C) Installation Manual
1
Advertisement

Related Manuals for Fantech RE Series


Summary of Contents for Fantech RE Series
- Page 1 Installation Instructions for Model RE(C) READ & SAVE THESE INSTRUCTIONS! Installation 1. The compactness and adaptability of Models RE(C) fans permit easy installation. The straight-thru air flow fans are shipped fully assembled and can be mounted at any angle. For various mounting and ducting options. (see Typical Installations) 2.
- Page 2 Typical Installations Pitched roof Flat roof mount with curb with flat base RE(C) Fan LD Duct Wall mount Silencer RE(C) Fan Insulated Flexible Duct Grill Dimensions Dimensional Data Model MAX RPM MAX WATTS MAX AMPS 9 ³ ₄ 5 ³ ₄ 15 ¹...
-
Page 3: Installation Instructions
3. Through the opening, attach ductwork to fan inlet orifice by using advisable to put a bead of sealant around the inside edge of curb. Fantech FC clamps or duct tape. 3. Before mounting base on curb, place a layer of sealant along the 4. - Page 4 Limitation of Warranty and Liability This warranty does not apply to any FANTECH INC. product or part which has failed as a result of faulty installation or abuse, incorrect electrical connections or alterations made by others, or use under abnormal operating conditions or misapplication of the product or parts. We will not approve for payment any repair not made by us or our authorized agent without prior written consent.
Need help?
Do you have a question about the RE Series and is the answer not in the manual?
Questions and answers