
Related Manuals for clage GERMAN POOL GPIM7


Summary of Contents for clage GERMAN POOL GPIM7
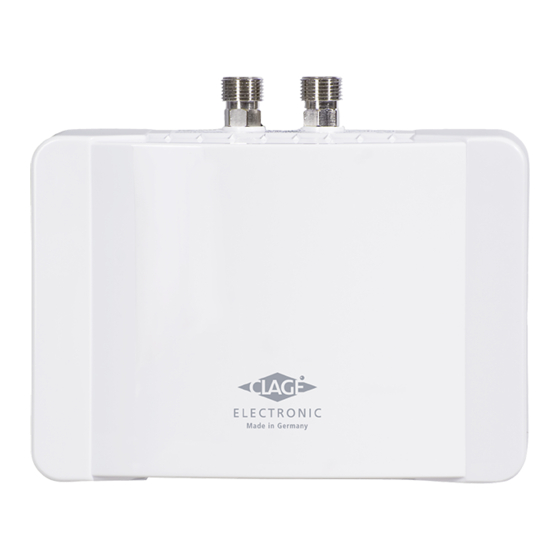
- Page 1 GPI M7 MDX 6 MADE IN GERMANY MADE IN GERMANY Printed in Germany GPI_M7-MDX6-M-13(1)
-
Page 2: Layout Of Appliance
1. Layout of appliance When ordering spare parts, please always specify the appliance model and serial number! Pos. Description Pos. Description Wall bracket Heating spiral with support Water connector Safety temperature limiter Filter Temperature sensor Safety earthing terminal Potentiometer for temperature adjustment Electronic PCB Adjusting screw for water flow rate... -
Page 3: Table Of Contents
Contents 1. Layout of appliance ..............2 2. Environment and recycling . -
Page 4: Safety Notes
3. Safety notes Installation, initial operation and maintenance of this appliance must only be conducted by an authorised professional, who will then be responsible for adherence to applicable standards and installation regulations. We assume no liability for any damages caused by failure to observe these instructions. -
Page 5: The Following Must Be Observed
4. Intended use, operation If the flow rate is too low, if the flow pressure is too low, or if the warm-water valve is closed, the appli- ance switches itself off automatically. For an optimum flow of water, always fit the special jet regulator enclosed with the appliance. This regulator is screwed into the thread on the end of the tap. If the thread of the chrome-plated sleeve does not fit your tap, you can insert it into any standard sleeve M22/24. The maximum possible outlet temperature is determined by the temperature of the incoming water, the rate of flow and the heating power of the heater. The flow rate can be preset inside the appliance to achieve the selected temperature between about 30 °C and 50 °C. -
Page 6: Installing The Appliance
6. Installing the appliance Abb. 1 fi g. 1 Abb. 2 fi g. 2 fi g. 2 • Secure the wall bracket to the wall with screws and suitable wall plugs (see fig 1). • Place the appliance on the wall bracket and snap it into position (see fig. 2). • The appliance is good for undersink and oversink installation according to the examples of installation on the next pages. For undersink installation the water connectors must point vertically upwards. • Pipe connection (see fig. 3): Cold water inlet (blue) and hot water outlet (red) are marked on the rat- ing plate. Connect the appropriate pipes from the tap to the water inlet and outlet accordingly. Avoid exerting any kind of mechanical pressure exerted on the appliance, e.g. by water pipes etc. • After installation, carefully check all connections for leaks and rectify as necessary. In order to obtain an optimum water jet at low flow rates, always screw the enclosed jet regulator onto the tap outlet. This insert fits commercially available sleeves with an M22 or M24 thread. seal strainer seal cold water connection (inlet) hot water connection (outlet) fi g. -
Page 7: Typical Installation
7. Typical installation Fit jet regulator Electrical connection with mains power cable (cut if necessary) T-piece with pressure hose Cable entry ≥70... -
Page 8: Electrical Connection
8. Electrical connection Fill the appliance completely with water by repeatedly opening and closing the hotwater tap before connecting to electrical power. The heating element may be damaged if this is not done! • The installation must comply with current IEC regulations and national local regulations and any par- ticular regulation, specified by the local electricity supply company! • The mains cable must be permanently connected via connecting box as shown in the circuit diagram. -
Page 9: Adjusting The Water Flow And Temperature
9. Adjusting the water flow and temperature The maximum outlet temperature can be set between about 30 °C and 50 °C with the potentiometer (Fig. 7), adjustment only by a professional. The factory setting is about 45 °C. Turning the potentiometer clockwise reduces the Min. maximum outlet temperature; turning it counter- Temperature clockwise increases the temperature. adjustment During use, the red LED on the printed circuit Max. red LED board lights if the maximum power of the heater green LED cannot achieve the preset outlet temperature. -
Page 10: Commissioning
10. Commissioning Do not switch on the electric power at this time! 1. Open the hot water tap and allow water to flow until it emerges free of air bubbles. 2. Now close the circuit breaker to connect the electrical supply. 3. If desired, set the desired outlet temperature inside the appliance (see Fig. 7). 4. Explain the functions of the heater to the user and ensure that he knows how to use it. Hand over these operating instructions to the user. 11. Technical specifications Type GPIM7 Art. No. 120061 capacity litre 0.2 nominal pressure in MPa (bar) 1 (10 ) heating system IES system / bare resistance element water resistance at 15 °C in Ω cm ≥... -
Page 11: Functions Of The Leds
12. Functions of the LEDs Green LED flashing regularly: Standby mode Green LED lights: Appliance is heating water Red LED lights: Maximum power reached; the desired outlet temperature cannot be reached. Red LED flash code: long-short-short-short-long Inlet temperature too high long- short-short-short-short Temperature sensor faulty 13. Purging To prevent damage to the appliance, the instantaneous water heater must be purged from air before using it for the first time. Each time it is emptied (e.g. after work on the plumbing system, if there is a risk of frost or following repair work), the appliance must be purged from air before it is used again. -
Page 12: Customer Service
15. Customer service The following table will help you to determine and rectify the reasons for possible problems. If you cannot rectify the fault with the aid of this table, please contact: German Pool Customer service Room 24, Upper G/F, Newport Centre, 116 Ma Tau Kok Road, Tokwawan, Kowloon, Hong Kong. Tel: +852 2333 6249 Fax: +852 2356 9798 We can either give you the name and address of an authorised customer service company or repair the heater ourselves. -
Page 13: Notes
16. Notes... -
Page 14: 重要部件名稱
1. 重要部件名稱 掛牆背碼 外殼 接水喉管 發熱線 過濾器 熱切斷器 地線接碼 溫度感應器 電子線路板 溫度調節錶 電線封蓋 流量調校旋鈕... -
Page 15: 環保及循環再造
目錄 1. 重要部件名稱 ........... . . 14 2. 環保及循環再造... -
Page 16: 安全指示
3. 安全指示 必需由合格的技師安裝,初部操作及保養本熱水器以確保能符合有關安全標 準及安裝條例。本公司對未遵照此規定而引致損失或問題概不負責。 - 本熱水器只適宜用於室內不結霜的環境作家居用途,並只適宜將自來水加 熱。 - 切勿將本熱水器暴露於結霜的環境中。 - 本熱水器必須時刻接地。 - 來水電阻不可低於規格表上列明之數值。 - 最高水壓不可高於規格表上列明之數值。 - 初次試機前及每次需要將熱水器內的儲水排清時(例如:要進行水喉工程 或有結霜可能或維修保養),需按本說明書內之有關指示,將熱水器內空 氣排出。 - 任何情況下,在關掉電源前,不能打開面蓋。 - 切勿對本熱水器(包括熱水器機體、電線或水管)作出任何技術性改動。 - 請注意溫度高於43°C的水會被界定為熱水(對於小童尤甚),並可引致燙 傷。熱水器經使用一段時間後,水喉配件可能會很熱。 - 入水水溫不可高於70°C。 - 如遇上故障,請即關掉電源。如有漏水,應即關掉冷水水源。並必須由總 代理的合格技師維修。 - 除有負責其安全的人士監督或收到如何使用本熱水器指示,否則任何活動 能力有限或情緒、神智有問題的人士不可使用本熱水器。必需監督兒童以 確保兒童不會把玩熱水器。... -
Page 17: 操作應用
4. 操作應用 此小型熱水器適用於供應單一出水位例如廚房星或洗手盆,安裝時直接接駁 龍頭水喉配件。開啟熱水龍頭,如來水流量高於最低流量,熱水器會自動啟 動將來水加熱。 出廠時預設出水水溫45°C。達至此溫度後,電子調校器會自動降低電量以確 保水溫不會高於45°C,不需再用人手調校。如未能達至最高出水水溫,可略 為調低入水流量。如需要較低水溫,可加入冷水。 如流量太低或水流壓力太低或關掉熱水龍頭,熱水器會自動關掉。要達至最 佳流量,請裝上隨機附上的流量調節器。將調節器旋入水龍頭末端螺紋。如 鍍鉻套管的螺紋不能旋入龍頭末端,可加入一個標準M22/24套管。 最高的出水水溫取決於來水水溫、流量及熱水器的加熱功能。可在熱水器內 預設流量以達到選定的溫度(30 ℃至50 ℃)。... -
Page 18: 安裝說明
5. 安裝說明 必需選用原廠提供的配件安裝並 注意下列要點: - 安裝此熱水器時,必須遵照法 例及本地供電與水務條例。 - 查看技術資料及標籤上的數 據。 - 確保從包裝箱內取出所有配 件。 - 確保熱水器安裝後可以容易接 觸得到,應加裝閘掣。 - 接駁前先清洗水管。 - 最佳操作水壓為 0.2-0.4 MPa (2-4 bar),確保水壓不超過1 封閉式出水管安裝時的重要注意 MPa (10 bar)。 事項:如果安裝時需要安裝止回 閥,則必須將其安裝在即熱式熱 水器之後的熱水出水管中。止回 閥“不得”安裝在設備之前的冷 水進水管中!... -
Page 19: 安裝指示
6. 安裝指示 圖 圖 Abb. 1 Abb. 2 - 將掛碼以螺絲及定縫銷(膨脹螺絲)安裝於牆上(圖1)。 - 將熱水器掛在掛碼上(圖2)。 - 按照下數頁安裝範例,本熱水器可安裝於星盆上或下。如安裝於星盆 下,出入水喉接駁件必需垂直向上。 - 水管接駁(圖3)。冷水進水管(藍色)及熱水出水管(紅色)均有清楚標示,請 按水管顏色接駁入水及出水喉管。切勿以向熱水器施加機械性壓力。 - 安裝後小心檢查所有接駁位有沒有漏水,如有任何漏水情況請即調整。 為確保進水最佳流量,請將提供的流量調節器安裝在龍頭出水口。如鍍 鉻套管的螺紋不能旋入龍頭末端,可加入一個標準M22/24套管。 密封圈 過濾器 密封圈 冷水入水位 熱水出水位 圖... -
Page 20: 基本安裝
7. 基本安裝 開關水龍頭 接駁總掣電源線 (如需要可將電線切短) 三叉連壓力水管 電線入口位 ≥ 70... -
Page 21: 電線接駁
8. 電線接駁 為保護發熱線,接駁電線前先重覆開關熱水水龍頭以注滿水入熱水器內,才 開啟電源。 - 安裝時必須遵守現行 IEC 法規、所在國家當地法規以及當地供電公司的 特別規定。 - 主要電源線必需經接駁箱如線路圖所示固定安裝。必需接駁地線。 - 必需在接駁箱電線供電一方提供電路斷路器,每極之間應保持最少3mm 距離。 - 只能使用經過 CCC 認證的 4mm 電線。電線的粗幼必需符合有關電線要 求。請參考技術規格。 - 如熱水器電源線之插頭為固定裝置,需確保此插頭的插蘇配備有地線及 有適當菲士或斷路器保護。 - 接駁電線前,必須確保已關掉電源。 PE N (220V~) 線路圖 1. 電子控掣器 < 2. 發熱線 3. 安全熱切斷器 < 圖... -
Page 22: 調節流量及溫度
9. 調節流量及溫度 - 最高出水溫度可於30°C至50°C範 圍預設,必需由專業技術人員 預設(圖7)。出廠時之預設出水 溫度為45°C。順時針方向調校 Min. 溫度調校掣會減低出水溫度, 溫度調校 逆時針方向調校會調高出水水 紅色 LED Max. 溫。 綠色 LED - 使用時,線路板上紅色LED燈亮着 表示加熱的最高功率未能達致 出高的預調出水水溫。 圖 Abb. 7 - 在這情況下,必需減低流量。 - 由專業人員旋動調校旋鈕調校 流量(圖8),順時針方向調校減 低流量,逆時針方向調校會增 加流量。 - 注意!切勿將旋鈕調校超越凹陷 位置,以免漏水。 - 注意:任何與流速和溫度有關 的調整只能由經過授權的技術 人士進行! 方向 流量 温度升高 流量調節 –... -
Page 23: 開始操作
10. 開始操作 不要在此時開啟電源。 1. 先打開熱水龍頭,排出熱水器內空氣後再讓水排出。 2. 關閉斷路器,接上電源。 3. 如有需要,在熱水器內調校要求之出水水溫(參考圖7)。 4. 對使用者解釋熱水器性能以確保他懂得如何使用。 將本說明書交予使用者。 11. 技術規格 GPI-M7 型號 容量 1(10) 操作壓力 發熱系統 IES系統 明線加熱 來水電阻15° C Ω cm ≥1000 電源電壓 1/N/PE ~ 220V 6.0 kW 額定功率 額定電流 27.3 A approx. 30 °C – 50 °C 溫度選擇範圍 出廠預校溫度 approx. 45 °C 30 °C 最高入水水溫 出廠預校流量 4.5 l/min 43 K : 2.0 l/min 34 K : 2.5 l/min 29 K : 3.0 l/min 在額定功率... -
Page 24: Led 功能
12. LED 功能 綠燈規則地閃動 備用狀態 綠燈亮着 熱水器正在將水加熱 紅燈亮着 已達致最高功率,但未能達致出水水溫要求 紅燈閃動密碼: 長-短-短-短-長 入水水溫太高 長-短-短-短-短 溫度感應器故障 13. 排清熱水器喉管內空氣 為防止損壞熱水器,初次使用時必需排清熱水器喉管內 的空氣。熱水器每次排清喉管內的水後(例如喉管工程或 維修後),必需將喉管內的空氣排出才可使用。 1. 將熱水器電源切斷。 2. 重覆打開及關閉熱水龍頭數次,直至沒有空氣排出, 確保熱水器內所有空氣已排出。 3. 然後再開啟電源 14. 保養及清潔 只可用濕布清潔塑膠外殼及配件。切勿使用強烈清 潔劑或溶劑。 請定時清洗流量調節器。 污垢及喉管內的沉澱物會影響熱水器運作,如水流 量減少或水流發出聲響,表示熱水器內有水垢或沉 澱物,需找技術員檢查熱水器。如有需要,可清洗冷 水入水位的過濾器。... -
Page 25: 檢查要點
15. 檢查要點 如遇以下一般性故障,請按以下指示處理,如仍處理不了或未發現故障原因 時,請聯絡: 客戶服務部 德國寶(香港)有限公司 香港九龍土瓜灣碼頭角道116號 新寶工商中心高層地下2-4室 電話:+852 2333 6249 傳真:+852 2356 9798 故障 原因 措施 沒有水流出 供水系統中斷 開啟供水系統開關掣 / 閘掣 沒有安裝流量調節 裝上專用噴射調節掣 掣 水流量較預 檢查來水水壓,檢查流量調節旋鈕 水壓不足 (參看圖8) 期慢 清洗過濾器、掣閥或水龍頭內的污 喉管內有污垢 垢;查看技術規格 熱水器自動開 水壓變動,流量太 清理積聚之污垢,增加水流壓力, 啟及關閉 低 關閉其他水龍頭,再打開掣閥 熱水器已啟 發熱線損壞... -
Page 26: 设备布局
1. 设备布局 订购备件时,请务必指定设备型号和序列号! 位置 说明 位置 说明 壁托架 加热螺旋线及支座 水管连接件 安全限温器 过滤器 温度传感器 安全接地端子 温度调节电位器 电子线路板 水流速调节螺钉 电缆密封套 外盖... -
Page 27: 环境与回收再生
目录 1. 设备布局 ............26 2. 环境与回收再生... -
Page 28: 安全说明
3. 安全说明 本设备的安装、初始操作和维护只能由经过授权的专业人员进行,他们将负责 遵守适用的标准和安装规定。我们对由于不遵守这些说明而导致的任何损坏概 不负责。除非设备已正确安装并处于最佳工作状态,否则请勿使用设备。 • 本设备仅适用于封闭、无霜房间内的家庭用途和类似应用,并且仅用于加 热来自干线的供水。 • 切不可将设备暴露在霜冻环境中。 • 本设备必须始终接地。 • 最小特定水电阻不得低于标签上所指示的值。 • 最大水压不得超过标签上的值。 • 初次试运行之前和每次设备排空后(例如,由于在管道系统上工作后,如 果有霜冻风险或如果进行维护时),必须根据本手册中的说明对设备进行 正确放气。 • 任何情况下,请勿在切断电源与设备的连接之前拆下前盖。 • 切勿进行技术改动(不论对设备本身还是电线和水管)。 • 请注意,水温超过约 43 °C 将被视为热水(尤其是对儿童而言),并且可能 导致灼热感。另外,设备使用一段时间后,配件和水龙头可能会非常热。 • 进水温度不得超过 30 °C。 • 如果发生故障,请立即断开保险丝。如果发生泄漏,请立即切断冷水供 给。只能由客户服务部门或经过授权的专业人员进行维修。 • 身体、感知或精神能力有缺陷或无法获得经验和/或学习知识的人员(包 括儿童)必须在负责其安全的人员监督下或了解如何使用本设备后方可使 用。儿童应在监督下使用本设备以免其用本设备玩耍。 4. 设计用途及操作 本款小型即热式热水器设计用于针对单出水口(即厨房星盆或洁面盆)提供 经济的加热方式,可连同卫生用水配件一起安装。热水阀为打开状态时,热 水器会在水流速超过最低值后自动打开,对流经设备的水流进行加热。 热水器出厂时设置的出水温度为 45 °C。达到此温度后,电子调节器会降低 功率以确保出水温度不超出该值。由于存在上述自动温度调节机制,洗手时 只需打开配件的温水阀即可。如未能达到最高出水温度,可略微调小水流。 所需水温较低时,可加入冷水。... -
Page 29: 注意事项
4. 设计用途及操作 流速过低、流动压力过低或温水阀关闭时,设备会自动关闭。要达到最佳 水流量,请安装设备随附的专用喷射调节器。可将调节器拧入水龙头末端 的螺纹内。如镀铬套管的螺纹与水龙头尺寸不匹配,可将其插入任一标准 M22/24 套管。 最高出水温度取决于进水温度、流速及热水器的加热功率。可在设备内预设 流速,从而达到选定的温度(30 ℃至50 ℃)。 5. 注意事项 本热水器仅可安装于无霜房间内最接 近出水口的位置(如图所示)。我们 仅保证设备在使用德国宝配件和附件 的前提下无故障运行。安装过程中请 注意以下事项: • 安装时必须遵守所有法律规定以及 当地电力和供水公司的规定。 • 检查技术数据及标称铭牌上的信 息。 • 确保已从包装材料中取出所有附 件。 • 应始终确保设备便于使用。须安装 外部关闭阀。 • 连接前应先彻底清洗供水管道。 • 流动压力为 0.2 至 0.4 MPa (2-4 bar) 时可确保获得最佳运行状态。设备 封闭式出水管安装时的 重要注意事项: 所承受压力切勿超过 1 MPa (10 bar) 。 如果安装时需要安装止回阀,则必 须将其 安装在即热式热水器之后 的热水出水管中。 止回阀“不得”安装在设备 之前的冷水进水管中!... -
Page 30: 安装设备
6. 安装设备 Abb.1 图 1 Abb.2 图 2 • 使用螺钉及合适的壁式插头将壁托架固定于墙壁上(见图 1)。 • 将设备置于壁托架上并将其安放到位(见图 2)。 • 按照后续页所述安装范例,本设备适于在星盆下方或上方安装。如安装于 星盆下方,水管连接件须垂直向上。 • 管 道 连 接 ( 见 图 3 ) : 标 称 铭 牌 上 标 出 了 冷 水 进 水 口 ( 蓝 色 ) 和 热 水 出 水 口 ( 红 色 ) 。 请 从 水 龙 头 处 将 适用管道相应地连接至进水口和出水口。应避免向设备施加任意类别机械性... -
Page 31: 典型安装
7. 典型安装 安装喷射调节器 接电源的电气连接 电源电缆(必要时可截短) 接压力软管的三通管 电缆接入处 ≥70... -
Page 32: 电气连接
8. 电气连接 与电源连接之前,请重复开关热水龙头,将设备完全注满水。如未执行此步 骤可能导致加热元件损坏! • 安 装时必须遵守现行 IEC 法规、所在国家当地法规以及当地供电公司的特 别规定。 • 电源电缆须通过接线盒永久连接(如电路图所示)。必须连接接地导体。 • 在接线盒电源一侧,根据 IEC 的要求,电路断路器与各极间须至少保持 3 mm 的触点开放间隙。 电线。电线横截面必须完全符合额定功 • 只能使用经过 CCC 认证的 4mm 率要求。请参阅技术数据。 • 为保护设备,必须装配跳闸电流与设备标称电流相等的保险丝元件。 • 进行电气连接之前请检查电源是否关闭。 PE N (220V~) Abb.6 Schaltplan 1 Elektronische Regelung < 2 Heizelement 3 Sicherheitstemperaturbegrenzer < 图 6 电路图 1 电子调节器 2 加热元件 3 安全热熔断路器... -
Page 33: 调节水流量及温度
9. 调节水流量及温度 最 高 出 水 温 度 可 通 过 电 位 器设置为约 30 °C 至 50 °C (图 7),仅限由专业人员进行调 节。出厂设置温度约为 45 °C。顺 时针旋转电位器可调低最高出水温 最小 度;逆时针旋转则调高此温度。 温度调节 使用过程中,如加热器最大功率无 红色 LED 最大 法达到预设出水温度,则印刷电路 绿色 LED 板上的红色 LED 亮起。 在此情况下须降低流速。 图 7 Abb.8 可由专业人员通过调节螺钉(图 )来调节流速。顺时针旋转该螺钉 可调低流速;逆时针旋转则调高流... -
Page 34: 试运行
10. 试运行 此时请勿开启电源! 1. 打开热水龙头排水,直到不再浮出气泡。 2. 此时关闭电路断路器,将设备与电源连接。 3. 如有需要,可在设备内设置所需出水温度(见图 7)。 4. 向用户说明热水器的功能,确保其了解如何使用。 将操作说明转交给用户。 11. 技术规格 机型 MDX6 货号 120061 容量 升 0.2 标称压力,MPa (bar) 1 (10 ) 加热系统 IES 系统/裸露式电阻元件 ≥ 1000 15 °C 时的水电阻,Ω cm 电源 1/N/PE~ 220 V 标称额定功率 6.0 kW 标称电流 26 A 温度选择范围 约 30 °C – 50 °C 出厂温度设置... -
Page 35: Led 功能
12. LED 功能 绿色 LED 有规律地闪 备用模式 烁: 绿色 LED 亮起: 设备正在将水加热 红色 LED 亮起: 达到最高功率;未达到所需出水温度。 红色 LED 闪烁代码: 长-短-短-短-长 进水温度过高 长-短-短-短-短 温度传感器故障 13. 排气 为避免设备损坏,初次使用即热式热水器之前必须对其进行排气。每次排空 后(例如在管道系统上工作后,如果有霜冻风险或随后需要进行维修工作 时),再次使用之前必须重新对设备进行排气。 1. 断 开设备与电源的连接。 2. 打 开和关闭热水龙头数次,直到没有气体从管道排出并且所有气体均已从 热水器中排出。 3. 仅 在执行上述步骤之后方可将电源重新连接至设备。 14. 维护和清洁 • 塑料表面和配件只能以湿布进行擦拭。切勿使用研磨性清洁剂或溶液。 • 定期清洗喷射调节器或手持式淋浴器,必要时应予以更换。 • 管道或热水器中沉积的污物和水垢会影响热水器的功能。上述情形的典型 迹象为流速降低或水流有杂音。在此情况下,应由技术人员对热水器进行 检查,必要时还应清洁冷水进水口的过滤器。... -
Page 36: 客户服务
15. 客户服务 下表有助于查明可能的故障原因并进行修复。如果借助此表 无法修复故障,请通过以下方式与德国宝取得联系: German Pool Customer service Room 24, Upper G/F, Newport Centre, 116 Ma Tau Kok Road, Tokwawan, Kowloon, Hong Kong. 电话:+852 2333 6249 传真:+852 2355 7100 我们可能会向经过授权的客户服务公司提供您的姓名和地址,也可能会自行维修热 水器。 故障 原因 措施 没有水流 供水关闭 打开干线供水阀/关闭阀 未安装喷射调节器 安装专用喷射调节器 检查水流压力,并检查水流量调节( 水流速低于... - Page 37 16. 備註...
- Page 38 16. 備註...
- Page 40 GPI_M7-MDX6-M-13(1)
Need help?
Do you have a question about the GERMAN POOL GPIM7 and is the answer not in the manual?
Questions and answers