Advertisement
Quick Links
CONTACT US FIRST
CONTACT US FIRST
sauder.com
sauder.com
sauder.com
BEFORE MAKING ANY RETURNS TO THE STORE.
BEFORE MAKING ANY RETURNS TO THE STORE.
sauder.com/service
Visit
Prefer the phone? Give us a ring at
Customer Service is available Monday-Friday - 9 a.m. to 5:30 p.m. EST (except holidays)
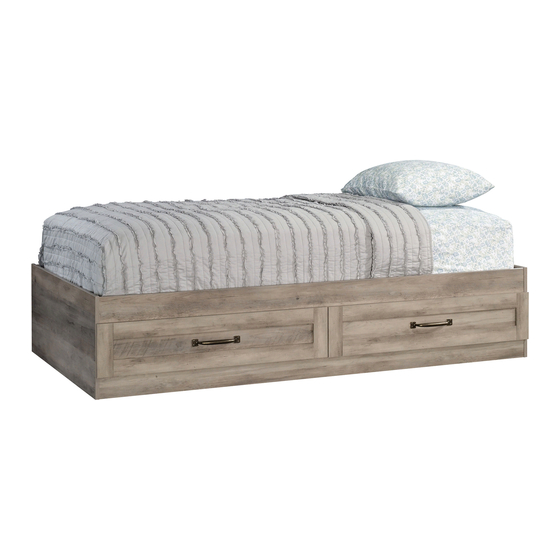
Mates Bed
Model 423003
Share your journey!
to order replacement parts, view video assembly tips, or chat with a live rep.
1-800-523-3987
.
WARNING
CHOKING HAZARD - Small Parts
Not for children under 3 years.
Adult assembly required.
NOTE: THIS INSTRUCTION
BOOKLET CONTAINS IMPORTANT
SAFETY INFORMATION.
PLEASE READ AND KEEP FOR
FUTURE REFERENCE.
English pg 1-20
Français pg 21-23
Español pg 24-26
Lot # 531291
Purchased: __________________
07/17/19
Advertisement

Related Manuals for Sauder Mates Bed 423003


Summary of Contents for Sauder Mates Bed 423003
- Page 1 CONTACT US FIRST CONTACT US FIRST sauder.com sauder.com sauder.com BEFORE MAKING ANY RETURNS TO THE STORE. BEFORE MAKING ANY RETURNS TO THE STORE. sauder.com/service Visit to order replacement parts, view video assembly tips, or chat with a live rep. 1-800-523-3987 Prefer the phone? Give us a ring at Customer Service is available Monday-Friday - 9 a.m.
-
Page 2: Table Of Contents
Table of Contents Assembly Tools Required Part Identifi cation No. 2 Phillips Screwdriver Tip Shown Actual Size Hardware Identifi cation Assembly Steps 5-20 Hammer Not actual size Français 21-23 Español 24-26 Skip the power trip. Warranty This time. Page 2 423003 www.sauder.com/service... -
Page 3: Part Identifi Cation
D476 DRAWER BACK (2) LEFT DRAWER FRONT (1) DRAWER BRACE (2) BACK PANEL (1) UPPER RAIL (1) (Hidden part using recycled CENTER SUPPORT (1) LOWER RAIL (1) material. Color may vary.) D212 D476 D213 D212 D476 D213 www.sauder.com/service 423003 Page 3... -
Page 4: Hardware Identifi Cation
BLACK 9/16" LARGE HEAD SCREW - 10 30S BLACK 1-9/16" FLAT HEAD SCREW - 10 BLACK 1-1/8" PAN HEAD SCREW - 18 SILVER 1/4" MACHINE SCREW - 4 101S BLACK 1-1/2" FLAT HEAD SCREW - 10 Page 4 423003 www.sauder.com/service... -
Page 5: Assembly Steps
Look for this icon. It means a Step 1 video assembly tip is available at www.sauder.com/service/tips Assemble your unit on a carpeted fl oor or on the empty å carton to avoid scratching your unit or the fl oor. Push sixteen HIDDEN CAMS (1F) into the BACK å... - Page 6 *patent pending glide system å GOLD 5/16" FLAT HEAD SCREW (4 used in this step) A tracking label will be on one of these surfaces. Please do not remove. Glide end Glide end Rounded edge Rounded edge Page 6 423003 www.sauder.com/service...
- Page 7 Use two BLACK 9/16" LARGE HEAD SCREWS (1S). NOTE: Position the BRACKET exactly as shown. å BLACK 9/16" LARGE HEAD SCREW (2 used in this step) Glide end GOLD 5/16" FLAT HEAD SCREW (4 used in this step) Glide end www.sauder.com/service 423003 Page 7...
- Page 8 With a hammer, tap twelve TACK GLIDES (12E) into the å long edges of the HEADBOARD/FOOTBOARDS (B), BACK PANEL (C), CENTER SUPPORT (D), and LOWER RAIL (F). This SUPPORT BRACKET must be here. Unfi nished edge Page 8 423003 www.sauder.com/service...
- Page 9 Inspect the parts thoroughly before assembling. Disassembly of glued parts is extremely diffi cult. Rounded edge i t h Rounded edge f a c S u r D E N H I D The CABINET RAIL should be here. www.sauder.com/service 423003 Page 9...
- Page 10 Caution Inspect the parts thoroughly before assembling. Disassembly of glued parts is extremely diffi cult. S u r f a c i t h H I D D E N The CABINET RAIL should be here. Page 10 423003 www.sauder.com/service...
- Page 11 Inspect the parts thoroughly before assembling. Disassembly of glued parts is extremely diffi cult. Tighten the HIDDEN CAM Finished edge Tighten the HIDDEN CAM I D D u t H i t h o f a c S u r www.sauder.com/service 423003 Page 11...
- Page 12 Tighten the HIDDEN CAM The UPPER RAIL will rest on the SUPPORT BRACKET. Tighten the HIDDEN CAM I D D u t H i t h o f a c Rounded edge S u r Page 12 423003 www.sauder.com/service...
- Page 13 PANEL and RAILS inserts into the holes in the HEADBOARD/FOOTBOARD. Rounded edge Fill the holes 1/4 to 1/2 full with GLUE. Rounded edge S u r f a c i t h o u t h o l e www.sauder.com/service 423003 Page 13...
- Page 14 Step Step 10 Fasten four CLEATS (G) to the BACK PANEL (C) å and UPPER RAIL (E). Use twelve BLACK 1-1/8" PAN HEAD SCREWS (9S). BLACK 1-1/8" PAN HEAD SCREW (12 used in this step) Page 14 423003 www.sauder.com/service...
- Page 15 Fasten the remaining CLEATS (G) to the HEADBOARD/ å FOOTBOARDS (B). Use six BLACK 1-1/8" PAN Don't worry. It isn't HEAD SCREWS (9S). Rome. This can be built in a day. BLACK 1-1/8" PAN HEAD SCREW (6 used in this step) www.sauder.com/service 423003 Page 15...
- Page 16 Use fi ve BLACK 1-9/16" FLAT HEAD SCREWS (30S). Fasten the DRAWER BRACE (M65) to the RIGHT DRAWER å Repeat this step for the other drawer using the LEFT å FRONT (H). Tighten one HIDDEN CAM. DRAWER FRONT (J). Page 16 423003 www.sauder.com/service...
- Page 17 Repeat this step for the LEFT DRAWER. å Glide end SILVER 1/4" MACHINE SCREW (4 used in this step) 151M D213 These holes will not be used. Glide end 149K D212 GOLD 5/16" FLAT HEAD SCREW (8 used in this step) www.sauder.com/service 423003 Page 17...
- Page 18 The Headboard attachment will be shown in the 422892 Headboard instruction book. NOTE: The diagrams below show the 422892 Headboard å on the left or right of this Platform Bed. 422892 HEADBOARD on the right 422892 HEADBOARD on the left Page 18 423003 www.sauder.com/service...
- Page 19 Step 15 Fasten the BOTTOMS (A2) to the CLEATS (G). Use ten å BLACK 1-1/2" FLAT HEAD SCREWS (101S). Almost time to celebrate! With a nap. 101S BLACK 1-1/2" FLAT HEAD SCREW (10 used in this step) www.sauder.com/service 423003 Page 19...
- Page 20 This completes assembly. Clean with a damp cloth. Wipe dry. å And to celebrate, why not share your success story at Walmart.com or 25 lbs. 25 lbs. Place the glide on the SLIDE behind the glide on the RAIL. Page 20 423003 www.sauder.com/service...
-
Page 21: Français
DESCRIPTION QUANTITÉ REFERENCE DESCRIPTION QUANTITÉ conserver le livret pour future référence. Pour contacter Sauder en DESSOUS ................2 40DA GLISSIÈRE D'ÉLÉMENT UNIVERSELLE ..4 ce qui concerne cet TÊTE DE LIT/PIED DE LIT ........2 40DC TIROIR DROIT ............2 élément, faire référence B30 FOND DE TIROIR ............2 40DD TIROIR GAUCHE .............2... - Page 22 DE LIT (B) sur le PANNEAU ARRIÈRE (C). Serrer deux DE LIT. EXCENTRIQUES ESCAMOTABLES. Nettoyer l'excès de colle. REMARQUE : S’ a ssurer de bien insérer la CHEVILLE EN BOIS du PANNEAU ARRIÈRE dans le trou dans la TÊTE DE LIT/PIED DE LIT. Page 22 423003 www.sauder.com/service...
- Page 23 4. Fixer l'ARRIÈRE DE TIROIR (D476) aux CÔTÉS DE TIROIR (D212 et D213) et à l’ENTRETOISE DE TIROIR (M65). Utiliser cinq VIS TÊTE PLATE 40 mm NOIRES (30S). Répéter cette étape pour l'autre tiroir en utilisant le DEVANT DE TIROIR GAUCHE (J). www.sauder.com/service 423003 Page 23...
-
Page 24: Español
40DA RIEL UNIVERSAL DE GABINETE ....4 su referencia futura. Si necesita ponerse en CABECERA/PIE DE CAMA ......2 40DC CAJÓN DERECHO ..........2 contacto con Sauder en FONDO DE CAJÓN ..........2 40DD CAJÓN IZQUIERDO ..........2 cuanto a esta unidad, PANEL POSTERIOR ..........1 SOPORTE DE APOYO.........1... - Page 25 CAMA (B) al PANEL POSTERIOR (C). Apriete dos EXCÉNTRICOS ESCONDIDOS. Quite el exceso de pegamento. NOTA: Asegúrese de insertar el PASADOR DE MADERA del PANEL POSTERIOR en el agujero de la CABECERA / del PIE DE CAMA. www.sauder.com/service 423003 Page 25...
- Page 26 4 Fije el DORSO DE CAJÓN (D476) a los LADOS DE CAJÓN (D212 y D213) y a la RIOSTRA DE CAJÓN (M65). Utilice cinco TORNILLOS NEGROS DE CABEZA PERDIDA de 40 mm (30S). Repita este paso para el otro cajón utilizando la CARA IZQUIERDA DE CAJÓN (J). Page 26 423003 www.sauder.com/service...
-
Page 27: Warranty
à compter de la date d'achat la première fois et qui sont signalés à Sauder dans les limites de couverture de la contre tout défaut de matériaux ou de fabrication des composantes de mobilier Sauder. - Page 28 Walmart.com in the product detail page. General Conformity Certifi cate 1. This certifi cate applies to the Sauder Woodworking Product identifi ed by this Instruction Book. 2. This certifi cate applies to compliance of this product with the CPSC Ban on Lead-Containing Paint (16 CFR 1303).
Need help?
Do you have a question about the Mates Bed 423003 and is the answer not in the manual?
Questions and answers