Table of Contents
Advertisement
Advertisement
Table of Contents

Related Manuals for Gin Genie Lite 3


Summary of Contents for Gin Genie Lite 3
- Page 1 Genie Lite3 User manual v1.0 - 11/2019...
- Page 2 Genie Lite3 XC HARNESS...
-
Page 3: Table Of Contents
CONTENTS Genie Lite Thank You........................Warning........................Introducing Genie lite3....................Specifications........................ Components of The Genie lite3................Before You Fly......................Rescue Installation......................Storage......................... Adjustments......................... Flying with the Genie Lite3..................Maintenanance and Repairs................... Final Words........................Harness Diagram....................... -
Page 4: Thank You
THANK YOU For choosing Gin Gliders. We are confident you’ll enjoy many rewarding experiences in the air with your new GIN harness. This manual contains important safety, performance and maintenance information. Read it before your first flight, keep it for reference, and please pass it on to the new owner if you ever re-sell your harness. -
Page 5: Warning
Always seek to expand your knowledge and to develop self-reliance. If there is anything you do not understand, consult with your local dealer as a first point of contact, with the GIN importer in your country or with Gin Gliders directly. -
Page 6: Introducing Genie Lite3
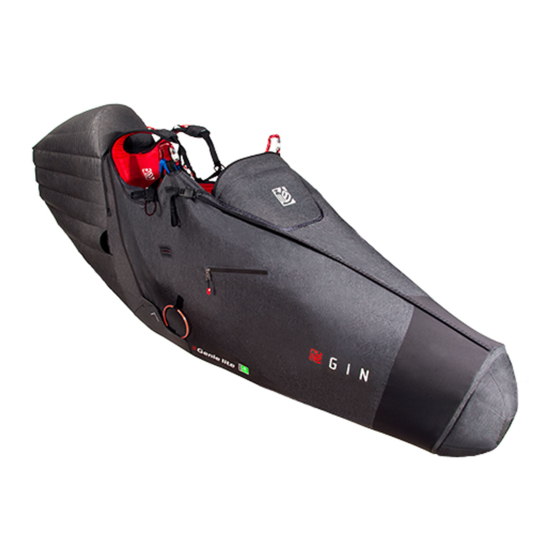
INTRODUCING GENIE LITE3 The Genie Lite 3 is for sport and XC pilots who are looking for a light cocoon harness with all the essential features and no compromises in comfort. It is intended only for the use as a harness for an EN certified paraglider and not for any other use. -
Page 7: Specifications
Certification number: PH 277.2019 | CE certification DELIVERY PACKAGE 1 Harness 1 Triplex seat plate and foot plate 1 Flight deck (integrated into cocoon) 1 Rescue deployment handle 1 Rescue bridle 2 GIN 30mm carabiners BACK PROTECTION KOROYD 9cm Back protection CE and EN Certified... -
Page 8: Components Of The Genie Lite3
The the risk of injury. The Genie Lite 3 back protection is EN flight deck also has a 4.5L pocket (M size) and CE certified. -
Page 9: Before You Fly
Your harness must be assembled by a suitably qualified paragliding professional, for example, your instructor. Gin Gliders recommends that assembly be carried out in the following order. If you are in any doubt whatsoever about this procedure, please seek professional advice from your instructor, GIN dealer or importer. - Page 10 INSTALLING THE SEAT PLATE WARNING: Forgetting to loop the leg straps behind the seat plate may place the pilot at risk of falling out of the harness. The seat plate is removable and can be accessed by a panel at the front edge of the seat. The seat plate should be installed with the round corners orientated to the rear of the harness and the square corners at the front.
- Page 11 The back protection does not eliminate the chance of injury as a result of a crash. To install the back protector in the Genie Lite 3, first open the zipper compartment under the seat. Insert WARNING: If the back protection zip is not ful- the back protector with the narrow end first.
- Page 12 G-CHUTE POCKET The Genie Lite 3 has a dedicated pocket for a G-chute. Please refer to the G-Chute manual for correct operation in flight. The pocket has a flap to close the pocket and retain the aerodynamic shape of the harness. After disabling the G-Chute it is possible to return it into the pocket but pilots may find it less time consuming to fly with the disabled G-chute and re-install it after landing.
-
Page 13: Rescue
After every repack of the rescue parachute you should also do a compatibility check. The harness is delivered with its own rescue container. All current GIN rescue inner containers can be added to the rescue deployment handle. This might not be the case for other manufacturers. - Page 14 The deployment bag of other manufacturers’ rescue systems (i.e. non-GIN rescue systems) may have different loop positions which may cause a deployment failure. Be sure to contact your parachute dealer or a qualified...
- Page 15 INNER CONTAINER PACKING Your rescue should be repacked into the supplied inner containers as follows. Fold the para-cord into symmetrical Close the bottom flap in the order Place the folded rescue into the Fold 60cm of line under the rescue. bundles the approximate width of shown.
- Page 16 CONNECTING THE RESCUE BRIDLE To connect a rescue to your harness we recommend using a GIN Rescue Carabiner. If you choose to use different type of connector, it should be rated at least 9 times the maximum weight. For example, our recommended 6mm Stainless Steel screwgate maillon (square) connector has a minimum breaking load of 12,5kN (1250 Kgf).
- Page 17 It is very important to properly install the rescue parachute. If the parachute is not folded correctly or the lines are not placed properly then a serious if not fatal accident could result. If you have any doubts speak with your instructor or GIN dealer.
-
Page 20: Storage
STORAGE BACK POCKET UNDER SEAT POCKET The back pocket is designed to store the pilots The under seat pocket has a capacity for approx. 4L rucksack and other light accessories during flight. of ballast (M size) or other items. Bear in mind that any ballast placed here will affect the flying angle of the harness…... -
Page 21: Adjustments
ADJUSTMENTS NOTE: Make sure that the rescue system has been installed before making adjustments. After choosing a harness that is close to your body size, adjust your harness to suit your physique and flying style. It is important to adjust it correctly to ensure you can easily slide into the sitting position after take off. A poorly adjusted harness can adversely affect the flying characteristics of your paraglider. - Page 22 LATERAL STRAPS SPEED BAR The lateral straps adjust the angle between the thighs and the back. Lengthening the straps increases Hanging in the simulator, adjust the length of the speed bar the angle and vice-versa. The easiest way to adjust them correctly is during a flight in calm air. Remember cord so that the bar hangs at least 15cm below the front of the harness.
- Page 23 COCOON ADJUSTMENTS The cocoon should be tight and the harness fabric should be smooth and wrinkle-free to create the most aerodynamic shape. The nose of the cocoon should form a straight line and point slightly down. Tighten the upper line to raise the nose of the cocoon, loosen to allow the nose to drop and extend the length of the cocoon.
-
Page 24: Flying With The Genie Lite3
Is the air chamber intake open and clear? The maximum clip in weight of the Have you closed your leg and chest straps? Double check before you take off! Genie Lite 3 is 120kg, we do not recommend you fly with more than this weight. - Page 25 Rescue Deployment In the event of an emergency, you must quickly evaluate your height and the seriousness of the incident. A seconds hesitation in deploying the reserve could prove fatal if there is insufficient height. On the other hand, deploying the rescue when the glider is recoverable may result in needless injury. If you decide to deploy the rescue: 1) Look for the rescue handle and grasp it firmly with one hand 2) Pull forwards and upwards on the handle to release the deployment bag from the rescue container.
- Page 26 Flying over water Towing Tandem Flying Water landings should be avoided at all The Genie Lite 3 can be used for towed The Genie Lite 3 is not designed for costs, as the back protection increases the tandem flying. See www.gingliders.com launches.
-
Page 27: Maintenanance And Repairs
MAINTENANCE AND REPAIRS The materials used in this harness have been carefully selected for maximum durability. Nevertheless, keep your harness clean and airworthy to ensure the longest possible period of safe operation. Care and maintenance Don’t drag your harness over rough or rocky ground. Avoid unnecessary exposure to UV rays, heat and humidity. - Page 28 Repairs The manufacturer or an official GIN dealer should carry out any repair that involves critical parts of the harness. This will ensure that the correct materials and repair techniques are used.
- Page 29 Gin Gliders gives consideration to the entire life cycle of its harnesses, the last stage of which is recycling in an environmentally-friendly manner. The synthetic materials used in a harness must be disposed of properly.
-
Page 30: Final Words
To stay safe, the best you can do is to increase your understanding, skill and experience at a rate you can manage safely. There is no substitute for self-responsibility and good judgment. In the end, paragliding offers a unique opportunity to learn to take control of your own destiny. Memento mori, carpe diem! Fly safely, and...ENJOY! GIN team... - Page 31 TECHNICAL DATA Size Carabiner distance (cm) 34-43 34-43 36-46 40-49 CERTIFICATION PARACHUTE CONTAINER BACK PROTECTION The Genie Lite3 is EN and LTF certified, max load 120 daN Integrated container underneath seat plate KOROYD 9cm Back Protection Certification number: PH 277.2019 | CE certification MATERIALS Harness fabric Outer...
- Page 32 PILOT DETAILS / PROOF OF OWNERSHIP 1. Owner Name: Address: Phone: Email: 2. Owner Name: Address: Phone: Email: 3. Owner Name: Address: Phone: Email:...
- Page 33 HARNESS DETAILS Size Colour Serial Number Check flight (date): Mark and signature: INSPECTIONS AND REPAIRS OVERVIEW Date Work carried out General conditions on delivery Completed by (name) Stamp and signature...
-
Page 34: Harness Diagram
HARNESS DIAGRAM Back pocket Rescue container Foot plate Upper cocoon adjustment Lower cocoon adjustment Speed system hook Speed system Pulley Speed bar Back protector Rescue handle Hook knife... - Page 35 Gin Gliders INC. 2318-32, Baegok-daero, Moyheon-myeon, Cheoin-gu, Yongin, Gyeonggi-do, Korea 17063 tel. +82 (0)31 333 1241 fax. +82 (0)31 334 6788 gin@gingliders.com www.gingliders.com...
Need help?
Do you have a question about the Genie Lite 3 and is the answer not in the manual?
Questions and answers