Furuno 1824C-BB Installation Manual
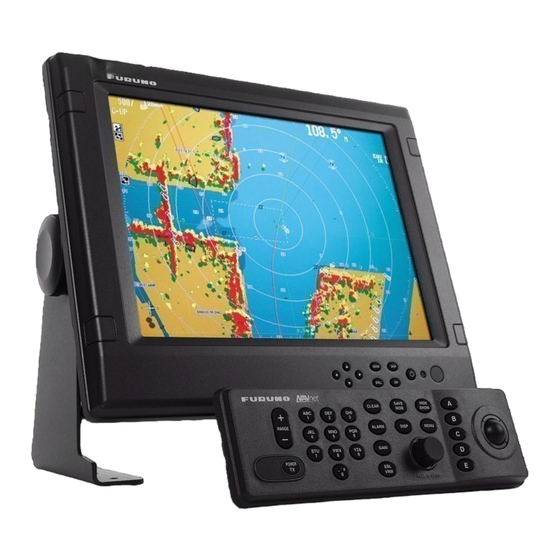
Marine radar and color video plotter
Hide thumbs
Also See for 1824C-BB:
- Specifications (10 pages) ,
- Operator's manual (236 pages) ,
- Operator's manual (233 pages)

Related Manuals for Furuno 1824C-BB


Summary of Contents for Furuno 1824C-BB
- Page 1 MODEL 1824C-BB MARINE RADAR MODEL 1834C-BB MARINE RADAR MODEL 1934C-BB MARINE RADAR MODEL 1944C-BB MARINE RADAR MODEL 1954C-BB MARINE RADAR GD-1920C-BB COLOR VIDEO PLOTTER P R I N T E D I N J A P A N...
- Page 2 The paper used in this manual is elemental chlorine free. Your Local Agent/Dealer Your Local Agent/Dealer 9-52 Ashihara-cho, 9-52 Ashihara-cho, Nishinomiya 662-8580, JAPAN Nishinomiya 662-8580, JAPAN Telephone : Telephone : 0798-65-2111 0798-65-2111 0798-65-4200 0798-65-4200 FIRST EDITION : FIRST EDITION : FEB FEB. . 2005 2005 Printed in Japan Printed in Japan All rights reserved.
- Page 3 This is possible - Ask Serious injury or death can result if some- your FURUNO representative or dealer to one falls from the radar mast. provide this feature. Turn off the power at the mains switch- board before beginning the installation.
-
Page 4: Table Of Contents
TABLE OF CONTENTS EQUIPMENT LISTS ..................... iii SYSTEM CONFIGURATIONS ................v 1. MOUNTING ....................1-1 1.1 Mounting the Control Unit..................1-1 1.2 Mounting the Processor Unit ..................1-4 1.3 Mounting the Antenna Unit of MODEL1824C-BB ............1-5 1.4 Mounting the Antenna Unit of MODEL1834C-BB .............1-13 1.5 Mounting the Antenna Unit of MODEL1934C-BB/1944C-BB/1954C-BB ....1-18 1.6 Mounting the Power Supply Unit for MODEL1954C-BB ...........1-27 2. -
Page 5: Equipment Lists
EQUIPMENT LISTS Standard supply Name Type Code No. Remarks Control unit RCU-017 Processor unit RPU-015 RSB-0094-0075 MODEL1824C-BB RSB-0071-057 MODEL1834C-BB XN10A-RSB-0070-064 MODEL1934C-BB, 24 rpm XN10A-RSB-0073-064 MODEL1934C-BB, 48 rpm Antenna unit XN12A-RSB-0070-059 MODEL1944C-BB, 24 rpm XN12A-RSB-0073-059 MODEL1944C-BB, 48 rpm XN12A-RSB-0072-060 MODEL1954C-BB, 4ft, 24 rpm XN12A-RSB-0073-060 MODEL1954C-BB, 4ft, 48 rpm XN13A-RSB-0072-060... - Page 6 Optional supply Name Type Code No. Remarks 000-013-484 For GD-1920C-BB, 100 VAC 000-013-485 For GD-1920C-BB, 110 VAC PR-62 Rectifier 000-013-486 For GD-1920C-BB, 220 VAC 000-013-487 For GD-1920C-BB, 230 VAC RU-3423 000-030-443 For MODEL series External buzzer XH3-BZ-L970 000-146-422 MJ-A6SPF0014-010 000-144-421 For NavNet, 1 m MJ-A6SPF0014-050 000-144-422...
-
Page 7: System Configurations
: Local supply (GD-1920C-BB, etc.) 100/110/115/220/230 VAC 12 - 24 VDC* 1φ, 50/60 Hz* Network *: The power for the power supply unit Sounder and display unit must be drawn from ETR-6/10N the same power source. ETR-30N NavNet system: Model 1824C-BB/1834C-BB/1934C-BB/1944C-BB/1954C-BB... - Page 8 GPS receiver GP-310B/320B Processor unit Control unit RPU-015 RCU-017 Monitor (Local supply) SAVE SAVE HIDE HIDE CLEAR CLEAR SHOW SHOW RANGE RANGE ALARM ALARM DISP DISP MENU MENU POWER YZ& YZ& GAIN GAIN F.G. SLAVE DISPLAY POWER POWER PUSH TO ENTER PUSH TO ENTER OUTPUT 12 VDC...
- Page 9 Three-or-more-unit NavNet system Radar Antenna Unit Radar Antenna Unit GPS Receiver GP-310B/320B GPS Receiver GP-310B/320B RADAR RADAR PLOTTER PLOTTER Radar data Plotter data Sounder data Sounder data Facsimile data Network Sounder Facsimile Network Sounder ETR-6/10N Receiver ETR-6/10N ETR-30N FAX-30 ETR-30N (option) (option) (option)
- Page 10 This page intentionally left blank. viii...
-
Page 11: Mounting
1. MOUNTING 1.1 Mounting the Control Unit 1.1.1 Mounting considerations The control unit can be mounted on a desktop or flush mounted in a console or panel. For flush mounting, the optional flush mount kit is required. When selecting a mounting location for the control unit keep the following in mind: •... - Page 12 1.1.2 Mounting procedure Flush mounting Follow the procedure below to mount the control unit in a panel, using accessories FP03-10001. 1. Prepare a cutout in the mounting location, referring to the outline drawing at the end of this manual. 2. Set the control unit to the cutout. 3.
- Page 13 Desktop mounting Use the optional desktop mount kit FP03-09901 (Code number 008-443-540). Name Type Code No. Hanger fixture 19-023-1061 100-307-941 Hanger fixture 19-023-1062 100-307-951 Tapping screw 5 x 20 000-802-081 Hex bolt M5 x 10 000-802-288 1. Fix the hanger fixture 19-023-1062 on a desktop with four tapping screws (5x20). 2.
-
Page 14: Mounting The Processor Unit
1.2 Mounting the Processor Unit The unit can be mounted on the deck, a desktop or on a bulkhead. Select a mounting location considering the points below. • Locate the unit out of direct sunlight. • Select a location where temperature and humidity are moderate and stable. •... -
Page 15: Mounting The Antenna Unit Of Model1824C-Bb
1.3 Mounting the Antenna Unit of MODEL1824C-BB 1.3.1 Mounting considerations When selecting a mounting location for the antenna unit, keep in mind the following points. • Install the antenna unit on the hardtop, radar arch or on a mast on an appropriate platform. - Page 16 1.3.2 Mounting procedure 1. Remove the mounting hardware from the bottom of the antenna unit: four each of hex bolts (M10X20), spring washers and flat washers. Save the mounting hardware to use it to fix the antenna unit to the mounting platform later on. Stern Screws two screws on other side...
- Page 17 4. The mounting base is fitted with a snap holder, which may be used to hang the cover after removal. Use the hole next to a screw hole inside the cover to hang it. a) Unfasten the snap assy. with the string attached at the holder in the mounting base. b) Unwind the string.
- Page 18 5. Unfasten the rotation detector cable from the cable clamps, referring to the figure on page 1-11. 6. Unfasten 16 screws ( in the figure below) to dismount the shield plate, core case and core case cover. Pan head screws M3x10 2 pcs.
- Page 19 7. Pass the antenna cable with connector through the cable gland, gasket and cable entrance of the antenna unit, and then tighten cable gland. Note 1: Be sure the shrink tube on the antenna cable does not contact the gasket. Note 2: Pinch the gasket tightly and insert it into the cable entrance.
-
Page 20: Pan Head Screws
9. Attach connectors of the antenna cable to the locations shown in the figure below, and then fasten a pan head screw M4x10 to fix shield cable and core case (removed at step Pan head screws M4x10 9 pcs. J810 J809 (13 pin) (4 pin) - Page 21 12. Pass the cable from the rotation detector through two cable clamps. Rotation detector Cable clamps Cable tie (Another should be inside.) Antenna unit, clamping the rotation detector cable 13. Follow the instructions on the label inside the mounting base to secure the snap assy. 14.
- Page 22 M8 x 20 Mounting plate M8 x 20 Bracket (1) Fixing plate Support plate (2) Bracket (2) Support plate (1) M8 x 20 M4 x 12 (A) Assembling the mounting bracket M10 x 25 (supplied with antenna unit) (B) Fastening antenna to mounting bracket How to assemble and mount the optional mounting bracket 1-12...
-
Page 23: Mounting The Antenna Unit Of Model1834C-Bb
1.4 Mounting the Antenna Unit of MODEL1834C-BB 1.4.1 Mounting considerations • See the mounting considerations for the MODEL1824C-BB on page 1-5. 1.4.2 Mounting procedure 1. Open the antenna unit packing box carefully. 2. Unbolt the four bolts at the base of the radome cover to remove the cover. Radome cover Antenna unit The mounting surface must be parallel with the waterline and provided with five holes... - Page 24 Antenna base plate Effective Gasket thread length Radome 25 mm 5 - 10 mm Flat washer Spring Platform washer M10 x 25 Apply silicone sealant. Hex bolt How to fasten the radome base to the mounting platform Wiring and final preparations 4.
- Page 25 9. Attach three connectors of the signal cable to respective receptacles as shown below. to one of the screws of the cable clamping plate 9-pin connector: to J801 on MD-9208 4-pin connector: to J802 on MD-9208 13-pin connector: to J611 on IF-9214 Signal cable, antenna unit side J802 J801...
- Page 26 10. Bundle the cables with the EMI core (supplied) as shown below. J801 J802 MD-9208 J805 J804 J806 J803 Cable entrance Cable Motor clamping plate EMI core E04SS251512 (Above cable clamping plate) J613 PTU-9335 IF9214 IF9214A J611 EMI core 11. Fix the shield cover. Do not pinch the cable. 12.
- Page 27 Mounting the optional mounting bracket A mounting bracket for fastening the antenna unit for the MODEL1834C-BB to a mast on a sailboat is optionally available. Contents of mounting bracket 1 (Type: OP03-92, Code No.: 008-445-070) Part Type Code No. Hex. bolt M4X12 000-804-725 Hex.
-
Page 28: Mounting The Antenna Unit Of Model1934C-Bb/1944C-Bb/1954C-Bb
1.5 Mounting the Antenna Unit of MODEL1934C-BB/1944C-BB/1954C-BB 1.5.1 Mounting considerations • The antenna unit is generally installed either on top of the wheelhouse or on the radar mast on a suitable platform. Locate the antenna unit where there is a good all-round view. - Page 29 1.5.2 Mounting procedure Referring to the outline drawing at the back of this manual, drill five holes in the mounting platform: four holes of 15 mm diameter for fixing the antenna unit and one hole of 25-30 mm diameter for the signal cable. Fastening the radiator to the radiator bracket For your reference, the antenna installation materials list appears in the packing list for this unit at the back of this manual.
- Page 30 Mounting the antenna unit The antenna unit can be mounted using the fixing holes on the outside (200 x 200 mm) or inside (140 x 150 mm) the antenna unit. Using outside fixing holes of the antenna housing Use the hex head bolts (supplied) to mount the antenna unit as below. 1.
- Page 31 3. Insert four hex bolts (M12x60, supplied) and seal washers (Ф30, supplied) from the top of the antenna housing, as shown below. Hex bolt Seal washer Flat washer Spring washer Fixing the antenna unit chassis 4. Pass flat washers (M12, supplied), spring washers (M12, supplied) and nuts (M12, supplied) onto hex bolts.
- Page 32 8. Coat ground terminal and ground point with silicone sealant as shown below. Hex bolt Flat washer Ground Flat washer wire Spring washer Hex nut Silicone GROUND sealant POINT Hex nut Ground Spring washer wire Flat washer Hex nut Weld here. GROUND TERMINAL Silicone...
- Page 33 Using inside fixing holes of the antenna housing This method requires removal of the RF unit in the antenna unit to access inside fixing holes. Use hex head bolts, flat washers, spring washers and nuts (local supply) to mount the antenna unit, confirming length of bolts. 1.
- Page 34 Connecting the signal cable Only the signal cable runs from the display unit (power supply unit in case of 1954C-BB) to the antenna unit. In order to minimize the chance of picking up electrical interference, avoid where possible routing the signal cable near other onboard electrical equipment. Also, avoid running the cable in parallel with power cables.
- Page 35 5. Position the signal cable so that no more than 4 cm of the sheath is exposed as shown in the figure below. Tighten fixing bolts. Tubing Shield Sheath Bolt Within 4 cm Plate Gasket Flat washer CABLE GLAND How to fix signal cable in cable gland 6.
- Page 36 8. Connect the signal cable to the RTB Board (03P9249 or 03P9250), referring to the interconnection diagram and the figure below. 9. Attach three EMI cores to the signal cable as shown below. RTB Board J821 VH9P J822 VH2P J824 NH13P Lead in J823 VH4P cable here.
-
Page 37: Mounting The Power Supply Unit For Model1954C-Bb
1.6 Mounting the Power Supply Unit for MODEL1954C-BB A power supply unit is shipped with the MODEL1954C-BB, because of its high power consumption. The power supply unit can be installed almost anywhere provided the location is dry, well-ventilated, sufficient maintenance space is provided and is installed within 5 m (cable length) from the display unit. - Page 38 This page intentionally left blank. 1-28...
-
Page 39: Wiring
WIRING 2.1 Standard Wiring All wiring is terminated at the rear of the processor unit. Antenna unit RSB-0094-0075 RSB-0071-057 XN10A-RSB-0070-064 XN12A-RSB-0070-059 XN12A-RSB-0072-060 XN10A-RSB-0073-064 XN12A-RSB-0073-059 XN12A-RSB-0073-060 XN13A-RSB-0072-060 MJ-B24LPF0002-xxx (for M1824C-BB, M1834C-BB) MJ-B24LPF0005-xxx Camera (for M1934C-BB, M1944C-BB M1954C-BB) Processor Unit RPU-015 10/15/20/30 m MJ-B24LPF MONITOR Sub-display... - Page 40 DJ-1 For MODEL1824C-BB/1834C-BB/1934C-BB/1944C-BB/1954C-BB, remove the waterproofing cap from the DJ-1 port on the processor unit and discard it. GD-1920C-BB: Do not remove the waterproofing cap. Wrap the connector nut and cap with vinyl tape as shown below. Waterproofing cap (yellow) Vinyl tape Connector nut (for 24P) Waterproofing cap and connector nut, sectional view...
- Page 41 Other NavNet equipment should be connected to this port with the optional MJ-A6SPF0014 cable. Available equipments are shown below. Radar Plotter Network sounder Other 1824C-BB/1834C-BB/ GD-1920C-BB 1934C-BB/1944C-BB/ HUB (used when ETR-6/10N 1834C-BB/1954C-BB more than two NavNet ETR-30N units are connected.) Or other FURUNO NavNet radar.
-
Page 42: Wiring The Power Supply Unit For Model1954C-Bb
2.2 Wiring the Power Supply Unit for MODEL1954C-BB 1. Loosen three M4 screws to remove the cable clamp. 2. Loosen six M4 screws to remove the unit cover. 3. Attach the VL connector of power supply cable VL3P-VV-S2X2C-AA050 (supplied as installation materials) to J1 on the POWER Board. - Page 43 Note: The power for the power supply unit and processor unit must be drawn from the same power switch on the ship’s power terminal board. Other Equipment (ex. GPS, E/S, etc.) Processor unit Power supply unit POWER F.G. SLAVE DISPLAY OUTPUT 12 VDC NTSC/PAL...
- Page 44 This page intentionally left blank.
-
Page 45: Setting Up The Equipment
3. SETTING UP THE EQUIPMENT 3.1 Setting up with the Installation Wizard After you have installed the equipment, set up the equipment with the installation wizard. The wizard allows you to easily set up the NavNet network (choose source of radar, sounder and auxiliary), GPS, ports, etc. - Page 46 CAUTION: Ensure that the settings to be loaded are compatible with this NavNet unit. Improper setting will damage the equipment. 7. The screen for set up of units of measurement appears. RANGE UNIT nm, kt DEPTH UNIT °F TEMPERATURE UNIT WIND UNIT LOCAL TIME OFFSET +00:00...
- Page 47 MEDIUM MONITOR MODE HEADING ADJUST Installation wizard, radar setup 14. Choose ANTENNA TYPE and then press the C: EDIT soft key. ANTENNA TYPE A (MODEL 1824C-BB) B (MODEL 1834C-BB) (MODEL 1934C-BB) D (MODEL 1944C-BB) (MODEL 1954C-BB) (MODEL 1964C-BB) 15. Choose the appropriate antenna type and then press the C: ENTER soft key.
- Page 48 16. Choose HEADING DATA and then press the C: EDIT soft key. HEADING DATA MAGNETIC TRUE 17. Choose the appropriate heading data format and then press the C: ENTER soft key. Select MAGNETIC when connecting with a magnetic compass, or select TRUE when connecting with a gyrocompass.
- Page 49 (1) Target (2) Correct (3) Target pushed pulled outward Examples of improper and correct sweep timing a) Choose ON and then press the C: ENTER soft key. b) Transmit on the shortest range and confirm that gain and A/C SEA are properly adjusted.
- Page 50 29. If you are going to use the equipment as a remote display, choose MONITOR MODE and then press the C: EDIT soft key. If not, go to step 31. MONITOR MODE 30. Choose ON and then press the C: ENTER soft key. •...
- Page 51 NAV SETUP menu description Item Description Settings (Default in boldface) Position FURUNO BB GPS: GPS Receiver Chooses source of position data. Source GP-310B/320B GP: GPS navigator (via NETWORK or NMEA port) LC: Loran C navigator (via...
- Page 52 36. After setting up navigation equipment, press the A: NEXT soft key, and the GPS SETUP menu appears. This menu sets ups the FURUNO GPS receiver GP-310B/320B. If you do not have this equipment, press the NEXT soft key and go to step 39.
- Page 53 GPS SETUP menu description (con’t from previous page) Item Description Settings Default Setting Spd/Cse During position fixing, ship’s velocity 0-999 sec 5 sec Smoothing (speed and course) is directly measured by receiving GPS satellite signals. The raw velocity data may change randomly depending on receiving conditions and other factors.
- Page 54 GPS SETUP menu description (con’t from previous page) Item Description Settings Default Setting Fix Mode Choose position fixing method: 2D 2D, 2D/3D 2D/3D (three satellites in view), 2D/3D (three or four satellites in view whichever is greater). Cold Start Clears the Almanac to receive the latest No, Yes Almanac.
- Page 55 OUTPUT DESTINATION NO Installation wizard, NMEA port setup Description of items in “port” menus Item Description Settings Default Setting FURUNO GPS Selects whether the GPS Receiver Yes, No Yes (DATA1) Sensor GP-310B/320B is connected to the No (DATA2) DATA1 or DATA2 port or not.
- Page 56 42. Press the A: NEXT soft key, and the NMEA sentence selection window (for network) appears. Installation wizard, NMEA sentence selection window 43. Choose sentence to process and press the A: ON/OFF soft key to show ON or “- -“ (OFF) as appropriate. 44.
-
Page 57: Checking Magnetron Heater Voltage
1. Open the antenna unit. 2. Turn on the power. Do not transmit the radar. 3. Connect a multimeter, set to 10VDC range, appropriate position on the MD (1824C-BB), PTU (1834C-BB) or RTB (1934C-BB/1944C-BB/1954C-BB) Board in the antenna unit. Refer to the table in below. - Page 58 This page intentionally left blank. 3-14...
-
Page 59: Optional Equipment
OPTIONAL EQUIPMENT 4.1 External Buzzer The external buzzer provides a louder alert when the alarm is violated. External buzzer Type: XH3-BZ-L970 Code no.: 000-146-422 1. Unfasten 11 screws and 9 connectors to remove the cover. 2. Use a knife to cut a “cross” in the rubber bushing on the rear cover. 3. -
Page 60: Arp Kit Arp-11
4.2 ARP Kit ARP-11 Necessary parts Name: ARP kit Type: ARP-11 Code no.: 008-523-050 Contents of ARP kit Name Type Code No. ARP Board 18P9013 008-521-830 Pan head screw M3x6 C2700W 000-881-403 000-801-850 Spacer* SQ15 000-801-779 Spring washer* M3 C5191W 000-864-204 *Not used 1. - Page 61 3. Mate P107 on the ARP Board to J112 on the 19P1001 board and fasten the ARP board with four screws. 19P1001 board J112 4. Mount the shield plate and the19P1015 board and connect P1361 and P1357 to the 19P1015. 5.
-
Page 62: Packing Lists
PACKING LIST 19AV‑X‑9853 ‑1 RPU‑015‑E‑*‑CS N A M E DESCRIPTION/CODE № O U T L I N E Q'TY ユニット UNIT RPU‑015‑E‑N 制御部 PROCESSOR UNIT 000‑088‑224 予備品 SPARE PARTS 予備品 SP03‑14501 SPARE PARTS 008‑444‑420 工事材料 INSTALLATION MATERIALS CP03‑25900 工事材料 CP03‑25901 INSTALLATION MATERIALS 008‑443‑690 MJ‑A3SPF0018‑050Z ケーブル組品MJ CABLE ASSY. 000‑139‑872 図書 DOCUMENT ヒューズ変更のお願い C32‑00007‑* NOTICE FOR FUSE REPLACEMENT 000‑809‑188 OSE‑35490‑* 操作要領書(英) OPERATOR'S GUIDE 000‑151‑807 装備要領書(英) IME‑35490‑*... - Page 63 PACKING LIST 19AV‑X‑9854 ‑0 RPU‑015*/RCU‑017E* N A M E DESCRIPTION/CODE № O U T L I N E Q'TY ユニット UNIT RCU‑017‑E‑5‑CS 操作部一式箱詰品 CONTROL UNIT COMPLETE SET 000‑050‑533 制御部一式箱詰品 RPU‑015‑E‑N‑CS PROCESSOR UNIT COMPLETE SET 000‑088‑215 (略図の寸法は、参考値です。 DIMENSIONS IN DRAWING FOR REFERENCE ONLY.) 19AV‑X‑9854...
- Page 64 A - 3...
- Page 65 A - 3 PACKING LIST PACKING LIST 19AO-X-9851 -1 PACKING LIST PACKING LIST RSB-0094-075 RSB-0094-075 RSB-0094-075 RSB-0094-075 N A M E DESCRIPTION/CODE № O U T L I N E Q'TY ユニット ユニット UNIT UNIT ユニット ユニット UNIT UNIT 空中線部 RSB-0094-075 ANTENNA UNIT 000-080-237 工事材料...
- Page 67 A - 4 Model 1824C-BB/1834C-BB...
- Page 68 A - 5 Model 1934C-BB/1944C-BB/1954C-BB...
- Page 69 A - 7...
- Page 71 PACKING LIST 19AN‑X‑9851 ‑1 A-10 PSU‑005 N A M E DESCRIPTION/CODE № O U T L I N E Q'TY ユニット UNIT PSU‑005 空中線電源部 POWER SUPPLY UNIT 000‑080‑190 予備品 SPARE PARTS SP03‑14001 ヒューズ FGBO 7A AC125V FUSE 000‑549‑013 FGBO 15A AC125V ヒューズ FUSE 000‑549‑014 工事材料 INSTALLATION MATERIALS CP03‑24501 4X16 SUS304 1シュ +トラスタッピンネジ SELF‑TAPPING SCREW 000‑802‑080 その他工材 OTHER INSTALLATION MATERIALS ケーブル組品MJ MJ‑B24LPF0009‑050 CABLE ASSY. 000‑145‑887 VL3P‑VV‑S2X2C‑AA050 ケーブル組品...
- Page 75 Y. Hatai...
- Page 78 Y. Hatai...
- Page 79 *2. CONNECTOR PLUG FITTED AT FACTORY. *2)コネクタは工場にて取付済み。 *3. SHIELD SHOULD BE EFFECTIVELY GROUNDED AT BOTH UNIT ENDS. *3)シールドは両ユニット側で完全に接地すること。 SCALE MASS NAME MARINE RADAR *4)副指示器として使用する場合は、制御部の内部設定を変更する。 *4. CHANGE SETTING IN PROCESSOR UNIT FOR USING AS A REMOTE DISPLAY. DWG.No. INTERCONNECTION DIAGRAM C3549‑C01‑ A FURUNO ELECTRIC CO., LTD.
- Page 80 *3. CONNECTOR PLUG FITTED AT FACTORY. *3)コネクタは工場にて取付済み。 SCALE MASS NAME *4. SHIELD SHOULD BE EFFECTIVELY GROUNDED AT BOTH UNIT ENDS. MARINE RADAR *4)シールドは両ユニット側で完全に接地すること。 *5)副指示器として使用する場合は、制御部の内部設定を変更する。 *5. CHANGE SETTING IN PROCESSOR UNIT FOR USING AS A REMOTE DISPLAY. DWG.No. INTERCONNECTION DIAGRAM C3551‑C01‑ A FURUNO ELECTRIC CO., LTD.
- Page 81 *2)コネクタは工場にて取付済み。 SCALE MASS NAME *3. SHIELD SHOULD BE EFFECTIVELY GROUNDED AT BOTH UNIT ENDS. MARINE RADAR *3)シールドは両ユニット側で完全に接地すること。 *4)副指示器として使用する場合は、指示器の内部設定を変更する。 *4. CHANGE SETTING IN THE DISPLAY UNIT FOR USING AS A REMOTE DISPLAY. DWG.No. INTERCONNECTION DIAGRAM C3553‑C01‑ A FURUNO ELECTRIC CO., LTD.
- Page 82 D. MILLS GD‑1920C‑BB Jan. 25, '05 *2)コネクタは工場にて取付済み。 CHECKED 名 称 カラービデオプロッタ TAKAHASHI.T APPROVED 相互結線図 Y. Hatai NOTE *1. SHIPYARD SUPPLY SCALE MASS NAME COLOR VIDEO PLOTTER *2. CONNECTOR PLUG FITTED AT FACTORY. DWG.No. INTERCONNECTION DIAGRAM C4433‑C01‑ A FURUNO ELECTRIC CO., LTD.
Need help?
Do you have a question about the 1824C-BB and is the answer not in the manual?
Questions and answers