Table of Contents
Advertisement
Available languages
Available languages
Type Sup 037RG
ISTRUZIONI PER L'USO
OPERATING INSTRUCTIONS
BEDIENUNGSANLEITUNG
MODE D'EMPLOI
LEGGERE ATTENTAMENTE QUESTE ISTRUZIONI D'USO PRIMA DI UTILIZZARE LA MACCHINA.
READ THESE OPERATING INSTRUCTIONS CAREFULLY BEFORE USING THE MACHINE.
DIESE BEDIENUNGSANLEITUNG IST VOR DEM ERSTEN GEBRAUCH DER MASCHINE AUFMERKSAM ZU LESEN.
LIRE ATTENTIVEMENT CES INSTRUCTIONS AVANT D'UTILISER LA MACHINE.
FOR HOUSEHOLD USE ONLY
USAGE DOMESTIQUE SEULEMENT
Advertisement
Table of Contents

Related Manuals for Gaggia RI9833/70


Summary of Contents for Gaggia RI9833/70
- Page 1 Type Sup 037RG ISTRUZIONI PER L'USO OPERATING INSTRUCTIONS BEDIENUNGSANLEITUNG MODE D’EMPLOI LEGGERE ATTENTAMENTE QUESTE ISTRUZIONI D'USO PRIMA DI UTILIZZARE LA MACCHINA. READ THESE OPERATING INSTRUCTIONS CAREFULLY BEFORE USING THE MACHINE. DIESE BEDIENUNGSANLEITUNG IST VOR DEM ERSTEN GEBRAUCH DER MASCHINE AUFMERKSAM ZU LESEN. LIRE ATTENTIVEMENT CES INSTRUCTIONS AVANT D’UTILISER LA MACHINE.
-
Page 2: Norme Di Sicurezza
GENERALITÀ La macchina da caff è è indicata per la preparazione di caff è espresso impiegando caff è in grani; è dotata di un dispositivo per l’ e rogazione del vapore e di acqua calda. Il corpo della macchina dall’ e legante design è stato progettato per uso domestico e non è indicato per un funzionamen- to continuo di tipo professionale. -
Page 3: Protezione D'altre Persone
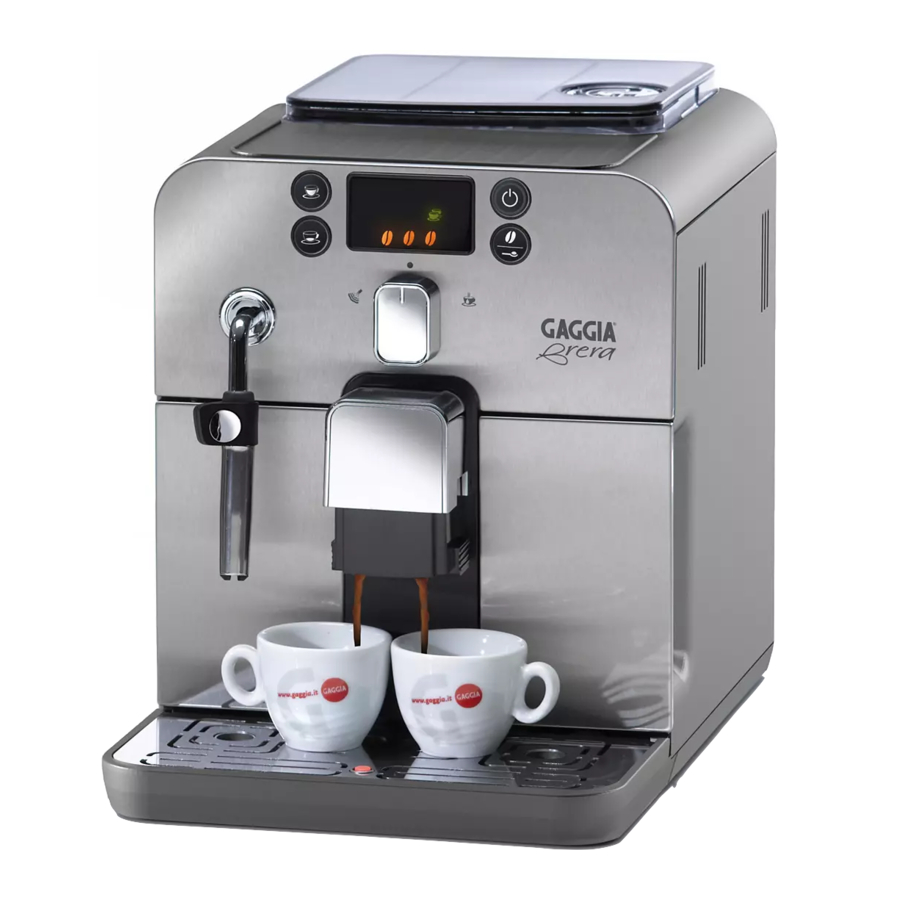
Protezione d’altre persone Tenere i bambini sotto supervisione, per evitare che giochino con l’apparecchio. I bambini non si rendono conto del pericolo connesso agli elettrodomestici. Non lasciare alla portata dei bam- bi ni i ma te ria li utilizzati per im bal la re la mac chi na. Pericolo d’ustioni Evitare di dirigere contro se stessi e/o altri il getto di vapore e/o d’acqua calda: pericolo di scottature! Usare sempre le apposite maniglie o manopole. - Page 4 Manopola regolazione macinatura Pannello comandi Erogatore caff è Scompartimento caff è pre-macinato Griglia appoggia tazze Indicatore vasca raccogli gocce piena Serbatoio acqua Grasso per Gruppo Caff è Cavo alimentazione Tasto erogazione espresso Tasto erogazione caff è lungo • 4 • Contenitore caff è...
-
Page 5: Installazione
INSTALLAZIONE Per la propria sicurezza e quella di terzi attenersi scrupolosamente alle istruzioni riportate nel capitolo “Norme di sicurezza”. Imballaggio L’imballo originale è stato progettato e realizzato per proteggere la macchina du- rante la spedizione. Si consiglia di conser- varlo per un eventuale trasporto futuro. Operazioni preliminari •... - Page 6 • Portare l’interruttore generale su “I” per poter accendere la macchina. • Il tasto “STAND-BY” lampeggia. • Assicurarsi che il selettore sia in posi- zione “ ”; se necessario, ruotarlo fi no a portarlo nella posizione indicata. • Per accendere la macchina è suffi ciente premere il tasto “STAND-BY”...
- Page 7 Primo utilizzo o dopo un pe- riodo di lungo inutilizzo. Queste semplici operazioni vi permette- ranno di erogare sempre un ottimo caff è. 1 Inserire un contenitore capiente sotto l’ e rogatore. 2 Prima d’iniziare la procedura verifi care che il display visualizzi i seguenti simboli.
-
Page 8: Gaggia Adapting System
Filtro acqua “INTENZA”. Per migliorare la qualità dell’acqua uti- lizzata, si consiglia d’installare il filtro acqua. Togliere il filtro dalla confezione ed immergerlo in posizione verticale (con l’apertura verso l’alto) in acqua fredda e premere delicatamente i lati per far uscire le bolle d’aria. - Page 9 spina dalla presa di corrente. Non immettere caff è in grani quando il macinacaff è è in funzione. La macchina consente una leggera rego- lazione del grado di macinatura del caff è per adattarlo al tipo di caff è utilizzato. La regolazione deve essere effettuata agendo sul pomello presente all’interno del contenitore caff è;...
-
Page 10: Erogazione Caffé
Per l’utilizzo di tazze grandi. • Sotto all’ e rogatore possono essere po- sizionate due tazze/tazzine per erogare contemporaneamente due caff è. Regolazione “Aroma” La macchina è predisposta per consentire la regolazione della quantità di caffè da macinare da 7 gr a 10,5 gr per caff è. Premendo e rilasciando il tasto “... -
Page 11: Erogazione Acqua Calda
• L’erogazione del caffè si ferma auto- maticamente quando viene raggiunto il livello impostato; è comunque pos- sibile interrompere l’erogazione del caffè premendo il tasto azionato in precedenza. La macchina è regolata per preparare un vero espresso all’italiana. Questa caratteristica potrebbe allungare leggermente i tempi d’... -
Page 12: Erogazione Vapore
• Ruotare il selettore in senso orario fi no al punto “ ”. • Sul display viene visualizzato solo il seguente simbolo acceso in modo fi sso. Fisso • Prelevare la quantità desiderata di acqua calda; per fermare l’erogazio- ne dell’acqua calda ruotare in senso antiorario il selettore fi no a riportarlo nella posizione “... -
Page 13: Pulizia E Manutenzione
• Riempire con latte freddo 1/3 del contenitore che si desidera utilizzare per preparare il cappuccino. Per garantire un miglior risultato nella preparazione del cappuccino, il latte utilizzato deve essere freddo da frigorifero. • Se volete riscaldare il latte direttamente nella tazza, immergere il tubo vapore (pannarello, se presente) nel latte da riscaldare. - Page 14 - riposizionare la parte superiore nel tubo vapore (assicurarsi che sia completamente inserita). Rimontare la parte esterna del panna- rello. • Si consiglia di pulire quotidianamente il serbatoio dell’acqua; per favorire l’estrazione del serbatoio dell’acqua spostare il tubo vapore/pannarello verso l’alto: - Estrarre il fi ltrino bianco posto all’in- terno del serbatoio e pulirlo con acqua corrente potabile.
- Page 15 DECALCIFICAZIONE La formazione del calcare è naturale con- seguenza dell’uso dell’apparecchio. La necessità d’ e seguire la decalcifi cazione viene evidenziata dall’accensione del sim- bolo sul display. Fissi Nota importante: si consiglia di consultare il paragrafo suc- cessivo “Note sulla decalcifi cazione” in cui vengono chiarite alcune soluzioni per mantenere in perfetta effi cienza la macchina.
- Page 16 9 Quando l’acqua all’interno del serbatoio è terminata appare il simbolo posto a lato; questo indica di riportare il selettore nella posizione “ ”. Fisso 10 Risciacquare bene il serbatoio e riem- pirlo con acqua fresca potabile. 11 Vuotare il contenitore utilizzato per recuperare il liquido che esce dalla macchina.
- Page 17 22 Mantenere premuto il tasto “ 6 secondi per azzerare la macchina ed eliminare l’allarme della decalcifi cazio- Fissi Rimontare la parte esterna del panna- rello. Se la macchina viene spenta durante l’esecuzione del ciclo di decalcifi cazione, il ciclo deve essere ripetuto interamente alla successiva riaccensione.
-
Page 18: Segnali Di Avviso
DISPLAY PANNELLO COMANDI Segnali di pronto • Macchina pronta per l’ e rogazione del caff è con caff è in chicchi e dell’acqua calda. Fisso • Macchina pronta per l’ e rogazione del caff è con caff è premacinato. Fisso •... - Page 19 Segnali d’allarme • Riportare il pomello del rubinetto acqua calda / vapore in posizione corretta. • Il Gruppo Caff è deve essere inserito nella macchina. Lampeggianti • Chiudere lo sportello di servizio. • Svuotare il cassetto raccogli fondi. Fisso • Inserire il cassetto raccogli fondi.
-
Page 20: Risoluzione Problemi
RISOLUZIONE PROBLEMI Comportamenti Cause La macchina non si accende. La macchina non è collegata alla rete elettrica. Il caff è non è abbastanza caldo Le tazzine sono fredde. Non fuoriesce acqua calda o vapore. Il foro del tubo vapore è otturato. Pannarello sporco (se presente). -
Page 21: Dati Tecnici
DATI TECNICI Il costruttore si riserva il diritto di modifi care le caratteristiche tecniche del prodotto. Tensione nominale - Potenza nominale - Alimentazione ..........Vedi targhetta posta all’interno dello sportello Materiale corpo . -
Page 22: Important Safeguards
IMPORTANT SAFEGUARDS When using electrical appliances, basic safety precautions should always be followed, including the following: 1. Read all instructions. 2. Do not touch hot surfaces. Use handles or knobs. 3. To protect against fire, electric shock and injury to persons do not immerse cord, plugs, or appliance in water or other liquid. - Page 23 This appliance is for household use only. Any servicing, other than cleaning and user maintenance, should be performed by an authorized service center. Do not immerse machine in water. To reduce the risk of fire or electric shock, do not disassemble the machine.
-
Page 24: General Information
GENERAL INFORMATION The coff ee machine is suitable for preparing espresso coff ee using either coff ee beans or ground coff ee and is equipped with a device to dispense steam and hot water. The structure of the ma- chine has been designed for domestic use only and is not suitable for continuous professional- type operation. - Page 25 Danger of Burns Never direct the steam/hot water wand towards yourself or others: Danger of scalding! Always use the handles or knobs provided. Machine Location - Suitable Location for Operation and Maintenance For best use, it is recommended to: • Choose a safe, level surface, where there will be no danger of overturning it or being inju- red.
- Page 26 Grinder adjustment knob Control panel Dispensing spout Pre-ground coff ee compartment Cup holder grill Full drip tray indicator Water tank Grease for the brew group Power cord Espresso coff ee brew button Long coff ee brew button • 26 • Coff ee bean hopper Cup stacking surface Coff ee grounds drawer...
-
Page 27: Installation
INSTALLATION For your safety and the safety of others, carefully follow the instruc- tions provided in the “Safety Regu- lations” section. Machine Packaging The original packaging has been designed and constructed to protect the machine during transport. We recommend keeping the packaging material for possible future transport. -
Page 28: Circuit Priming
• Switch the power button to “I” to turn the machine on. • The “STAND-BY” button blinks. • Make sure the selector switch is in the “ ” position; if this is not the case, set it to that position. •... -
Page 29: Using The Machine For The First Time Or After A Long Period Of Inactivity
Using the machine for the first time or after a long period of inactivity. These simple operations will make it pos- sible to always brew excellent coff ee. 1 Place a large container under the dispensing spout. 2 Before starting the procedure, check that the following icons are displayed. -
Page 30: Gaggia Adapting System
“INTENZA” water fi lter. To improve the quality of the used water, it is advisable to install the water fi lter. Remove the water filter from its packa- ging, immerse it vertically (with the ope- ning positioned upwards) in cold water and delicately press the sides so as to let the air bubbles out. -
Page 31: Adjusting The Coff Ee Length
The machine allows slight adjustments to the coff ee grinder to adapt it to the kind of coff ee used. To make any adjustment, press and turn the knob inside the coff ee bean hopper. Press and turn the knob by one notch at a time and brew 2-3 cups of coffee;... -
Page 32: Coffee Brewing
For use with large cups. • Two cups can be placed under the dispensing spout for brewing two coff ees at the same time. “Aroma” Adjustment The machine is set-up for an amount of coff ee to grind to be adjusted from 7 g to 10.5 g per coff ee. -
Page 33: Using Pre-Ground Coff Ee
button initially pressed. The machine is adjusted to brew a true Italian espresso coffee. This feature may slightly lengthen the brewing time, allowing the intense fl avour of the coff ee to develop fully. Using Pre-ground Coff ee This function allows using pre-ground and decaff eina- ted coff ee. -
Page 34: Steam Dispensing
• Turn the selector switch clockwise to set it to the “ ” position. • Only the following icon will be displa- yed steady on. Steady on • Fill the cup with hot water to the desi- red level; to stop hot water dispensing, turn selector switch counter-clockwise back to the “... -
Page 35: Cleaning And Maintenance
• To heat the milk directly in the cup, immerse the steam wand (Pannarello, if supplied) in the milk to be heated. • Turn the selector switch counter- clockwise to set it to the “ ” position. Rotate the container and move it gently up and down to obtain uniform foam. -
Page 36: Brew Group
Reassemble the external part of the Pannarello. • We recommend cleaning the water tank daily. For an easier removal of the water tank, move the steam wand / Pannarello upwards: - Remove the small white fi lter in the water tank and wash it under running drinking water. - Page 37 DESCALING Limescale normally builds up with the use of the appliance. The machine must be descaled when the icon appears on the display. Steady on Important note: It is recom- mended to refer to the next section, “Remarks on Descaling”, for some tips about keeping the machine in perfect working order.
- Page 38 9 When the water in the tank is fi nished, the icon on the side is displayed to indicate that the selector switch must be brought back to the “ ” position. Steady on 10 Rinse the water tank thoroughly and refi ll it with fresh drinking water.
- Page 39 22 Hold the “ “ button pressed for 6 seconds to reset the machine and cancel the descaling alarm signal. Steady on Reassemble the external part of the Pannarello. If the machine is switched off during the descaling cycle, next time the machine is switched on the cycle must be repeated from the beginning.
-
Page 40: Control Panel Display
CONTROL PANEL DISPLAY Ready Signals • The machine is ready for brewing coff ee from bean and hot water dispensing. Steady on • The machine is ready for pre-ground coff ee brewing. Steady on • The machine is in the steam dispensing phase. -
Page 41: Alarm Signals
Alarm Signals • Return the hot water / steam knob to its correct position. • Insert the brew group in the machine. Blinking • Close the service door. • Empty the coff ee grounds drawer. Steady on • Insert the coff ee grounds drawer. Blinking •... -
Page 42: Troubleshooting
TROUBLESHOOTING Machine Actions Causes The machine does not turn on. The machine is not connected to the power source. The coff ee is not hot enough. The cups are cold. No hot water or steam is dispensed. The hole of the steam wand is clogged. Pannarello is dirty (if supplied). -
Page 43: Technical Specifications
TECHNICAL SPECIFICATIONS The manufacturer reserves the right to make changes to the technical specifi cations of the product. Nominal Voltage - Power Rating - Power Supply ............See label on the inside of the service door Housing material . -
Page 44: Sachgemäßer Gebrauch
ALLGEMEINES Die Kaff eemaschine eignet sich für die Zubereitung von Espresso unter Verwendung von Boh- nenkaff ee. Sie ist mit einer Vorrichtung für die Dampf- und die Heißwasserausgabe ausgestat- tet. Das Gehäuse der Maschine hat ein elegantes Design und ist für den Hausgebrauch konzi- piert worden, nicht aber für den Dauergebrauch bei gewerblichen Anwendungen. - Page 45 Schutz anderer Personen Kinder beaufsichtigen, damit sie nicht mit dem Gerät spielen. Kinder können die Gefahrensi- tuationen, die durch Haushaltsgeräte entstehen können, nicht abschätzen. Die für die Verpak- kung der Maschine benutzten Materialien sollten nicht in Reichweite von Kindern aufbewahrt werden.
- Page 46 Kaff eebohnenbehälter Drehknopf Mahlgradeinstellung Tassenabstellfl äche Bedienfeld Kaff eeauslauf Fach für vorgemahlenen Kaff ee Tassenabstellrost Anzeige Abtropfschale voll Wassertank Fett für die Brühgruppe Netzkabel Ausgabetaste Espresso Ausgabetaste großer Kaff ee • 46 • Deckel Kaff eebohnenbehälter Kaff eesatzbehälter Schutz für Ausgabedüse Heißwasser-/Dampfdüse Hauptschalter Einschaltung/ vollständige Ausschaltung...
-
Page 47: Vorbereitende Arbeiten
INSTALLATION Für Ihre eigene Sicherheit und die Dritter sollten die Hinweise im Ka- pitel “Sicherheitsvorschriften” strikt eingehalten werden. Verpackung Die Original-Verpackung wurde für den Schutz der Maschine während des Versands entwickelt und hergestellt. Es wird empfohlen, diese Verpackung für eventuelle zukünftige Transporte aufzu- bewahren. -
Page 48: Entlüftung Des Systems
• Den Hauptschalter auf die Position “I” stellen, um die Maschine einschalten zu können. • Die Taste “STANDBY” blinkt. • Sicherstellen, dass der Wahlschalter sich in der Position “ ” befindet. Soweit erforderlich, muss der Schalter in die angegebene Position gedreht werden. - Page 49 Erste Inbetriebnahme oder Benutzung nach längerer Nichtbenutzung. Mit diesen einfachen Vorgängen wird die Ausgabe eines stets optimalen Kaffees gewährleistet. 1 Einen Behälter mit ausreichendem Fassungsvermögen unter den Auslauf stellen. 2 Vor dem Beginn der Vorgänge sollte überprüft werden, ob auf dem Display die folgenden Symbole angezeigt werden.
-
Page 50: Gaggia Adapting System
Wasserfi lter “INTENZA”. Um die Qualität des verwendeten Wassers zu verbessern, wird die Installation des Wasserfi lters empfohlen. Den Filter aus der Verpackung heraus- nehmen und senkrecht (so dass die Öff- nung nach oben zeigt) in kaltes Wasser tauchen. Den Filter leicht an den Seiten zusammendrücken, um die Luftblasen zu entfernen. -
Page 51: Einstellung Kaff Eemenge In Der Tasse
des Kaff eebehälters sollte stets die Maschine ausgeschaltet und der Stek- ker von der Steckdose abgenommen werden. Während sich das Mahlwerk in Betrieb befi ndet, sollte kein Boh- nenkaff ee eingefüllt werden. Auf der Maschine ist die leichte Einstel- lung des Mahlgrades möglich, um diesen an den verwendeten Kaff ee anzupassen. - Page 52 Für die Verwendung von großen Tassen. • Unter dem Auslauf können auch zwei Tassen aufgestellt werden, um gleich- zeitig zwei Tassen Kaff ee auszugeben. Einstellung “Aroma” Auf der Maschine kann die Menge des zu mahlenden Kaff ees (zwischen 7 und 10,5 g pro Kaff ee) eingestellt werden.
- Page 53 • Nach dem Vorbrühzyklus beginnt der Kaff ee aus dem Auslauf zu fl ießen. • Die Kaffeeausgabe wird automatisch beendet, wenn die eingestellte Menge erreicht ist. Die Kaffeeausgabe kann jedoch auch durch Druck der vorher ge- drückten Taste abgebrochen werden. Die Maschine ist für die Aus- gabe eines echten italieni- schen Espresso eingestellt.
- Page 54 • Den Wahlschalter im Uhrzeigersinn bis zum Punkt “ ” drehen. • Auf dem Display wird nur das folgende Symbol angezeigt, das dauerhaft aufl euchtet. Dauerhaft aufl euchtend • Die gewünschte Heißwassermenge ausgeben. Um die Ausgabe des Heiß- wassers abzubrechen, wird der Wahl- schalter im Gegenuhrzeigersinn bis in die Position “...
-
Page 55: Reinigung Und Wartung
• Den Behälter, der für die Cappuccinozu- bereitung benutzt werden soll, zu 1/3 mit kalter Milch füllen. Für die Zubereitung eines optimalen Cappuccinos sollte die verwendete Milch kalt sein und aus dem Kühlschrank kommen. • Soll die Milch direkt in der Tasse erhitzt werden, die Dampfdüse (Pannarello, soweit vorhanden) in die zu erhitzende Milch tauchen. - Page 56 Tuch reinigen und eventuelle Milchreste entfernen; - den oberen Bereich der Dampfdüse wieder anbringen (sicherstellen, dass diese vollständig eingesetzt ist). Den äußeren Bereich des Pannarellos wieder montieren. • Es wird empfohlen, den Wassertank täglich zu reinigen und das Wasser zu wechseln.
- Page 57 ENTKALKUNG Die Bildung von Kalk ist eine natürliche Folge des Betriebs des Geräts. Die Einschaltung des Symbols auf dem Display zeigt an, wann die Ausführung der Entkalkung erforderlich ist. Dauerhaft aufl euchtend Wichtiger Hinweis: In diesem Zusammenhang ist auf den folgenden Abschnitt “Hinweise zur Entkalkung”...
- Page 58 9 Ist kein Wasser mehr im Tank vorhan- den, wird das seitlich dargestellte Symbol angezeigt. Dieses zeigt an, dass der Wahlschalter wieder in die Position Dauerhaft “ ” gestellt werden muss. aufl euchtend 10 Den Tank sorgfältig ausspülen und mit frischem Trinkwasser füllen.
- Page 59 22 Die Taste “ “ für einen Zeitraum von 6 Sekunden drücken, um die Maschine auf Null zu stellen und den Alarm für die Entkalkung auszuschalten. Dauerhaft aufl euchtend Den äußeren Bereich des Pannarellos wie- der montieren. Wird die Maschine während der Ausführung des Entkal- kungszyklus ausgeschaltet, muss der Zyklus bei der nachfolgenden...
- Page 60 DISPLAY BEDIENFELD Bereitschaftssignale • Maschine bereit für die Ausgabe von Kaff ee aus Kaff eebohnen und heißem Wasser. Dauerhaft aufl euchtend • Maschine bereit für die Ausgabe von Kaff ee aus vorgemahlenem Kaff ee. Dauerhaft aufl euchtend • Maschine in Ausgabephase von Dampf. Dauerhaft aufl euchtend •...
- Page 61 Alarmsignale • Den Drehknopf des Reglers Heißwasser / Dampf wieder in die korrekte Position drehen. • Die Brühgruppe muss in die Maschine Blinkend eingesetzt werden. • Die Servicetür schließen. • Den Kaff eesatzbehälter leeren. Dauerhaft aufl euchtend • Den Kaff eesatzbehälter einsetzen. Blinkend •...
- Page 62 PROBLEME UND IHRE MÖGLICHEN URSACHEN Verhalten/Störung Ursachen Die Maschine schaltet sich nicht ein. Die Maschine ist nicht an das Stromnetz ange- schlossen. Der Kaff ee ist nicht heiß genug. Die Tassen sind kalt. Es erfolgt keine Ausgabe von Heiß- Die Austrittsöffnung der Dampfdüse ist ver- wasser oder Dampf.
-
Page 63: Technische Daten
TECHNISCHE DATEN Der Hersteller behält sich das Recht vor, technische Änderungen am Produkt vorzunehmen. Nennspannung - Nennleistung - Stromversorgung ..........Siehe Typenschild auf der Innenseite der Klappe Material des Gerätekörpers . - Page 64 IMPORTANT Lors de l’utilisation d’appareils électriques, il est indispensable de respecter toujours les précautions de sécurité principales, y compris les suivantes : 1. Lire toutes les instructions. 2. Ne pas toucher de surfaces chaudes. Utiliser les poignées ou les boutons. 3.
- Page 65 PRÉCAUTIONS La machine est réservée à un usage domestique. Tout entretien, en dehors du nettoyage et de l’entretien usuel par l’usager, doit être fait par un service après- vente autorisé. Ne pas plonger la base dans l’eau. Pour éviter les courts-circuits et les décharges électriques, ne pas démonter la base.
-
Page 66: Consignes De Sécurité
GÉNÉRALITÉS La machine à café est indiquée pour la préparation de café expresso avec du café en grains et est équipée d’un dispositif pour la distribution d’eau chaude et de vapeur. La structure de cet appareil au design élégant a été conçue exclusivement pour un usage domestique et n’ e st donc pas indiqué... -
Page 67: Protection Des Autres Personnes
Protection des autres personnes Garder les enfants sous supervision, afi n d’ é viter qu’ils ne jouent avec l’appareil. Les enfants ne se rendent pas compte du danger que représentent les électroménagers. Les matériaux utilisés pour l’ e mballage de la machine doivent être gardés hors de la portée des enfants. Danger de brûlures Ne pas diriger le jet d’... - Page 68 Réservoir à café en grains Bouton de réglage mouture Plaque pour poser les tasses Bandeau de commande Distributeur de café Logement café prémoulu Grille égouttoir Indicateur bac d’ é gouttement plein Réservoir à eau Graisse pour le Groupe de distribution Câble d’alimentation Touche de distribution du café...
-
Page 69: Mise En Place
MISE EN PLACE Pour votre sécurité et celle des tiers, respecter scrupuleusement les ins- tructions fournies à la section « Consignes de sécurité ». Emballage L’ e mballage original a été conçu et réalisé pour protéger la machine au cours de sa livraison. -
Page 70: Amorçage Du Circuit
• Tourner l’interrupteur général sur « I » pour mettre la machine en marche. • La touche « STAND-BY » clignote. • Vérifi er que le sélecteur se trouve sur la position “ ”; le cas échéant, le tourner jusqu’à atteindre la position indiquée. •... - Page 71 Première utilisation ou après une longue période d’inac- tivité. Ces simples opérations vous permettront de distribuer toujours un café excellent. 1 Placer un grand récipient sous la buse de distribution. 2 Avant de commencer la procédure, vérifi er si les symboles suivants appa- raissent sur l’affi cheur.
-
Page 72: Filtre À Eau « Intenza
Filtre à eau « INTENZA ». Afin d’améliorer la qualité de l’eau uti- lisée, il est conseillé d’installer le fi ltre à eau. Enlever le fi ltre de son emballage, ensuite le plonger verticalement dans l’ e au froide (l’ o uverture vers le haut). Pousser le fi ltre délicatement sur les bords pour faire sor- tir toute bulle d’air. - Page 73 de courant avant d’intervenir pour une raison quelconque à l’intérieur du réservoir à café. Ne pas verser de café en grains lorsque le moulin à café est en marche. La machine permet de régler légèrement le degré de mouture pour l’adapter au type de café...
-
Page 74: Distribution De Café
Pour utiliser de grandes tasses. • Il est possible de placer sous le distribu- teur deux grandes/petites tasses pour distribuer deux cafés en même temps. Réglage « Arôme » La machine a été conçue pour permettre de régler la quantité de café à moudre de 7 g. -
Page 75: Distribution D'eau Chaude
• La distribution de café s’arrêtera auto- matiquement lorsque le niveau réglé sera atteint ; il est quand même pos- sible d’interrompre la distribution du café en appuyant sur la touche activée précédemment. La machine est réglée pour la préparation d’un véritable café... -
Page 76: Distribution Vapeur
• Tourner le sélecteur dans le sens des aiguilles d’une montre jusqu’au point “ ”. • L’affi cheur ne montre que le symbole suivant allumé fi xe. Fixe • Prélever la quantité d’ e au chaude sou- haitée ; pour interrompre la distribu- tion d’... -
Page 77: Nettoyage Et Entretien
• Remplir 1/3 du récipient servant à préparer le cappuccino avec du lait froid. Pour un résultat optimal dans la préparation du cappuccino, utiliser du lait froid étant dans le réfrigérateur. • Si l’ o n souhaite réchauff er le lait direc- tement dans la tasse, plonger la buse de vapeur (Pannarello, si présent) dans le lait à... -
Page 78: Groupe De Distribution
- replacer la partie supérieure dans la buse de vapeur (vérifi er qu’elle est insérée complètement). Monter à nouveau la partie extérieure du Pannarello. • On recommande de nettoyer tous les jours le réservoir à eau ; pour mieux re- tirer le réservoir à... - Page 79 DÉTARTRAGE La formation du calcaire est une consé- quence naturelle entraînée par l’utilisa- tion de l’appareil. L’allumage du symbole sur l’afficheur nous indique lorsqu’il faut effectuer un Fixes cycle de détartrage. Remarque importante : il est conseillé de consulter la section suivante «...
- Page 80 9 Lorsque l’ e au dans le réservoir est fi nie, le symbole à côté apparaît sur l’affi - cheur. Cela indique qu’il faut remettre le sélecteur sur la position “ ”. Fixe 10 Rincer soigneusement le réservoir et le remplir d’...
- Page 81 22 Garder la touche “ “ appuyée pendant 6 secondes pour remettre à zéro la machine et éliminer l’alarme de détartrage. Fixes Monter à nouveau la partie extérieure du Pannarello. Au cas où la machine serait éteinte pendant l’exécution du cycle de détartrage, le cycle doit être entièrement répété...
-
Page 82: Signaux D'avertissement
AFFICHEUR DU BANDE AU DE COMMANDE Signaux machine prête • Machine prête pour la distribution du café avec café en grains et de l’ e au chaude. Fixe • Machine prête pour la distribution du café avec café prémoulu. Fixe •... -
Page 83: Signaux D'alarme
Signaux d’alarme • Remettre le bouton du robinet eau chaude/ vapeur sur la bonne position. • Le groupe de distribution doit être inséré dans la machine. Clignotants • Fermer la porte de service. • Vider le tiroir à marc. Fixe •... -
Page 84: Dépannage
DÉPANNAGE Comportements Causes La machine ne se met pas en mar- La machine n’est pas branchée sur le réseau che. électrique. Le café n’ e st pas assez chaud. Les tasses sont froides. La machine ne distribue ni d’eau Le trou de la buse de vapeur est obturé. chaude ni de vapeur. -
Page 85: Données Techniques
DONNÉES TECHNIQUES Le constructeur se réserve le droit d’apporter des modifi cations aux caractéristiques techniques du produit. Tension nominale - Puissance nominale - Alimentation ..........Voir la plaquette signalétique dans la porte Matériau du corps . - Page 86 • 86 •...
- Page 87 • 87 •...
- Page 88 GAGGIA s.p.a. Strada Prov. per Abbiategrasso 20087 Robecco Sul Naviglio Milano, ITALIA Tel: +39 02 949931 Fax: + 39 02 9470888 www.gaggia.com Il produttore si riserva il diritto d`apportare qualsiasi modifica senza preavviso. The manufacturer reserves the right to change the features of the product without prior notice. Der Hersteller behält sich das Recht vor, Änderungen ohne Ankündigung vorzunehmen.