
Subscribe to Our Youtube Channel
Related Manuals for WELLTECH ATA Series


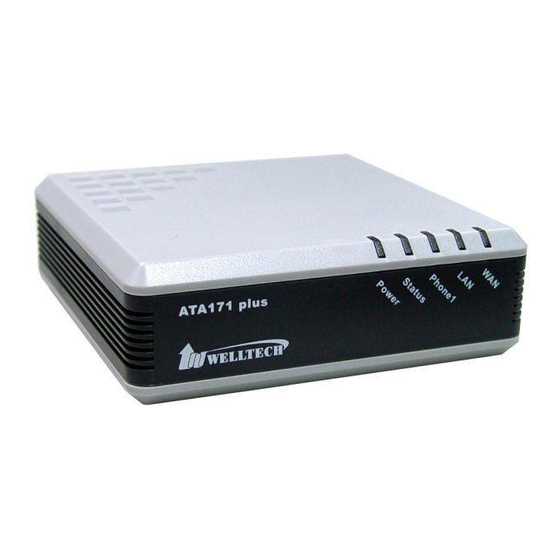
Summary of Contents for WELLTECH ATA Series
-
Page 1: User Guide
ATA Web User Guide VoIP ATA series (ATA171plus, ATA172plus, ATA-171, ATA-172, ATA-171M, ATA-171P) User Guide Firmware Version : V.303... -
Page 2: Table Of Contents
ATA Web user guide 1. Introduction ........................4 2. Hardware Overview ......................4 2.1 Two RJ-45 Network interface................4 2.2 One or two RJ-11 analog telephone jack and line interfaces....4 2.3 LED Indication......................4 3. Software Overview ......................4 4. - Page 3 ATA Web user guide 11.1 Function ......................112 11.2 Instruction ......................112 12. Logout (Login System) .................... 113 12.1 Function ......................113 12.2 Instruction ......................113 3 / 114...
-
Page 4: Introduction
ATA Web user guide 1. Introduction This user’s manual is for all ATA series VoIP terminal adapter (ATA). This user’s manual explains the IVR instruction, web configuration, and command line configuration for the ATA. Before using the ATA, some setup processes are required to make the ATA work properly. -
Page 5: Keypad Interface From Analog Phone Set Of Ata
ATA Web user guide Call Forward Configuration Caller ID 3-way conference DTMF Function Web Browser Telnet In-Band DTMF IVR/Keypad Out-of Band DTMF SIP Info Firmware Upgrade SIP Server Registrar Server (Five SIP accounts) ... - Page 6 ATA Web user guide System will automatically Disable Call Function #139# None reboot and Call Waiting will Waiting be disabled. System will automatically Enable reboot and Send Function #140# None Anonymous Anonymous CID was enabled. System will automatically Disable reboot and Send Function #141# None...
- Page 7 ATA Web user guide Enter value-using numbers on Set Network #113xxx*xxx*xx the telephone keypad. Use the Setting Must set Static IP first. Mask x*xxx# * (star) key when entering a decimal point. Enter IP address using numbers on the telephone Set Gateway #114xxx*xxx*xx Setting...
-
Page 8: Instruction Of Web Environment
ATA Web user guide 5. Instruction of Web Environment 5.1 Default setting 5.1.1 Default network setting Netwrok Mode: Default NAT Mode WAN Port: DHCP Client Mode LAN Port: DHCP Server Enable, IP Address: 192.168.123.1 5.1.2 Web login VoIP Web Login default link, http://192.168.123.1:9999 Account Login : ... - Page 9 ATA Web user guide 5.4.2 Function description item Description Gateway Device model name for Gateway(ATA) or Phone Status Current device information list Phone Phone item provide [Phone Book , Dial Plan , Call Service , General setting, Volume setting] function Network Network setting provide [WAN , DDNS, VLAN , VPN (PPTP/L2TP), SNTP (time sync)] function...
-
Page 10: System Information
ATA Web user guide 5.5 System Information 5.5.1 Function description There are network information, firmware version and SIP register status. Item Description WAN Information Shows the current status of WAN Port. Link Status Shows the network connected Speed. Active Shows the network connected type. IP Address Shows IP address of the device. - Page 11 ATA Web user guide Item Description DSP Version Shows the DSP version. AC: AC97 WM: Winbound LE: Legeeity NV:Nuvoton Current Time Shows the current time. Update Date Shows the date of updating system. System Up Time Shows the system running time. Netwrk Link Up Shows the network running time.
- Page 12 ATA Web user guide Figure 2: LAN Mode: Router (NAT Router) (Figure 2) 12 / 114 2015/1/8...
-
Page 13: Phone
ATA Web user guide 6. Phone Provide functions of [Phone Book, Speed Dial, Dial Plan – Basic, Dial Plan – Advanced, Call Service, Genereal, Volume] 6.1 Phone Book 6.1.1 Function description Phone Book can provide entries; Export/Import feature, the file format is csv. - Page 14 ATA Web user guide Item Description Page Default: Page 1. Select the page, from Page1~Page7. Index Shows the serial number. 140 entries in total, from Phone 0~139. One page has 20 entries. Name Set up the user’s name. These columns provide the function of speed dial by only enter numbers;...
- Page 15 ATA Web user guide Item Description period at HTTP or TFTP server by itself. Submit [Button] Save the Settings. 6.1.3 Operate Instruction Example 1: Setup [Phone Book] data Step 1: On the [Phone Book Setting] page, Setup [Index: 1, Name: 301, Number: 301@192.168.1.2;...
- Page 16 ATA Web user guide button, LP399 parameter will save to 『.csv』file format (See Figure 4). (Figure 4) Step 4: Open the file, then check [Phone Book] number data (See Figure 5). (Figure 5) Import Featuer Step 1: Set up 『.csv』 format for [Phone Book] data (See Figure 6). 16 / 114 2015/1/8...
- Page 17 ATA Web user guide (Figure 6) Step 2: In [Phone Book Setting] web page, choose the phone book file data to load [example: F:\Test\phbook.csv], press [Import csv)] button (See Figure 7). (Figure 7) Step 3: Load data finish, [Index: 1 and 2] will show phone book data (See Figure 8). (Figure 8) 17 / 114 2015/1/8...
-
Page 18: Dial Plan Setting
ATA Web user guide 6.2 Dial Plan setting 6.2.1 Function Provide dial rule and define proxy server prefix code. 6.2.2 Instructions Figure 1: Suitable for 1FXS and 2FXS ATA. (Figure 1) Item Description Index Index number. There are 4 rules to support dial rule for Add, drop and replacement features. - Page 19 ATA Web user guide Item Description use “Prefix"field number instead. Disable: Add prefix number in front of the called number when called number match “Rule” number Enable: Replace “Rule” number to “Prefix” number when called number match “Rule” number Prefix Added or replace number.
- Page 20 ATA Web user guide Item Description Disable: follow [Auto Dial Time] time to dial out. # Format is %23 Default is Disable; Use [#] word to send %23 singal. Provide drop-down options: Disable, Enable. Submit Save the configuration. Figure 2: 1FXS+1FXO, ATA-171M. (Figure 2) Item Description...
- Page 21 ATA Web user guide Item Description Drop Prefix Default setting is Disable. When it was set to “Enable"and the number match the“Rule"number, ATA will replace the “Rule"field number and use “Prefix"field number instead. Disable: Add prefix number in front of the called number when called number match “Rule”...
- Page 22 ATA Web user guide Item Description and #, *. PS: If account registers fail, it will not be switched. Auto Dial Time Default is 5 seconds, the option range is 3 to 9 seconds. ATA will dial out automatically when user didn’t enter any digit within this time period.
- Page 23 ATA Web user guide (Figure 3) Item Decription Index Index number. There are 4 entries to configure ADD and Replace dial codes. Drop Prefix Default setting is “Disable” (It is also an Add digits feature). When it was set to “Enable”...
- Page 24 ATA Web user guide Item Decription called number match “Rule” number. Prefix Added or Replace number. It only allows to enter number. Maximum data length is digits. Rule Define number manipulation rule. It can be numbers or signs (+, x). The (+) means “Or”. The (x) means any numbers which are from 0 to 9.
- Page 25 ATA Web user guide Item Decription Auto PSTN Default is Disable. Provide PSTN auto backup function. When SIP backup account register to SIP Server fail, FXS port was switched to PSTN line automatically if ATA was set to enable. In the meantime, the FXS port’s dial tone was generated from PSTN line.
- Page 26 ATA Web user guide Drop prefix: Disable, Replace rule: 009, Rule: 12. When the dialing number is like [12xxxx], it matched [Rule] -> [12], ATA will add [Prefix] [009] in front of [12]. The actual dialing number will be [009+12xxxx]. Instruction 4: When the dialing number is [53789], it matched [Rule] ->...
-
Page 27: Call Services
ATA Web user guide Description 1: When dialing these digits [0800024365], it matched content [0800] of [Routing Rule]. ATA dials these digits from FXO port. Description 2: When dialing these digits [00986123456], it matched content [009] of [Routing Rule]. ATA dials these digits from FXO port. Description 3: When dialing these digits [00782280220], it matched content [D007] of [Routing Rule]. - Page 28 ATA Web user guide (Figure 1) Item Decription Forward Type of Default is Disable. To configure Phone 1 forward type. phone1 Here provides 5 options: Disable, All (unconditional), Busy, No Answer, Busy or No Answer. NOTE : Please make sure your service provider support this forward function.
- Page 29 ATA Web user guide Item Decription phone 1 Default is From 0:0(start time) To 0:0(end of time). The time format is 24 hours system (hh/mm, Hours/Minutes). Each field has 2 digits number only. Alarm Type Default is Disable. Configure Phone 1 alarm function. When you phone 1 set to enable, phone 1 will Ring according to pre-configured (see...
- Page 30 ATA Web user guide Item Decription phone 2 Here provides 5 options: Disable, All (unconditional), Busy, No Answer, Busy or No Answer. NOTE : Please make sure your service provider support this forward function. Forward Number To configure Phone 2 forward number, simply dial [number or of phone 2 digit string].
- Page 31 ATA Web user guide Item Decription row). DND Time of This command is to configure DND time period at phone 2. phone 2 Default is From 0:0(start time) To 0:0(end of time). The time format is 24 hours system (hh/mm, Hours/Minutes). Each field has 2 digits number only.
- Page 32 ATA Web user guide Item Decription of phone1 digit string]. The maximum digit length is 63. Rings of phone 1 That feature is used for no answer forward only. Default is 3 rings. When there is no answer after configured rings, ATA forward pre-configured number...
- Page 33 ATA Web user guide Step 2: When receiving a new incoming call, LP399 will forward to this number [Forward Number: 812345678] automatically. Busy (Busy Forward) Step 1: In [Call Service Setting] web page, Setup [Forward Type: Busy, Forward Number: 405] (See Figure 2).
- Page 34 ATA Web user guide (Figure 6) Step 2: When picking up LP399 phone and wait for 3 seconds delay time, it will dial to [Hot Line number: 192.168.50.4] automatically. Example 3: DND Feature Period Step 1: In [Call Service Setting] web page, Setup [DND Type: Period, During the DND From: 18:15, To: 22:20] (See Figure 7).
-
Page 35: General
ATA Web user guide 6.4 General 6.4.1 Function Provide Caller ID, Call waiting, auto answer and T.38 FAX transmission. 6.4.2 Instruction Frigure 1: 1FXS(ATA171plus, ATA-171), 2FXS(ATA172plus, ATA-172) and1FXS+1PSTN (ATA-171P) (Figure 1) Item Description Call Waiting Enable/Disable call waiting function. This feature allows you to answer the incoming call when you are on line at another call. - Page 36 ATA Web user guide (Figure 2) Item Decription Call Waiting Enable/Disable call waiting function. This feature allows you to answer the incoming call when you are on line at another call. When you are on line to talk, an “Du Du" sound was heard to remind you there is an incoming call.
- Page 37 ATA Web user guide Item Decription Both: IP or FXO incoming call auto switch to FXO or IP correspondant after pre-configured Ring Cycles was expired. Trunk Gateway: ATA forwards an IP incoming call from SIP Proxy to FXO port directly. This is an VoIP termination to local PSTN feature.
-
Page 38: Volume
ATA Web user guide 6.5 Volume 6.5.1 Function This function is to adjust volume of microphone and speaker at analog phone set, and FXO port’s volume as well. 6.5.2 Instruction Figure1: ATA171plus, ATA-171, ATA172plus, ATA-172, ATA-171P (Figure 1.) Item Decription Handset Volume Default is 10. - Page 39 ATA Web user guide PSTN-Out Default is 10. Adjust the volume from FXO to IP port (0 to 12). Volume PSTN-In Gain Default is 10. Adjust the volume from IP to FXO port (0 to 12). Submit [button] Save the configuration. 39 / 114 2015/1/8...
-
Page 40: Network Environment
ATA Web user guide 7. Network environment Provide [WAN, DDNS, VLAN, VPN, SNTP] function setting. 7.1 WAN (network setting) 7.1.1 Function WAN provides function to set up WAN port network IP address with fixed IP, DHCP Client and PPPoE. 7.1.2 Instruction Item Decription WAN Active... - Page 41 ATA Web user guide Primary DNS Default: 168.95.192.1. The enter type is xxx.xxx.xxx.xxx of 15 bytes. Secondsond DNS Default: 168.95.1.1. The enter type is xxx.xxx.xxx.xxx of 15 bytes. MAC Address Shows the MAC ID address. System Name Default: VOIP_Phone. This column can enter numbers and strings; maximum length is 15 bytes.
- Page 42 ATA Web user guide (Figure 2) Example 2: Check PPPoE Service Name & AC Name Step 1: In [WAN Setting] web page, Setup [WAN Active: PPPoE, PPPoE User: test@hinet.net, PPPoE Password: test] (See Figure 3). (Figure 3) Step 2: In [System Status] web page, User can view [WAN] port network status [Type: PPPoE Client] (See Figure 4).
-
Page 43: Ddns (Dynamic Dns Settings)
ATA Web user guide 7.2 DDNS (Dynamic DNS Settings) 7.2.1 Function Dynamic DNS provides a residential user's Internet gateway that has a variable, often changing IP address with a well known hostname resolvable through standard DNS queries. 7.2.2 Instruction Item Decription DDNS Active Default is Disable;... - Page 44 ATA Web user guide Item Decription Off Line Default is Disable. The Off Line function will be activate when you set it to enable. It provides two options: Disable and Enable. NOTE: Please make sure your DDNS provider supports this feature when you set it to enable.
-
Page 45: Vlan
ATA Web user guide 7.3 VLAN 7.3.1 Function Provide Network, SIP and RTP VLAN function. This feature needs to work with VLAN Router. 7.3.2 Instruction Item Decription Network (Both Configure VLAN function of both WAN and LAN ports. WAN & LAN) VLAN Packets Default is Disable. -
Page 46: Vpn (Pptp/L2Tp Connection)
ATA Web user guide 7.4 VPN (PPTP/L2TP connection) 7.4.1 Function Provide [PPTP or L2TP] configuration. Note: After you have enabled the VPN functions, you could login in LP399 to configure via LAN port. 7.4.2 Instruction Item Decription Type Default is Disable. Provide PPTP/L2TP connection mode. Server Name Enter PPTP/L2TP Server information which can be IP Address or Domain Name. -
Page 47: Ntp (Time Environment)
ATA Web user guide 7.5 NTP (Time Environment) 7.5.1 Function Provide time synchronization and daylight saving function. 7.5.2 Instruction Item Decription NTP Active Default: Enable; When Enable this function, the SNTP is on. Provide options: Disable, Enable. Primary NTP Default: north-america.pool.ntp.org. This column can enter IP or Domain Name with the format of xxx.xxx.xxx.xxx;... - Page 48 ATA Web user guide Item Decription is 1~31, maximum length is 2 bytes. Hour; Setup Hour; Only use number, Data Settings secondstion is 0~23, maximum length is 2 bytes. Minute; Setup Minute; Only use number, Data Settings secondstion is 0~59, maximum length is 2 bytes. Secondsond;...
- Page 49 ATA Web user guide (Figure 1) Step 2: In [System Status] web page, View the [Current Time] field, The field show time information now (See Figure 2). (Figure 2) Example 2: DST Setting (Daylight Saving Time) Step 1: In [NTP Setting] web page, Setup [NTP Active: Auto, Primary NTP: north-america.pool.ntp.org, Secondsondary NTP: asia.pool.ntp.org, Time Zone: GMT+ 08:00, Update Interval: 6 Hour, Daylight Saving Time: Enable, OffSet up: +1 Hour, Start Time: Aug, By Week, Last Week, Mon, 01, End Time: Oct, By Week,...
- Page 50 ATA Web user guide Example 3: Manually Setup NTP Step 1: In [NTP Setting] web page, Setup [NTP Active: Manual] , Press [Get PC Time] button to get personal computer’s date and time (For example : Date & Time: 2005 Year, 1 Month, 1 Date, 0 Hour, 0 Min, 23 secondsond) (See Figure4). (Figure 4) Step 2: In [System Status] web page, View the [Current Time] field, The field show [Manually Time] time information (See Figure 5).
-
Page 51: Nat
ATA Web user guide 8. NAT Provide [LAN, DMZ & MAC Clone, Virutal Server] function. 8.1 LAN 8.1.1 Function Provide LAN port configuration setting including DHCP server function. 8.1.2 Instruction Item Decription Device Active Default: NAT. Setup the routing function of LAN Port. Provide options: Bridge, NAT. - Page 52 ATA Web user guide LAN IP Address Default: 192.168.123.1. The type is xxx.xxx.xxx.xxx of 15 bytes. LAN MAC Address Show LAN MAD ID address. Enable DHCP Default: Enable; When you Disable this function, LAN Port will Server not be a DHCP Server. Provide options: Enable, Disable.
- Page 53 ATA Web user guide (Figure 4) 53 / 114 2015/1/8...
-
Page 54: Dmz & Mac Clone
ATA Web user guide 8.2 DMZ & MAC Clone 8.2.1 Function Provide DMZ and MAC Clone configuration. 8.2.2 Instruction Item Decription DMZ Type Default is Disable. When set to Enable, all network packages will be sent to the IP address which was defined from [Assigned IP Address]. -
Page 55: Virtual Server
ATA Web user guide 8.3 Virtual Server 8.3.1 Function Provide 12 sets of Virtual Server. 8.3.2 Instruction Item Description Index Index number to support 12 sets configuration. Enable Default is Disable to all sets. When setting Enable, this function will be started. Protocol Default is TCP. - Page 56 ATA Web user guide 8.3.3 Operate Instruction Step 1: In [Vitrual Server Setting] web page, Setup [Index: 1, Active :select, Protocol: TCP, Internet Port: 80~80, Extranet Port: 8080~8080, Server IP Address: 192.168.123.150; Index: 2, Active:select, Protocol: TCP, Internet Port: 600~600, Extranet Port: 600~600, Server IP Address: 192.168.123.15] (See Figure 1).
-
Page 57: Sip Setting
ATA Web user guide 9. SIP Setting Provide Service, Code, Advanced and STUN function. 9.1 Service (SIP register setting) 9.1.1 Function Provide 5 SIP register accounts to register 5 different SIP Server or IP-PBX. 9.1.2 Instruction Figure 1: 1FXS (ATA171plus, ATA-171), 1FXS+1PSTN (ATA-171P) and 1FXS+1FXO (ATA-171M). - Page 58 ATA Web user guide Item Decription special Port Address is needed, please add it behind. For instance: nat.voiptalk.org:5065. Subscribe of MWI Subscribe for MWI function (message waiting indicator). Your Register SIP Proxy server must support this function. Submit [button] Save the configuration. Figure 2: 2FXS (ATA172plus or ATA-172) (Figure 2) Item...
- Page 59 ATA Web user guide Item Decription 63 digits. If special Port Address is needed, please add it behind. For instance, nat.voiptalk.org:5065. Subscribe of MWI Subscribe for MWI function (message waiting indicator). Your Register SIP Proxy server must support this function. Submit [button] Save the configuration.
- Page 60 ATA Web user guide (Figure 2) Example 2: Enalbe Subscribe For MWI Step 1: In [Service Domain Setting] web page, Setup [Realm Active: Enable, Display Name: 22061, Phoner Number: 22061, Authentication ID: 22061, Authentication Password: test, Domain Server: 61.62.236.71:6000, Proxy Server: 61.62.236.71:6000, Subscribe for MWI: Enable ] (See Figure 3).
-
Page 61: Codec (Voice Format)
ATA Web user guide 9.2 Codec (Voice Format) 9.2.1 Function Provide Voice Codec priority, RTP payload type and Codec ID setting. 9.2.2 Instruction Figure 1: G.723 voice codec. Item Decription Disabled Codecs Default: G.726.16, G.726.24, G.726.32, G.726.40. Disable these voice Codecs. >>... - Page 62 ATA Web user guide Item Decription <<: Select [Enable Codecs] item, press [<<] button, can move to Disable Codec area. Up [Button] Select [Endble Codec] item, press [Up] button, can move up the codec priority. Down [Button] Select [Endble Codec] item, press [Down] button, can move down the codec priority.
- Page 63 ATA Web user guide Operate Instruction 9.2.3 Example 1: Adjust Codec Order Step 1: In [Code Setting] web page, Setup G.726 - 16 enable, move mouse on [Disabled Codecs: G.726 -16], then press [>>] button, can move to [Enabled Codecs] area, move mouse on this Codec, can use [Up] or [Down] button, adjust codec negotiation priority during call was established (See Figure 1).
-
Page 64: Advanced
ATA Web user guide 9.3 Advanced 9.3.1 Function Provide [SIP Expire Time, SIP/RTP Port, QoS, Register SIP Expire Time, Use DNS SRV, DTMF, User=Phone, PRACK] Function. 9.3.2 Instruction Figure 1: 1FXS(ATA171plus, ATA-171), 1FXS+1PSTN(ATA-171P), 1FXS+1FXO(ATA-171M). (Figure 1) 64 / 114 2015/1/8... - Page 65 ATA Web user guide Item Description SIP Expire Time Default is 60; When this function is Set up to 0, the SIP Expire Time is according to the default value of Server. This column can only be numbers; maximum length is 5 bytes with the range of 60~86400 (seconds).
- Page 66 ATA Web user guide Item Description *This function must be supported by Server. For example, if T1 is 500 ms, T2 is 4 seconds and B,F,H is 32 seconds, then non-INVITE retransmissions occur at intervals of 500 ms, 1s, 2s, 4s, 4s, 4s, 4s, 4s, 4s, 4s. This means that retransmissions occur with an exponentially increasing interval that caps at T2.
- Page 67 ATA Web user guide Item Description sends Inband message and [Request: Info] message. RPort Default: Disable; Set up RPort function. When this function is on, the [Rport] message will add in [Message Header]. Provide options: Disable, Enable. *This function must be supported by Server. Voice QoS Default: 40;...
- Page 68 ATA Web user guide Item Description Provide options: Disable, Enable. *This function must be supported from SIP Server. Use user=phone Default: Disable; When this function is on, the Invite Header will (Invite) add ”user=phone” message in Invite packages. Provide options: Disable, Enable. *This function must be supported from SIP Server.
- Page 69 ATA Web user guide Figure 2: 2FXS (ATA172plus and ATA-172). (Figure 2) Item Description SIP Expire Time Default is 60; When this function is Set up to 0, the SIP Expire Time is according to the default value of Server. This column can only be numbers;...
- Page 70 ATA Web user guide Item Description The count formula of SIP Expire Time: General: SIP Expire Time-[(SIP Expire Time/30)*6] as SIP Expire Time > 60 seconds, if SIP Expire Time < 60 seconds, the SIP Expire Time subtract 5 seconds uniformly. 1/2: SIP Expire Time * 1/2.
- Page 71 ATA Web user guide Item Description numbers; maximum length is 5 bytes with the range of 8000~64000. Local SIP Port of Default: 5060~5060. phone 1 Set up the Start and End SIP Port Range of phone 1. This column can only enter numbers; maximum length is 5 bytes with the range of 1024~40000.。...
- Page 72 ATA Web user guide Item Description show [RTP Event]. SIP Info: When you enter key information, the [Ethereal] will show [Request: Info]. Provide options: InBand, RFC2833, SIP Info. RFC2833 + Inband: When you enter key information, LP399 sends Inband message and [RTP Event] message. SIP Info + Inband: When you enter key information, LP399 sends Inband message and [Request: Info] message.
- Page 73 ATA Web user guide Item Description Provide options: General, Asterisk, BroadWorks, Nortel, Xener, Vodtel, SKTelink. * Please make sure which model of SIP Server or IP-PBX server for Wellgate M1 to work with in order to select suitable SIP Server Type. Use user=phone Default: Disable;...
- Page 74 ATA Web user guide (Figure 1) Step 2: In [SIP – Advanced Setting] web page, Set up [SIP Expire Time: 60] (See Figure (Figure 2) Step 3: When registering to Server successfully, LP399 will send a register package every 55 seconds. SIP Expire Time: 0 (by server) ...
- Page 75 ATA Web user guide (Figure 4) Step 2: In [SIP – Advanced Setting] web page, Set up [Use DNS SRV: Enable] (See Figure 5) (Figure 5) Example 3: Keep Alives Message Keep Alives Message: Send UDP Step 1: Set up register SIP account settings (See Figure 6). (Figure 6) Step 2: In [SIP –...
-
Page 76: Stun (Stun & Froce Configuration)
ATA Web user guide 9.4 STUN (STUN & Froce configuration) 9.4.1 Function STUN Provides function to set up STUN and Force feature. 9.4.2 Instruction Item Description STUN Active Default: Disable; When this function is on, STUN functions Enable. Provide options: Disable, Enable. STUN Server Default: stun.xten.com;... - Page 77 ATA Web user guide (Figure 1) Example 2: Force The structure figure (See Figure 2): (Figure 2) Step 1: Please set up the SIP account first. Step 2: In [STUN Setting] web page, set up [Force Active: Enable, Public IP Address: 118.169.209.251, Public Port: 7777] (See Figure 3).
-
Page 78: Management (Advanced Configuration)
ATA Web user guide 10. Management (Advanced configuration) Provide [Status Log, Auto Config, Auto Update, New Firmware, Advanced, Passowrd, Tones, Default, Language] functions. 10.1 Status Log 10.1.1 Function Status Log Provide the running status of the system. 10.1.2 Instruction 78 / 114 2015/1/8... - Page 79 ATA Web user guide Item Description Phone Status Show the Phone user status now; The status has: IDLE, Off-Hook. IDLE: Ready Off Hook: in use. Refresh [Button] Refresh the Phone status. Status Log System work status message. Page Default: (Page Select page.
- Page 80 ATA Web user guide (Figure 3) Example 2: Save System Log File Step 1: In [Status Log] web page, press [Export System Log] button, Enter [Save File] menu, Then press [Save] button (See Figure 4). (Figure 4) Step 2: Save file completely, Any text editor can open [SysLog.log] file (See Figure 5). 80 / 114 2015/1/8...
- Page 81 ATA Web user guide (Figure 5) 81 / 114 2015/1/8...
-
Page 82: Auto Configuration
ATA Web user guide 10.2 Auto Configuration 10.2.1 Function Provide 3 kind of provision methods. (TFTP, FTP and HTTP) 10.2.2 Instruction Item Decription Provision Active Default: Disable; When this function is on, LP399 will download the MACID.dat from the designated Server. Provide options: Disable, TFTP, FTP and HTTP. - Page 83 ATA Web user guide Item Decription Broadcasting. *This function must be supported by Server. Scheduling Default: Disable; Execute the Configuration regularly. When this function is on, system will check the Configuration Server by [Next Config Time]. Provide options: Disable, Enable. Note: The time parameter use [Auto Update Setting] web page’s [Scheduling Time &...
- Page 84 ATA Web user guide Step 3: In [Service Domain Setting] web page, Check [Realm: 1] Settings, Use [MACID.dat] file to load configuration (See Figure 2). (Figure 2) Example 2: Configuration by FTP Step 1: Please complete MACID.dat first, and place it at the path of the designated Server.
- Page 85 ATA Web user guide (Figure 4) Step 2. Set up the [$Service Domain Setting] data, and [line0Name=, ph1Realm1Active=1] cannot be deleted (See Figure 5). (Figure 5) 85 / 114 2015/1/8...
- Page 86 ATA Web user guide Step 3: On [Auto Configuration Setting], Set up [Type: TFTP, 2 Steps Configuration: Enable, TFTP Server: 192.168.50.99] (See Figure 6). (Figure 6) Step 4: In [Service Domain Setting] web page, Check [Realm: 1] Settings, Use [MACID.dat] file to load configuration (See Figure 7). (Figure 7) Example 4:...
- Page 87 ATA Web user guide (Figure 9) Step 3: Enter [Service Domain Setting] web page, check [Realm No.: 1] Settings, Use [MACID.dat] file to load configuration. DHCP Option 66 (TFTP) (Please refer to DHCP Turbo and TFTP Turbo documents) Step 1: Install [DHCP Turbo + TFTPd32] software, then placed [MACID.dat] file into the specified directory.
- Page 88 ATA Web user guide Step 3: In [Auto Provision Setting] web page, Check [TFTP Server] field, the field will upload this data (See Figure 13). Note:If start TFTP Server at the same time, This field parameter can’t see data, Because this data upload provision function by TFTP Server.
- Page 89 ATA Web user guide Enable, TFTP Server: 192.168.50.91] (See Figure 16). (Figure 16) Step 3: Return [Auto Update Setting] web page; In [Next Configuration Time] field, the field will show upgrade date and time at next time (See Figure 17). (Figure 17) Note: How to establish MAC File data, Please refer『Auto_provision_1.ppt』file.
-
Page 90: Auto Update (Firmware Auto Upgrade)
ATA Web user guide 10.3 Auto Update (Firmware Auto Upgrade) 10.3.1 Function Provide the types of TFTP, FTP, HTTP to update the firmware in type. 10.3.2 Instruction Item Decription Update Active Default: Disable; When this function is on, LP399 will update the firmware from the designate Auto provision Server. - Page 91 ATA Web user guide Item Decription 63 bytes. File File Path This column can enter numbers or strings; maximum length is 63 bytes with the “/” in the end, ex: 123/. Check new Default: Scheduling Only. Firmware Type Set up the type for checking new firmware. - Power on and Scheduling: Check the new firmware when powers on and base on Scheduling - Scheduling: According to [Next Update Time] to check the new...
- Page 92 CNAME: The updating filename, please enter a complete name without space or signs. Step 3: Please place ***_ver.dat *.ssh files in the designated folder of the Server. Note: This example device is IP-Phone(LP399), ATA series is the same method. 92 / 114 2015/1/8...
-
Page 93: New Firmware
ATA Web user guide 10.4 New Firmware 10.4.1 Function The Firmware upgrade only support .ssh format. 10.4.2 Instruction Item Decription Update Active Default: CPU+DSP xxxx.ssh; Upgrade file format. Load From File The location of the updating file. Upgrade [Button] Execute updating firmware. PS:It takes 2 or 3 minutes when you start update firmware. -
Page 94: Advanced (Advanced Settings)
ATA Web user guide 10.5 Advanced (Advanced Settings) 10.5.1 Function Provide anonymous call, billing signal, encryption, syslog and FXS/FXO parameter function setting. 10.5.2 Instruction Figure 1: 1FXS(ATA171plus, ATA-171), 2FXS(ATA172plus, ATA-172) and 1FXS+1PSTN(ATA-171P). (Figure 1) Item Decription ICMP Not Echo Default is Disable. When ICMP was set to Enable, ATA doesn’t response PING command. - Page 95 Encrypt Type Default is Disable. Option: Disable, INFINET, AVS, WALKERSUN1, WALKERSUN2, CSF1, CSF2, GX, VGX, RC4, VOS_R, VGCP and Welltech. VGCP is popular in the market. Once this featuare was selected, both voice codec and SIP command were encrypted during transmit on IP network.
- Page 96 ATA Web user guide Item Decription When Flash time is longer than 600ms, it was regarded as On-Hook (drop call) command. Configuration range is from (4~255), Unit: 10ms. Maximum length is 3 digits. Flash Signal Default is 7(equal to 70ms). Detect (Min) When Flash Time is longer than 70ms, it will be regarded as FLASH command.
- Page 97 Default is Disable. Option: Disable, INFINET, AVS, WALKERSUN1, WALKERSUN2, CSF1, CSF2, GX, VGX, RC4, VOS_R, VGCP and Welltech. * Your Register Proxy server must support this function. Encrypt Key Set encryption password。Only support GVX encryption format, maximum data: 63 bytes.
- Page 98 ATA Web user guide Item Decription General] ->[Auto Answer] [Phone – Caller Service] -> [Forward] . If ATA was set Forward & Auto-answer, the CID of incoming call will be forwarded to SIP Server. Generate Flash Default is 10 (equal to 100ms). Signal for FXO Generate Flash Singal for FXO: 100ms When the Flash signal :...
- Page 99 ATA Web user guide (Figure 2) Note: User can use ethereal capture to check syslog data. Example 2: DHCP Gateway ARP Check Period Step 1: In [WAN Setting] web page, Set up [WAN Active: DHCP] (See Figure3). (Figure 3) 99 / 114 2015/1/8...
- Page 100 ATA Web user guide Step 2: In [Management - Advanced Setting] web page, Set up [DHCP Gateway ARP Check Period: 30] (See Figure 4). (Figure 4) 100 / 114 2015/1/8...
-
Page 101: Password (Change Login Account)
ATA Web user guide 10.6 Password (Change Login Account) 10.6.1 Function Password Provides 3 Authority functions to change their User name and Password, respectively. 10.6.2 Instruction Figure 1: Admin (Figure 1) Item Decription Admin Administrator (the highest authority): it can only Set up an Administrator account. - Page 102 ATA Web user guide Item Decription bytes. New Password Enter new user password, This column can enter numbers or strings (support: 0~9, a~z, @, _, -, ., +, :, [, ], *, #, !, %); maximum length is 32 bytes. Confirmed Confirm new user password, This column can enter numbers or Password...
- Page 103 ATA Web user guide Item Decription maximum length is 32 bytes. Confirmed Confirm new user password, This column can enter numbers or Password strings (support: 0~9, a~z, @, _, -, ., +, :, [, ], *, #, !, %); maximum length is 32 bytes. User Normal User (the lowest authority): it can only Set up a Normal User account.
-
Page 104: Tones (Audio Frequency Set Up)
ATA Web user guide 10.7 Tones (Audio Frequency Set up) 10.7.1 Function Tone setting provides Dial, Ring Back, Busy, Congestion, Ring, Call Waiting Tone and Multi-Frequency configuration. 10.7.2 Instruction Item Decription Dial Tone Set up the Dial Tone Settings. Cadence On Default: Disable;... - Page 105 ATA Web user guide Item Decription On Time 2 Default: 0; Set up the second category of ON time. This column can only enter numbers; maximum length is 3 bytes with a range of 0~999 (10ms). Off Time 2 Default: 0; Set up the second category of OFF time. This column can only enter numbers;...
- Page 106 ATA Web user guide Item Decription length is 5 bytes with a range of 0~65535.。 On Time 1 Default: 50; Set up the first category of ON time. This column can only enter numbers; maximum length is 3 bytes with a range of 0~ 999 (10ms). Off Time 1 Default: 50;...
- Page 107 ATA Web user guide Item Decription Hi-Tone Freq Default: 480; This column can only enter numbers; maximum length is 4 bytes with a range of 0~4096. Lo-Tone Freq Default: 440; This column can only enter numbers; maximum length is 4 bytes with a range of 0~4096. Hi-Tone Gain Default: 15360;...
- Page 108 ATA Web user guide Item Decription with a range of 0~ 999 (10ms). Off Time 3 Default: 0; Set up the third category of OFF time. This column can only enter numbers; maximum length is 3 bytes with a range of 0~ 999 (10ms). Submit [Button] Save the Settings.
-
Page 109: Default
ATA Web user guide 10.8 Default 10.8.1 Function Default Provides the way of eliminating all Settings and reloading the default Settings except the data of Phone Book. 10.8.2 Instruction Item Decription Reset [Button] Clear all Setting and reset to default, Then reboot system automatically. - Page 110 ATA Web user guide configuration file, Press [Open] button. Return [Reset to Default] web page, make sure to perform the update, Press [Restore] button (See Figure 3). (Figure 3) Step 2: Restore complete, Must save setting and reboot system (See Figure 4), Reboot system can take effect the [config.db] parameter.
-
Page 111: Language
ATA Web user guide 10.9 Language 10.9.1 Function Provide language option for web configuration, ATA will auto reboot after press [Submit]. Don’t remove Power adaptor at this moment. 10.9.2 Instruction Item Decription Choice Language Default is English. ATA has to restart after you have changed Web language. -
Page 112: Save & Reboot
ATA Web user guide 11. Save & Reboot Save configuration and Reboot ATA. Function 11.1 Save Change: Save configuration and auto reboot to take effect. Reboot System: Reboot ATA Instruction 11.2 Item Decription Save [Button] Save all Settings and restart device. Reboot [Button] Restart device. -
Page 113: Logout (Login System)
ATA Web user guide 12. Logout (Login System) Function 12.1 Logout system and return to login page. Instruction 12.2 Item Decription Logout [Button] Logout system Settings menu; Return web page login. 113 / 114 2015/1/8... - Page 114 ATA Web user guide 114/ 114...
Need help?
Do you have a question about the ATA Series and is the answer not in the manual?
Questions and answers