
Related Manuals for Makita XCV15


Summary of Contents for Makita XCV15
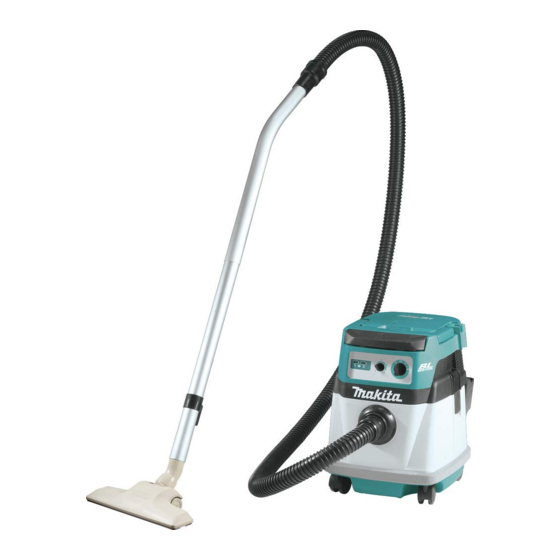
- Page 1 INSTRUCTION MANUAL MANUAL DE INSTRUCCIONES Cordless Vacuum Cleaner Aspiradora Inalámbrica XCV14 XCV15 XCV16 IMPORTANT: Read Before Using. IMPORTANTE: Lea antes de usar.
-
Page 2: Important Safety Instructions
Bluetooth SIG, Inc. and any use of such marks by Makita is under license. Other trademarks and trade names are those of their respective owners. Applicable battery cartridge and charger... - Page 3 WARNING Do not use the cleaner as a stool or work bench. The machine may fall down and may result in personal injury. To reduce the risk of fire, electric shock or injury: Do not vacuum the following: Do not leave appliance when battery Flammable liquid (kerosene, •...
- Page 4 NOTE: Read the OSHA regulation on Do not expose a battery pack or silica dust to understand the require- appliance to fire or excessive tem- ments needed to reduce exposure to perature. Exposure to fire or tem- silica dust at the jobsite. Specific rules perature above 130 °C may cause apply to the drilling, demolition cutting explosion.
- Page 5 Do not short the battery cartridge: causing fires, personal injury and damage. It will also void the Makita warranty for the Makita tool and Do not touch the terminals with charger.
-
Page 6: Functional Description
► 1. Tank cover 2. Float 3. Float cage 4. Cloth filter 5. Tank Model XCV15, XCV16 (Powder filter (for dry dust) model) ► 1. Lock 2. Battery cover Align the tongue on the battery cartridge with the groove in the housing and slip it into place. - Page 7 To remove the battery cartridge, slide it from the tool Indicating the remaining battery while sliding the button in front of the cartridge. capacity CAUTION: Always install the battery cartridge fully until the red indicator cannot be seen. If not, it may accidentally fall out of the cleaner, causing injury to you or someone around you.
- Page 8 Suction power can be increased by turning the suc- Tool / battery protection system tion force adjusting knob from the symbol to symbol. The tool is equipped with a tool/battery protection sys- tem. This system automatically cuts off power to the NOTICE: Always set the stand-by switch to the "O"...
-
Page 9: Installing The Water Filter
Mount the damper on the powder filter and then Carriage handle place them in the prefilter with aligning the mounting position markings. When carrying the cleaner, carry it by holding the han- Finally, mount the tank cover and lock it. dle on the head. - Page 10 To pick up water or wet dust only, the water filter is more Extend the paper pack. suitable than the cloth filter. Align the paper pack opening with the dust suction When installing the water filter, align its mounting posi- opening of the cleaner.
-
Page 11: Installing The Tool Box
Spread the bag around the top of the tank so that the NOTE: Take the polyethylene bag carefully out of the cloth filter / prefilter edge can catch and hold the bag tank so that the polyethylene bag cannot be caught securely. - Page 12 WIRELESS ACTIVATION Tool registration for the cleaner FUNCTION NOTE: A Makita tool supporting the wireless activa- For XCV16 only tion function is required for the tool registration. What you can do with the wireless NOTE: Finish installing the wireless unit to the tool before starting the tool registration.
- Page 13 Press the wireless activation button on the cleaner Connect the hose of the cleaner with the tool. for 3 seconds until the wireless activation lamp blinks in green. And then press the wireless activation button on the tool in the same way. Set the stand-by switch on the cleaner to "AUTO".
- Page 14 Press the wireless activation button on the cleaner NOTE: The wireless activation lamp on the tool will for 6 seconds. The wireless activation lamp blinks in stop blinking in blue when there is no operation for green and then become red. After that, press the wire- 2 hours.
- Page 15 Install the batteries to the cleaner. When the wireless activation lamp starts blinking fast (about 5 times per one second) in red, release your Set the stand-by switch to "AUTO". finger from the wireless activation button. When the Hold down the wireless activation button for about wireless activation lamp lights up in red and later lights 6 seconds until the wireless activation lamp blinks in red off, all tool registrations are erased.
- Page 16 Before asking for repairs, conduct your own inspection first. If you find a problem that is not explained in the manual, do not attempt to dismantle the tool. Instead, ask Makita Authorized Service Centers, always using Makita replace- ment parts for repairs.
-
Page 17: Maintenance
Never use gasoline, benzine, thinner, alcohol or the like. Discoloration, deformation or cracks may result. To maintain product SAFETY and RELIABILITY, repairs, any other maintenance or adjustment should be performed by Makita Authorized or Factory Service Centers, always using Makita replacement parts. 17 ENGLISH... - Page 18 CAUTION: These accessories or attachments are recommended for use with your Makita tool specified in this manual. The use of any other accessories or attachments might present a risk of injury to persons. Only use accessory or attachment for its stated purpose.
- Page 19 NOTE: Some items in the list may be included in the tool package as standard accessories. They may differ from country to country. MAKITA LIMITED WARRANTY Please refer to the annexed warranty sheet for the most current warranty terms applicable to this product.
-
Page 20: Especificaciones
El término Bluetooth así como su marca y logo son marcas registradas propiedad de Bluetooth SIG, Inc. y su uso por parte de Makita está autorizado bajo licencia. Las demás marcas registradas y nombres comerciales pertenecen a sus respectivos propietarios. -
Page 21: Advertencias De Seguridad
Apague todos los controles antes ADVERTENCIAS DE de retirar el cartucho de batería. SEGURIDAD Tenga especial cuidado cuando lim- pie en escaleras. INSTRUCCIONES No lo utilice para recoger líquidos inflamables o combustibles, tal IMPORTANTES DE como gasolina, ni en áreas donde puedan estar presentes. - Page 22 Sustancias explosivas o pirofó- Este aparato no se destina para utili- • ricas (nitroglicerina, aluminio, zarse por personas (incluyendo niños) magnesio, titanio, zinc, fósforo cuyas capacidades físicas, sensoria- rojo, fósforo amarillo, celu- les o mentales sean diferentes o estén loide, etc., y su polvo, gases o reducidas o carezcan de experiencia o vapores) de conocimiento, a menos que dichas...
- Page 23 En condiciones abusivas, podrá Símbolos escapar líquido de la batería; evite tocarlo. Si lo toca accidentalmente, A continuación se muestran los símbolos enjuague con agua. Si hay contacto utilizados para la herramienta. del líquido con los ojos, busque asistencia médica. Puede que el volts o voltios líquido expulsado de la batería cause irritación o quemaduras.
- Page 24 Asimismo, esto inva- No guarde la herramienta ni el car- lidará la garantía de Makita para la herramienta y el tucho de batería en lugares donde la cargador Makita. temperatura pueda alcanzar o exce- Consejos para alargar al máximo...
-
Page 25: Descripción De Las Piezas
► 1. Cubierta del tanque 2. Flotador 3. Caja del flota- dor 4. Filtro de tela 5. Tanque Modelo XCV15, XCV16 (Modelo con filtro de polvo (para polvo seco)) ► 1. Seguro 2. Cubierta de la batería Alinee la lengüeta en el cartucho de batería con la ranura en la... - Page 26 Para quitar el cartucho de batería, sáquelo de la herra- Indicación de capacidad restante de mienta mientras desliza el botón enfrente del cartucho. la batería PRECAUCIÓN: Siempre introduzca comple- tamente el cartucho de batería hasta que el indi- cador rojo no pueda verse. De lo contrario, podría salirse accidentalmente de la aspiradora y ocasio- narle lesiones a usted o a alguien a su alrededor.
-
Page 27: Protección Contra Sobrecarga
Para arrancar la aspiradora: Sistema de protección para la Ajuste el interruptor de modo en espera en el lado “I”. La herramienta/batería aspiradora se pondrá en el estado de modo en espera. Oprima el botón de encendido/apagado. La herramienta está equipada con un sistema de pro- Para poner la aspiradora en el modo en espera, oprima tección de la herramienta/batería. -
Page 28: Mango De Transporte
Es conveniente bloquear la rueda para almacenar la Para usar el filtro de polvo: aspiradora, detener el trabajo momentáneamente y Extraiga la caja del flotador y el flotador retirando mantener la aspiradora inmóvil. los pernos. Para usar el tope, muévalo manualmente. Para bloquear la rueda con el tope, baje la palanca del tope y la rueda ya no podrá... -
Page 29: Instalación Del Filtro De Agua
Instalación del filtro de agua PRECAUCIÓN: (Para el modelo con filtro de tela) Accesorio opcional para el modelo con filtro de tela Nunca aspire agua ni otros líquidos o polvo • húmedo cuando utilice la bolsa de papel PRECAUCIÓN: Nunca aspire agua ni polvo para polvo. - Page 30 Instalación de la bolsa de polietileno Vaciado de la bolsa de polietileno La aspiradora también se puede utilizar sin la bolsa ADVERTENCIA: Asegúrese siempre de que de polietileno. Sin embargo, con el uso de la bolsa de la aspiradora esté apagada y que el cartucho de polietileno resulta más fácil vaciar el tanque sin ensu- batería haya sido extraído antes de vaciar la bolsa ciarse las manos.
-
Page 31: Conexión De La Manguera
Cierre la cubierta de la batería y ponga el seguro. FUNCIÓN DE ACTIVACIÓN INALÁMBRICA Para el modelo XCV16 únicamente Lo que puede hacer con la función de activación inalámbrica La función de activación inalámbrica permite una ope- ración limpia y cómoda. Si conecta a la aspiradora una herramienta compatible, podrá... - Page 32 Registro de herramientas para la aspiradora NOTA: Para el registro de la herramienta, se requiere una herramienta Makita compatible con la función de activación inalámbrica. NOTA: Termine de instalar la unidad inalámbrica en ► 1. Botón de activación inalámbrica 2. Luz indica- la herramienta antes de comenzar con el registro de dora de activación inalámbrica...
- Page 33 Después de registrar una herramienta en la aspiradora, Jale el gatillo interruptor de la herramienta. esta última se activará automáticamente junto con el Verifique que la aspiradora funcione mientras jala el interruptor de activación de la herramienta. gatillo interruptor en la herramienta. Instale la unidad inalámbrica en la herramienta.
- Page 34 Oprima el botón de activación inalámbrica en la Borrado de todos los registros de aspiradora durante 6 segundos. La luz indicadora de herramientas activación inalámbrica parpadeará en verde y luego se pondrá en rojo. Después de eso, oprima el botón de activación inalámbrica en la herramienta de la misma Usted puede borrar todos los registros de herramientas de la aspiradora como se indica a continuación.
- Page 35 Descripción del estado de la luz indicadora de activación inalámbrica ► 1. Botón de activación inalámbrica 2. Luz indica- dora de activación inalámbrica La luz indicadora de activación inalámbrica muestra el estado de la función de activación inalámbrica. Consulte la tabla a continuación para ver qué...
- Page 36 Antes de solicitar alguna reparación, primero realice una inspección por su cuenta. Si detecta algún problema que no esté explicado en el manual, no intente desensamblar la herramienta. En vez de esto, solicite la reparación a un centro de servicio autorizado de Makita, usando siempre piezas de repuesto Makita. Estado de la anomalía Causa probable (avería)
-
Page 37: Mantenimiento
Para mantener la SEGURIDAD y FIABILIDAD del pro- ducto, las reparaciones, y cualquier otra tarea de man- tenimiento o ajuste deberán ser realizadas en centros de servicio autorizados o de fábrica Makita, empleando siempre repuestos Makita. 37 ESPAÑOL... -
Page 38: Accesorios Opcionales
PRECAUCIÓN: Estos accesorios o aditamen- tos están recomendados para utilizarse con su herramienta Makita especificada en este manual. El empleo de cualquier otro accesorio o aditamento puede conllevar el riesgo de lesiones personales. Utilice los accesorios o aditamentos solamente para su fin establecido. - Page 39 Filtro de agua (opcional para el modelo con filtro de tela) • Batería y cargador originales de Makita NOTA: Algunos de los artículos en la lista pueden incluirse en el paquete de la herramienta como acce- sorios estándar. Éstos pueden variar de país a país.
- Page 40 Para reducir la exposición a estos productos químicos: trabaje en un área bien ventilada y póngase el equipo de seguridad indicado, tal como las máscaras contra polvo que están especialmente diseñadas para filtrar partículas microscópicas. Makita Corporation 3-11-8, Sumiyoshi-cho, Anjo, Aichi 446-8502 Japan 885718-949...
Need help?
Do you have a question about the XCV15 and is the answer not in the manual?
Questions and answers