
Related Manuals for Alfa Laval ALS Series


Summary of Contents for Alfa Laval ALS Series
- Page 1 Instruction Manual Alfa Laval Agitator - ALS Shut Down Seal 4303-0128 100000047-EN1 2018-09 Original manual...
-
Page 3: Table Of Contents
Table of contents The information herein is correct at the time of issue but may be subject to change without prior notice 1. EC Declaration of Conformity ............... 2. Safety ....................2.1. Important information ................2.2. Warning signs ..................2.3. Intended use .................. -
Page 4: Ec Declaration Of Conformity
1 EC Declaration of Conformity The Designated Company Alfa Laval Kolding A/S Company Name Albuen 31, DK-6000 Kolding, Denmark Address +45 79 32 22 00 Phone No. hereby declare that Agitator - EnSaFoil 10.000 - 100.000 Designation Serial no(s) ALS-ME-GP-50LF-S3SD-S700-P550D3G... -
Page 5: Safety
The Alfa Laval quotation agreement has been exchanged during the quote process between a technical purchaser and Alfa Laval. If you are not in hold of the Alfa Laval quotation agreement, please get through to your local Alfa Laval contact, inform the Agitator serial number and... -
Page 6: Safety Precautions
2 Safety All warnings in the manual are summarised on this page. Pay special attention to the instructions below so that severe personal injury and/or damage to the Agitator are avoided. 2.4 Safety precautions Installation: Always read the technical data thoroughly (see section 6 Technical data). Always follow installation instructions thoroughly (see section 3 Installation). -
Page 7: Installation
3.1 Unpacking/delivery Always use lifting equipment when handling the Agitator (see Step 3 below). CAUTION! Alfa Laval cannot be held responsible for incorrect unpacking. Step 1 Inspect the delivery for visible transportation damages - all issues to be reported to carrier. - Page 8 3 Installation The instructions manual is part of the delivery. Study the instructions carefully. TD605-103 Do NOT use eye bolts on gear motor to lift the Agitator. They are only for gear motor removal. TD605-101 Do NOT use eye bolts on shroud (if any) to lift the Agitator. They are only for shroud removal. TD605-172...
-
Page 9: Installation
Always have the Agitator connected to power supply by authorized personnel. NOTE! Alfa Laval highly recommend to install motor protection guard to protect the motor from overloading. Never install a none Alfa Laval shroud on the Agitator as it can lead to overheat and a breakdown of the motor. -
Page 10: Guidelines For Cutting Hole In Tank For Flat Shaped Welding Flange (Fswf)
3.3 Guidelines for cutting hole in tank for Flat Shaped Welding Flange (FSWF) CAUTION! Alfa Laval recommend that all other welding tasks on the tank are finished before cutting the hole for the flange. Chamfer inner and outer hole edge 45°. -
Page 11: Guidelines For Welding Procedure For Flange (Fswf)
3 Installation Study the instructions carefully and pay special attention to the warnings! Always check the Agitator before operation - see section 3.6 Pre-use check. The Agitator is for permanent fastening. Make sure that the motor correspond to the environment. 3.4 Guidelines for welding procedure for flange (FSWF) Step 1 Always allow flange to cool to ambient temperature after each section has been welded. -
Page 12: Mounting Agitator
3 Installation Study the instructions carefully and pay special attention to the warnings! Always check the Agitator before operation - see section 3.6 Pre-use check. The Agitator is for permanent fastening. Make sure that the motor correspond to the environment. 3.5 Mounting Agitator CAUTION! Always ensure that mounting is carried out according to description shown in section 6 Technical data. - Page 13 Follow instructions in section 8.1 Drive unit instructions. Ensure that the rotation direction is according to nameplate. Always perform pre-use check before operation (see section 3.6 Pre-use check). NOTE! On closed tanks, Alfa Laval recommend installing a manhole circuit breaker, cutting power supply if hatch is open.
-
Page 14: Pre-Use Check
3 Installation Study the instructions carefully and pay special attention to the warnings! Always check the Agitator before operation. The Agitator is only designed to operate according to data given in section 6 Technical data Check the rotation direction before operation. 3.6 Pre-use check Never install the Agitator in environments which deviate from those given in section 6 Technical data. -
Page 15: Recycling Information
If frequency converter drive is used, it must be ensured NOT to operate continuously within +/-20% of critical oscillation speed. (The critical oscillation speed can be found in the supplied Alfa Laval quotation agreement. In case of any doubt, please advise with Alfa Laval). -
Page 16: Operation
Study the instructions carefully and pay special attention to warnings! Always check the Agitator before operation (see section 3.6 Pre-use check). Alfa Laval recommend a soft starter or a frequency converter for the Agitator to reduce the load on tank and Agitator. For operation instructions from suppliers see section 8 Appendix. -
Page 17: Troubleshooting
Study the instructions carefully and pay special attention to warnings! Always check the Agitator before operation (see section 3.6 Pre-use check). Alfa Laval recommend a soft starter or a frequency converter for the Agitator to reduce the load on tank and Agitator. For operation instructions from suppliers see section 8 Appendix. -
Page 18: Cleaning - Recommendations
Study the instructions carefully and pay special attention to warnings! Always check the Agitator before operation (see section 3.6 Pre-use check). Alfa Laval recommend a soft starter or a frequency converter for the Agitator to reduce the load on tank and Agitator. For operation instructions from suppliers see section 8 Appendix. -
Page 19: Maintenance
- S3SD Media perishability Alfa Laval recommend to use the end plug (aeration plug) to get fresh media inside the seal housing while operating. Loosen the plug and let the media drain down. Refreshing is carried out as required and depends on the media inside the tank. The volume of the media inside the seal housing is approx. -
Page 20: Replacement Of Drive Unit
5 Maintenance Read the instructions carefully. The items refer to the parts lists in section 7.3 and service kit section. For maintenance instructions from suppliers, see section 8 Appendix. Always ensure that mounting is according to section 6 Technical data. Ensure totally clean surfaces during mounting - also remove remaining Loctite residue on threads. Always refer to tightening torques in section 6.2 Tightening torques for bolt connections. - Page 21 5 Maintenance Read the instructions carefully. The items refer to the parts lists in section 7.3 and service kit section. For maintenance instructions from suppliers, see section 8 Appendix. Always ensure that mounting is according to section 6 Technical data. Ensure totally clean surfaces during mounting - also remove remaining Loctite residue on threads. Always refer to tightening torques in section 6.2 Tightening torques for bolt connections.
- Page 22 5 Maintenance Read the instructions carefully. The items refer to the parts lists in section 7.3 and service kit section. For maintenance instructions from suppliers, see section 8 Appendix. Always ensure that mounting is according to section 6 Technical data. Ensure totally clean surfaces during mounting - also remove remaining Loctite residue on threads. Always refer to tightening torques in section 6.2 Tightening torques for bolt connections.
- Page 23 5 Maintenance Read the instructions carefully. The items refer to the parts lists in section 7.3 and service kit section. For maintenance instructions from suppliers, see section 8 Appendix. Always ensure that mounting is according to section 6 Technical data. Ensure totally clean surfaces during mounting - also remove remaining Loctite residue on threads. Always refer to tightening torques in section 6.2 Tightening torques for bolt connections.
- Page 24 5 Maintenance Read the instructions carefully. The items refer to the parts lists in section 7.3 and service kit section. For maintenance instructions from suppliers, see section 8 Appendix. Always ensure that mounting is according to section 6 Technical data. Ensure totally clean surfaces during mounting - also remove remaining Loctite residue on threads. Always refer to tightening torques in section 6.2 Tightening torques for bolt connections.
- Page 25 5 Maintenance Read the instructions carefully. The items refer to the parts lists in section 7.3 and service kit section. For maintenance instructions from suppliers, see section 8 Appendix. Always ensure that mounting is according to section 6 Technical data. Ensure totally clean surfaces during mounting - also remove remaining Loctite residue on threads. Always refer to tightening torques in section 6.2 Tightening torques for bolt connections.
-
Page 26: Replacement Of Shaft Seal, Type S3Sd
5 Maintenance Read the instructions carefully. The items refer to the parts lists in section 7.3 and service kit section. For maintenance instructions from suppliers, see section 8 Appendix. Always ensure that mounting is according to section 6 Technical data. Ensure totally clean surfaces during mounting - also remove remaining Loctite residue on threads. Always refer to tightening torques in section 6.2 Tightening torques for bolt connections. - Page 27 5 Maintenance Read the instructions carefully. The items refer to the parts lists in section 7.3 and service kit section. For maintenance instructions from suppliers, see section 8 Appendix. Always ensure that mounting is according to section 6 Technical data. Ensure totally clean surfaces during mounting - also remove remaining Loctite residue on threads. Always refer to tightening torques in section 6.2 Tightening torques for bolt connections.
- Page 28 5 Maintenance Read the instructions carefully. The items refer to the parts lists in section 7.3 and service kit section. For maintenance instructions from suppliers, see section 8 Appendix. Always ensure that mounting is according to section 6 Technical data. Ensure totally clean surfaces during mounting - also remove remaining Loctite residue on threads. Always refer to tightening torques in section 6.2 Tightening torques for bolt connections.
- Page 29 5 Maintenance Read the instructions carefully. The items refer to the parts lists in section 7.3 and service kit section. For maintenance instructions from suppliers, see section 8 Appendix. Always ensure that mounting is according to section 6 Technical data. Ensure totally clean surfaces during mounting - also remove remaining Loctite residue on threads. Always refer to tightening torques in section 6.2 Tightening torques for bolt connections.
-
Page 30: Replacement Of Sealing Parts, Complete
5 Maintenance Read the instructions carefully. The items refer to the parts lists in section 7.3 and service kit section. For maintenance instructions from suppliers, see section 8 Appendix. Always ensure that mounting is according to section 6 Technical data. Ensure totally clean surfaces during mounting - also remove remaining Loctite residue on threads. Always refer to tightening torques in section 6.2 Tightening torques for bolt connections. - Page 31 5 Maintenance Read the instructions carefully. The items refer to the parts lists in section 7.3 and service kit section. For maintenance instructions from suppliers, see section 8 Appendix. Always ensure that mounting is according to section 6 Technical data. Ensure totally clean surfaces during mounting - also remove remaining Loctite residue on threads. Always refer to tightening torques in section 6.2 Tightening torques for bolt connections.
- Page 32 5 Maintenance Read the instructions carefully. The items refer to the parts lists in section 7.3 and service kit section. For maintenance instructions from suppliers, see section 8 Appendix. Always ensure that mounting is according to section 6 Technical data. Ensure totally clean surfaces during mounting - also remove remaining Loctite residue on threads. Always refer to tightening torques in section 6.2 Tightening torques for bolt connections.
- Page 33 5 Maintenance Read the instructions carefully. The items refer to the parts lists in section 7.3 and service kit section. For maintenance instructions from suppliers, see section 8 Appendix. Always ensure that mounting is according to section 6 Technical data. Ensure totally clean surfaces during mounting - also remove remaining Loctite residue on threads. Always refer to tightening torques in section 6.2 Tightening torques for bolt connections.
- Page 34 5 Maintenance Read the instructions carefully. The items refer to the parts lists in section 7.3 and service kit section. For maintenance instructions from suppliers, see section 8 Appendix. Always ensure that mounting is according to section 6 Technical data. Ensure totally clean surfaces during mounting - also remove remaining Loctite residue on threads. Always refer to tightening torques in section 6.2 Tightening torques for bolt connections.
- Page 35 5 Maintenance Read the instructions carefully. The items refer to the parts lists in section 7.3 and service kit section. For maintenance instructions from suppliers, see section 8 Appendix. Always ensure that mounting is according to section 6 Technical data. Ensure totally clean surfaces during mounting - also remove remaining Loctite residue on threads. Always refer to tightening torques in section 6.2 Tightening torques for bolt connections.
- Page 36 5 Maintenance Read the instructions carefully. The items refer to the parts lists in section 7.3 and service kit section. For maintenance instructions from suppliers, see section 8 Appendix. Always ensure that mounting is according to section 6 Technical data. Ensure totally clean surfaces during mounting - also remove remaining Loctite residue on threads. Always refer to tightening torques in section 6.2 Tightening torques for bolt connections.
- Page 37 5 Maintenance Read the instructions carefully. The items refer to the parts lists in section 7.3 and service kit section. For maintenance instructions from suppliers, see section 8 Appendix. Always ensure that mounting is according to section 6 Technical data. Ensure totally clean surfaces during mounting - also remove remaining Loctite residue on threads. Always refer to tightening torques in section 6.2 Tightening torques for bolt connections.
-
Page 38: Technical Data
6.1 Technical data The Alfa Laval Agitator is available in various configurations and is configured to solve the specific application. Therefore, specific information like weight, size, critical oscillation speed and duties can be found in the supplied Alfa Laval quotation agreement. -
Page 39: Tightening Torques For Bolt Connections
6 Technical data All dimensions in mm unless otherwise stated. 6.2 Tightening torques for bolt connections CAUTION! ® Use Loctite before fastening. Do NOT use air powered tools. M16* 11Nm 26Nm 51Nm 88Nm 141Nm 218Nm 308Nm 439Nm 582Nm 724Nm *Maximum tightening torque for shaft, M16 using hook wrench tool 100 Nm. 6.3 Storage Store the Agitator in dry and clean environments. -
Page 40: Parts Lists And Service Kits
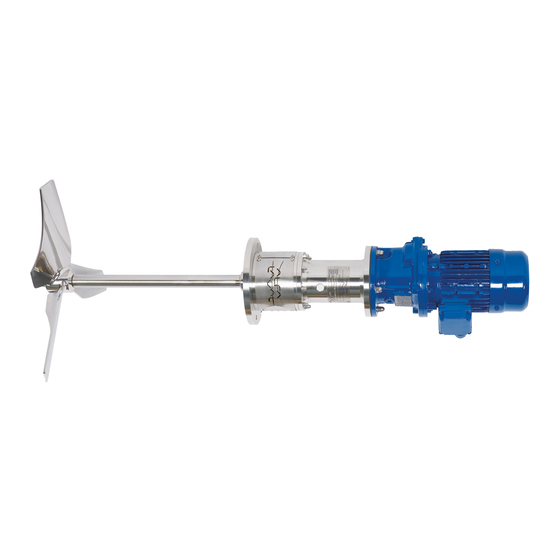
7 Parts lists and service kits Main components 7.1 Main components 4303-0113... - Page 41 Flange, mounting O-ring (for flange) Shaft O-ring (for shaft) Impeller device, EnSaFoil Article numbers are to be found in the Spare part manual 1000000046, available from the online Alfa Laval product catalogue Anytime or the Close at hand spare part catalogue.
-
Page 42: Lantern, Complete
7 Parts lists and service kits Lantern, complete 7.2 Lantern, complete... - Page 43 7 Parts lists and service kits Lantern, complete Parts list Pos. Denomination Lantern, ext. Screw Guard, ext. Nut, cap Screw Stud...
-
Page 44: Shaft Seal, Type S3Sd
7 Parts lists and service kits Shaft seal, type S3SD 7.3 Shaft seal, type S3SD 4303-0115... - Page 45 7 Parts lists and service kits Shaft seal, type S3SD Parts list Pos. Denomination End Plug ♦ O-ring S3SD Seal ♦ Sleeve, inner Circlip Screw, pointed Seal housing Screw ♦ O-ring (for flange, mounting) Screw ♦ O-ring ♦ O-ring Flange, support Locking pin ♦...
-
Page 46: Tools
7 Parts lists and service kits Tools 7.4 Tools 4303-0116... - Page 47 7 Parts lists and service kits Tools Parts list Pos. Denomination ♦ Hook wrench with pin ♦ Tool, flat ♦ Tool, retainer ♦ Screw Service kits Denomination Item no. Seal kit, Tools ♦ Seal kit, Tools ..........9615364701...
-
Page 48: Appendix
8 Appendix Tools 8.1 Drive unit instructions The drive unit is supplied by sub supplier and all important installation requirement is transferred to the Agitator instruction manual. For further information regarding maintenance and storage of the drive unit please find the drive unit instruction manual by below links For Agitators with gears please find the drive unit instruction manual by below link: https://www.nord.com/cms/en/documentation/manuals/details_1139/detail_42075.jsp... - Page 50 © Alfa Laval Corporate AB This document and its contents is owned by Alfa Laval Corporate AB and protected by laws governing intellectual property and thereto related rights. It is the responsibility of the user of this document to comply with all applicable intellectual property laws. Without limiting any rights related to this document, no part of this document may be copied, reproduced or transmitted in any form or by any means (electronic, mechanical, photocopying, recording, or otherwise), or for any purpose, without the expressed permission of Alfa Laval Corporate AB.
Need help?
Do you have a question about the ALS Series and is the answer not in the manual?
Questions and answers