Baby Jogger City Go Instructions Manual
Hide thumbs
Also See for City Go:
- Manual (92 pages) ,
- Instruction manual (75 pages) ,
- Instructions manual (56 pages)
Table of Contents
Advertisement
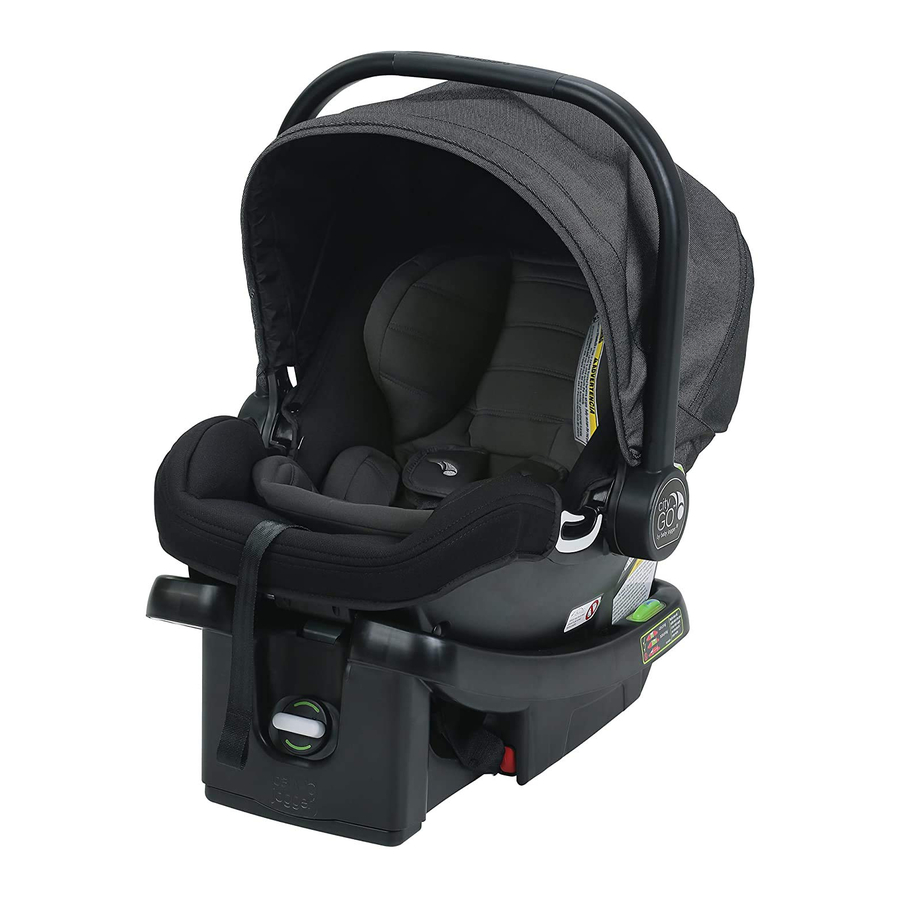
car seat & base
PD349383B
KEEP INSTRUCTIONS FOR FUTURE USE
Do not install or use this child restraint until you read, understand and follow the
instructions in this manual and the warnings on the car seat..
1
FAILURE TO PROPERLY USE THIS CHILD RESTRAINT INCREASES THE RISK OF SERIOUS
INJURY OR DEATH IN A SUDDEN STOP OR CRASH.
babyjogger.ca
Advertisement
Table of Contents

Related Manuals for Baby Jogger City Go


Summary of Contents for Baby Jogger City Go
- Page 1 car seat & base PD349383B KEEP INSTRUCTIONS FOR FUTURE USE Do not install or use this child restraint until you read, understand and follow the instructions in this manual and the warnings on the car seat.. FAILURE TO PROPERLY USE THIS CHILD RESTRAINT INCREASES THE RISK OF SERIOUS INJURY OR DEATH IN A SUDDEN STOP OR CRASH.
-
Page 2: Table Of Contents
TABLE OF CONTENTS Registration ............................3 Warnings ............................. 5 UAS System ............................9 Vehicle seat locations ......................10 Features .............................14 Adjusting the Handle ......................17 Attaching the Canopy ......................18 Body Support ..........................19 Attaching & Removing Car Seat................20 Adjusting the Recline ......................21 Base Installation •... -
Page 3: Registration
REGISTERING YOUR CHILD RESTRAINT Please complete the pre-paid registration card that is attached to your child restraint and send the portion shown below in today or register online at www.babyjogger.ca/carseatregistration. Child restraints could be recalled for safety reasons. You must register this restraint to be reached in a recall. - Page 4 CERTIFICATION This child restraint meets or exceeds all applicable requirements of Canadian Motor Vehicle Safety Standards 213 and 213.1 for use in motor vehicles. This restraint is certified for use in motor vehicles and aircraft. Use only in forward facing aircraft seats. Follow the instruction in the “Seat Installation-Lap Belt Only”...
-
Page 5: Warnings
WARNING WHEN USED IN YOUR VEHICLE • This restraint system may only be used in these classes of vehicles: passenger cars, multi-purpose passenger vehicles and trucks that have vehicle lap/shoulder belts and tether anchors. DO NOT place rear-facing child seat on front seat with an active airbag. - Page 6 • For low birth-weight infants, you must always use the body support. The body support must be used for infants who weigh less than 2.7 kg (6 lb). • Some children with special needs, such as pre-term babies or those who have tested positive for positional apnea, may be at increased risk of suffering breathing or other difficulties in a child restraint.
- Page 7 • DO NOT allow children to play with or around this child restraint. • Always replace the child restraint and base after a crash of any kind even if it was unoccupied. A crash can cause damage to the child restraint that may not be visible.
- Page 8 WARNING FOR USE AS AN INFANT CARRIER • Read all instructions before use of the infant carrier. • Keep instructions for future use. • NEVER LEAVE child unattended. • SUFFOCATION HAZARD: Infant carrier can roll over on soft surfaces and suffocate child. NEVER place carrier on beds, sofas or other soft surfaces.
-
Page 9: Uas System
UAS SYSTEM UAS stands for Universal Anchor System. The UAS system can make installation easier without using the vehicle’ s seat belts. UAS is a way to secure your child restraint to your vehicle by using the UAS connectors on your child restraint base. These connectors attach to the lower points in certain vehicle seating positions. -
Page 10: Vehicle Seat Locations
VEHICLE SEAT LOCATIONS WARNING! • Failure to place the child restraint in the correct seating positions increases the risk of serious injury or death. • DO NOT place rear-facing child seat on front seat with airbag. DEATH or SERIOUS INJURY can occur. •... - Page 11 UNSAFE VEHICLE SEAT BELTS WARNING! The following types of vehicle seat belts are NOT compatible with this child seat. If any of the belt types listed are in the chosen seating position, choose another seating position within in the vehicle. Lap or Shoulder Motorized Shoulder Belt Mounted on...
- Page 12 SAFE VEHICLE SEAT BELTS The following vehicle belt systems are SAFE to use for child restraint installation. 1 Lap Belt with Locking Latch Plate - The vehicle belt is tightened by pulling on the free end of the strap until the belt is tight.
- Page 13 SAFE VEHICLE SEAT BELTS 3 Lap/Shoulder Belt with Locking Latch Plate - The lap portion of this belt does not loosen once the belt is buckled. The vehicle belt is tightened by pulling up hard on shoulder belt and feeding the webbing into the retractor.
-
Page 14: Features
Handle Buckle Canopy 8 Buckle Strap Cover Head Rest 9 Body Support Lap Belt Guide Harness Adjustment Button Harness Cover Harness Adjustment Strap 6 Chest Clip... - Page 15 15 Base Release Handle 16 Taxi Safe Belt Path 17 Head Support Height Adjustment 18 Locking Clip Storage Crotch Strap Clip Harness Strap Waist Strap Buckle Strap...
- Page 16 Level Indicators UAS Adjuster 2 Belt Lock-Off UAS Release Button 3 UAS Strap UAS Connector 4 UAS & Vehicle Belt Path Recline Foot 5 UAS Storage Compartment...
-
Page 17: Adjusting The Handle
ADJUSTING THE HANDLE There are 4 positions: A - Carry position/In vehicle position B/C - Middle positions D - Stationary position 1 Squeeze handle release buttons on both sides. Rotate the handle. The handle will lock into position. 2 Both adjustment buttons must pop out to lock handle in place. -
Page 18: Attaching The Canopy
CANOPY 1 To attach canopy, insert the canopy bow into the canopy mounting brackets on both sides of the seat until it clicks into place. Pull canopy over back of infant restraint. 2 To remove, press release tab and remove from mounting bracket. -
Page 19: Body Support
USING THE BODY SUPPORT WARNING: • To prevent ejection or serious injury, only use the body support for children under 5.5 kg (12 lb). • For infants weighing under 2.7 kg (6 lb), you must always use the body support. •... -
Page 20: Attaching & Removing Car Seat
ATTACHING & REMOVING THE CAR SEAT 1 Attach the carrier into the base until you hear a click. Lift up on the handle of the carrier to make sure that it is securely attached in the base. 2 To remove the seat from the base, pull up the release handle located on the rear of the car seat. -
Page 21: Adjusting The Recline
ADJUSTING THE RECLINE 1 The base has 6 recline positions for the foot. 2 To raise the foot, twist the knob to the left until it clicks into place. Recline base until the bubble rests completely within the blue line. 3 Reverse steps to lower the foot. -
Page 22: Uas
BASE INSTALLATION - UAS Before installing base, make sure vehicle is on level ground. Place base on an approved UAS vehicle seating location. 1 Remove UAS strap from UAS storage compartment. 2 Extend the strap to the longest length by pushing in on the gray button and pulling on the strap. - Page 23 BASE INSTALLATION - UAS 3 Press the UAS connectors onto the adjacent vehicle anchors until a click is heard. Pull each UAS connector to verify a secure lock. 4 Check the level indicator on the base. The bubble must be completely within the zone of your childs weight.
- Page 24 BASE INSTALLATION - UAS 7 Place child restraint into the base. Push down on the front of the child restraint and handle, you will hear a click. Test to make sure it is attached by pulling up on the front corners of the child restraint.
-
Page 25: Lap/Shoulder Belt
BASE INSTALLATION - LAP/SHOULDER BELT Before installing base, make sure vehicle is on level ground. Place base on an approved vehicle seat location. 1 Open the lock off. 2 Ensure the vehicle seat belt is not twisted and route the vehicle belt through the first belt path opening then under the belt lock-off and down through the second belt guide. - Page 26 BASE INSTALLATION - LAP/SHOULDER BELT 4 While pressing the base down into the seat, pull on the vehicle belt to tighten. 5 Close the lock-off over the lap belt until it clicks into place. 6 Test For Tightness. Grab the sides of the base where the seat belt is and push and pull the base from side to side and front to back.
- Page 27 BASE INSTALLATION - LAP/SHOULDER BELT 7 Place child restraint into the base. Push down on the front of the child restraint and handle, you will hear a click. Test to make sure it is attached by pulling up on the front corners of the child restraint. 8 Check the level indicator.
-
Page 28: Lap Belt Only
BASE INSTALLATION - LAP BELT ONLY Before installing base, make sure vehicle is on level ground. Place base on an approved vehicle seat location. 1 Open the lock off. 2 Route the vehicle seat belt through the rear-facing belt path (marked with labels) and buckle. - Page 29 BASE INSTALLATION - LAP BELT ONLY 4 While pressing the base down into the seat, pull on the vehicle belt to tighten. 5 Close the lock-off over the lap belt and lock it. 6 Test For Tightness. Grab the sides of the base where the seat belt is and push and pull the base from side to side and front to back.
- Page 30 BASE INSTALLATION - LAP BELT ONLY 7 Place child restraint into the base. Push down on the front of the child restraint and handle, you will hear a click. Test to make sure it is attached by pulling up on the front corners of the child restraint.
-
Page 31: Lap Belt Only
SEAT INSTALLATION WITHOUT BASE- LAP BELT ONLY Place carrier on an approved vehicle seat location. Carry handle MUST be in position A. See page 17. 1 Place the car seat rear-facing on the vehicle seat. Route the vehicle belt through the belt guides on both sides of carrier. - Page 32 SEAT INSTALLATION WITHOUT BASE- LAP BELT ONLY 4 Test For Tightness. Grab the sides of the car seat where the seat belt is and push and pull the car seat from side to side and front to back. If the car seat moves less than 2.5 cm (1”), it is tight enough.
-
Page 33: Lap/Shoulder Belt Only
SEAT INSTALLATION WITHOUT BASE- LAP/SHOULDER BELT ONLY Place carrier on an approved vehicle seat location. Carry handle MUST be in position A. See page 17. 1 Place the car seat rear-facing on the vehicle seat. Route the lap portion of the lap/shoulder belt through the lap belt guides on both sides of carrier. - Page 34 SEAT INSTALLATION WITHOUT BASE- LAP/SHOULDER BELT ONLY 4 Pull on shoulder portion toward the retractor while pressing down on the center of the carrier to tighten carrier to vehicle seat. 5 Test For Tightness. Grab the sides of the car seat where the seat belt is and push and pull the car seat from side to side and front to back.
- Page 35 SEAT INSTALLATION WITHOUT BASE- LAP/SHOULDER BELT ONLY (ALTERNATE METHOD) Before installing carrier, make sure vehicle is on level ground. Place carrier on an r to approved vehicle seat location. Carry handle MUST be in position A. See page 1 Place the car seat rear-facing on the side vehicle seat.
- Page 36 SEAT INSTALLATION WITHOUT BASE- LAP/SHOULDER BELT ONLY (ALTERNATE METHOD) 4 Test For Tightness. Grab the sides of the car seat where the seat belt is and push and pull the car seat from side to side and front to back. If the car seat moves less than 2.5 cm (1”), it is tight enough.
-
Page 37: Placing Child In The Carrier
PLACING CHILD IN THE CARRIER WARNING: Improper placement of the harness straps and buckle strap increases the risk of serious injury or death in a sudden stop or vehicle crash. Do not put snowsuits or bulky garments on your child when placing them in the car seat. - Page 38 PLACING CHILD IN THE CARRIER 3 Press on the red button and pull the buckle tongues out and place harness straps off to the side. 4 Place child in the seat. Make sure their back is flat against the car seat back. 5 Place harness straps over child’...
- Page 39 PLACING CHILD IN THE CARRIER 6 Check harness height. Harness straps must be at or just below the child’ s shoulders. 7 Adjust the headrest to adjust harness height. Remove child. From the back of the seat, squeeze the headrest adjustment buttons and move it up or down to the correct harness position.
-
Page 40: Adjusting The Buckle Strap
ADJUSTING THE BUCKLE STRAP 1 Turn the child restraint over and push the belts out of the way. Push the crotch strap clip through the slot and from the front pull buckle strap out of the seat. 2 Push crotch strap clip through the slot that fits closest to your child without being underneath the child. -
Page 41: Securing The Child In The Restraint
SECURING THE CHILD IN THE RESTRAINT 1 Place your child in the seat and place the harness straps over their shoulders. 2 Insert the buckle tongues into the buckle as shown. Make sure you hear them click into place. No te: DO NOT use child restraint if buckle tongues do not click into the buckle. - Page 42 SECURING THE CHILD IN THE RESTRAINT 5 Pull all of the slack out from around the waist. Pull up on the harness while pushing the chest clip down. Do this on both sides. 6 Slowly pull harness adjuster strap to make the shoulder straps snug around the child’...
-
Page 43: Uas And Instruction Storage
UAS AND INSTRUCTION STORAGE 1 Press the UAS connectors into the UAS storage compartments until a click is heard. 2 Store instruction manual on the under side of the base in the specified grooves in the base. car seat & base Do not install or use this child restraint until you read and understand the instructions in this manual. -
Page 44: Remove Head Support & Seat Pad
TO REMOVE HEAD REST PAD 1 Unfasten snaps on both sides of head rest pad. Pull out from around harness straps and pull pad away from head support TO REMOVE SEAT PAD 2 Unfasten hook and loop patches and plastic flaps from infant restraint. Pull out plastic flaps from under infant restraint lip Pull out from around harness hip straps. -
Page 45: Care And Maintenance
CARE AND MAINTENANCE Cleaning the Seat Pad: Refer to the care tag on your seat pad for washing instructions. NEVER use carrier without the seat pad attached. Cleaning the Shell: Spot clean using warm water and mild soap. Do not use any other cleaning agents or bleach. -
Page 46: Warranty
Attorney General. Note: When contacting Baby Jogger regarding your product, please have the serial number and manufacturing date ready. It can be found on the underside of the car seat and inside of the base. - Page 47 Notes:...
- Page 48 Baby Jogger, LLC Brands In Motion Inc. • 300 Ambassador Drive • Mississauga, Ontario L5T 2J3 1-866-774-7177 • www.babyjogger.ca...
Need help?
Do you have a question about the City Go and is the answer not in the manual?
Questions and answers