Table of Contents
Advertisement
Quick Links
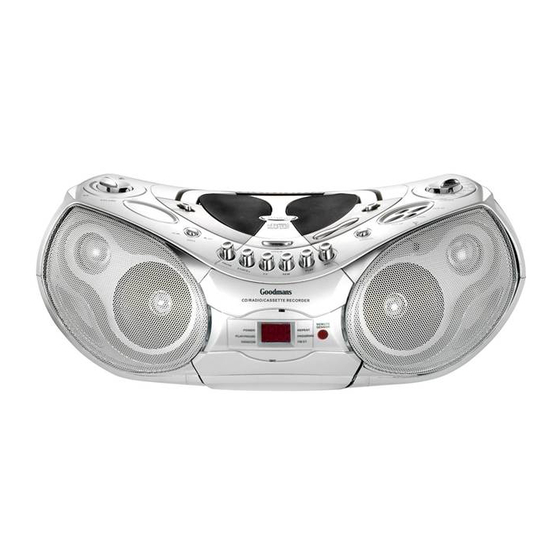
PORTABLE CD/MP3 DISC PLAYER
STEREO RADIO CASSETTE RECORDER
GPS161MP3R
Instruction Manual
SPECIFICATIONS
Programme Play ............................................Up to 20 tracks
Earphone output ............................................
Power requirement ........................................AC 230V/50Hz
Dimension .....................................................
Weight ...........................................................Approx. 3.2Kg (not including batteries)
For improvement purposes, specification and design are subject to change without notice.
20mW x 2 (32
)
Approx. 446.6(L) X 246.2(W) X 170.2(H) mm
IMPORTANT SAFEGUARDS
PRE FITTED MAINS PLUGS
For your convenience a mains plug has been fitted to this appliance. For your safety please
observe the following information.
1. Should the fuse in the plug remove the plug from the wall socket and replace the fuse with a 3
Amp ASTA approved to BS 1362 fuse.
2. Never use the plug without the fuse cover fitted. Replacement fuse covers are available from
your dealer or most electrical retail outlets.
3. If the mains plug is cut off the cable, rewire the replacement plug in accordance with
instruction given in this manual.
4. CAUTION: Under no circumstances should the discarded plug be inserted mains socket. To
prevent a shock hazard carefully dispose of the discarded plug. Do not leave the plug lying
around where children might see it.
WARNING:
To prevent fire or shock hazard do not expose this unit to rain or moisture.
CAUTION: DANGEROUS VOLTAGES EXIST INSIDE THIS UNIT, DO NOT REMOVE COVER
(OR BACK). NO USER SERVICEABLE PARTS INSIDE. REFER SERVICING TO
QUALIFIED SERVICE PERSONNEL. DISCONNECT FROM MAINS SUPPLY
WHEN NOT IN USE.
PLUG WIRING DETAILS
E
L
BLUE
FUSE
BROWN
N
CORD
GRIP
WARNING: UNDER NO CIRCUMSTANCES MUST THE LIVE OR NEUTRAL WIRES BE
CONNECTED TO THE EARTH TERMINAL IN A 3-PIN MAINS PLUG.
This symbol means that this unit is double insulated.
An earth connection is not required.
The wires in this mains lead are coloured in
accordance with the following wiring codes:
Blue................................................. Neutral
Brown................................................... Live
The wires in this mains lead must be
connected to the terminals in the plugs as
follows:
Blue Wire..................................... N or Black
Brown Wire..................................... L or Red
Only a 3 Amp fuse should be fitted in the plug
or a 5 Amp fuse at the distribution board.
Advertisement
Table of Contents

Related Manuals for Goodmans GPS161MP3R


Summary of Contents for Goodmans GPS161MP3R
- Page 1 2. Never use the plug without the fuse cover fitted. Replacement fuse covers are available from your dealer or most electrical retail outlets. GPS161MP3R 3. If the mains plug is cut off the cable, rewire the replacement plug in accordance with instruction given in this manual.
- Page 2 CAUTION IMPORTANT NOTES CLASS 1 LASER PRODUCT Use of Controls or adjustments or performance of procedures other than those specified herein may result in hazardous radiation exposure. Your hearing is very important to you and to us so please take care when operating LASER SAFETY this equipment.
-
Page 3: Table Of Contents
TABLE OF CONTENTS SAFETY PRECAUTIONS 1. POWER SOURCES Power Sources ..........1 AC MAINS OPERATION 1. As the laser beam used in this compact BATTERY OPERATION Player Maintenance..........2 disc player is harmful to the eyes, do not attempt to disassemble the casing. Disc Cleaning, Maintenance and Care .... -
Page 4: Disc Cleaning, Maintenance And Care
3. DISC CLEANING , MAINTENANCE AND CARE 4. LOCATION OF CONTROLS Cleaning the Disc 1. PHONES SOCKET 2. VOLUME CONTROL 3. POWER INDICATOR 1. To handle a disc use only one of the two 4. FUNCTION SWITCH manners illustrated. 5. BASS BOOST SWITCH 6. -
Page 5: Lcd Display
6. RADIO OPERATION 5. LCD DISPLAY GET FAMILIARIZED WITH THE DISPLAYED CONTENTS IN THE LCD 1. Set the FUNCTION switch to the RADIO position, the POWER Indicator will light RADIO 2. Select the desired band with the BAND TAPE/OFF CD/MP3 switch. -
Page 6: Load And Remove A Disc
4. To stop playing temporarily, press the PLAY/ 7. LOAD AND REMOVE A DISC PAUSE CD PLAY/PAUSE button. Ÿ The current playing track would flash on the display. Ÿ Resume normal play by pressing LOAD A DISC PLAY/PAUSE button again. 5. - Page 7 PROGRAMMED PLAY REPEAT ALL TRACKS Programmed play is that tracks on the To repeat all tracks, press MODE button disc can be edited for playback in a twice in play mode, "REPT ALL" shows in p r e f e r r e d o r d e r w i t h t h e u s e o f the LCD.
-
Page 8: Mp3 Disc Playback
REPEAT A SINGLE TRACK 9. MP3 DISC PLAYBACK To repeat a preferred track in playback, press MODE button once, "REPT 1" shows in the LCD . Then select the This player is capable of MP3-CDs. It takes longer time for this player to read an MP3-CD preferred track using SKIP/SERCH than it does CD-DA. - Page 9 INTRODUCTION PLAY PROGRAMMED PLAY Programmed play is that tracks on the disc Introduction play is that the first ten can be edited for playback in a preferred seconds of each track are played in a order with the use of EQ/PROGRAM sequential order.
-
Page 10: Anti-Shock Protection
TO PLAY A CASSETTE TAPE 10. ANTI-SHOCK PROTECTION 1. Open the cassette door by pressing the cassette STOP/EJECT button. A special circuitry inside the player guarantees that there will be no sound skipping when 2. Insert a cassette with the exposed tape the player is subject to shock and shaking in music playback. -
Page 11: Recording From Radio/Mic/ Cd/Mp3
RECORDING FROM THE BUILT-IN 13. RECORDING FROM RADIO/MICROPHONE/CD/MP3 MICROPHONE 1. Set the FUNCTION switch to the RADIO TAPE/OFF position. TAPE/OFF RECORDING FROM RADIO CDMP3 2. Load the cassette which you wish to FUNCTION record on into the guides on the 1. -
Page 12: Remote Control
7. Press the cassette PAUSE button again 15. PRODUCT SPECIFICATIONS and then recording begins. 8. To end the recording, press the cassette STOP/EJECT button. 9. Press the CD STOP button and then Please note: Due to the fact that we are continually trying to improve our products these move the FUNCTION switch to the specifications are subject to change without notice.
Need help?
Do you have a question about the GPS161MP3R and is the answer not in the manual?
Questions and answers