
Subscribe to Our Youtube Channel
Related Manuals for Pfaff expression 2014


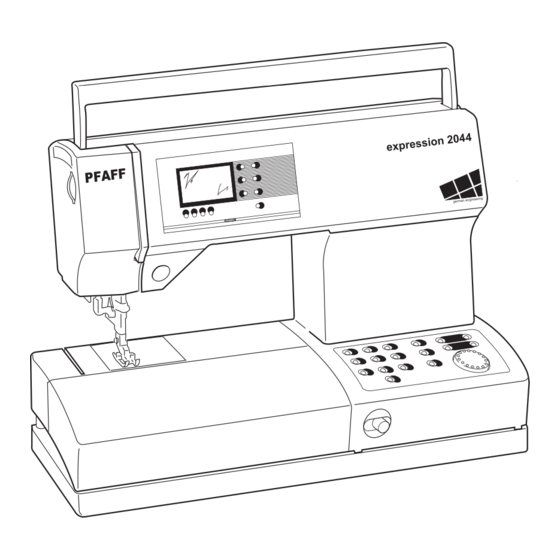
Summary of Contents for Pfaff expression 2014
- Page 1 expression 2014, 2024, 2034, 2044 german engineering Service Manual 1st edition November 2002...
- Page 2 Leerseite...
-
Page 3: Table Of Contents
Adjustment of the flat-toothed belt tension Adjustment of feed dog in sideways direction for Pfaff Expression 2014 2a. Adjustment of feed dog in sideways direction for Pfaff Expression 2024 - 2044 Timing of feed motion Adjustment of feed dog height... - Page 4 37. Changing the lower stepping motor 38. Changing the buttonhole sensor 39. Changing the thread monitor with free-arm cover by model 2044 40. Changing the needle threader 41. Self-test, foreword 42. Self-test model 2014 and 2024 43. Table for self-test model 2034 44.
-
Page 5: Foreword
Foreword This service and repair manual is intended to assist you in carrying out all repairs to the machines quickly and correctly. Adjustments should only be carried out if you find the actual settings deviating from the requirements described here. When checking or adjusting a machine, please always proceed in the sequence specified. -
Page 6: Notes On The Sewing Machine
6. To avoid the risk of electric shock, do not open the machine. There are no parts inside the machine which the user can repair. This is solely the responsibility of our qualified service staff. 7. Be sure to use only original PFAFF parts. -
Page 7: Specifications
Specifications of the PFAFF expression 2014 - 2024 Electronic free-arm, utility and fancy stitch sewing machine 8 bit processor with 1 Kbyte RAM and 32 Kbyte ROM Bobbin thread stitch width = 0 - 6 mm with 30 full steps... - Page 8 Large ball point Suffix = SKF Pointed cloth point Suffix = J Leather point right hand Suffix = LR Specifications of drive motor for the PFAFF expression 2014 - 2024 ____________________________________________________________________ No. 92-330111-91 24 V =41 W 9300 r.p.m. ____________________________________________________________________...
- Page 9 Lockstitch of types 301, 302, 303, 304, 305, 308 and all other variants obtainable by sideways needle movement or forwards and reverse control of the machine feed PFAFF horizontal double-rotating hook (9 mm hook on model 2044) Link take-up Bobbin thread monitoring on model 2044...
- Page 10 Large ball point Suffix = SKF Pointed cloth point Suffix = J Leather point right hand Suffix = LR Specifications of drive motor for the PFAFF expression 2034 - 2044 ____________________________________________________________________ Nr. 92-330111-91 24 V =41 W 9300 U/min ____________________________________________________________________...
-
Page 11: Dismantling The Housing
Dismantling the housing cover Note: Before adjusting or repairing the machine, make sure to dismantle the housing covers according to the adjustment and repair instructions. Pull out the mains plug and the socket on the machine. Remove the needle and the presser foot shoe. Remove the detachable work support. - Page 12 Loosen the torx screw on the face plate. Remove the complete face plate together with the sewing lamp and cable (fig. 3). Remove the carrying handle. Unscrew and remove the three fastening screws on the baseplate. Tilt the baseplate toward the front. Remove 12-wire flat cable 3 and motor cable 4 from the circuit board (fig.
- Page 13 Unscrew and remove both fastening screws 5 on the free-arm cover (fig. 5). Put the feed drop mechanism in its normal working position. Using a small screwdriver, disengage both feed regulators 6. Open the cable clip. Remove connection plug 7 from the circuit board (fig. 6). Remove the free-arm lid carefully from the housing, to the left.
- Page 14 Remove the needle plate. Unscrew and remove both fastening screws 8 (fig. 7). Remove the free-arm cover. Loosen screw 9 on the stand cover (fig. 8). Remove the stand cover.
- Page 15 Remove fastening screws 10 and 11 on the rear housing shell (fig. 9 and 10). Open the catch connections on the inside of the arm by pressing with your thumb against the points indicated by the arrows (fig. 11). Remove the rear housing shell.
- Page 16 Remove the five connection plugs 12, 13, 14, 15 and 16 from the circuit board (fig. 12). Loosen fastening screws 17 and 18 (fig. 13) as well as fastening screw 19 (fig. 14). Remove the front housing shell carefully.
- Page 17 Remove buttonhole sensor's cable guide 20 (fig. 15). Remove the complete buttonhole sensor with the spring.
- Page 18 Notes:...
-
Page 19: Feeding System
Feeding system 1. Adjustment of the flat-toothed belt tension Requirement: The flat-toothed belt must be so taut that the sewing hook has no play in its rotating direction, but it must be possible to turn the machine easily. Adjustment: Loosen screw 1 (fig. 1). Re-position tensioning roller 2 with a screwdriver accordingly. -
Page 20: Adjustment Of Feed Dog In Sideways Direction For Pfaff Expression 2014
2. Adjustment of feed dog in sideways direction for Pfaff expression 2014 Requirement: The distance of the feed dog to the right and left edges of the feed slot must be equal (fig. 2). Check: Carry out a visual check of the feed dog position. - Page 21 Move stud 20 sideways until link 7 and connecting rod 19 still have some play and move easily. Tighten screw 4. Attach both springs 3 and 9. Cross-check: The feed dog must now be positioned in the exact middle of the feed slot.
-
Page 22: 2A. Adjustment Of Feed Dog In Sideways Direction For Pfaff Expression 2024 - 2044
2a. Adjustment of feed dog in sideways direction for Pfaff expression 2024, 2034 und 2044 Requirement: The distance of the feed dog to the right and left edges of the feed slot must be equal (fig. 2). Check: Carry out a visual check of the feed dog position. - Page 23 Check whether the slide block can be moved easily, but without play or binding. Push slide lever shaft 16 complete with stepping motor 17 carefully to the left until there is a clearance of 0.05 mm between slide block 8 and connecting bar 19. Tighten screw 15 and check whether the slide block moves easily and without play.
-
Page 24: Timing Of Feed Motion
3. Timing of feed motion Operating sequence: When the rising needle has left the fabric, the feed dog moves up above the needle plate. The risen feed dog pushes the fabric to the rear. Shortly before the end of the feeding motion, the take-up lever is in its highest position (t.d.c). - Page 25 Timing: If the adjustment is not correct, remove the needle-rise clamp. Loosen the three screws 29 in the lower flat-toothed-belt sprocket. Re-fit the needle-rise clamp and repeat the procedure as described in "Check" until the needle bar has moved upwards by 2 mm and the clamp is in contact with the spacer (fig. 8). Turn the long drive shaft 28 in sewing direction until it is possible to insert the pin gauge in both holes (fig.
-
Page 26: Adjustment Of Feed Dog Height
4. Feed dog height Requirement: In the highest position of the feed dog, the points of its teeth must protrude above the needle plate surfa- ce by 0.85 - 0.9 mm. The tolerance must not remain under or exceed 0.85 to 0.9 mm (fig. 10). Check: Remove the needle. -
Page 28: Adjustment Of Synchronizer
5. Adjustment of synchronizer Note: The following machine positions or functions are controlled by the synchronizer: 1. A change of feeding direction 2. Sideways needle bar movement 3. Take-up lever/needle "up" positioning 4. Needle "down" positioning This adjustment must only be carried out when compelling reasons exist! It must be performed with maximum accuracy. - Page 29 Adjustment: Leave the adjustment gauge on the needle plate. Remove the top cover and the housing insert. Slightly loosen the fastening screw on control cam 32 (fig. 18). Set the stitch length to "0.5". Turn the handwheel a full rotation forwards, then keep on turning it until point 31 is at 0.3 (fig. 17). Set the stitch length to "00".
-
Page 30: Adjustment Of Presser Foot Height
6. Adjustment of presser foot height Requirement: With the presser bar lifter raised there must be a clearance of 8 mm between the needle plate and the sole of the zigzag foot. Check: Raise the presser bar lifter. Fit the zigzag foot. Lower the feed dog. -
Page 31: Adjustment Of Top Feed Foot In Sewing Direction
7. Adjustment of top feed foot in sewing direction Requirement: The front edge of the top feed foot must be between the first and second tooth point of the center tooth row of the feed dog (fig. 22). Check: Raise the presser bar lifter. Remove the complete presser foot. -
Page 32: Adjustment Of Top Feed Height
8. Adjustment of top feed height Requirement: In its highest working position the top feed foot must be 2 mm higher than the lower edge of the zigzag foot sole (fig. 25). Note: This adjustment must only be carried out when the height of the presser bar is set correctly. Check: Raise the presser bar lifter. - Page 33 Cross-check: Turn the handwheel and check for clearance of 0.2 mm.
-
Page 34: Zigzag Mechanism
Zigzag mechanism 9. Adjustment of needle in needle hole Requirement: At the straight stitch setting, the needle must be in the center of the needle hole (fig. 26). The widest zigzag stitches must be the same distance from the left and right needle hole edges (fig 27.). Check: Remove the presser foot. -
Page 36: Stitch Forming Parts
Stitch forming parts (Hook) Foreword: The sewing hook adjustment consists basically of the three following adjustments: Needle rise Needle bar height Hook-to-needle clearance Needle rise: The needle rise is the movement by which the needle must rise from its lowest position until a thread loop has formed on the side of the needle on which the scarf is located. -
Page 37: Position Of Needle In Needle Hole In Sewing Direction
10. Position of needle in needle hole in sewing direction Requirement: There must be a clearance of 0.2 mm between the back edge of the needle shank and the back edge of the needle hole in the needle plate (fig. 29). Note: Since system 130/705 H needles increases in size at the needle front side only, the point of an Nm 100 needle is positioned exactly in the middle of the needle hole (as seen in feeding direction), while the point... - Page 38 Adjustment in relation to the presser foot: Loosen screw 47 (fig. 31). Move pin 48 together with collar and needle frame 49 to the front or the rear until the needle is exactly in the middle of the needle hole on the presser foot. Tighten screw 47.
-
Page 40: Adjustment Of Hook-To-Needle Clearance
11. Adjustment of hook-to-needle clearance Requirement: At the straight stitch setting the distance of the sewing hook point from the bottom of the scarf in the needle must be 0.05 mm (fig. 33). In the widest zigzag stitch, the sewing hook point must almost touch the needle. -
Page 41: 11A. Adjustment Of Bevel Gears
Note: The large flat of the hook shaft bush must face the right. Cross-check: Check for free movement of the hook shaft. Check again the distance between the sewing hook point and the bottom of the needle scarf. 11a. Adjustment of bevel gears Requirement: The bevel gears must move freely and without play. -
Page 42: Sewing Hook Timing
12. Hook timing Requirement: When the needle bar has moved 2.2 mm upwards from its lowest position (with the machine set for straight stitch and center needle position), the sewing hook point must be exactly opposite the center line of the needle (fig. 36). Check: Remove the presser foot and the needle plate. -
Page 44: Adjustment Of Needle Bar Height
13. Adjustment of needle bar height This machine has a transverse double-rotating hook. On the right zigzag penetration, the sewing hook reaches the needle a little earlier and at the left penetra- tion a little later than at the center penetration. Thus the looper point is positioned slightly higher above the needle-eye for the right zigzag penetration than for the left zigzag penetration (fig. -
Page 45: Adjustment The Bobbin Case Position Finger
14. Adjustment of bobbin case position finger Requirement: The clearance between the position finger and the bottom of the groove in the bobbin case base must be 0.7 mm (fig. 41). Check: It must be possible to insert the clearance gauge (61-111 621-15) with ease but without play between the position finger and the bottom of the groove in the bobbin case base. -
Page 46: Stitching Off
Stitching off 15. Adjustment of needle threader Requirement: With the threader key pushed fully down, prong 62 must pass through in the center between the top and bottom edge of the needle eye of a needle size Nm 70 (fig. 42). Check: Insert a new needle system 130/705 H, size Nm 70. -
Page 47: Adjustment Of Bobbin Winder Stop
16. Adjustment of bobbin winder stop Requirement: The bobbin winder must stop when the thread has reached a level of 1 mm below the bobbin rim. Check: Wind a bobbin and check that the winder stops as required. Adjustment: Loosen screw 68 (fig. 45). Position stop 69 to the left for less thread and to right for more thread. -
Page 48: Adjustment Of Bobbin Thread Tension
17. Adjustment of bobbin thread tension Requirement: The force required for pulling cotton thread 50/2 or synthetic fiber thread 100/3 off the bobbin must be approximately 25 - 30 g. Check: When a threaded bobbin case hangs on its thread, it must not slide downwards by its own weight. With a sharp upward movement of the hand, the thread must run off gradually (fig. - Page 49 Check: Set the needle thread tension at "5". Set stitch pattern "03" for zigzag and the stitch width at "6.0". Set the stitch length at "2.0". Place a piece of fabric under the zigzag foot and sew. Select stitch pattern "01" for straight stitch and set the stitch length at "2.5". Sew with straight stitch.
-
Page 50: Adjustment Of Thread Check Spring Stroke
19. Adjustment of thread check spring stroke The tread check spring prevents the descending needle from piercing the slack needle thread. The needle thread is slackened by the descending take-up lever. Requirement: Thread check spring 144 must keep the needle thread taut at least until the needle point enters the fabric (Fig. - Page 51 Notes:...
-
Page 52: Adjustment Of Equal Forward And Reverse Stitch Length For Pfaff Expression 2014/2024
20. Adjustment of equal forward and reverse stitch length for Pfaff expression 2014 / 2024 (for all forward and reverse controlled stitch patterns) Requirement: Adjusting program 95 must be sewn as a rectangle (fig. 52) and not be sewn from the machine as a rhombus (fig. - Page 53 Note: If very different sewing threads or difficult fabrics are used, buttonholes, utility stitches or fancy stitches may be sewn with shifts in the pattern design. To correct this, the customer can adjust the balance. On top of that, the length of the reverse buttonhole seam can be programmed.
-
Page 54: Adjustment Of Equal Forward And Reverse Stitch Length For Pfaff Expression 2034/2044
21. Adjustment of equal forward and reverse stitch length for Pfaff expression 2034 / 2044 (for all forward and reverse controlled stitch patterns) Requirement: Letters B, D, G, H sewn in succession must measure 34.5 +/- 0.5 mm and must not be distorted (fig. 62). - Page 55 Note: If very different sewing threads or difficult fabrics are used, buttonholes, utility stitches or fancy stitches may be sewn with shifts in the pattern design. To correct this, the customer can adjust the balance. On top of that, the length of the buttonhole reverse seam can be programmed.
-
Page 56: Making Up A Sewing Sample
This sewing sample should contain the most important stitch patterns, which can be sewn on a repaired machine (fig. 67). If the customer has special requirements, these should appear on a separate sewing sample. The following is a sewing sample from the PFAFF expression 2044 Stitch program Stitch width Stitch length Presser foot no. -
Page 57: Repair Instructions
Repair Instructions 23. Dismantling and assembling the needle thread tension Removal: Remove the needle thread tension. Press the two plastic noses 70 together and remove tension dial 71 (fig. 66). Remove spring disc 72. Turn milled nut 73 out of guide 74. Remove guide 74. -
Page 58: Changing The Torsion Spring In Handwheel
24. Changing the torsion spring in handwheel Dismantling the handwheel Remove stand cover in accordance with the instructions for dismantling the housing. Turn the handwheel until the handwheel cutout is facing upward (fig. 67). Push lug 81 to the rear using a screwdriver. Pull off the handwheel from the arm shaft to the right. -
Page 60: Dismantling And Assembling Sewing Hook
25. Dismantling and assembling the sewing hook Removal: Remove the needle. Unscrew the presser foot. Remove the bobbin case. Unscrew the bobbin case position finger. Take out the three screws with springs from behind (fig. 69). Remove the bobbin case base with sewing hook gib (fig. 70). Turn the sewing hook gib to the left or to the right out of the bobbin case base (fig. -
Page 62: Changing The Flat-Toothed Belt
27. Changing the flat-toothed belt Removal: Remove the housing in accordance with the adjustment and repair instructions. Turn the handwheel until the lobe of feed eccentric 5 is positioned at the rear. Loosen fastening screw 1 of tensioning roller 2 (fig. 75). Tilt the machine to the rear. - Page 64 Fitting: Lift complete hook driving shaft 28 out of the lower right calotte bearing 92 as far as it will go (fig. 78). Pull the flat toothed belt between calotte 95 and calotte bearing 92. Place hook driving shaft 28 together with calotte 95 in the lower right calotte bearing 92 exactly. Fit clamping plate 91 and fasten with screw 90.
- Page 66 Adjusting the machine: Tilt the machine towards the rear. Disconnect spring 3 (fig. 80). Unscrew and remove screw 4. Turn the handwheel until the lobe of feed eccentric 5 is at the rear. Fold feed regulator 6 downward and remove it with link 7 to the left from feed bar pin. Check that the slide block can be moved easily without play or binding into the slotted lever.
- Page 67 Fold the baseplate towards the machine. Attach the cable clip. Fasten the baseplate on the housing with the three fastening screws. Attach the face plate. Attach connection plug 2 onto the circuit board of the front housing shell. Install the sewing lamp cable. Mount the facing panel of the front housing panel.
-
Page 68: Changing The Bevel Gears
28. Changing the bevel gears Note: Always change bevel gears in pairs. Removal: Remove the mains plug of the machine. Remove the detachable work support. Unscrew and remove the three fastening screws of the baseplate. Remove both connection plugs 3 and 4 from the circuit board. Unscrew and remove both fastening screws 5 on the free-arm cover. - Page 70 Fitting: Insert the new hook driving shaft with bevel gear 56 in the sewing hook bearing (fig. 82). Mount sewing hook 52 with the plastic disk on the sewing hook bearing and set it. Fasten the sewing hook bearing using both screws 111 (fig. 83). Note that the sewing hook bearing is fastened parallel to the housing.
- Page 71 Attach spring 9. Set the base plate against the machine. Mount both connection plugs 3 and 4 on the circuit board. Now the following adjustments are to be carried out: Section 3: Timing of the feed motion Section 4: Adjustment of feed dog height Section 5: Adjustment of synchronizer Section 11: Adjustment of hook-to-needle clearance Section 12: Hook timing...
-
Page 72: Changing The Base Circuit Board
29. Changing the base circuit board Note: The base circuit board is only exchanged as a complete unit. Removal: Remove the mains lead from the mains socket and from the machine. Remove the detachable work support. Unscrew and remove the three fastening screws on the base plate. Tilt the base plate to the front. -
Page 74: Changing The Upper Circuit Board On Front Housing Panel
30. Changing the upper circuit board on front housing panel Removal: Remove the mains lead from the mains socket and from the machine. the detachable work support. Remove the folding cover. Unscrew and remove both torx screws of the housing insert. Remove the housing insert. - Page 75 Fitting: Place the circuit board on the front housing panel. Secure the circuit board with screws 114, 115 and 116 (fig. 86). Mount connection plugs 2, 7, 12, 13, 14, 15, 16, 112 and 113 onto the circuit board. Mount the facing panel onto the front housing panel, making sure that both lugs 1 lock into place (fig.
-
Page 76: Changing The Control Board With Keys
31. Changing the control board with keys Removal: Remove the mains lead from the mains socket and from the machine. Remove the detachable work support. Remove the folding cover. Unscrew and remove both torx screws of the housing insert. Remove the housing insert. Raise both lugs 1 slightly and remove the facing panel of the front housing panel in the direction of the arrow (fig. - Page 77 Fitting: Mount the control board with keys onto the circuit board whilst making sure that all four lugs 116, 117, 119 and 120 lock in completely behind the circuit board (fig. 90). Mount the facing panel onto the front housing panel and make sure that both lugs 1 lock fully into place (fig.
-
Page 78: Changing The Key-Pair Panel
32. Changing the key-pair panel Removal: Remove the housing according to the service manual. Remove connection plug 113 from the circuit board (fig. 92). Unscrew and remove the five fastening screws 121 (fig. 93). Remove the complete circuit board together with the key-pair panel and the keys from the front housing panel. - Page 79 Fitting: Attach the circuit board complete with key pair panel 122 and the keys onto the front housing panel (fig. 95). Secure the circuit board with the five fastening screws 121 (Fig. 94). Mount connection plug 113 on the circuit board on the front housing panel (fig. 95). Fit the complete housing according to the service manual.
-
Page 80: Changing The Synchronizer Circuit Board
33. Changing the synchronizer circuit board Removal: Remove the mains lead from the mains socket and from the machine. Remove the detachable work support. Remove the folding cover. Unscrew and remove both torx screws of the housing insert. Remove the housing insert. Remove connection plug 12 from the circuit board on the front housing panel (fig. -
Page 82: Changing The Motor
34. Changing the motor Note: The motor is only exchanged complete. Removal: Remove the mains lead from the mains socket and the machine. Clap the carrying handle up. Loosen fastening screw 9 on the stand cover (fig. 100). Remove stand cover. Unscrew and remove fastening screw 84 (fig. -
Page 84: Changing The Cable In The Foot Control
35. Changing the cable in the foot control Removal: Lift rubber strip 126 and pull it out with its three feet (fig. 103). Pull out the two plugs 127. Unscrew and remove the four Philips screws 128. Remove housing cover 129. Remove the rectangular pedal 130 with guide 131 and take out contact spring 136. -
Page 86: Changing The Top Stepping Motor
36. Changing the top stepping motor Note: The stepping motor for sideways needle bar movement is only exchanged complete. Removal: Remove mains lead. Remove detachable work support. Remove the housing according to the service manual. Remove circlip 97 on zigzag stepping motor 46 (fig. 105). Disengage connecting rod 99 and the tooth segment of zigzag stepping motor 46. -
Page 88: Changing The Lower Stepping Motor
37. Changing the lower stepping motor Note: The feed stepping motor is only exchanged complete. Removal: Remove the machine's power plug. Remove the detachable work support. Remove the housing according to the service manual. Remove tension spring 3 (fig. 107). Unscrew and remove fastening screw 4. -
Page 90: Changing The Buttonhole Sensor
38. Changing the buttonhole sensor Note: The buttonhole sensor is only exchanged complete. Removal: Remove the machine's mains lead. Remove the needle and presser foot. Remove the folding cover. Unscrew and remove both torx screws from the housing insert. Remove the housing insert. Raise both lugs 1 slightly and remove the facing panel of the front housing panel. - Page 91 Fold the base plate to the machine and secure with the three fastening screws. Mount the facing panel onto the front housing panel. Insert the housing insert and secure with both torx screws. Attach the folding cover. Carry out an electrical safety test in accordance with VDE 0701 using testing appliance Metra- watt 5013.
-
Page 92: Changing The Thread Monitor With Free-Arm Cover By Model 2044
39. Changing the thread monitor with free-arm cover on model 2044 Note: The thread monitor is only exchanged complete with the free-arm cover. Removal: Remove the machine's mains lead. Remove the needle and presser foot. Remove the folding cover. Unscrew and remove both torx screws of the housing insert. Remove the housing insert. -
Page 94: Changing The Needle Threader
40. Changing the needle threader Note: The needle threader is only exchanged complete with the threader bar frame. Removal: Remove the machine's mains lead. Remove the needle and the presser foot. Presser threader key 63 down completely and keep it pressed (fig. 114). Using a small screwdriver, raise bracket 139 of threader bar frame 140 slightly. -
Page 95: Self-Test, Foreword
41. Self-test, foreword The self-test provides the mechanic with a simple and quick means of checking the machine. Sequential faults are not detected. Faults are only detected if the machine is mechanically in order. The self-test is carried out sequentially; changing the test sequence is not possible. However, the program can be stopped any time by switching the machine off. -
Page 96: Self-Test Model 2014 And 2024
42. Self-test model 2014 and 2024 Step Display / Function Visual Check / action Nominal Remarks Sewing machine at machine machine display Machine without needle Master switch off Press pattern mirroring After releasing both keys, key and actuate master you have to wait for a switch at the same time. - Page 97 19=pattern mirror Visual check: According to the stan- (stepping motors test) Both stepping motors dard, both stepping rotate through the stroke motors rotate through the 5 times stroke 5 times alternately, no error must occur. Press foot control slowly max. 92 92 If control is not actua- (foot control test) as far as it will go twice.
- Page 98 If control is not actuated during the period of rea- ding, or the r.p.m. are too low, an error will be dis- played. The program stops after 12 secs and the motor stops. Test completed The program can only be exited by switching off machine.
-
Page 99: Table For Self-Test Model 2034
When turning the machine on, the "mirroring" key must be actuated. The program can only be exited be turning off the machine. The machine will display "G.M. PFAFF AG TEST". Step Display / function... - Page 100 14=store pattern sequence 15=clear 16=prog. sel. key left 17=prog. sel. key right 18=stitch width - 19=stitch width + 20=stitch length - 21=stitch length + 22=correction - 23=correction + 24=info 25=pattern mirroring 26=slow 27=needle lowered 28=sewing off 29=reverse sewing key Stepping motor Visual check: According to the stan- (stepping motor test)
- Page 101 recognized, „ERROR“ will appear in the display. Buttonhole sensor Remove buttonhole guide from "1" to "95" Display appears in field (buttonhole sensor test) for length display. Main motor Actuate foot control If control is not actuated, (motor test) the width display field is empty.
-
Page 102: Table For Self-Test Model 2044
When turning the machine on, the "mirroring" key must be actuated. The program can only be exited be turning off the machine. The machine will display "G.M. PFAFF AG TEST". Step Display / function... - Page 103 14=store pattern sequence 15=clear 16=monograms italics 17=stitch width - 18=stitch width + 19=stitch length - 20=stitch length + 21=correction - 22=correction + 23=info 24=pattern mirroring 25=slow sewing 26=needle lowered 27=sewing off 28=reverse sewing key DIAL Turn dial to the left and "50"...
- Page 104 Pos. Detector Turn the handwheel evenly Display appears If all signals are recogni- (Synchronizer test) to the front in field for pat- zed, the message "OKAY" tern display will appear in the display. If a signal has not been recognized, "ERROR" will appear in the display.
-
Page 107: Safety Test
Safety test 46. Electrical safety test According to the German law of safe machine operation of 24th June 1986, the VDE-regulations are regarded as the official rules in electronics and are the basis for the regulations for testing electrical safety of technical devices. The required electrical tests are established in the regulations for repair, modification and testing of used electrical appliances (VDE 0701 issue 10.86) par. - Page 108 IV Stray current: Milliampere = mA Sewing machine plug remains in tester socket. Use clamp to attach test lead of testing appliance M 5013 to presser bar. Set knob for measuring range at "20 mA" (fig. 118). Meter reading: maximum 0.50 mA.
-
Page 110: Measures Required In Case Of Inadmissible Test Readings
48. Measures required in case of inadmissible test readings As to I If one of the 4 test functions is a failure, the ground mains socket is defective. Inform the landlord. As to II If the current consumption deviates considerably from the indicated value, although the machine does not bind, the motor is defective and must be exchanged. - Page 111 Notes:...
- Page 112 PFAFF GmbH Amalienbadstraße 36 76227 Karlsruhe Printed in Germany telephone: +49 (0)721/4001-286 Technische Änderungen vorbehalten telefax: +49 (0)721/4001-440 Subject to alterations in design e-mail: info@pfaff.com Sous toute réserve de modifications techniques internet: www.pfaff.de Salvo modificaciones técniche Druckerei Gablenz GmbH Con riserva di modifiche tecniche Stettiner Straße 17...
Need help?
Do you have a question about the expression 2014 and is the answer not in the manual?
Questions and answers