Table of Contents
Advertisement
Electronic Refrigeration
Dimensions
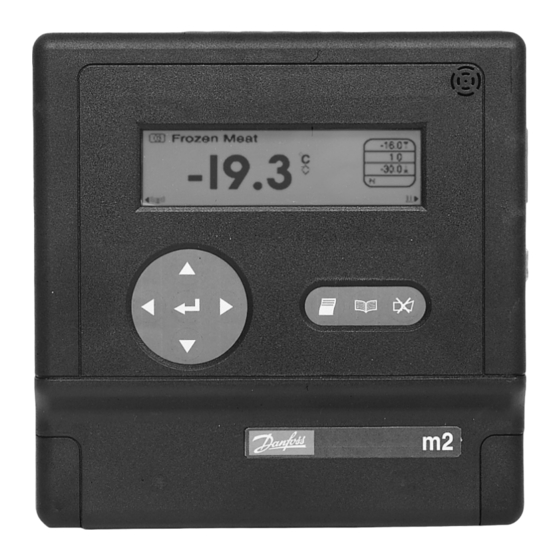
m2/m2-Spy
Mounting
When choosing a suitable location for the unit,
avoid a site where the unit would be subject to
the following conditions:-
·
Extremely hot, cold or humid
environment.
·
Near an appliance generating a strong
magnetic field.
·
In direct sunlight.
Secure the case to the building fabric by the three
screws/rawlplugs provided. Drill and fit one
screw to the wall at the same height as the main
LED displays but leave the screw protruding by
8.5 - 10 mm. Hook the case on to the screw via
the moulded brackets on the rear of the case,
then mark the position of the other two fixing
holes which are beneath the connector cover.
Remove the case and drill the two holes, fit the
rawlplugs, refit the case and fix the two bottom
screws.
m2/m2-Spy/m2+
Instructions
Bedienungsanleitung
Instructions
Abmessungen
Montage
Beachten Sie bei der Wahl des Standorts für den
m2, daß das Gerät nicht den folgenden
Bedingungen ausgesetzt ist:
·
extrem heiße, kalte oder feuchte
Umgebung
·
Nähe zu einem Gerät mit starkem
Magnetfeld
·
direkte Sonneneinstahlung
Befestigen Sie das Gehäuse mit den drei
mitgelieferten Schrauben/Dübeln am building
fabric. Bringen Sie eine Schraube in Höhe der
Haupt-LED-Anzeigen in der Wand an, aber lassen
Sie die Schraube 8,5 - 10 mm hervorstehen.
Hängen Sie das Gehäuse mit der an der Rückseite
befindlichen Halterung an die Schraube.
Markieren Sie dann die Position der anderen
beiden
Befestigungslöcher
Steckerabdeckung. Entfernen Sie das Gehäuse
und bohren Sie die beiden Löcher. Passen Sie die
Dübel ein, bringen sie das Gehäuse wieder an und
befestigen Sie die beiden unteren Schrauben.
Instructions RI.8B.M4.83 © Danfoss
m2/m2-Spy/m2+
Dimensions
m2+
Montage
Lorsque vous décidez d'un emplacement pour le
m2, évitez les zones où l'appareil pourrait être
soumis aux conditions suivantes :
·
Un milieu extrêmement chaud, froid ou
humide.
·
Proximité de dispositifs produisant un
champ magnétique puissant.
·
Exposition directe à la lumière du soleil.
Fixez le boîtier sur son support à l'aide des trois
vis/chevilles en plastique fournies. Percez et
fixez une vis sur le mur à hauteur de l'affichage
de l'unité et laissez dépasser la vis de 8,8-10 mm.
Accrochez le boîtier sur la vis au moyen des
fixations moulées situées à l'arrière du boîtier,
puis marquez l'emplacement des deux autres
trous de fixation qui se trouvent sous le domino
unter
der
de raccordement. Enlevez le boîtier. Percez les
deux trous et insérez les chevilles en plastique.
Reposez le boîtier et fixez les deux vis du bas.
09-2002
1
Advertisement
Table of Contents

Related Manuals for Danfoss m2


Summary of Contents for Danfoss m2
- Page 1 Lorsque vous décidez d’un emplacement pour le avoid a site where the unit would be subject to m2, daß das Gerät nicht den folgenden m2, évitez les zones où l’appareil pourrait être the following conditions:- Bedingungen ausgesetzt ist: soumis aux conditions suivantes : ·...
- Page 2 Niedrigspannungs-Anschlüsse (Fühler, Relais, pas les terminaux basse tension (sondes, relais, etc.), da hierdurch das Gerät beschädigt würde. etc.) car cela endommagerait l’unité. Le m2 doit Das m2-Gerät muß durch den Anschluß eines être mis à la terre en branchant un connecteur...
- Page 3 CW1293, CW1308 ou EX109-6 (Section 3). Dans the unit and 0.6 conductor for probes up to 100 Hierfür ist die Verwendung von 0,5 mm-Leitern le cas d’un m2 version Type 2 (NTC), utiliser des conducteurs de ∅ 0,5 mm pour les sondes metres.
- Page 4 EKC controllers, but must be connected to Ist eine Abschirmung vorhanden, muß diese Si un blindage est utilisé, il ne doit pas être the m2 unit and along the entire length of the nicht angeschlossen werden. connecté aux régulateurs EKC, mais doit être network.
- Page 5 Up to 31 ‘TX’ or ‘DX’ controllers can be con- Bis zu 31 “TX/DX-Regler” können maximal an nected to a m2 at a time, unless boosters are Jusqu’à 31 régulateurs DX ou TX peuvent être used. A maximum of 99 controllers can be con- einen m2 angeschlossen werden.
- Page 6 - Erweiterungseinheiten Unités d’extension du m2+ The m2 can be expanded by the addition of Der m2 kann durch Anschluß von bis zu 7 m2 La capacité du m2 peut être étendue en ajoutant up to 7 m2+ expansion units to provide up to Plus-Erweiterungseinheiten auf bis zu 99 Punkte jusqu’à...
- Page 7 24 V / 1 A. m2+ Link Setup m2+ Verbindungs-Setup Configuration des liaisons Each m2+ expansion unit has to have an address Jede m2+Erweiterungseinheit muß über ein Chaque unité d’extension m2+ doit être dotée link setup, which is situated just above the Adressenverbindungs-Setup verfügen.
- Page 8 EKC Controllers EKC Reglern connexion avec un EKC A EKC controller is logged onto a m2 system from Die EKC 201/301 können nur von den EKCs aus La connexion entre un régulateur EKC 201/301 the controller only. After the controller has been an einen m2 "aufgeschaltet"...
Need help?
Do you have a question about the m2 and is the answer not in the manual?
Questions and answers