
Related Manuals for DHC BT2100


Summary of Contents for DHC BT2100
- Page 1 Model BT2100 BATTERY & ELECTRICAL SYSTEM ANALYZER READ ENTIRE MANAUAL BEFORE USING THIS PRODUCT...
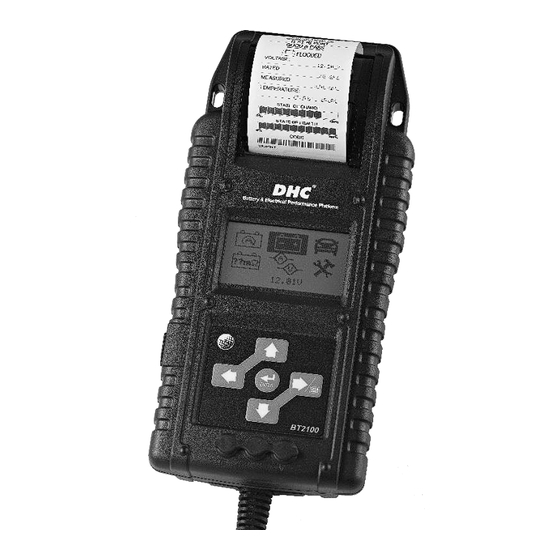
- Page 2 (ONLY 12 volt for START & STOP battery test) 2. Suggested operation range 32°F(0°C) to 122°F(50°C) in ambient temperature. ○ Temperature Sensor ○ Printer ○ Display ○ Directional Keys ○ USB Port ○ Voltmeter Jack BT2100 ○ AMP Clamp Jack...
-
Page 3: Personal Safety Precautions
WARNING: Pursuant to California Proposition 65, this product contains chemicals known to the State of California to cause cancer and birth defects or other reproductive harm. Wash hands after handling. Working in the vicinity of a lead acid battery is dangerous. Batteries generate explosive gases during normal battery operation. -
Page 4: Preparing To Test
PREPARING TO TEST Be sure area around battery is well ventilated while battery is being tested. Clean battery terminals. Be careful to keep corrosion from coming in contact with eyes. Inspect the battery for cracked or broken case or cover. If battery is damaged, do not use tester. - Page 5 3. Make sure the battery terminals are clean. Wire brush them if necessary. Clamp the black load lead to the vehicle negative battery terminal. Clamp the red load lead to the vehicle positive battery terminal. Please clamp on the lead part of the terminal only. Clamping on the iron part of the terminal will lead to wrong test results.
- Page 6 4. Press the ◄ ► key to input the battery capacity: SAE (CCA): 25~3,000 EN: 25~2,830 DIN: 25~1,685 IEC: 25~1,985 Press «ENTER» to begin test. 5. Press the◄ ► key to confirm the location of the battery if a surface charge is detected, follow the tester ‘s introductions to remove the surface charge.
- Page 7 RECHARGE & RETEST (YELLOW backlight) Battery is discharged, the battery condition cannot be determined until it is fully charged. Recharge & retest the battery. BAD & REPLACE (RED backlight) The battery will not hold a charge. It should be replaced immediately BAD CELL &...
- Page 8 CHECK CLAMP The connection between battery and cable set is loosed, please check cable clamp. INTERNAL BATTERY LOW Please change new AA batteries. NO PAPER Please insert new paper row. VOLTAGE HIGH The voltage of tested battery is too high and cannot be measured.
- Page 9 BATTERY TEST 1. Press the ◄ ► key to select Battery Test. 2. Press the ◄ ► key to confirm the battery voltage. 3. Press the ◄ ► key to confirm if the battery has been charged recently. 4. Press the ◄ ► key to select the battery type: a.
- Page 10 9. Aim the “Temperature Measurement sensor” 2.5cm (1 inch) from the top or sides of the battery case press <<ENETR>>. Measured temperature may vary by distance from the battery, under hood conditions, and cabinet temperature. 10. When the test is completed, the display shows the results as following.
- Page 11 12. Press ENTER to print the result. NOTE: Under certain conditions the follow messages may be displayed. LOAD ERROR The tested battery is bigger than 3000 SAE (CCA) or the connection is not established. Check the capacity of the battery & make sure the clamps are properly connected.
- Page 12 SYSTEM TEST 1. Press the ◄ ► key to select Battery Test. 2. Turn off all vehicle accessory loads such as light, air conditioning, radio, etc. before starting the engine. 3. When the engine is started, one of the three results will be displayed along with the actual measured result.
- Page 13 4. If the cranking voltage is normal, press «ENTER» to begin charging system test. 5. Press the «ENTER» key, you will view the following screen. 6. Press the «ENTER» key, one of the three results will be displayed along with the actual reading measured. NOTE: Under certain conditions the follow messages may be displayed.
- Page 14 automotive regulator is 14.7 volts +/- 0.05. Check manufacturer specifications for the correct limit, as it will vary by vehicle type and manufacturer. Following the charging system at idle, press «ENTER» for the charging system with accessory loads. Turn on the heater blower to high, high beam headlights, and rear defogger (If equipped).
- Page 15 CHARGING SYSTEM LOW WHEN TEST WITH ACC. LOADS The alternator is not providing sufficient current for the system’s electrical loads and the charging current for the battery. Check the belts to ensure the alternator is rotating with the engine running. If the belts are slipping or broken, replace the belts and retest.
- Page 16 IR TEST 1. Press the ◄ ► key to select IR TEST. 2. Press the ◄ ► key to confirm the battery voltage. 3. Press the ◄ ► key to confirm if the battery has been charged recently. 4. If the battery has NOT been charged, please select “NO”...
- Page 17 AM TEST 1. Install the 9V battery. 2. Connect Clamp Meter to the jack A on BT2100. Press POWER. 3. Press the button ZERO. Make sure the display reads zero. 4. Press the trigger to open the transformer jaws and clamp one electrical wire.
-
Page 18: Clear Memory
SETTING AND INFORMATION RETRIEVAL Press the ◄ ► key to select Setting. LCD BACKLIGHT 1. Press the directional keys to get to the LCD BACKLIGHT. 2. Press the directional keys to adjust the brightness of the display. 3. Press ENTER and the display returns to the menu. LANGUAGE SELECT 1. - Page 19 INFORMATION 1. Press the directional keys to enter INFORMATION. 2. Use the direction key to input customized data. 3. Press «ENTER» button and the display returns to the menu. BLUETOOTH 1. Press the directional keys to enter BLUETOOTH. 2. Press ENTER and the display will show the connection status.
- Page 20 PC NAVIGATION GUIDE Each BT2100 comes with a CD, including the driver of the software installation DHC SYNC and its user guide. Review the test data stored in the tester. Connect BT2100 to PC through the supplied USB lead.
Need help?
Do you have a question about the BT2100 and is the answer not in the manual?
Questions and answers