Table of Contents
Advertisement
Advertisement
Table of Contents

Related Manuals for Dillon EDxtreme


Summary of Contents for Dillon EDxtreme
- Page 1 Optional Communicator EDxtreme Dynamometer and Crane Scale User’s Manual...
- Page 2 Read and understand this manual before using the equipment. Failure to follow instructions can result in serious injury or death. Weigh Bar ® is a registered trademark of Weigh-Tronix Inc. EDxtreme Dynamometer User’s Manual June 1, 2007 EDX_U.P65 PN 29808-0011 Issue AB Printed in USA...
-
Page 3: Table Of Contents
Radio Communications Reliability ..................6 Introduction ..........................7 EDX & Communicator Description ..................... 7 EDX Front Panel ........................7 EDxtreme Connector ......................8 Communicator Front Panel ....................8 Communicator Connectors ....................9 Power On and Annunciators ..................... 10 EDX Setup ..........................11 Setup Menu ........................ -
Page 4: Specifications
Accuracy: 0.1% of capacity.* Instrument size: 9.0 x 4.6 x 1.8 inch (228 x 117 x 45mm). Repeatability: 0.1% of capacity.* *1 part in 1000 display mode with Dillon provided Accuracy: Not applicable. Only sends and receives digital shackles. information. -
Page 5: Safe Operation
The total significantly impact fatigue life of the instrument and cause premature and load on the dynamometer abrupt failure. If a higher capacity reading is needed, Dillon insists that a should NEVER exceed the larger instrument be used. -
Page 6: Radio Safety
In these applications where timely updates are critical, a communication cable should be used to physically connect the EDxtreme and Communicator remote (see setup of RS-485 communications). -
Page 7: Introduction
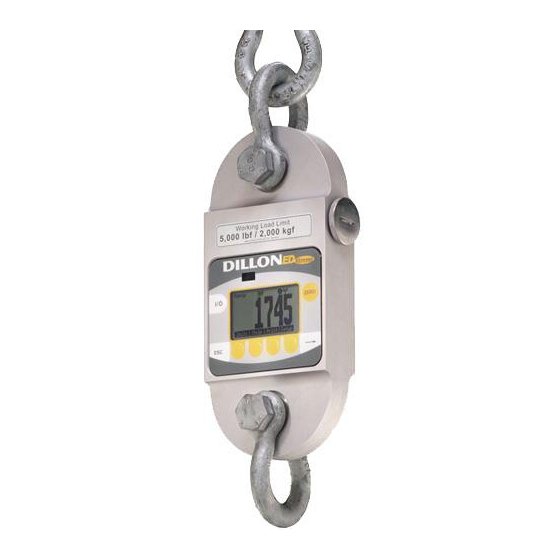
The EDX can be used to measure tension or weight. It can operate stand-alone or be coupled with a remote Dillon Communicator, via radio communication or direct wire connection, for improved convenience, functionality and safety. -
Page 8: Edxtreme Connector
Arrow key Use this key to access any available soft keys not currently viewed. The connector on the EDxtreme is recessed for protection. It is used to EDxtreme Connector connect the instrument to a Communicator remote display/controller, printer or external power supply. See your Dillon distributor for details. -
Page 9: Communicator Connectors
The Communicator may have between 2-3 connectors. CELL is for wireline Communicator communications with an EDxtreme. COM1 is for serial communications. Connectors AUX is not presently used and is either nonfunctional or not installed. EDxtreme Dynamometer User’s Manual... -
Page 10: Power On And Annunciators
Press the Arrow key to move between the two displays in Figure 3. In the display on the right in Figure 3, one of the soft keys is labeled Setup. Press this and you gain access to the soft keys shown in the Setup Menu in Figure 4. EDxtreme Dynamometer User’s Manual... -
Page 11: Edx Setup
Network Name of Identifier Enter Figure 4 Operator setup menu for the EDxtreme Press the appropriate soft key shown in Figure 4 to accomplish the func- Setup Menu tions listed on the following pages. EDxtreme Dynamometer User’s Manual... - Page 12 Displayed unit of measure (up to 7 characters) 9,17,26 Commas Carriage return Example 1 <sp><sp><sp>104.5,<sp><sp><sp><sp>lbf, <sp><sp><sp>302.5,<sp><sp><sp><sp>lbf<CR> Example 2 (custom unit) <sp>140000.,<sp><sp><sp><sp><sp>kg,<sp>165450., ,<sp><sp><sp><sp><sp>kg<CR> This would yield (shown in courier): 111111111122222222223333333333444444444455555555 123456789012345678901234567890123456789012345678901234567 104.5, lbf, 302.5, lbf,<CR> 140000., kg, 165450., kg,<CR> EDxtreme Dynamometer User’s Manual...
- Page 13 Format #5 Live force, unit of measure, peak force, unit of measure. All tab separated. 104.5<tab>lbf<CR> (if presently displaying live readings) 302.5<tab>lbf<CR> (if presently displaying peak readings) 104.5<tab>lbf<tab>302.5<tab>lbf<CR> (if presently displaying dual mode) EDxtreme Dynamometer User’s Manual...
- Page 14 Press Arrow key and F3 simultaneously to decrease intensity. The next soft key is the About. The About menu shows an assortment of Setup information about your Dillon instrument. This can be handy for maintain- About ing calibration, troubleshooting or determining if the firmware can be upgraded.
- Page 15 Lists radio information; the enabled channel and identifier. The Test functions can help service technicians remotely diagnose your Setup Dillon instrument by showing information on key internal functions. Typi- Test cally these menus will have significance only to trained technicians . You may look at these menus without technical guidance, but the information may have little meaning, or an error may be reported that may not exist.
-
Page 16: Configuration
Use the Num keys to enter the first character of the password and the Adv changed and forgotten, key to move to the next character. When you are done press the Enter key contact your Dillon distributor and the soft keys shown in Figure 7 become available. for assistance. EDxtreme Dynamometer User’s Manual... -
Page 17: Configuration Menu
4000 or 5000 divisions. This follows normal display incre- ment practice of changing by 1, 2, 5 or a multiple or submultiple of those numbers (e.g. 10, 20, 50, .1, .2, .5, etc.) EDxtreme Dynamometer User’s Manual... - Page 18 The following display appears: The * indicates which option is currently selected. The second serial port re- quires a larger connector. The standard 4-pin connector only has one serial connection (COM 2). EDxtreme Dynamometer User’s Manual...
- Page 19 Choose Print Key Only to print only when the Print key is pressed. 8. Repeat steps 2-7 for the other serial port if it needs configuring. 9. Press ESC to return to the first soft key set of the Configuration menu. EDxtreme Dynamometer User’s Manual...
- Page 20 2. Select a display mode value using the Sel key to scroll through the choices. Press Enter to accept the displayed setting. The display returns to the first soft key set of the Configuration menu. EDxtreme Dynamometer User’s Manual...
- Page 21 : If the constant is not known, lift a weight of known mass close to the capacity of the instrument. In enhanced resolution mode, observe the reading. Divide the actual by the ob- served reading and use this as the multiplier entry. EDxtreme Dynamometer User’s Manual...
- Page 22 Key presses reset the timer. programmed to shut down after a period of inactivity. Characters received through the serial port also reset the timer. Timer reflects the period required to pass before Auto-Shutdown activates. EDxtreme Dynamometer User’s Manual...
- Page 23 IMPORTANT: Changing the password ChPwd denies access to this menu without entry of the new password. Contact your Dillon distributor if you lose your password. Config The last soft key in this set is the Reset soft key. Use this to reset the system to its factory default settings.
-
Page 24: Edx Operation
You can clear this by pressing the Clear soft key. Peak reading is maintained after instrument power off and will be recalled with the next power-on. Peak reading may be lost if battery power is removed. EDxtreme Dynamometer User’s Manual... - Page 25 Figure 8 Display mode menu Press the Mode soft key repeatedly until the desired display mode is reached. EDxtreme Dynamometer User’s Manual...
-
Page 26: Communicator Operation
Communicator Operation The Dillon Communicator is a remote display and control module designed to work with the EDxtreme. It can be connected by wire or can communi- cate by radio if both the Communicator and EDxtreme are equipped with optional radio boards. -
Page 27: Setup Menu
Lets you test the following items: Batt Press this to check the battery condition. Display shows voltage condition of the batteries. Disp Press this to perform a display test. Press any key to stop the test. EDxtreme Dynamometer User’s Manual... -
Page 28: Config Menu
Inten Mode Number of display on Zero contrast EDX in ntwrk Adjust Enable Blite flash press intensity and set Blite timer Address Same as for EDX 1 Network ID backlight Enter Figure 10 Config(uration) menu EDxtreme Dynamometer User’s Manual... -
Page 29: Communicator Print Formats
Excel 104.5 302.5 Fixed characters. Position Description Live force number 10-16 Displayed unit of measure (up to 7 characters) 18-25 Peak force number 27-33 Displayed unit of measure (up to 7 characters) 9,17,26 Commas Carriage Return EDxtreme Dynamometer User’s Manual... - Page 30 165450., kg<CR> Format #5 Live force, unit of measure, peak force, unit of measure for active EDxtreme only. All tab separated. 104.5<tab>lbf<CR> (if presently displaying live readings) 302.5<tab>lbf<CR> (if presently displaying peak readings) Format #6 Cell #, description, live force, unit of measure for all active EDXs plus a total.
-
Page 31: General Information
AC power supply. The EDxtreme is built to be rugged and endure typical industrial and Care commercial use. It is still, however, a precision instrument that should be treated with care. -
Page 32: Installing Spacers
See Figure 12. Figure 12 Inserting roll pin Insert through matching holes in dynamometer body. Lay the dynamometer on the spacers on a solid surface with the roll pins protruding from the top. See Figure 13. EDxtreme Dynamometer User’s Manual... - Page 33 The spacers should “sandwich” the dynamometer body, but should not be drawn completely tight. Remove the four large circular foam plugs from the carry case and it can continue to be used with the spacers attached. EDxtreme Dynamometer User’s Manual...
-
Page 34: Common Configurations And Settings
COM1 Trans Level – Disabled COM2 Trans Level – RS-232 (all other parameters should agree with peripheral such as baud, data bits & parity) Communicator connected to one EDxtreme by wire on CELL port Key Settings (EDxtreme and Communicator): COM1 Trans Level – Disabled COM2 Trans Level –... -
Page 35: Fcc Information
Agency Identification Numbers US/FCC CAN/IC KQL-PKLR2400 CAN2268391158A The FCC states that any changes or modifications to this device that are Modifications not expressly approved by Dillon may void the user’s authority to operate the equipment EDxtreme Dynamometer User’s Manual... -
Page 36: Troubleshooting
Radio systems not initial- Enable the radio system in the COM2 configuration ized. No “Y” appears. of both instruments (under Comm menu). Displayed Change batteries in the device when the is blinking. EDxtreme Dynamometer User’s Manual... - Page 37 Solution Radio communications Operating channels matched Remote and link must be on the same operating not working at all channel. See EDxtreme and Communicator (continued) configurations of COM2 for radio (under Comm menu). Excessive radio noise or Remove dynamometer and remote from the interference in environment environment.
-
Page 38: Weigh And Force Measurement Practice
To achieve published accuracy you must use the shackle pins and centering spacers provided by Dillon. Torque and bending should be avoided. Use Torque and Bending swivels on the lifting wire for anti-torque and avoid side forces. -
Page 39: Good Force Measurement Practice
Good Force Measurement Practice Be sure fixturing does not bind between the body of the EDX and the shackle! EDxtreme Dynamometer User’s Manual...
Need help?
Do you have a question about the EDxtreme and is the answer not in the manual?
Questions and answers