Table of Contents
Advertisement
Advertisement
Table of Contents

Related Manuals for JVC KW-M25BT


Summary of Contents for JVC KW-M25BT
-
Page 1: Instruction Manual
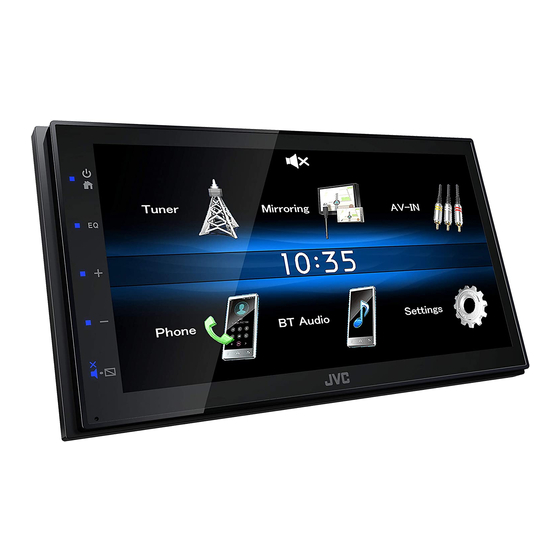
KW-M25BT MONITOR WITH RECEIVER INSTRUCTION MANUAL • Updated information (the latest Instruction Manual, etc.) is available from <http://www.jvc.net/cs/car/>. Model name indication position See “Removing the trim plate” (P.22) Trim plate © 2019 JVC KENWOOD Corporation B5A-3197-00b (E) -
Page 2: Table Of Contents
................9 Preparation ........................9 • When you purchase optional accessories, check Playback operations ....................9 with your JVC dealer to make sure that they work Mirroring ..................11 with your model and in your area. Preparation ........................11 • The Radio Data System or Radio Broadcast Data Mirroring operations....................11... -
Page 3: Getting Started
Getting Started BT Auto Connection Turn the ignition key of your car to ACC. The unit automatically reconnect when the last The unit is turned on. connected Bluetooth device is within range. Press the < > button. “ON” (Default), “OFF” Touch [Settings]. -
Page 4: Clock Settings
Getting Started Clock settings Touch panel adjustment Press the < > button. Ñ Synchronizing the clock time with FM RDS Touch [Settings]. Activate [RDS Clock Sync]. See “Tuner Setup” (P.13). Touch [Display]. Touch [Panel Adjust]. Ñ Adjusting the clock manually Follow the instruction on the screen and touch ✎... -
Page 5: Basics
Basics Basics Functions of the Buttons on the Front Common operations Panel Ñ Turning on the power Press the < > button. Ñ Turning off the power Press and hold the < > button. 1 Remote Sensor • Receives the remote control signal. (HOME) •... -
Page 6: Home Screen Descriptions
List screen Displays the Mirroring screen.(P.11) There are some common function keys in the list • When android device with “Mirroring OA for JVC” screens of most sources. application installed is connected. 4 Switches to an external component connected to the AV-IN input terminal. -
Page 7: Usb
Preparation Playback operations Ñ Connecting a USB device Ñ Control the music you are listening to on the source control screen Remove the cap of the USB terminal. Connect the USB device with the USB cable. The unit reads the device and playback starts. Ñ... - Page 8 Ñ Playing videos and pictures Ñ Selecting a track in a list (Searches file) When the operation buttons are not displayed on Touch [ the screen, touch the display. Select whether you search by audio files [ video files [ ] or picture files [ Touch [Y] to moves to the upper hierarchy.
-
Page 9: Ipod/Iphone
iPod/iPhone iPod/iPhone Preparation Playback operations Ñ Connecting iPod/iPhone Ñ Control the music you are listening to on the source control screen • For Lightning connector models: Use USB Audio cable for iPod/iPhone—KS-U62 (optional accessory). • For details about connecting iPod/iPhone, see page 24 . - Page 10 iPod/iPhone Ñ Selecting a content in a list Touch [ Touch desired item. When you touch a category its contents are displayed. Touch desired item from the content list. Playback starts. • Touch [6] to moves to the upper hierarchy. ✎...
-
Page 11: Mirroring
Download Mirroring App from Google Play. Ñ To turn off the Mirroring Install the latest version of the Mirroring application “Mirroring OA for JVC” on your Android. Press the < > button. Remove the cap of the USB terminal. -
Page 12: Tuner
Tuner Ñ Manual memory Tuner Basic Operation You can store the current receiving station in Press the < > button. memory. Touch [Tuner]. Tune in to a station you want to preset. Ñ Source control screen Touch and hold [#] (#:1-6) in which you want to store the station. -
Page 13: Tuner Setup
Tuner Tuner Setup When station reception is poor, automatically switches to the station that is broadcasting the same program Ñ Function menu over the same Radio Data System network. Press the < > button. “ON” (Default), “OFF” Touch [Settings]. Touch [6]. Touch [Tuner]. -
Page 14: External Components
External Components External Components Using external audio/video players Rear view camera To use a rear view camera, the REVERSE lead Ñ Starting playback connection is required. For connecting a rear view camera. (P.23) Connect an external component to the AV-IN input terminal. -
Page 15: Bluetooth Smartphone
Bluetooth smartphone Bluetooth smartphone Ñ About the Bluetooth smartphone and Ñ Disconnecting the device Bluetooth audio player • Turn off the Bluetooth function from your smartphone/cell-phone. This unit conforms to the following Bluetooth • Turn off the ignition switch. specifications: Version Receive a phone call Bluetooth Ver.2.1 + EDR... -
Page 16: Make A Phone Call
Bluetooth smartphone Call using the phonebook Make a phone call 1) Touch [ Press the < > button. 2) Select the name from the list. Touch [Phone]. See the table below for each operation method. Make a call • [ ] : Updates the phonebook. -
Page 17: Playing Bluetooth Audio Device
Bluetooth smartphone Playing Bluetooth Audio Device Delete the registered Bluetooth device Press the < > button. Press the < > button. Touch [BT Audio]. Touch [Phone]. Ñ Source control screen Touch [ Touch the device name. 1 [L] : Plays or pauses. [E] [F] : Searches the previous/next content. -
Page 18: Controlling Audio
Controlling Audio Controlling Audio Controlling General Audio Equalizer Control Press the < > button. Press the < > button. Touch [Settings]. Touch [Settings]. Touch [Audio]. Touch [Audio]. Touch [Sound Effect]. Touch [Sound Effect]. Touch [ Set each item as follows. Set each item as follows. -
Page 19: Remote Control
Remote control Remote control This unit can be operated using the remote control. Functions of the Remote control The remote control RM-RK258 (optional accessory) Buttons can be used. • Aim the remote control directly at the remote sensor WARNING on the faceplate. •... -
Page 20: Installation
Installation Installation Before Installation • Secure the wires with cable clamps and wrap vinyl tape around the wires that comes into contact with Before installation of this unit, please note the metal parts to protect the wires and to prevent short following precautions. -
Page 21: Installing The Unit
Installation Ñ Installation procedure Ñ Trim plate 1) To prevent a short circuit, remove the key from 1) Attach accessory 1 to the unit. the ignition and disconnect the ¤ terminal of the battery. 2) Make the proper input and output wire connections for each unit. -
Page 22: Removing The Unit
Installation Ñ Removing the trim plate Ñ Removing the unit 1) Use the extraction key (accessory 3) to lever out the 1) Remove the trim plate by referring to step 1 in four tabs (two on the left part, two on the right part). “Removing the trim plate”. -
Page 23: Connecting Wires To Terminals
• Make sure that the pin assignment of the connector matches with the JVC unit. • Take extra notice of the power wire. • In case battery wire and ignition wire are not corresponding then change them accordingly. - Page 24 Installation Ñ Connecting an iPod/iPhone Ñ Connecting an Android smartphone iPod/iPhone Lightning connector Android smartphone KS-U62 (0.8m) Micro USB to USB cable USB terminal (0.8 m) USB terminal (0.8 m) 5V = 1A 5V = 1A AV-IN REAR FRONT AV-IN REAR FRONT VOUT...
-
Page 25: About This Unit
About this Unit About this Unit More information Troubleshooting What appears to be trouble is not always serious. Ñ Playable Audio files Check the following points before calling a service Audio Bit rate Sampling frequency center. • For operations with the external components, refer format MP3 (.mp3) 16 –... -
Page 26: Copyrights
• Turn on the video component if it is not on. owned by the Bluetooth SIG, Inc. and any use of such marks by • Connect the video component correctly. JVC KENWOOD Corporation is under license. Other trademarks and trade names are those of their respective owners. Ñ Bluetooth •... - Page 27 About this Unit • libFLAC Copyright (C) 2000-2009 Josh Coalson Copyright (C) 2011-2013 Xiph.Org Foundation Redistribution and use in source and binary forms, with or without modification, are permitted provided that the following conditions are met: – Redistributions of source code must retain the above copyright notice, this list of conditions and the following disclaimer.
-
Page 28: Specifications
About this Unit Ñ Bluetooth section Specifications Technology Ñ Monitor section : Bluetooth Ver.2.1 + EDR Frequency Picture Size : 2.402 – 2.480 GHz : 6.75 inches (diagonal) wide : 151.8 mm (W) × 79.7 mm (H) Output Power : +4 dBm (MAX), Power Class2 Display System : Transparent TN LCD panel Maximum Communication range... - Page 29 About this Unit Ñ Information on Disposal of Old Electrical Ñ Audio section and Electronic Equipment and Batteries Maximum Power (Front & Rear) (applicable for EU countries that have : 50 W × 4 adopted separate waste collection Full Bandwidth Power (Front & Rear) systems) Full Bandwidth Power (at less than 1% THD) Products and batteries with the symbol (crossed-out...
- Page 30 Declaration of Conformity with regard to the RE Directive 2014/53/EU Declaration of Conformity with regard to the RoHS Directive 2011/65/EU Manufacturer: JVC KENWOOD Corporation 3-12, Moriyacho, Kanagawa-ku, Yokohama-shi, Kanagawa 221-0022, JAPAN EU Representative: JVCKENWOOD Europe B.V. Amsterdamseweg 37, 1422 AC UITHOORN, THE...
- Page 31 KW-M25BT е в съответствие с Директива 2014/53/ЕС. Пълният текст на ЕС Slovensko декларацията за съответствие е достъпен на следния интернет адрес: S tem JVC KENWOOD izjavlja, da je radijska oprema KW-M25BT v skladu z Direktivo 2014/53/EU. Celotno besedilo direktive EU o skladnosti je dostopno na tem spletnem naslovu:...
Need help?
Do you have a question about the KW-M25BT and is the answer not in the manual?
Questions and answers