Gaggenau RW 414 Operating Instructions Manual
Hide thumbs
Also See for RW 414:
- Operating instructions manual (58 pages) ,
- Installation instruction (199 pages) ,
- Installation instructions manual (129 pages)
Table of Contents
Advertisement
Quick Links
Advertisement
Table of Contents

Subscribe to Our Youtube Channel
Related Manuals for Gaggenau RW 414


Summary of Contents for Gaggenau RW 414
-
Page 3: Table Of Contents
Table of Contents Congratulations ............. Variable interior design ......... Pull outs ..............Safety and warning information ......Presentation attachment ......... Before you switch ON the appliance ......Setup mode ............Technical safety ............Important information when using the appliance ..Individual adjustments .......... - Page 4 Odours ..............19 Warning messages via the display ....... 19 Door alarm............... 19 Sensor failure............19 Low voltage ............. 19 Eliminating minor faults yourself......20 Change the light bulbs .......... 21 Upper halogen lamp ..........21 LED presentation light..........21 Changing activated carbon air filter .....
-
Page 5: Congratulations
Congratulations Safety and warning information By buying our temperature-controlled wine unit you have Before you switch ON the appliance chosen a modern, high-quality domestic appliance. Only when they have reached the right drinking tempera- Please read the operating and installation instructions ture do good wines first develop their aroma and flavour for carefully. -
Page 6: Important Information When Using The Appliance
Important information when using Children in the household the appliance Do not allow children to play with the appliance! Never use electrical appliances inside the appliance If the appliance features a lock, keep the key out (e.g. heater, electric ice maker, etc.). of the reach of children. -
Page 7: Information Concerning Disposal
Information concerning disposal * Disposal of packaging The packaging protects your appliance from damage during transit. All utilised materials are environmentally safe and recyclable. Please help us by disposing the packaging in an environmentally friendly manner. Please ask your dealer or inquire at your local authority about current means of disposal. -
Page 8: Your New Appliance
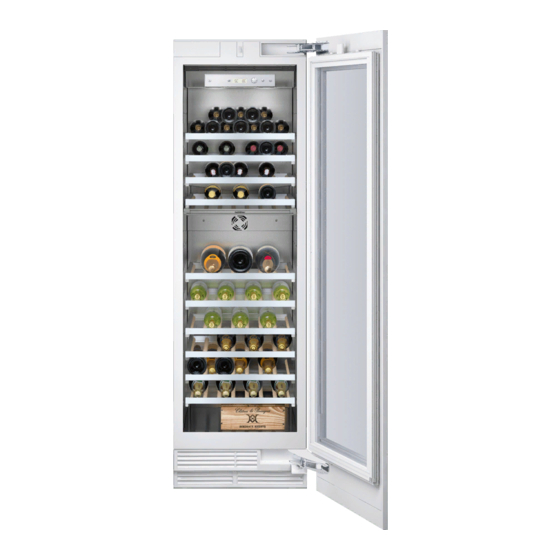
Your new appliance These operating instructions refer to several models. Illustrations can differ. Upper climatic zone Fascia Lower climatic zone Lighting for the upper climatic zone Pull out for storing wine bottles lying down Division wall for dividing up the different climatic zones Light LED presentation light for the lower climatic zone Presentation attachment *... -
Page 9: Fascia
Fascia On/off button Press setup button W This button starts and ends the setup mode. Serves to switch the appliance on and off. If the setup mode is ended using the setup button W , the changes which have been made are stored. Alarm button Press Holiday button $ Used to switch off the warning signal. -
Page 10: Installation Instructions
Installation instructions Fixing Installation location The appliance should be installed in a dry, well ventilated For secure installation, the appliance screwed to neigh- room. bouring kitchen furniture and/or units. It is very important therefore that all bordering furniture The installation location should neither be exposed and/or units are fixed securely to the floor and/or walls. -
Page 11: Electrical Connection
Electrical connection Selecting the temperature Do not use extension cables or distributors. The temperatures in both climatic zones can be set This appliance must be connected to a permanent socket. independently of each other from +5 °C to +20 °C. We recommend a setting of +11 °... -
Page 12: Set The Language
The door lock can be purchased either from customer service or a GAGGENAU dealer. Press the setup button W , in order to store the settings. The set temperature is displayed LED presentation light again in the fascia. -
Page 13: Variable Interior Design
Variable interior design Presentation attachment You can vary the shelves inside the appliance and the containers in the door to suit your requirements. In order to be able to use the presentation part, the upper- Pull outs most pull out must be taken out of the lower climatic zone. The pull outs can be easily pulled out and pushed in. -
Page 14: Menus In The Setup Mode
To switch to the next menu: To deactivate the setup mode: Press setup button . All of the changed settings are stored. If no button is selected within 20 seconds, the setup mode ends automatically. All of the changed settings are stored. The set temperature is displayed again in the fascia. -
Page 15: Temperature Unit
Temperature unit Humidity function The temperature can be displayed in degrees Fahrenheit Independent from one another, the air humidity in the two (° F) or degrees Celsius (° C). climatic zones can be increased.2. Press setup button W . In order to switch the increased air humidity on: ... -
Page 16: Holiday Mode
Holiday mode Rest mode If leaving the appliance for a long period of time, you can Settings in Rest mode: switch the appliance to the energy-saving holiday mode. – the accoustic signal is switched off when the button Holiday mode settings: is actuated (if activated);... -
Page 17: Storage Examples
Storage examples 45.7 cm appliance 61.0 cm appliance 70 bottles (0.75 l) 101 bottles (0.75 l) Practical tips for storing wine Drinking temperatures Always unpack bottles of wine – do not store in crates The correct serving temperature is crucial for the taste and or boxes. -
Page 18: Tips For Saving Energy
Tips for saving energy Switching off and disconnecting the appliance Install the appliance in a cool, well ventilated room, but not in direct sunlight and not near a heat source Switching off the appliance (e.g. radiator, cooker, etc.). If required, use an insu- lating plate. -
Page 19: Odours
Odours Sensor failure If you experience unpleasant odours: Press the on/off button O and switch the appliance off! Pull out the mains plug or switch off the fuse! Take all food out of the appliance. Clean the appliance interior (see “Cleaning the appliance”). -
Page 20: Eliminating Minor Faults Yourself
Eliminating minor faults yourself Before you call customer service: Please check whether you can eliminate the fault yourself based on the following information. Customer service will charge you for advice – even if the appliance is still under guarantee! Fault Possible cause Remedial action Appliance has no refrigerating... -
Page 21: Change The Light Bulbs
Change the light bulbs LED presentation light Warning Pull out mains plug or switch off fuse. A new LED can be obtained from customer service. Risk of electric shock! Caution Do not touch the halogen bulb with your fingers. Always use a soft cloth when inserting a halogen bulb. Upper halogen lamp Halogen lamp type: 12 V/20 W/bulbholder G4 ... -
Page 22: Changing Activated Carbon Air Filter
Changing activated carbon air filter Customer service Spare filters are available from your dealer. Check whether you can remedy the fault yourself on the basis of information provided in the “Eliminating minor faults yourself” section. Your local customer service can be found in the telephone directory or in the customer- service index.
Need help?
Do you have a question about the RW 414 and is the answer not in the manual?
Questions and answers